
:max_bytes(150000):strip_icc()/Bluetoothspeaker-ca607b5d62c24178babf3eb5b9b876c3.jpg)
"Ignite Your YouTube Traffic Understanding and Overcoming Zero Views"
Ignite Your YouTube Traffic: Understanding and Overcoming Zero Views
Create High-Quality Video - Wondershare Filmora
An easy and powerful YouTube video editor
Numerous video and audio effects to choose from
Detailed tutorials provided by the official channel
Many content creators wonder why they have 0 views YouTube. Everyone wants tons of people to watch their YouTube videos when they upload them on their channel. This guide will go through some of the reasons why your videos are not gaining any views. We will also explain how you can fix each problem so that your YouTube videos can amass views.
In this article
01 How Many Videos on YouTube Have 0 Views?
02 10 Reasons Why Your YouTube Videos Have 0 Views & Solutions
How Many Videos on YouTube Have 0 Views?
According to Pex, around 90% of videos people upload on their YouTube channels never reach 1,000 views. For a video-sharing site that gets more than 5 billion views daily, it is surprising that a high percentage of the uploaded videos never reach the target audience.
10 Reasons Why Your YouTube Videos Have 0 Views & Solutions
If you’re asking yourself: Why do my videos have 0 views YouTube? We have got you covered. Here are ten reasons that might be causing this:
1) Your YouTube Video Thumbnail Is Not Catchy

A video thumbnail is the first thing your audience will see on search results. It allows viewers to see a quick snapshot of a video while browsing YouTube. For these reasons, it plays a role in helping you get more views on YouTube.
Titles and thumbnails are like billboards, as they help viewers determine if they will watch your videos on YouTube. A well-designed thumbnail and a video title will undoubtedly attract more followers to your channel. In turn, more people will watch your videos. Additionally, this will make your content appealing to many YouTube advertisers.
Most of the YouTube videos with 0 views do not have an image or thumbnail that is eye-catching. Therefore, viewers can end up skipping over them.
How to Fix It
Create contrasting, engaging thumbnails for your YouTube videos to get more views. Avoid selecting screenshots from your video as your thumbnail picture. Instead, make sure you use high-quality and high-resolution images for your thumbnails.
2) You Are Not Consistent
Consistency gives your audience, subscribers, and viewers reason to be thrilled about your next YouTube video. If you are consistent, your audience will always know what they will get.
Failing to show consistency will see your viewers’ count dropping significantly. Your subscribers won’t know when you’ll be posting your next video on your channel.
What’s more? Failing to upload videos regularly may damage your ranking on YouTube. YouTube algorithm keeps channels that upload videos regularly and those that are consistent on top.
How to Fix It
Decide when and what you’ll be publishing videos and stick to it. Be sure to stay with the relative niche and be clear on what kind of YouTube videos you’ll be creating and uploading. In turn, you will increase the probability of YouTube’s algorithm picking your channel quickly.
3) Low-quality Videos
Videos with the most views on YouTube are of high quality. Viewers do not like watching videos with poor audio and video quality. That makes it a crucial factor you need to consider before uploading YouTube videos.
How to Fix It
Use Filmora to create high-quality YouTube videos. This software improves the quality of videos with low resolution. The tool can remove the shakiness in your video to make it look professional. You can also adjust white balance, 3D LUT, brightness, contrast, and tone.
You can improve the quality of your audio by adjusting the pitch, fade-out, fade-in, and output volume. The best part is: Filmora allows you to remove the background noises and add overlays, filters, and transitions to your videos.
For Win 7 or later (64-bit)
For macOS 10.12 or later
4) You Are Not Making the Content That Your Audience Wants
A high percentage of YouTube videos with 0 views is that the content isn’t for your audience. A YouTube channel can only grow when it is getting niche visitors to watch its videos. For that reason, the viewers watching your YouTube videos have to be interested in the niche of your video to allow your channel to grow naturally.
If the videos you create are not for your audience, you’ll get 0 views YouTube never, as you’ll not build subscribers. Your current subscribers will also stop watching your videos because they believe they won’t do anything for them.
How to Fix It
You need to choose your niche and analyze your viewers to find out what topics they are interested in; YouTube Analytics can help you find out which topics are trending. You can also get the details of interesting topics, enabling you to create relevant content for your target audience.
5) Not Responding to Your Audience
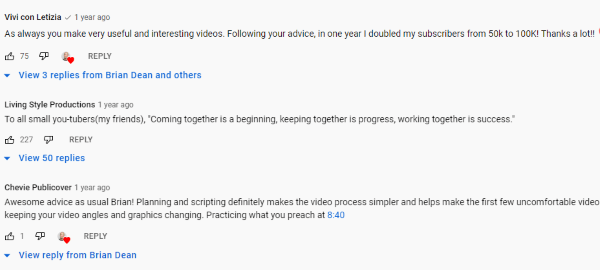
Engaging with your audience will create trust. If you do not respond to your viewers, they might stop watching your videos. And your future videos could end up with zero views.
How to Fix It
Be active on your channel, community, and other social media channels. Reply in the comment section, and this will make sure the videos you upload next will get views.
6) Your Videos Are Not Optimized
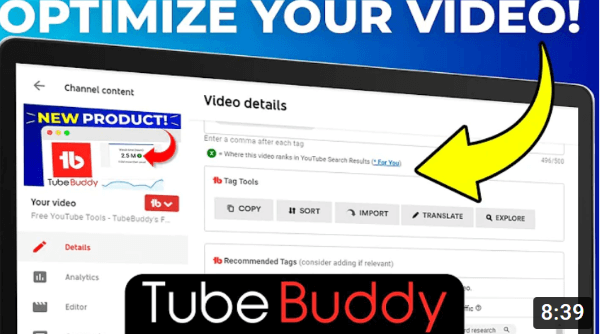
You can’t just upload your videos and expect millions of views without doing anything. If you look at a random YouTube video with 0 views, you’ll likely find it is not optimized. YouTube optimization can help to take your videos an extra step further.
How to Fix It
If you want your videos to get views, you have to do optimization with the factors below:
- Channel Design
- SEO
- Search Volume
- Keywords
- Target Niche and Viewers
- Custom Thumbnails
The most successful YouTubers constantly implement the above YouTube optimization methods. Input relevant keywords and titles for your videos. Using online tools to optimize your videos and channel with the latest techniques will help you earn YouTube views. YouTube optimization tools can find the best keywords to use on your videos.
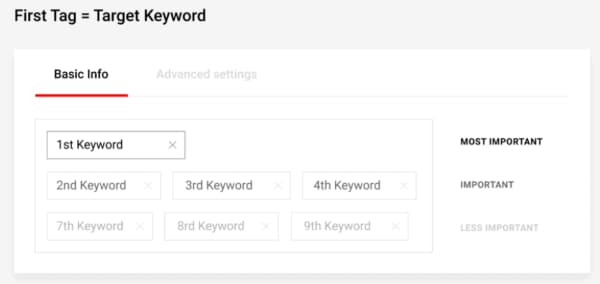
7) You Didn’t Use the Right Tags
Always follow YouTube SEO optimization methods and never leave the tag section blank. When you use tags, make sure you choose the right ones. YouTube works just like Google: Viewers enter a keyword for the YouTube video they are searching for, and it lists down the videos that best match the keyword. The more relevant YouTube thinks your videos are, the higher they will be positioned in the rank. Videos in the top pages of YouTube’s search engine earn the most views, and YouTube videos with 0 views will often appear at the lowest portion.
How to Fix It
Insert the specific keyword tags first when creating video tags. YouTube’s search engine prioritizes the first tag. You can use any YouTube optimization tool to make tags. After that, you can now enter the other video tags types, including generic tags and compound tags.
8) Your YouTube Videos Don’t Provide Any Value to Your Audience
Value is an essential part of being a content creator; it’s also a vital aspect of recognizing what you are bringing to the table in the viewer to YouTube relationship. Viewers will come to your channel if they have a reason to watch the videos you upload, whether for information or entertainment purposes. Before you upload a video, take a step back and ask yourself will people love it.
How to Fix It
Make sure you create value-rich content that your audience will find useful. Have a clear goal before you start making a video. There are always people who lack the knowledge you have, and they would love to learn it from you.
Think about what your audience is looking for when they come to YouTube and provide them with what they need. Do not forget to look for trending topics, searchable topics within your niche, and related topics. Your videos should answer all the questions your viewers have. They should also provide an exhilarating experience.
9) You Are Not Sharing Your Videos on Your Social Channels

Social media platforms are a powerful tool that helps YouTubers get more visitors to their channel. In turn, your video will get views. If you do not share your videos on your social media platform, none of your friends and followers will know about it, and you can end up having 0 views YouTube.
How to Fix It
You can get YouTube views from social media platforms like SubReddits, Facebook, Instagram, Quora, and more. Be sure to follow the terms and conditions of these platforms. You can also self-promote your videos on these platforms to get views. However, you should avoid spamming your YouTube videos in a community for the forum you belong to.
10) You Are Not Patient
Most YouTubers fail because they are not patient enough to run their channel. They upload a video and want it to get views immediately. If you’re serious about making videos on YouTube, you need patience and determination. If you continue uploading videos consistently, they will get views.
How to Fix It
Once you post your videos, give them some time to see if people will view them. Allow your videos to settle in the YouTube algorithm and search engine, and you’ll see the magic soon.
Conclusion
● These are the main reasons your videos have 0 views YouTube and their solutions. Remember the quality of your videos can affect your YouTube view count. Use Filmora to create HD videos that will attract more viewers.
Many content creators wonder why they have 0 views YouTube. Everyone wants tons of people to watch their YouTube videos when they upload them on their channel. This guide will go through some of the reasons why your videos are not gaining any views. We will also explain how you can fix each problem so that your YouTube videos can amass views.
In this article
01 How Many Videos on YouTube Have 0 Views?
02 10 Reasons Why Your YouTube Videos Have 0 Views & Solutions
How Many Videos on YouTube Have 0 Views?
According to Pex, around 90% of videos people upload on their YouTube channels never reach 1,000 views. For a video-sharing site that gets more than 5 billion views daily, it is surprising that a high percentage of the uploaded videos never reach the target audience.
10 Reasons Why Your YouTube Videos Have 0 Views & Solutions
If you’re asking yourself: Why do my videos have 0 views YouTube? We have got you covered. Here are ten reasons that might be causing this:
1) Your YouTube Video Thumbnail Is Not Catchy
A video thumbnail is the first thing your audience will see on search results. It allows viewers to see a quick snapshot of a video while browsing YouTube. For these reasons, it plays a role in helping you get more views on YouTube.
Titles and thumbnails are like billboards, as they help viewers determine if they will watch your videos on YouTube. A well-designed thumbnail and a video title will undoubtedly attract more followers to your channel. In turn, more people will watch your videos. Additionally, this will make your content appealing to many YouTube advertisers.
Most of the YouTube videos with 0 views do not have an image or thumbnail that is eye-catching. Therefore, viewers can end up skipping over them.
How to Fix It
Create contrasting, engaging thumbnails for your YouTube videos to get more views. Avoid selecting screenshots from your video as your thumbnail picture. Instead, make sure you use high-quality and high-resolution images for your thumbnails.
2) You Are Not Consistent
Consistency gives your audience, subscribers, and viewers reason to be thrilled about your next YouTube video. If you are consistent, your audience will always know what they will get.
Failing to show consistency will see your viewers’ count dropping significantly. Your subscribers won’t know when you’ll be posting your next video on your channel.
What’s more? Failing to upload videos regularly may damage your ranking on YouTube. YouTube algorithm keeps channels that upload videos regularly and those that are consistent on top.
How to Fix It
Decide when and what you’ll be publishing videos and stick to it. Be sure to stay with the relative niche and be clear on what kind of YouTube videos you’ll be creating and uploading. In turn, you will increase the probability of YouTube’s algorithm picking your channel quickly.
3) Low-quality Videos
Videos with the most views on YouTube are of high quality. Viewers do not like watching videos with poor audio and video quality. That makes it a crucial factor you need to consider before uploading YouTube videos.
How to Fix It
Use Filmora to create high-quality YouTube videos. This software improves the quality of videos with low resolution. The tool can remove the shakiness in your video to make it look professional. You can also adjust white balance, 3D LUT, brightness, contrast, and tone.
You can improve the quality of your audio by adjusting the pitch, fade-out, fade-in, and output volume. The best part is: Filmora allows you to remove the background noises and add overlays, filters, and transitions to your videos.
For Win 7 or later (64-bit)
For macOS 10.12 or later
4) You Are Not Making the Content That Your Audience Wants
A high percentage of YouTube videos with 0 views is that the content isn’t for your audience. A YouTube channel can only grow when it is getting niche visitors to watch its videos. For that reason, the viewers watching your YouTube videos have to be interested in the niche of your video to allow your channel to grow naturally.
If the videos you create are not for your audience, you’ll get 0 views YouTube never, as you’ll not build subscribers. Your current subscribers will also stop watching your videos because they believe they won’t do anything for them.
How to Fix It
You need to choose your niche and analyze your viewers to find out what topics they are interested in; YouTube Analytics can help you find out which topics are trending. You can also get the details of interesting topics, enabling you to create relevant content for your target audience.
5) Not Responding to Your Audience
Engaging with your audience will create trust. If you do not respond to your viewers, they might stop watching your videos. And your future videos could end up with zero views.
How to Fix It
Be active on your channel, community, and other social media channels. Reply in the comment section, and this will make sure the videos you upload next will get views.
6) Your Videos Are Not Optimized
You can’t just upload your videos and expect millions of views without doing anything. If you look at a random YouTube video with 0 views, you’ll likely find it is not optimized. YouTube optimization can help to take your videos an extra step further.
How to Fix It
If you want your videos to get views, you have to do optimization with the factors below:
- Channel Design
- SEO
- Search Volume
- Keywords
- Target Niche and Viewers
- Custom Thumbnails
The most successful YouTubers constantly implement the above YouTube optimization methods. Input relevant keywords and titles for your videos. Using online tools to optimize your videos and channel with the latest techniques will help you earn YouTube views. YouTube optimization tools can find the best keywords to use on your videos.
7) You Didn’t Use the Right Tags
Always follow YouTube SEO optimization methods and never leave the tag section blank. When you use tags, make sure you choose the right ones. YouTube works just like Google: Viewers enter a keyword for the YouTube video they are searching for, and it lists down the videos that best match the keyword. The more relevant YouTube thinks your videos are, the higher they will be positioned in the rank. Videos in the top pages of YouTube’s search engine earn the most views, and YouTube videos with 0 views will often appear at the lowest portion.
How to Fix It
Insert the specific keyword tags first when creating video tags. YouTube’s search engine prioritizes the first tag. You can use any YouTube optimization tool to make tags. After that, you can now enter the other video tags types, including generic tags and compound tags.
8) Your YouTube Videos Don’t Provide Any Value to Your Audience
Value is an essential part of being a content creator; it’s also a vital aspect of recognizing what you are bringing to the table in the viewer to YouTube relationship. Viewers will come to your channel if they have a reason to watch the videos you upload, whether for information or entertainment purposes. Before you upload a video, take a step back and ask yourself will people love it.
How to Fix It
Make sure you create value-rich content that your audience will find useful. Have a clear goal before you start making a video. There are always people who lack the knowledge you have, and they would love to learn it from you.
Think about what your audience is looking for when they come to YouTube and provide them with what they need. Do not forget to look for trending topics, searchable topics within your niche, and related topics. Your videos should answer all the questions your viewers have. They should also provide an exhilarating experience.
9) You Are Not Sharing Your Videos on Your Social Channels
Social media platforms are a powerful tool that helps YouTubers get more visitors to their channel. In turn, your video will get views. If you do not share your videos on your social media platform, none of your friends and followers will know about it, and you can end up having 0 views YouTube.
How to Fix It
You can get YouTube views from social media platforms like SubReddits, Facebook, Instagram, Quora, and more. Be sure to follow the terms and conditions of these platforms. You can also self-promote your videos on these platforms to get views. However, you should avoid spamming your YouTube videos in a community for the forum you belong to.
10) You Are Not Patient
Most YouTubers fail because they are not patient enough to run their channel. They upload a video and want it to get views immediately. If you’re serious about making videos on YouTube, you need patience and determination. If you continue uploading videos consistently, they will get views.
How to Fix It
Once you post your videos, give them some time to see if people will view them. Allow your videos to settle in the YouTube algorithm and search engine, and you’ll see the magic soon.
Conclusion
● These are the main reasons your videos have 0 views YouTube and their solutions. Remember the quality of your videos can affect your YouTube view count. Use Filmora to create HD videos that will attract more viewers.
Cutting-Edge Editing Meets Online Video Sharing
How Do I Use Adobe Premiere To Upload YouTube Videos?

Benjamin Arango
Mar 27, 2024• Proven solutions
Whilst getting the editing and post work just right on any project is what we all aim for, the ultimate aim is for other people to see our creations, and the most popular way to achieve that is YouTube . Chances are, if you are producing video, you will be putting some of it on YouTube at some point, so let’s have a look at the most efficient way to get your work from Premiere to YouTube.
Check if your computer meet the Premiere System Requirements >>
This is a basic tutorial about Adobe Premiere, professional video editing software. However, if video editing is new to you, consider Wondershare Filmora , which is a powerful but easy-to-use tool for users just starting out. Download the free trial version below.
 Download Mac Version ](https://tools.techidaily.com/wondershare/filmora/download/ )
How Do I Use Adobe Premiere To Upload YouTube Videos
1. Master Copy
Before exporting your work, it is important to first create a master copy of your project that is ‘as is’, in that it reflects the settings and codecs used in the original footage.
To do this you simply select the sequence within the Timeline or in the Project Panel, and go through the menu tree via File > Export > Media to bring up the export dialogue.

To create your Master Copy, simply select the first option of ‘Match Sequence Settings’, this exports a file that is of the same quality as your original footage, essentially producing a digital copy of the work for archiving before anything else is done.
With you work safe and secure it is now time to look at ensuring the project is suitable for YouTube. With our sequence selected in the Timeline or Project Panel again, we go through the same File > Export > Media path to bring up the media export dialogue as before.
2. Container
The first option we have to consider is the file format that our finished video needs to be in. Here you should refer to YouTube for its guidelines, whilst they do accept a number of file formats, digging through the YouTube help system to find the settings for highest quality we find that they recommend MPEG4 as the container, using the codec.

We can also see further recommended settings in this screenshot that will be covered later.
The good news is that Premiere automatically selects the appropriate container for us when we select our codec, however it is worth knowing the file type YouTube is expecting just to check yourself.
3. Video Codec
So having established that YouTube recommends the MPEG4 container using the codec, the first option we need to look for in the media export dialogue is to select the appropriate Format.
This is the first drop down in the dialogue box, and in this case we simply select from the list.

Once you select you can check the ‘output name’ field and see that premiere is automatically set the output file to .mp4 which is exactly what we need.
4. Preset
The next field we come to is the ‘Preset’ dropdown menu. This is a major help to most people, as Adobe have very kindly included large numbers of presets to quickly adapt video settings to suit specific uses. They vary depending on the exact version of Premiere you are using, and each format type does have its own list of presets, as we can see has a large number for YouTube, but also has many presets for specific devices (presets for iPad, Kindle, Nook, various other tablets and phones, Vimeo and a host of others) to make getting the right settings that bit easier for us.

It is important here to select the correct preset from the various YouTube options. You want to select the resolution and frame rate that match your source file, for the best results. So, if your source file is 1080p with a frame rate of 29.97 fps then that is the YouTube setting you would select.
Once a preset is selected a summary of the settings is displayed below, normally these will be well suited to your project, however you can fine tune anything you wish by selecting the video or audio tabs at the bottom which give you the chance to adjust each parameter individually. If you do this, you can save these changes as a custom preset by clicking the button at the side of the Preset dropdown menu and simply use it on later projects by selecting it from the list the same as any other, a great time saving tool.

5. Rendering
Once you are satisfied with the settings, either from the Preset alone or if you have adjusted anything yourself, you are nearly ready to render the file and export it.
For YouTube it is recommended you select the ‘Use Maximum Render Quality’ option to maintain the best output you can, it does add time to the render process but if you value the quality of your work it is worthwhile.
Finally you can choose a suitable filename and the destination of the file by clicking on the ‘Output Name’ field.
I normally use a filename that includes the destination medium so I can differentiate between different versions of a project and know which one to upload where, in this case I include ‘youtube’, but if I were planning on uploading clips of the project to vimeo as well for instance there may be a cut of the project with ‘vimeo’ in the name too. The destination is personal preference, because I do use filenames to differentiate versions I can put the various iterations into a single project file, others have folder structures for each type of file , so all YouTube output goes into a single folder and so on, how you organize is entirely dependent on how you work.

Once those are selected clicking ‘Export’ starts the rendering process, and eventually (how long depends on the speed of your computer and the size and type of file involved), you will end up with your YouTube optimized video in the location you chose.
Here I created 4 key frames that let the ‘Animation’ object move around the ‘Demo Text’ Object and finally come to rest below it. Whilst this type of effect does look very effective on screen, such is the ease of use of After Effects it really is just a few minutes work to achieve.
Learn more details about How to add text in Premiere >>
6. Uploading
Now you have your file, the next step is to go to your YouTube account and log in if you need to.
On the top of your homepage on the right is the upload button, selecting that brings up the select file menu as below.

You can either drag your file into the window or click on it to open a standard file browser to locate the desired file, click and the upload will begin. The dropdown underneath allows you to set the video as Public, Unlisted or Private. You can change this at any time once the video is uploaded as well.
This opens the upload progress window, where you can add in a name, description and tags as well as add the video to a playlist or adjust the privacy settings as the video is uploading.

Once the upload as finished, you can do final adjustments to settings and choose a thumbnail for the video. The final step is to click the ‘Publish’ button and your video will be processed and go live.

Benjamin Arango
Benjamin Arango is a writer and a lover of all things video.
Follow @Benjamin Arango
Benjamin Arango
Mar 27, 2024• Proven solutions
Whilst getting the editing and post work just right on any project is what we all aim for, the ultimate aim is for other people to see our creations, and the most popular way to achieve that is YouTube . Chances are, if you are producing video, you will be putting some of it on YouTube at some point, so let’s have a look at the most efficient way to get your work from Premiere to YouTube.
Check if your computer meet the Premiere System Requirements >>
This is a basic tutorial about Adobe Premiere, professional video editing software. However, if video editing is new to you, consider Wondershare Filmora , which is a powerful but easy-to-use tool for users just starting out. Download the free trial version below.
Download Mac Version ](https://tools.techidaily.com/wondershare/filmora/download/ )
How Do I Use Adobe Premiere To Upload YouTube Videos
1. Master Copy
Before exporting your work, it is important to first create a master copy of your project that is ‘as is’, in that it reflects the settings and codecs used in the original footage.
To do this you simply select the sequence within the Timeline or in the Project Panel, and go through the menu tree via File > Export > Media to bring up the export dialogue.
To create your Master Copy, simply select the first option of ‘Match Sequence Settings’, this exports a file that is of the same quality as your original footage, essentially producing a digital copy of the work for archiving before anything else is done.
With you work safe and secure it is now time to look at ensuring the project is suitable for YouTube. With our sequence selected in the Timeline or Project Panel again, we go through the same File > Export > Media path to bring up the media export dialogue as before.
2. Container
The first option we have to consider is the file format that our finished video needs to be in. Here you should refer to YouTube for its guidelines, whilst they do accept a number of file formats, digging through the YouTube help system to find the settings for highest quality we find that they recommend MPEG4 as the container, using the codec.
We can also see further recommended settings in this screenshot that will be covered later.
The good news is that Premiere automatically selects the appropriate container for us when we select our codec, however it is worth knowing the file type YouTube is expecting just to check yourself.
3. Video Codec
So having established that YouTube recommends the MPEG4 container using the codec, the first option we need to look for in the media export dialogue is to select the appropriate Format.
This is the first drop down in the dialogue box, and in this case we simply select from the list.
Once you select you can check the ‘output name’ field and see that premiere is automatically set the output file to .mp4 which is exactly what we need.
4. Preset
The next field we come to is the ‘Preset’ dropdown menu. This is a major help to most people, as Adobe have very kindly included large numbers of presets to quickly adapt video settings to suit specific uses. They vary depending on the exact version of Premiere you are using, and each format type does have its own list of presets, as we can see has a large number for YouTube, but also has many presets for specific devices (presets for iPad, Kindle, Nook, various other tablets and phones, Vimeo and a host of others) to make getting the right settings that bit easier for us.
It is important here to select the correct preset from the various YouTube options. You want to select the resolution and frame rate that match your source file, for the best results. So, if your source file is 1080p with a frame rate of 29.97 fps then that is the YouTube setting you would select.
Once a preset is selected a summary of the settings is displayed below, normally these will be well suited to your project, however you can fine tune anything you wish by selecting the video or audio tabs at the bottom which give you the chance to adjust each parameter individually. If you do this, you can save these changes as a custom preset by clicking the button at the side of the Preset dropdown menu and simply use it on later projects by selecting it from the list the same as any other, a great time saving tool.
5. Rendering
Once you are satisfied with the settings, either from the Preset alone or if you have adjusted anything yourself, you are nearly ready to render the file and export it.
For YouTube it is recommended you select the ‘Use Maximum Render Quality’ option to maintain the best output you can, it does add time to the render process but if you value the quality of your work it is worthwhile.
Finally you can choose a suitable filename and the destination of the file by clicking on the ‘Output Name’ field.
I normally use a filename that includes the destination medium so I can differentiate between different versions of a project and know which one to upload where, in this case I include ‘youtube’, but if I were planning on uploading clips of the project to vimeo as well for instance there may be a cut of the project with ‘vimeo’ in the name too. The destination is personal preference, because I do use filenames to differentiate versions I can put the various iterations into a single project file, others have folder structures for each type of file , so all YouTube output goes into a single folder and so on, how you organize is entirely dependent on how you work.
Once those are selected clicking ‘Export’ starts the rendering process, and eventually (how long depends on the speed of your computer and the size and type of file involved), you will end up with your YouTube optimized video in the location you chose.
Here I created 4 key frames that let the ‘Animation’ object move around the ‘Demo Text’ Object and finally come to rest below it. Whilst this type of effect does look very effective on screen, such is the ease of use of After Effects it really is just a few minutes work to achieve.
Learn more details about How to add text in Premiere >>
6. Uploading
Now you have your file, the next step is to go to your YouTube account and log in if you need to.
On the top of your homepage on the right is the upload button, selecting that brings up the select file menu as below.
You can either drag your file into the window or click on it to open a standard file browser to locate the desired file, click and the upload will begin. The dropdown underneath allows you to set the video as Public, Unlisted or Private. You can change this at any time once the video is uploaded as well.
This opens the upload progress window, where you can add in a name, description and tags as well as add the video to a playlist or adjust the privacy settings as the video is uploading.
Once the upload as finished, you can do final adjustments to settings and choose a thumbnail for the video. The final step is to click the ‘Publish’ button and your video will be processed and go live.
Benjamin Arango
Benjamin Arango is a writer and a lover of all things video.
Follow @Benjamin Arango
Also read:
- Are You Violating Copyright by ScreenRecording YouTube for 2024
- Enhance Visibility 11 Must-Know YouTube Video SEO Tactics for 2024
- Digital Recorder Snap Your Screen, Upload to YouTube Online/PC/Mac
- Eternal Void A Complete Ban on YouTube Short Video Feature for 2024
- In 2024, Adding a Digital Clock to Your YouTube Video Playback
- Essential Software to Rip YouTube Trailers
- 2024 Approved Achieving Video Popularity Mastering YouTube Thumbnail Selection
- Captivating Subscription Making an Animated Button for YouTube with Filmora for 2024
- Transform Your Channel Into a Revenue Powerhouse with Impactful Trailers
- Extracting YouTube Songs Safely A Free Guide Explored
- In 2024, Discover 7 Premium Android AdBlocking Tools
- Closing Powerhouses Free Top 6 Video Closers
- Youtube's Best Secrets for Creating Stellar Short Videos
- Access Exclusive Video Artwork – Free, Flawless, and Fast
- Lead the Pack with These Top 7 Android Tools Against Ads
- Comprehensive Review Evolution of Digital Entertainment
- Key View Figures for Earning Living on YouTube
- Best Buy Top 10 Gaming GPUs for High-Quality Online Viewing for 2024
- Brief Snippet Analysis for Beginners
- From Wanderlusts To Web Presence Your Strategy for Professional Blogging Success
- The Most Complete Review of Virtual YouTuber
- [New] Breaking Down YouTube Revenue per Million Views
- [New] Bring Out the Vibes of Your Channel Top 10 Online Artists Unite
- In 2024, Copycatting Charisma Making Ingenious Parodies
- The Complete Blueprint to Tally Your YouTube Growth and Income
- [Updated] Elevate Your Video Visibility 11 Secrets of Successful SEO
- Skyline Your Content with These 11 SEO Strategies
- [New] BiteVideo Innovator
- [Updated] Break Down Top 7 Video Streaming Tools that Revolutionize YouTube Broadcasts (iPhones/Android)
- [Updated] Auto Subscribe URL Creation for YouTube Enthusiasts
- 2024 Approved 8 Best Webspots FREE Eco-Backdrops and Footage Collection
- Digital Identity Building Crafting Perfect Channel Images
- The Complete Lowdown on Making Captivating Short Videos
- 2024 Approved Editorial Spellbinding Secrets Revealed
- Proven Pathways to Dominate the Unboxing Sphere
- [New] 2024 Streamline for Success Understanding YouTube Membership
- [Updated] Beyond the Basics Advanced Techniques for Improved Recordings
- Rapid Retreival of Trendiest TikTok Vids
- Updated 2024 Approved Ranking the Best Video Editing Programs for Windows 11
- How To Repair iOS System Issues of iPhone 13 Pro? | Dr.fone
- How to Hard Reset Vivo S18 Without Password | Dr.fone
- In 2024, How To Leave a Life360 Group On Asus ROG Phone 8 Without Anyone Knowing? | Dr.fone
- In 2024, Top-Rated Free iMovie Alternatives for Video Editing
- In 2024, How to Screen Mirroring Realme 11 Pro? | Dr.fone
- Complete Guide to Hard Reset Your Huawei Nova Y71 | Dr.fone
- New Sound Sleuths Exceptional Music Detection Software to Uncover Your Favorite Tunes on Android for 2024
- In 2024, Composition and Tints Mastering Color Usage
- [New] In 2024, Seamless Streams Addressing Instagram's Video Snags
- In 2024, How To Unlock Honor Magic 6 Phone Without Password?
- Essential Audio Collection The Top Ten Devices for Facile Song Archiving for 2024
- How to Lock Apps on Realme Note 50 to Protect Your Individual Information
- [Updated] The Ultimate List of Flashy Discord Tags
- Screen Recording Simplified Review Insights
- [Updated] Violating Copyrights in Video Posting What Are the Consequences, In 2024
- [New] The Future Is Virtual Making and Sharing Immersive Footage for FB for 2024
- [Updated] In 2024, Best Facebook Lite Video Downloading Software of 2023
- [Updated] Social Media Savvy How to Successfully Post Videos on FB for 2024
- Downloading SamFw FRP Tool 3.0 for Honor 90 Lite
- In 2024, How Do You Get Sun Stone Evolutions in Pokémon For Oppo A1x 5G? | Dr.fone
- [New] Clear Acoustic Advantages Review of the Top 6 Stream-Ready Mic Models
- [Updated] 2024 Approved Stream-Friendly Tips for Halo Legends
- In 2024, How to Track Xiaomi Redmi Note 12 4G Location by Number | Dr.fone
- In 2024, Top 7 Phone Number Locators To Track OnePlus Nord CE 3 5G Location | Dr.fone
- How To Restore Missing Music Files from Google Pixel Fold
- In 2024, Change Location on Yik Yak For your Samsung Galaxy F04 to Enjoy More Fun | Dr.fone
- Title: "Ignite Your YouTube Traffic Understanding and Overcoming Zero Views"
- Author: Steven
- Created at : 2024-05-25 19:27:36
- Updated at : 2024-05-26 19:27:36
- Link: https://youtube-clips.techidaily.com/ignite-your-youtube-traffic-understanding-and-overcoming-zero-views/
- License: This work is licensed under CC BY-NC-SA 4.0.
