
:max_bytes(150000):strip_icc()/GettyImages-1167680364-b87ba0c2ad964ac9bd4371c7007e178b.jpg)
Guidelines for Optimal YouTube Video Brightness
Guidelines for Optimal YouTube Video Brightness
How To Light Your YouTube Video

Richard Bennett
Oct 26, 2023• Proven solutions
When it comes to sensitivity to light, no consumer-level camera sensor comes close in performance to the human eye. Many newbies to videography, though, don’t think about this when they use their camera indoors and discover that their recorded footage appears too dark.
If you want to use your camera indoors as many YouTubers do, you’ll need to have extra light. But the solution is not as simple as surrounding yourself with lamps that are all randomly placed.
Below, I’ll go into detail on how you can set up your lighting equipment to make your YouTube videos look good.
| Table of Contents Using Light You Already Have Window LightingHome Lighting Home Studio Lighting Light Control3-Point Lighting4-Point Lighting |
|---|
Part 1: Using Light You Already Have
Most beginner YouTubers light their videos with what they already have. That’s what I did to start as well. In the past, my video recording space consisted of natural sunlight coming from my window and ceiling light for times when the sunlight wasn’t strong enough.
1. Window Lighting
The best thing about window lighting is that it’s free. The worst thing about it is that it’s uncontrollable. The amount of light you get in your video can vary with all the changes in the weather.
Window lighting for me was especially difficult to work with because I live in a very rainy and cloudy city, Vancouver, Canada, where we pretty much just get three months of good sun.

Above are two freeze frames from one of Daniel’s past window-lit vlogs. Although these two frames are both from the same vlog, you can see that the image on the right looks brighter due to clearer skies at that moment. These varying amounts of light is what you will have to deal with if you choose to light your YouTube video with window lighting.
2. Home Lighting
Home lighting is another source of light that many new YouTubers use. In the past, when my window light wasn’t strong enough to light my video recording space, I would turn on the ceiling light.

Notice how the color of Daniel’s skin looks much more orange here (above) than the color of the skin in the two side-by-side window lighting examples? The side of the face also appears to look bluer. This all happened because he mixed up different color temperatures shining out of the two lights (cooler window light and warmer ceiling light).
Most home lighting is warmer in its color temperature. If you want to use your home lights without everything being orange-tinted, you’ll need to switch out your light bulbs for daytime LED light bulbs.
Ceiling lights are also typically situated in the center of a room in order to light an entire room evenly. This is not likely to be the best location for your filming video. Since the ceiling light was directly above the face in the above example, you can see harder shadows beneath his cheeks.
Part 2: Home Studio Lighting
If you rather not deal with all the window and home lighting challenges, you can set up studio lighting in your home.
1. Light Control
The first thing you’ll want to do to set up studio lighting in your home is to pick a room to film in and eliminate as much external lighting as you can. Use blinds, curtains, towels, or any thick fabric to block sunlight from shining into your room.
2. 3-Point Lighting
The most common setup for studio lighting is 3-point lighting. For this kind of lighting you’ll need three lights: a key light, a fill light, and a back light (also called a hair light).

Out of the three lights, the key light should be the brightest. When it is positioned to the left of you (as shown in the diagram above) your right side will have shadows.
To minimize the shadows on your right side, use a weaker light as a fill light. You don’t want your fill light to completely eliminate all your shadows or else your shot will look flat.
Lastly, a backlight positioned behind you can give an appealing highlight to the ends of your head and even help to separate your hair from blending into your background if both happen to be dark.
3. 4-Point Lighting
As a YouTuber, you may not only want yourself to be seen optimally with proper lighting, but you may also want your background to be seen optimally, especially if you’ve taken the time to decorate it for your audience.
What you’ll need to ensure that your background is sufficiently lit is 4-point lighting setup. The 4-point lighting setup is the same as a 3-point lighting setup, but with an additional light shining at your background.
For more information on lighting equipment, check out my Top 17 Video Lighting Equipment For YouTubers .
Touch Up YouTube Videos with Filmora
Filmora is one of the best video editing software for YouTube beginners to start the YouTube channel. So, if you find the lighting isn’t perfect after recording, you can use the Auto Color Enhancement feature in Filmora to adjust the color with one-click. Or, you can change the white balance, Light, color, and HSL manually. Filmora also features some presets and LUTs templates , which allows you to apply pre-programmed effects to video for color correction faster.


Richard Bennett
Richard Bennett is a writer and a lover of all things video.
Follow @Richard Bennett
Richard Bennett
Oct 26, 2023• Proven solutions
When it comes to sensitivity to light, no consumer-level camera sensor comes close in performance to the human eye. Many newbies to videography, though, don’t think about this when they use their camera indoors and discover that their recorded footage appears too dark.
If you want to use your camera indoors as many YouTubers do, you’ll need to have extra light. But the solution is not as simple as surrounding yourself with lamps that are all randomly placed.
Below, I’ll go into detail on how you can set up your lighting equipment to make your YouTube videos look good.
| Table of Contents Using Light You Already Have Window LightingHome Lighting Home Studio Lighting Light Control3-Point Lighting4-Point Lighting |
|---|
Part 1: Using Light You Already Have
Most beginner YouTubers light their videos with what they already have. That’s what I did to start as well. In the past, my video recording space consisted of natural sunlight coming from my window and ceiling light for times when the sunlight wasn’t strong enough.
1. Window Lighting
The best thing about window lighting is that it’s free. The worst thing about it is that it’s uncontrollable. The amount of light you get in your video can vary with all the changes in the weather.
Window lighting for me was especially difficult to work with because I live in a very rainy and cloudy city, Vancouver, Canada, where we pretty much just get three months of good sun.
Above are two freeze frames from one of Daniel’s past window-lit vlogs. Although these two frames are both from the same vlog, you can see that the image on the right looks brighter due to clearer skies at that moment. These varying amounts of light is what you will have to deal with if you choose to light your YouTube video with window lighting.
2. Home Lighting
Home lighting is another source of light that many new YouTubers use. In the past, when my window light wasn’t strong enough to light my video recording space, I would turn on the ceiling light.
Notice how the color of Daniel’s skin looks much more orange here (above) than the color of the skin in the two side-by-side window lighting examples? The side of the face also appears to look bluer. This all happened because he mixed up different color temperatures shining out of the two lights (cooler window light and warmer ceiling light).
Most home lighting is warmer in its color temperature. If you want to use your home lights without everything being orange-tinted, you’ll need to switch out your light bulbs for daytime LED light bulbs.
Ceiling lights are also typically situated in the center of a room in order to light an entire room evenly. This is not likely to be the best location for your filming video. Since the ceiling light was directly above the face in the above example, you can see harder shadows beneath his cheeks.
Part 2: Home Studio Lighting
If you rather not deal with all the window and home lighting challenges, you can set up studio lighting in your home.
1. Light Control
The first thing you’ll want to do to set up studio lighting in your home is to pick a room to film in and eliminate as much external lighting as you can. Use blinds, curtains, towels, or any thick fabric to block sunlight from shining into your room.
2. 3-Point Lighting
The most common setup for studio lighting is 3-point lighting. For this kind of lighting you’ll need three lights: a key light, a fill light, and a back light (also called a hair light).
Out of the three lights, the key light should be the brightest. When it is positioned to the left of you (as shown in the diagram above) your right side will have shadows.
To minimize the shadows on your right side, use a weaker light as a fill light. You don’t want your fill light to completely eliminate all your shadows or else your shot will look flat.
Lastly, a backlight positioned behind you can give an appealing highlight to the ends of your head and even help to separate your hair from blending into your background if both happen to be dark.
3. 4-Point Lighting
As a YouTuber, you may not only want yourself to be seen optimally with proper lighting, but you may also want your background to be seen optimally, especially if you’ve taken the time to decorate it for your audience.
What you’ll need to ensure that your background is sufficiently lit is 4-point lighting setup. The 4-point lighting setup is the same as a 3-point lighting setup, but with an additional light shining at your background.
For more information on lighting equipment, check out my Top 17 Video Lighting Equipment For YouTubers .
Touch Up YouTube Videos with Filmora
Filmora is one of the best video editing software for YouTube beginners to start the YouTube channel. So, if you find the lighting isn’t perfect after recording, you can use the Auto Color Enhancement feature in Filmora to adjust the color with one-click. Or, you can change the white balance, Light, color, and HSL manually. Filmora also features some presets and LUTs templates , which allows you to apply pre-programmed effects to video for color correction faster.
Richard Bennett
Richard Bennett is a writer and a lover of all things video.
Follow @Richard Bennett
Cut Costs and Boost Creativity: 8 Online Spots Offering Free Eco-Backdrops
Top 8 Sites to Get Free Green Screen Backgrounds and Footage
Richard Bennett
Mar 27, 2024• Proven solutions
Green screen or also known as chroma key is used when you swap the background of a video with another background. It provides you the opportunity to create fancy YouTube videos without forming an expensive set or going to a distant location and will reduce your cost! You can shoot your video at any place, at any time you want and then you can just swap the background with a fancy animation!
In this article, we are going to show you 8 sites to download green screen footage and how to make green screen videos for free.
- Part1: Top 8 site for free green screen background videos
- Part2: How to make and apply a green screen background video
- Part3: How to use the green screen in video
The best video editor for YouTubers - Wondershare Filmora , not only allows you to cut, crop, rotate, reverse videos, but also offers advanced features like PIP, Green Screen , or audio mixing. What’s more, you can find lots of effects on Fashion, gaming, education, tutorial, sports, etc. Check this article to know more.
In the video tutorial below, we will walk you through the steps to transforming your video into a cinematic marvel. With a few simple clicks and adjustments, you can take your audience to another world.
Download Mac Version ](https://tools.techidaily.com/wondershare/filmora/download/ )
Part 1: Top 8 sites to get free green screen videos
With the latest release, you can now download video effects, video footage, stock image, and royalty-free sound effect and music from the effects store Wondershare Filmstock .
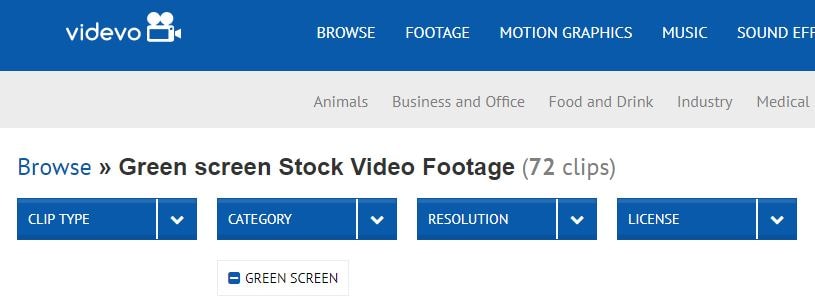
1. Videvo
Get amazing and high-quality videos that are free of the copyright at Videvo. It is a free stock website for videos that also offers free stock motion graphics that can be used in any projects you want. There are 4 segments that are clip-type, category, resolution, and license with further sub-categories for you to choose from. Only the videos with the Creative Commons license 3.0 must be given credit to the original creator.
The features of Videvo include-
- Use video clips free of charge.
- Offers free stock videos and motion graphics.
- Use the video for any types of production, personal or commercial.
- You may browse free green screen background videos.
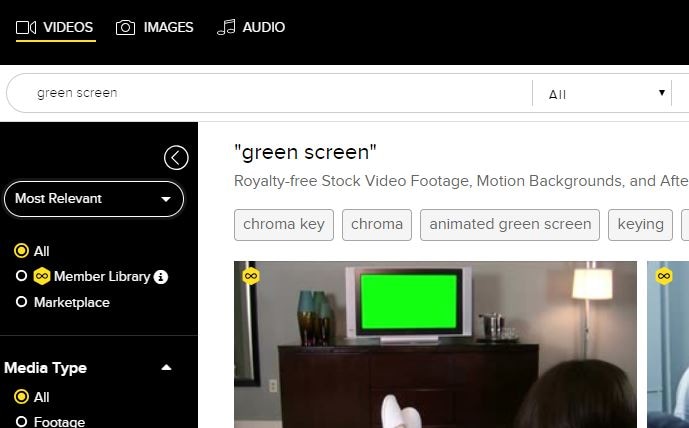
2. VideoBlocks
Download high-quality free stock video at VideoBlocks. Started in the year 2009, VideoBlocks offers animated free green screen background to 4k videos and after-effect templates.
The features are-
- Offers royalty-free stock video footages.
- Choose from the background, after-effects, and collections.
- From Chroma key to blue screen and touchscreen gestures.
- Come in 3 types of pricing plans basic, unlimited, and enterprise.
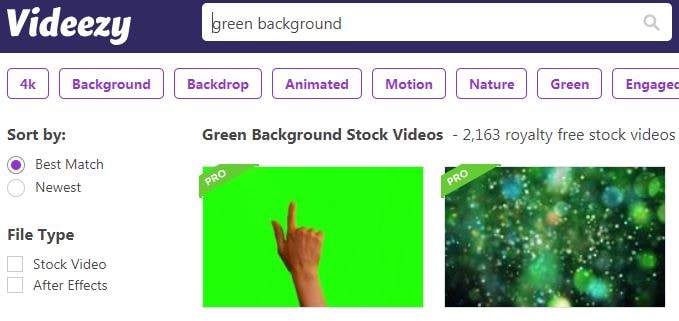
3. Videezy
From sharing HD quality videos to free green screen backgrounds and amazingly cool video footages, Videezy is a platform with numerous free stock video clips, backgrounds and more.
The features of Videezy include-
- All videos on this platform are licensed CC0.
- Share free green screen backgrounds.
- Offer ultra HD resolution.
- A range of themes.
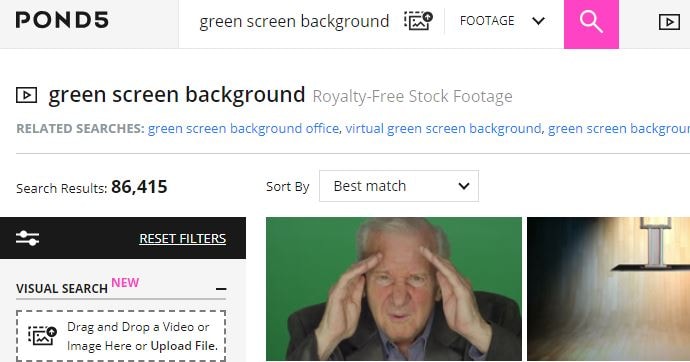
4. Pond5
You can now license your videos with Pond5 which is an international community of brands and media creators. It is a website with more than 60000 contributors of content from about 150 countries. Over 10000 videos are uploaded on Pond5 each day.
The features of Pond5 include-
- Browse more than 700k royalty-free video production tracks.
- Discover HD and 4K clips from filmmakers renowned globally.
- Easy visual search with drag and drop video feature.
- Free green screen background with animated HD videos.
- Several filters to present your green background video amazingly.
5. iStock
If you wish to search for millions of premium quality images, try iStock that handpicks and maintains the leading stock content globally.
The features of iStock include-
- From the green background to blue and orange backgrounds, iStock offers all.
- Find HD Video and 4K footage with green screen background at a nominal price just for the video and not the size.
- Pricing is flexible.

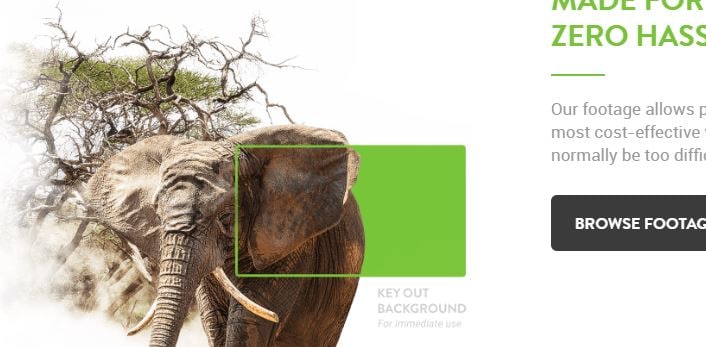
6. Green Screen Animals
The animals are truly difficult to capture. With the Green Screen Animals, you get the easiest and cost-effective access to high-quality video clips of domestic and exotic animals on a free green screen background.
The features are-
- Offers ultra HD 6k resolution video footage.
- You get access to any format as per your requirement.
- Use 3D chimpanzee models in your project with the green screen background.
- Getting performance from the animals can be a tough call, Green Screen Animals makes it easy.
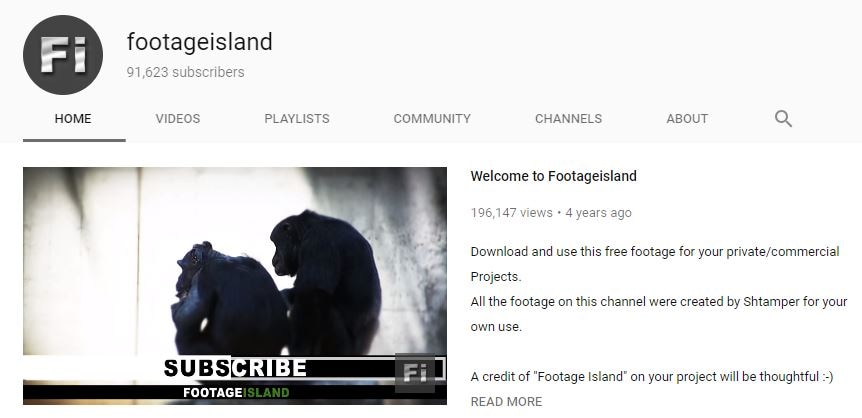
7. Footage Island
Get video footage for both private and commercial use completely free. You just need to give credit to Footage Island and use the content free.
- Free green screen background footages available.
- Free download for both personal and commercial use with just credits to the channel.
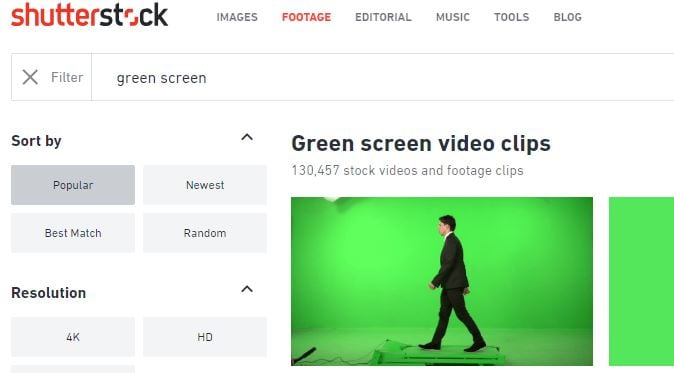
8. Shutterstock
You can sort green screen videos from shutterstock using various search options like popular, latest, best match, and random. You may also select SD, 4k or HD resolution, choose a character from people, animals or abstract, categories and more.
The features include-
- Over 1 lakh stock videos and video clips.
- Curated video collection.
- Categories like entertainment, news, sports, royalty.
- Add music to your free green screen background video.
- Easy editing tools for a great video.
Part 2: How to make and apply a green screen background
In our last article, we have shared with you how to make and use green screen footage .
While, in this article, we won’t repeat it but just share with you some tips for making and applying green screen footage in video editings.
The core objective is to have a smooth one colored background which is easy to replace in post-production. Since the green screen is employed in the film industry on a mega scale, professional green screen kits are quite expensive. Hence it is much more feasible that a DIY solution is employed for the required results.
For a good quality result from a DIY green screen, you need to take care of the following items:
1. Screen Quality
Green screens can be wall painted with a chroma key, a large sheet of cloth hung without any creases, or a portable setup canvas that can cover the given area.
2. Lightning
The most important thing to be kept in mind is that your background should be lit evenly. Any shadows on the background should be avoided. The distance of the subject should be at least ten feet from the background, to minimize any kind of shadow.
You may also like: >> Blue Screen VS Green Screen: All You Need to Know
Part 3: How to composite green screen video footage
The next step is to utilize the downloaded free green screen footage with your video.
The best green screen software for personal and semi-professional use is Filmora. It allows you to import and work on videos shot in any format (AVI, MPEG, MKV, MP4, etc.) and seamlessly integrate your video with the background.
We have already demonstrated the steps of compositing and editing green screen videos at the beginning of the article. While in the video tutorial below, you can check the samples of using Filmora to compositing downloaded free green screen footage.
You can edit a video with green screen using Filmora easily. Check the below video to learn how to manage it.
Download Mac Version ](https://tools.techidaily.com/wondershare/filmora/download/ )
Richard Bennett
Richard Bennett is a writer and a lover of all things video.
Follow @Richard Bennett
Richard Bennett
Mar 27, 2024• Proven solutions
Green screen or also known as chroma key is used when you swap the background of a video with another background. It provides you the opportunity to create fancy YouTube videos without forming an expensive set or going to a distant location and will reduce your cost! You can shoot your video at any place, at any time you want and then you can just swap the background with a fancy animation!
In this article, we are going to show you 8 sites to download green screen footage and how to make green screen videos for free.
- Part1: Top 8 site for free green screen background videos
- Part2: How to make and apply a green screen background video
- Part3: How to use the green screen in video
The best video editor for YouTubers - Wondershare Filmora , not only allows you to cut, crop, rotate, reverse videos, but also offers advanced features like PIP, Green Screen , or audio mixing. What’s more, you can find lots of effects on Fashion, gaming, education, tutorial, sports, etc. Check this article to know more.
In the video tutorial below, we will walk you through the steps to transforming your video into a cinematic marvel. With a few simple clicks and adjustments, you can take your audience to another world.
Download Mac Version ](https://tools.techidaily.com/wondershare/filmora/download/ )
Part 1: Top 8 sites to get free green screen videos
With the latest release, you can now download video effects, video footage, stock image, and royalty-free sound effect and music from the effects store Wondershare Filmstock .
1. Videvo
Get amazing and high-quality videos that are free of the copyright at Videvo. It is a free stock website for videos that also offers free stock motion graphics that can be used in any projects you want. There are 4 segments that are clip-type, category, resolution, and license with further sub-categories for you to choose from. Only the videos with the Creative Commons license 3.0 must be given credit to the original creator.
The features of Videvo include-
- Use video clips free of charge.
- Offers free stock videos and motion graphics.
- Use the video for any types of production, personal or commercial.
- You may browse free green screen background videos.
2. VideoBlocks
Download high-quality free stock video at VideoBlocks. Started in the year 2009, VideoBlocks offers animated free green screen background to 4k videos and after-effect templates.
The features are-
- Offers royalty-free stock video footages.
- Choose from the background, after-effects, and collections.
- From Chroma key to blue screen and touchscreen gestures.
- Come in 3 types of pricing plans basic, unlimited, and enterprise.
3. Videezy
From sharing HD quality videos to free green screen backgrounds and amazingly cool video footages, Videezy is a platform with numerous free stock video clips, backgrounds and more.
The features of Videezy include-
- All videos on this platform are licensed CC0.
- Share free green screen backgrounds.
- Offer ultra HD resolution.
- A range of themes.
4. Pond5
You can now license your videos with Pond5 which is an international community of brands and media creators. It is a website with more than 60000 contributors of content from about 150 countries. Over 10000 videos are uploaded on Pond5 each day.
The features of Pond5 include-
- Browse more than 700k royalty-free video production tracks.
- Discover HD and 4K clips from filmmakers renowned globally.
- Easy visual search with drag and drop video feature.
- Free green screen background with animated HD videos.
- Several filters to present your green background video amazingly.
5. iStock
If you wish to search for millions of premium quality images, try iStock that handpicks and maintains the leading stock content globally.
The features of iStock include-
- From the green background to blue and orange backgrounds, iStock offers all.
- Find HD Video and 4K footage with green screen background at a nominal price just for the video and not the size.
- Pricing is flexible.
6. Green Screen Animals
The animals are truly difficult to capture. With the Green Screen Animals, you get the easiest and cost-effective access to high-quality video clips of domestic and exotic animals on a free green screen background.
The features are-
- Offers ultra HD 6k resolution video footage.
- You get access to any format as per your requirement.
- Use 3D chimpanzee models in your project with the green screen background.
- Getting performance from the animals can be a tough call, Green Screen Animals makes it easy.
7. Footage Island
Get video footage for both private and commercial use completely free. You just need to give credit to Footage Island and use the content free.
- Free green screen background footages available.
- Free download for both personal and commercial use with just credits to the channel.
8. Shutterstock
You can sort green screen videos from shutterstock using various search options like popular, latest, best match, and random. You may also select SD, 4k or HD resolution, choose a character from people, animals or abstract, categories and more.
The features include-
- Over 1 lakh stock videos and video clips.
- Curated video collection.
- Categories like entertainment, news, sports, royalty.
- Add music to your free green screen background video.
- Easy editing tools for a great video.
Part 2: How to make and apply a green screen background
In our last article, we have shared with you how to make and use green screen footage .
While, in this article, we won’t repeat it but just share with you some tips for making and applying green screen footage in video editings.
The core objective is to have a smooth one colored background which is easy to replace in post-production. Since the green screen is employed in the film industry on a mega scale, professional green screen kits are quite expensive. Hence it is much more feasible that a DIY solution is employed for the required results.
For a good quality result from a DIY green screen, you need to take care of the following items:
1. Screen Quality
Green screens can be wall painted with a chroma key, a large sheet of cloth hung without any creases, or a portable setup canvas that can cover the given area.
2. Lightning
The most important thing to be kept in mind is that your background should be lit evenly. Any shadows on the background should be avoided. The distance of the subject should be at least ten feet from the background, to minimize any kind of shadow.
You may also like: >> Blue Screen VS Green Screen: All You Need to Know
Part 3: How to composite green screen video footage
The next step is to utilize the downloaded free green screen footage with your video.
The best green screen software for personal and semi-professional use is Filmora. It allows you to import and work on videos shot in any format (AVI, MPEG, MKV, MP4, etc.) and seamlessly integrate your video with the background.
We have already demonstrated the steps of compositing and editing green screen videos at the beginning of the article. While in the video tutorial below, you can check the samples of using Filmora to compositing downloaded free green screen footage.
You can edit a video with green screen using Filmora easily. Check the below video to learn how to manage it.
Download Mac Version ](https://tools.techidaily.com/wondershare/filmora/download/ )
Richard Bennett
Richard Bennett is a writer and a lover of all things video.
Follow @Richard Bennett
Also read:
- Boosting Engagement Perfect Time-Stamping Techniques for Videos for 2024
- Sourav Joshi's Predictions on YouTube Profits in the New Year
- Create Magic Download Premium Soundscapes Now for 2024
- In 2024, Crafting Compelling Hooks in Every Haul Post
- [Updated] Balancing Frequency & Quality in YouTube Video Uploads
- [Updated] 6 Completely Different Places to Get Icons and Logos for YouTube Videos
- The Young Entrepreneur's Guide Creating, Elevating & Earning
- [Updated] 10 Fastest Growing YouTube Channels to Light Up Your Mind
- Spectacular Backdrops to Elevate Thumbnails
- [New] Enhance Engagement Select Best Fonts for Your Thumbnails
- Amplify YouTube Performance - Rapid Video Rendering Guide
- GraphicGrind Studio
- Elevating Your Content with Engaging Haul Creation
- [Updated] Edit with Ease #10 Video-to-Mp3 Tools of the Trade
- Amplify Your Youtubes' Interaction with Emojis for 2024
- Navigating YouTube's Aspect Ratio Landscape A Complete Tutorial
- Banishing Dark Pixels From YouTube Views
- In 2024, Enjoy Your Favorite Songs Anytime Convert YouTube to MP3 Now
- Superior Earners on Social Media Platform
- Scripted Sentiments for Show Summation
- In 2024, EpicCutter Pro Dynamic PC Video & Melody Assembly
- Youngest Millionaire on YouTube Ryan's Unprecedented Wealth Accumulation
- [New] 5 Tools for Cutting Edge Video Title & Tag Generation
- Enhancing Narrative Flow Integrating Chapters Into Your YouTube Content
- In 2024, Building Bonds Before Buying Subscription Strategies
- How to Edit YouTube Videos in iMovie, In 2024
- [Updated] Best Buy List Selecting the Premier Video Cards for YouTube
- Dominating Digital Space Top 5 YouTube Tactics Revealed for 2024
- [Updated] Cutting Through Complexity Twitch Content on YouSocial Media Giant
- [Updated] Digital Divas Top Ten Gamers on YouTube
- Breakdown of Profit From a Million Youtube Watches
- [New] Branding with Visuals Inserting Watermarks Into YouTube Vids
- 2024 Approved A Comprehensive Tutorial for YouTube Customization Tools
- How to Capitalize on Youtube Shorts Must-Knows, Earning Prospects
- Crafting a Continuous Youtube Video Stream From Separate Files
- The Ultimate Guide to Year's Top Makeup Vloggers
- 2024 Approved Unveiling the New Era of Screen Capture with Apeaksoft
- Free Online Rhythm Analysis Boost Your DJ Skills Efficiently
- 2024 Approved Top Tricks to Document League of Legends Games Efficiently
- Everything To Know About Apple ID Password Requirements For Apple iPhone 6 Plus
- Is your Oppo Reno 11F 5G working too slow? Heres how you can hard reset it | Dr.fone
- Navigating the Social Media Watersheds of Your Interest Space
- Ubuntus Top Picks 10 Free Video Editors for Every Creator for 2024
- Recommended Best Applications for Mirroring Your Vivo Y02T Screen | Dr.fone
- New In 2024, How To Learn Cartoon Sketch Drawing
- In 2024, Preparation to Beat Giovani in Pokemon Go For Samsung Galaxy A05s | Dr.fone
- In 2024, A Straightforward Path Learn How To Use EZ Grabber Effectively
- Updated Translate Any Hindi Video Into English With AI for 2024
- How to Remove Activation Lock On the Apple iPhone 14 Plus Without Previous Owner?
- [New] How To Snappify Your Mac's Viewport for 2024
- [New] Reclaim Lost Chatter in Shared Tweeted Films
- A Detailed VPNa Fake GPS Location Free Review On Oppo Reno 10 Pro+ 5G | Dr.fone
- In 2024, Full Tutorial to Bypass Your Samsung Galaxy A14 4G Face Lock?
- Visual Virtuosos The Ultimate Resource for Filters Perfection for 2024
- In 2024, How can I get more stardust in pokemon go On Vivo Y28 5G? | Dr.fone
- 2024 Approved SmoothRecorder Ultimate Edition
- [New] Uncover the Secret to Extra Instagram Filters for Zero Cost for 2024
- How To Reset Your iPhone 11 Without iTunes? | Dr.fone
- New Assemble a Free Music Video Project for 2024
- [Updated] Convert Facebook Audio to MP3 for 2024
- Title: Guidelines for Optimal YouTube Video Brightness
- Author: Steven
- Created at : 2024-05-25 19:24:49
- Updated at : 2024-05-26 19:24:49
- Link: https://youtube-clips.techidaily.com/guidelines-for-optimal-youtube-video-brightness/
- License: This work is licensed under CC BY-NC-SA 4.0.
