
:max_bytes(150000):strip_icc()/how-to-watch-mission-impossible-movies-in-order-61da86fffee741fc89a1dbc52dddd4e4.jpg)
"From Stir to Screen Masterful Cooking Videos"
From Stir to Screen: Masterful Cooking Videos
How to Make a Cooking Video in Steps - an Ultimate Guide

Richard Bennett
Mar 27, 2024• Proven solutions
Cooking and food-oriented videos are among the most outreaching and popular categories of content to publish online, notably, on YouTube, Facebook, or Instagram. So if you are a cooking aficionado, you have excellent potential to gain positive attention and a loyal audience. But to create engaging videos, you’d need a lot more than excellent culinary skills. This article aims to enlighten aspiring food and recipe vloggers about the essentials of video making straight out of the oven, to create enriched content that’s professional, neat, and viral-worthy.
- Part 1: What to Prepare Before Making a Recipe Video?
- Part 2: Make a Cooking Video with Filmora: a Step-by-Step Guide
- Part 3: Tips to Make Your Cooking Videos Stand Out
- Part 4: How to Promote Your Cooking Channel on YouTube?
What to Prepare Before Making a Recipe Video
While you would know best about the prep work needed for the recipes, the prep work for making a video starts with a plan. What goes into the plan?
Brainstorm this equation - Main Content + Duration + Light + Sound + Camera + Camera Angle, Shots & Transition.
The main content is how you picture the finished video. Ask yourself - Do you want an intro gig? Are you going to talk in the video or show only hands and the cooking with a piece of background music? How do you wish to present the ingredients? Would there be additional tips? At what platform are you going to publish your content? How long should be your clippings? Consider all these questions to chalk out a basic framework of your video
The camera is a pivotal element. Whether it is a smartphone or a hi-fidelity digital camera, it is worthwhile to familiarise the best positions and light orientations and the capacity of the device to produce the best quality picture.
How is your sound going to be like? If you are going to talk in the video, it is recommended that you use a microphone. Or else, you can also use background sound. But to mix sound with the video, you’d need an excellent sound editing tool.
Finally, comes the editing and finishing part. Eventually, you’ll need purposive video-editing software to help you work out the video transitions, sound, and visual effects.Choose a toolkit that is easy to learn and that you can get comfortable with so that the job of video editing doesn’t take the focus away from the main task of cooking.

Now, once you have all the essential ingredients to create your video, start practicing. Remember that it is the most natural thing for the first videos to appear amateurish or inept. And that is part of the plan. Don’t be disheartened and keep going.
Make a Cooking Video with Filmora: a Step-by-Step Guide
As one of the easiest-to-use video editing tools, the full-featured Filmora is the right choice considering it can fit most of your needs. Moreover, you’d be delighted to know that the software also has a series of features and functions and even tutorial videos dedicated to cooking videos.


Step 1: Filming the Video
Whether you are going to present a traditional cook-with-me style video or feature the contemporary “jump-cut” style focusing on speedy short videos, you need to prepare all the equipment and ingredients to suit the frame by frame shots. Consider spills, drops, overcooking, etc. as part of the process, so keep adequate substitutes to continue with your project unwaveringly. If you are using a phone, keep it fully charged up. And have a plan beforehand about what you should do when you get an urgent call while shooting. Also, consider doing a site investigation of the shooting spot for any fragile items, pointy corners, slippery areas, curious pets, etc. to avoid trips and falls in the middle of the filming, especially when working with a cameraman who’s following your movement. If you are using a tripod, and floor-standing lights, remember to secure the equipment with plenty of adhesive tapes, lest they bump into an expensive trip or fall.
Step 2: mport Your Video In Filmora
You need to sync the device that you used to film the video with the computer that has Filmora installed. It may be a phone or a camcorder. Once the devices are synced, you should launch the Filmora software and go the “Media” button at the top right toolbar. There you will find the “Import” button. You will get a pop-up message asking you to choose the type of device. Select the right one, and your video will be imported in the Filmora interface.
Step 3: Edit Video Pace: Time-Lapse, Jump Cut, Slow Motion
To create crisp, fast-paced videos, you don’t have to gobble up the content eyeing at the duration. Think smart when you have the resources of a tool like Filmora. Here are the three best features that help you create fast-paced yet well-defined recipes.
Time-Lapse: The time-lapse feature allows you to adjust the speed of the video from slow-motion to 10x faster. To use this, double click on a specific clip in your imported video and open the custom speed settings. Use the adjusting meter beside speed to make your clip as fast or slow as you want. You may use the same feature to introduce the slow-motion effects in certain areas of the video.
Now, when you are using either the fast-forward or slow-motion effects, it is best to have stable video footage with consistent lighting and a static background. There are also the options of Reverse Speed that can play the clip backward, as in flash-back. The Ripple edit feature allows you to cut short a long clip seamlessly.
Jump Cut: The Jump Cut is about snipping unwanted areas in the clip. It may sound like the Ripple edit mentioned above, but the ripple edit is more functional for cutting short a continuous video so that the viewer won’t realize the snip. For the Jump Cut, it doesn’t have to be a constant clip. You can get to the next frame or scene with an abracadabra move.
To use Jump Cut, place the cursor over the starting of the clip that you want to cut, and right-click on it and select “Split” (the “scissors” feature on the toolbar does the same thing). To make this look neat, preview the portion of the clip once again and delete the cuts between two clips with the same right-click.
Step 4: Understanding Transitions on Filmora
Transitions make your video more interactive and help you segregate the video from frame-to-frame with effects like dissolve, fade, flash, etc. there are numerous transition options available within the Filmora suit.
The best way to do this drag and drop the clips on the timeline is to trim parts of the clip to shorten it. Once you have all the clips in place, go to the “Transitions” options at the top toolbar to apply it on the end or start of each clip.
Step 5: Audio, Playback & Sound Edits
There are plenty of options that you can remove background noise, add voiceover, add music, and detach audio from video. Refer to the Audios section from your toolbar.
Step 6: Save to Drive/ Emport/ Publish
Once you are satisfied with your content, then go to Export. Choose the format of the video, MOV, MP4, MPG, etc. and whether you wish to publish directly or save to drive.
Tips to Make Your Cooking Videos Stand Out
- Lighting is your best friend. Invest in some quality spotlights or use the best of daylight.
- Mind your video duration. Short and Simple videos get the most views, but your content should not look incomplete. It is not a fact that long and elaborate videos do not get a place on the table; it is all about the relevance of your content. So don’t stop till you get enough.
- If you appear in the video, keep yourself always look good.
- Keep your video titles relevant and prominent, so that people looking for it can readily find it.
- Have a scrumptious custom thumbnail.
How to Promote Your Cooking Channel on YouTube
- Create an inventory before publishing videos. YouTube vlogging is valued for consistency. If you have a list of 10, 15, 20 videos, then you can have enough time in hand to film your next videos.
- Have a consistent style to create brand recognition. Do you think branding is not for Vlogs? Well, I suppose you might be wrong. Branding is for anyone who uses it.
- Share the link of your YouTube videos on other platforms like Twitter and Facebook.
- Encourage your viewers to comment on the video.
- Explore the different YouTube SEO strategies and use the accurate keywords in your video descriptions with hashtags.
With prior planning and practicing, you are bent on developing more confident moves and camera angles. Once you have that, follow this step by step guide to gain speed and prowess and also enjoy the whole adventure.
Richard Bennett
Richard Bennett is a writer and a lover of all things video.
Follow @Richard Bennett
Richard Bennett
Mar 27, 2024• Proven solutions
Cooking and food-oriented videos are among the most outreaching and popular categories of content to publish online, notably, on YouTube, Facebook, or Instagram. So if you are a cooking aficionado, you have excellent potential to gain positive attention and a loyal audience. But to create engaging videos, you’d need a lot more than excellent culinary skills. This article aims to enlighten aspiring food and recipe vloggers about the essentials of video making straight out of the oven, to create enriched content that’s professional, neat, and viral-worthy.
- Part 1: What to Prepare Before Making a Recipe Video?
- Part 2: Make a Cooking Video with Filmora: a Step-by-Step Guide
- Part 3: Tips to Make Your Cooking Videos Stand Out
- Part 4: How to Promote Your Cooking Channel on YouTube?
What to Prepare Before Making a Recipe Video
While you would know best about the prep work needed for the recipes, the prep work for making a video starts with a plan. What goes into the plan?
Brainstorm this equation - Main Content + Duration + Light + Sound + Camera + Camera Angle, Shots & Transition.
The main content is how you picture the finished video. Ask yourself - Do you want an intro gig? Are you going to talk in the video or show only hands and the cooking with a piece of background music? How do you wish to present the ingredients? Would there be additional tips? At what platform are you going to publish your content? How long should be your clippings? Consider all these questions to chalk out a basic framework of your video
The camera is a pivotal element. Whether it is a smartphone or a hi-fidelity digital camera, it is worthwhile to familiarise the best positions and light orientations and the capacity of the device to produce the best quality picture.
How is your sound going to be like? If you are going to talk in the video, it is recommended that you use a microphone. Or else, you can also use background sound. But to mix sound with the video, you’d need an excellent sound editing tool.
Finally, comes the editing and finishing part. Eventually, you’ll need purposive video-editing software to help you work out the video transitions, sound, and visual effects.Choose a toolkit that is easy to learn and that you can get comfortable with so that the job of video editing doesn’t take the focus away from the main task of cooking.
Now, once you have all the essential ingredients to create your video, start practicing. Remember that it is the most natural thing for the first videos to appear amateurish or inept. And that is part of the plan. Don’t be disheartened and keep going.
Make a Cooking Video with Filmora: a Step-by-Step Guide
As one of the easiest-to-use video editing tools, the full-featured Filmora is the right choice considering it can fit most of your needs. Moreover, you’d be delighted to know that the software also has a series of features and functions and even tutorial videos dedicated to cooking videos.
Step 1: Filming the Video
Whether you are going to present a traditional cook-with-me style video or feature the contemporary “jump-cut” style focusing on speedy short videos, you need to prepare all the equipment and ingredients to suit the frame by frame shots. Consider spills, drops, overcooking, etc. as part of the process, so keep adequate substitutes to continue with your project unwaveringly. If you are using a phone, keep it fully charged up. And have a plan beforehand about what you should do when you get an urgent call while shooting. Also, consider doing a site investigation of the shooting spot for any fragile items, pointy corners, slippery areas, curious pets, etc. to avoid trips and falls in the middle of the filming, especially when working with a cameraman who’s following your movement. If you are using a tripod, and floor-standing lights, remember to secure the equipment with plenty of adhesive tapes, lest they bump into an expensive trip or fall.
Step 2: mport Your Video In Filmora
You need to sync the device that you used to film the video with the computer that has Filmora installed. It may be a phone or a camcorder. Once the devices are synced, you should launch the Filmora software and go the “Media” button at the top right toolbar. There you will find the “Import” button. You will get a pop-up message asking you to choose the type of device. Select the right one, and your video will be imported in the Filmora interface.
Step 3: Edit Video Pace: Time-Lapse, Jump Cut, Slow Motion
To create crisp, fast-paced videos, you don’t have to gobble up the content eyeing at the duration. Think smart when you have the resources of a tool like Filmora. Here are the three best features that help you create fast-paced yet well-defined recipes.
Time-Lapse: The time-lapse feature allows you to adjust the speed of the video from slow-motion to 10x faster. To use this, double click on a specific clip in your imported video and open the custom speed settings. Use the adjusting meter beside speed to make your clip as fast or slow as you want. You may use the same feature to introduce the slow-motion effects in certain areas of the video.
Now, when you are using either the fast-forward or slow-motion effects, it is best to have stable video footage with consistent lighting and a static background. There are also the options of Reverse Speed that can play the clip backward, as in flash-back. The Ripple edit feature allows you to cut short a long clip seamlessly.
Jump Cut: The Jump Cut is about snipping unwanted areas in the clip. It may sound like the Ripple edit mentioned above, but the ripple edit is more functional for cutting short a continuous video so that the viewer won’t realize the snip. For the Jump Cut, it doesn’t have to be a constant clip. You can get to the next frame or scene with an abracadabra move.
To use Jump Cut, place the cursor over the starting of the clip that you want to cut, and right-click on it and select “Split” (the “scissors” feature on the toolbar does the same thing). To make this look neat, preview the portion of the clip once again and delete the cuts between two clips with the same right-click.
Step 4: Understanding Transitions on Filmora
Transitions make your video more interactive and help you segregate the video from frame-to-frame with effects like dissolve, fade, flash, etc. there are numerous transition options available within the Filmora suit.
The best way to do this drag and drop the clips on the timeline is to trim parts of the clip to shorten it. Once you have all the clips in place, go to the “Transitions” options at the top toolbar to apply it on the end or start of each clip.
Step 5: Audio, Playback & Sound Edits
There are plenty of options that you can remove background noise, add voiceover, add music, and detach audio from video. Refer to the Audios section from your toolbar.
Step 6: Save to Drive/ Emport/ Publish
Once you are satisfied with your content, then go to Export. Choose the format of the video, MOV, MP4, MPG, etc. and whether you wish to publish directly or save to drive.
Tips to Make Your Cooking Videos Stand Out
- Lighting is your best friend. Invest in some quality spotlights or use the best of daylight.
- Mind your video duration. Short and Simple videos get the most views, but your content should not look incomplete. It is not a fact that long and elaborate videos do not get a place on the table; it is all about the relevance of your content. So don’t stop till you get enough.
- If you appear in the video, keep yourself always look good.
- Keep your video titles relevant and prominent, so that people looking for it can readily find it.
- Have a scrumptious custom thumbnail.
How to Promote Your Cooking Channel on YouTube
- Create an inventory before publishing videos. YouTube vlogging is valued for consistency. If you have a list of 10, 15, 20 videos, then you can have enough time in hand to film your next videos.
- Have a consistent style to create brand recognition. Do you think branding is not for Vlogs? Well, I suppose you might be wrong. Branding is for anyone who uses it.
- Share the link of your YouTube videos on other platforms like Twitter and Facebook.
- Encourage your viewers to comment on the video.
- Explore the different YouTube SEO strategies and use the accurate keywords in your video descriptions with hashtags.
With prior planning and practicing, you are bent on developing more confident moves and camera angles. Once you have that, follow this step by step guide to gain speed and prowess and also enjoy the whole adventure.
Richard Bennett
Richard Bennett is a writer and a lover of all things video.
Follow @Richard Bennett
Discover 8 YouTube Thumbnail Generators Online
Top 12 Free YouTube Thumbnail Makers - Filmora
Richard Bennett
Mar 27, 2024• Proven solutions
Video thumbnails are vital to get your videos more views. Many successful YouTubers make nice thumbnails which help them get lots of views and thus tons of subscribers.
If you are searching for software tools that can assist in the creation of YouTube video thumbnails, then you are on the right page because the details available below will provide you with complete information about the top 10+ highly rated YouTube Thumbnail Makers on both desktop and mobile devices. Some of them are free to create YouTube thumbnails; others may need to pay to get more advanced features. Besides, I’ll also show you how to create a thumbnail in the Filmora video editor in detail.
- Part 1: Best Free YouTube Thumbnail Makers for Online Users
- Part 2: How to Make Video Thumbnail with Wondershare Filmora [Creative Ways]
- Part 3: FAQs About YouTube Thumbnail
Before we get started, it is highly recommended to watch this video, teaching you how to make a YouTube Thumbnail in 30 seconds with Filmora.
You might be interested in
- How to Make Fortnite Thumbnail Super Easy and Free >>
- Best Size, Best Practices of Making YouTube Thumbnail >>
Part 1:10+ Free YouTube Thumbnail Makers for Windows/Mac/Online/Android/iPhone/iPad
In this part, we will share with you some Free YouTube Thumbnail Makers that you can use. Some of them are online solutions, so there is no need to download them, some of them can be downloaded on Windows or Mac computers.
If you prefer to edit videos on mobile devices, then it is good to have an app that allows you to create video thumbnails for YouTube videos. So in this part, we have included some video thumbnail maker apps that you can use on iPhone and Android phones.
1. Canva
It is a free thumbnail maker that can be accessed from its official website at Canva.com. This Video Thumbnail Maker is useful for graphic designers as it offers incredible features. The simple to use drag and drop type functions are wonderful, and the effects available for your Thumbnail Creation include free stock-type photos, Illustrations, Lines, Shapes, Frames, Grids, Backgrounds, Text, etc. The quick customer support facility is appreciable. Note: You need to sign up to use the thumbnail templates.
Main Features of this free YouTube Thumbnail Maker:
- It offers a customized YouTube thumbnail design
- You can change images, colors and fonts easily
- You can get more styles and templates if you pay
- Registration needed
2. Wondershare PixStudio
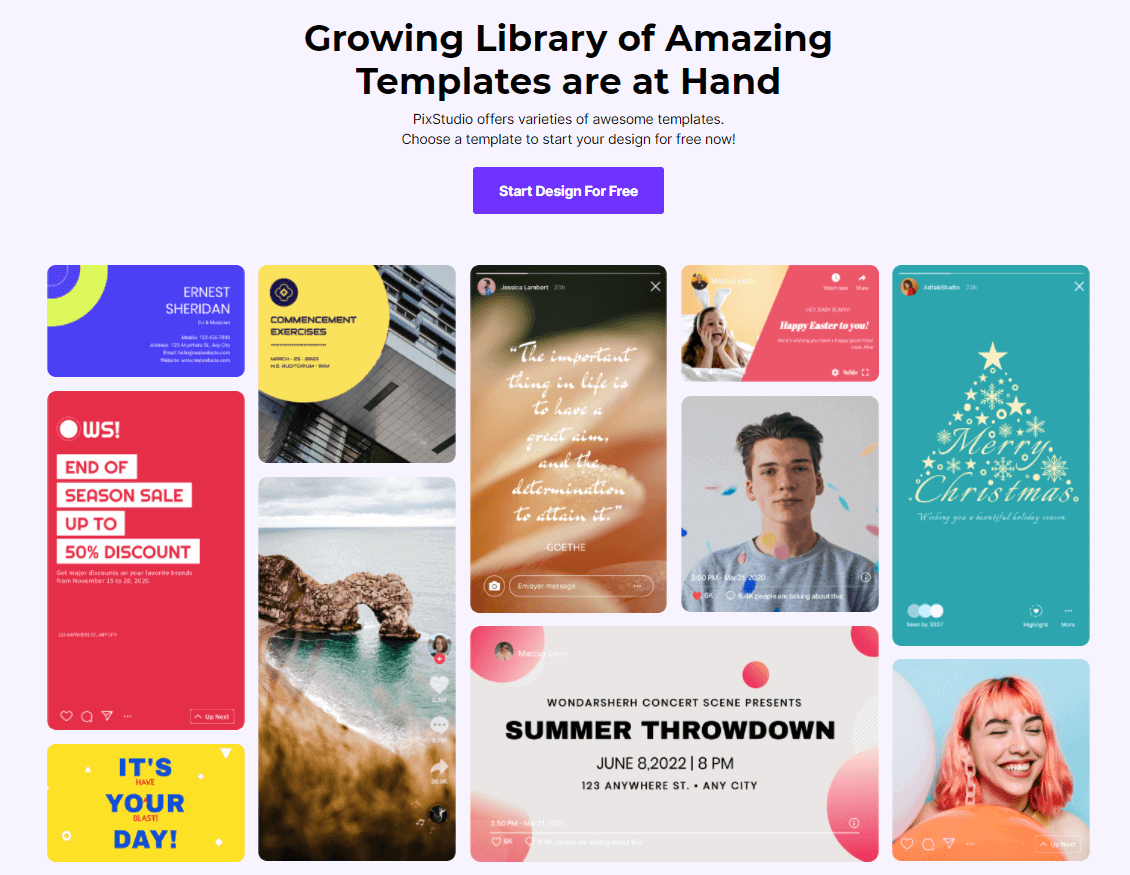
Wondershare PixStudio is an all-in-one and powerful online graphic design maker for everyone. It has various types of templates for YouTube Thumbnails, Logos, Posters, etc. You can create a beautiful design by simply dragging and dropping the elements and photos. The online platform is free to use all templates, just One-Click to download your creations and share to your Facebook, Instagram Story, YouTube Thumbnails, etc. immediately.
Features :
- Various types of templates
- Simple and Fast Design
- Background remover
Available:
Online
iPhone/iPad
Android
3. PicMonkey

This online thumbnail maker provides numerous filters, exclusive overlays, fonts, frames, and extra beautifying touch-up type tools to users with a single registration to Picmonkey’s premium membership. The exclusive effects like Ombre, zombify, premium fonts and Mirror are a really good collection of this tool. Now you can easily design beautiful collages, edit your memories, and create professional thumbnails with Picmonkey.com. Because of its wide range of options, it is probably the second most popular option for YouTubers who want to make professional thumbnails, right after Canva. One major difference between Picmonkey and Canva is that Picmonkey is no longer free. It costs $4 per month.
Features:
- As a youtube thumbnail maker, you also can touch up facial beautification
- Design tools make creative logos
- Provides 100+ designer-crafted thumbnail templates
Available :
Online
iPhone/iPad
Android
4. Fotor
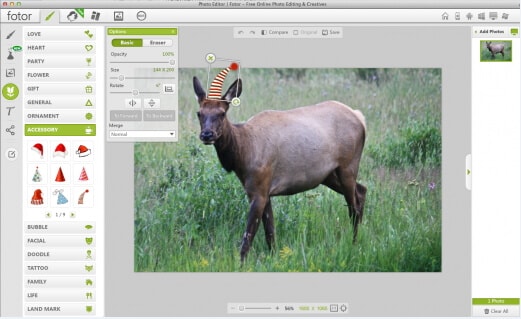
It is possible to get something outstanding even out of your simple content without making much effort because Fotor serves you with all advanced features, and it covers attractive themes from all over the world. Fotor allows you to re-discover your art and skills without any limitation as it offers all quick editing services online. It is very interactive and simple to use with all rich features, so even beginners who haven’t made any thumbnail before can make a video thumbnail with it easily.
Features:
- Your thumbnail will be saved on the cloud
- Fast processing speed while exporting your work
- Provides YouTube thumbnail templates for different scenarios
Available :
Online
iPhone/iPad
Android
5. Fotojet
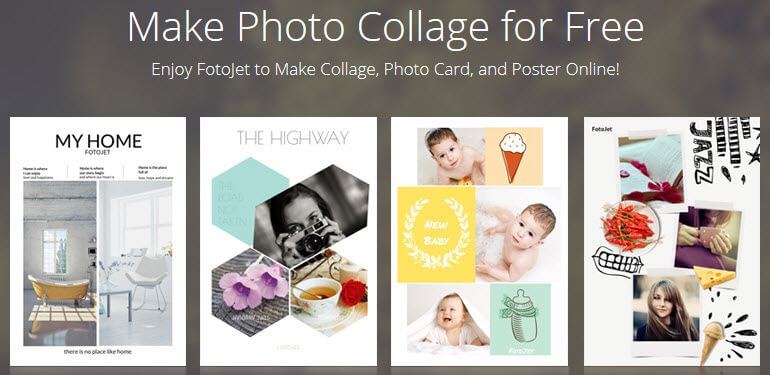
The fotojet.com online tool provides numerous facilities, whereas it is preferably used for collage making, graphic designing, and as a photo editor. With this advanced thumbnail creator tool, now you can easily rotate, crop, resize or filter your images while creating direct posts for social media pages such as Instagram, Facebook, etc. Fotojet.com possesses more than 600 stunning collage making templates that are suitable for your special events.
Features:
- It owns many templates for you to use
- Easy to have a high-quality thumbnail with only a few clicks
- 3 Steps to make a YouTube thumbnail
Available :
Online
Windows
Mac
6. Backgrounder
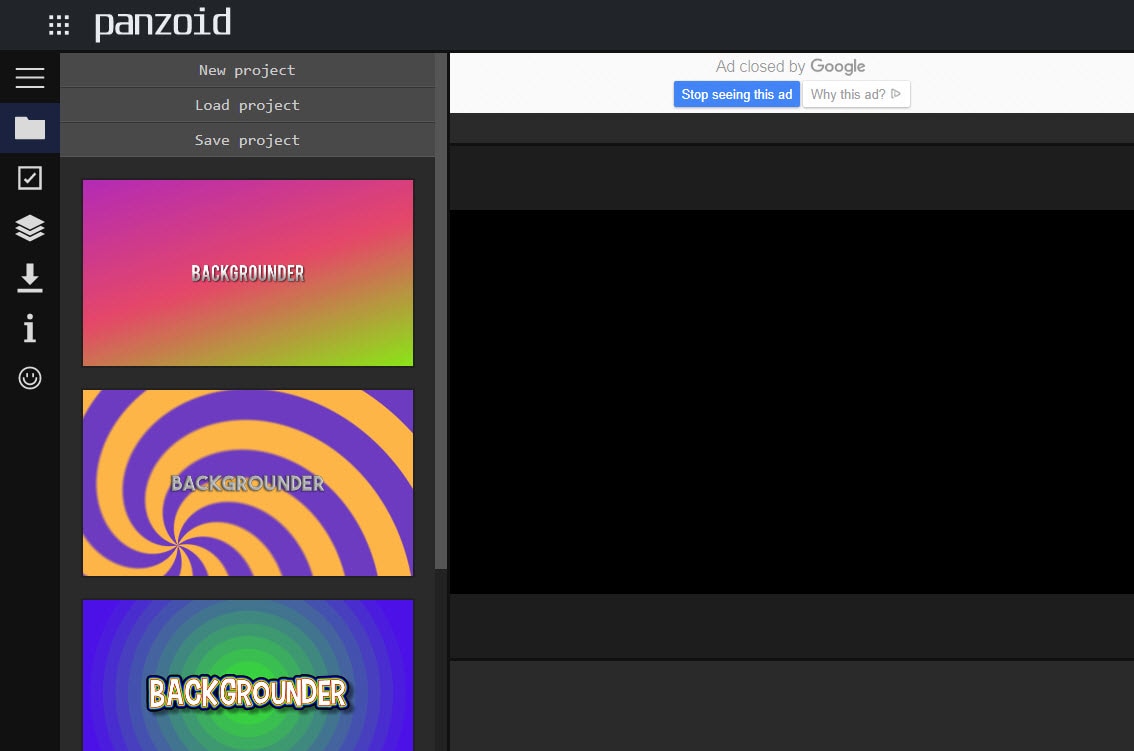
It allows you to design masterpieces of customized professional art, avatars, and thumbnails for videos on YouTube, Facebook, Twitter, etc. It is simple to use and contains an interactive user interface that is suitable for professionals as well as beginners.
Features:
- It owns a community that you can share works with other people
- The interface is extremely straightforward
Available :
Online
7. Pixlr:
It is a specially designs app version of well known Pixlr website where you can feel free to add overlays to your thumbnails. The choice of filters is also good for her with a high-end resolution as compared to available online solutions.
Features:
- Its free effects are a great source to come up with a new YouTube thumbnail
- Comprehensive editing tools are handy to use every day
Available :
Online
iPhone/iPad
Android
8. Photo Editor:
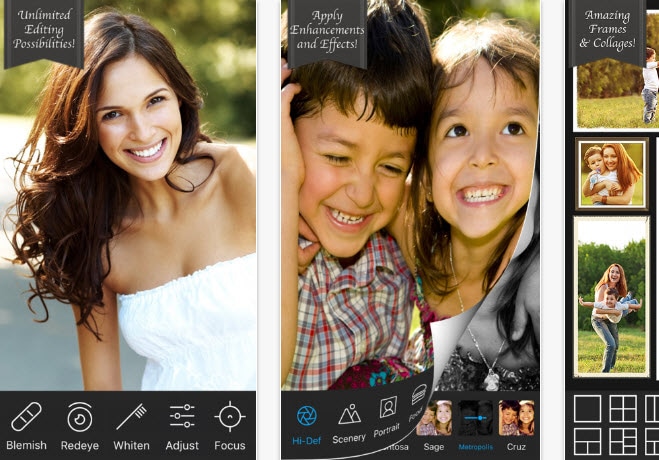
Photo Editor is one of the most popular applications that assist users in the easy addition of stickers, frames, etc while it makes adjustment of redeye, brightness, and sharpness much easier. Most people love this application more due to its ability to create memes with available images and text for those images can be adjusted easily. The photo editor also makes it much easier to share edited stuff on Instagram and the quality of edited images use to be very high in this case.
Features:
- Color splash is a great tool to brighten up your thumbnail
- You can easily crop, rotate and flip
Available :
iPhone/iPad
9. Insta Collage:
The name of this application describes its most special feature that is it allows users to create wonderful collages within very little time. This tool comes with easy editing and sharing features so that users can have an easy interface on other platforms too. There are lots of effects that can be added to images while designing thumbnails and it is rated to have an outstanding quality of results.
Features:
- The personalized layout will give you a catchy thumbnail
- It owns 30 patterns and 18 frames to select
Available :
Android
10. Cropic:
Here is one more application for you that you will need for easy customization as well as fast sharing to YouTube as well as Instagram. Users can bring all size types to this platform, and it is also possible to add text at the time of editing. This tool is suggested for beginners as well as professionals due to its great results.
Features:
- You can scale the image by hand and cut it
- Pro version is more powerful for supporting 1224x1224 pixels
Available :
iPhone/iPad
With all these available software tools, it becomes much easier to create video Thumbnails for YouTube. The easy-to-follow steps are well described in different articles on the internet, but first of all, you need to make a selection between whether you need to use the online tool or wish to download the app on your device.
For the second case, you need to spare some memory in your device, whereas for the first one it demands a fast internet connection for easy services. Besides those specially designed YouTube Thumbnail makers, you can also create a thumbnail in Filmora if you’ve already installed it.
11. Snappa:
If you’re looking for a tool that can be upgraded later, then Snappa could be for you. Offering users both free and paid functions, Snappa will allow users to generate some truly alluring thumbnails, while still being able to use the tools for work on other social media platforms.
Features:
- Pre-Made Templates Available
- Easily Customize Backgrounds
- Place Custom Text Anywhere You Want
- Create a Truly Bespoke YouTube Thumbnail
Available :
Online
iPhone/iPad
Android
12. Adobe Spark:
Not only is Adobe recognized for creating images in many different contexts, but it is also able to offer YouTubers a free tool to ensure that their video thumbnails are catching the eye of social network visitors.
Features:
- A Basic and Easy-To-Use Platform
- Ideal for Beginners
- Customize Colors, Backgrounds, and Text with Ease
- Add Additional Images if Needed
Available :
Windows 7 or newer
Mac OS X
Chromebook
Part 2: How to Make YouTube Thumbnails in Wondershare Filmora?
Filmora is easy to use and powerful video editing software for your YouTube videos, which allows you not only to cut, rotate, crop, reverse, or speed up your videos, but also to apply some advanced editing effects like green screen, PIP, audio editing, etc. within clicks.
Here are several creative ways of making thumbnails in Filmora. You can easily create a thumbnail in 30 seconds with Filmora’s new feature, AI portrait.
You can add your image or background image to Filmora and then add some filters, texts, overlay, or elements to the photo, and then take a snapshot, since Filmora features the snapshot tool which allows you to pick up the most attractive images from the video and use it as a video thumbnail.
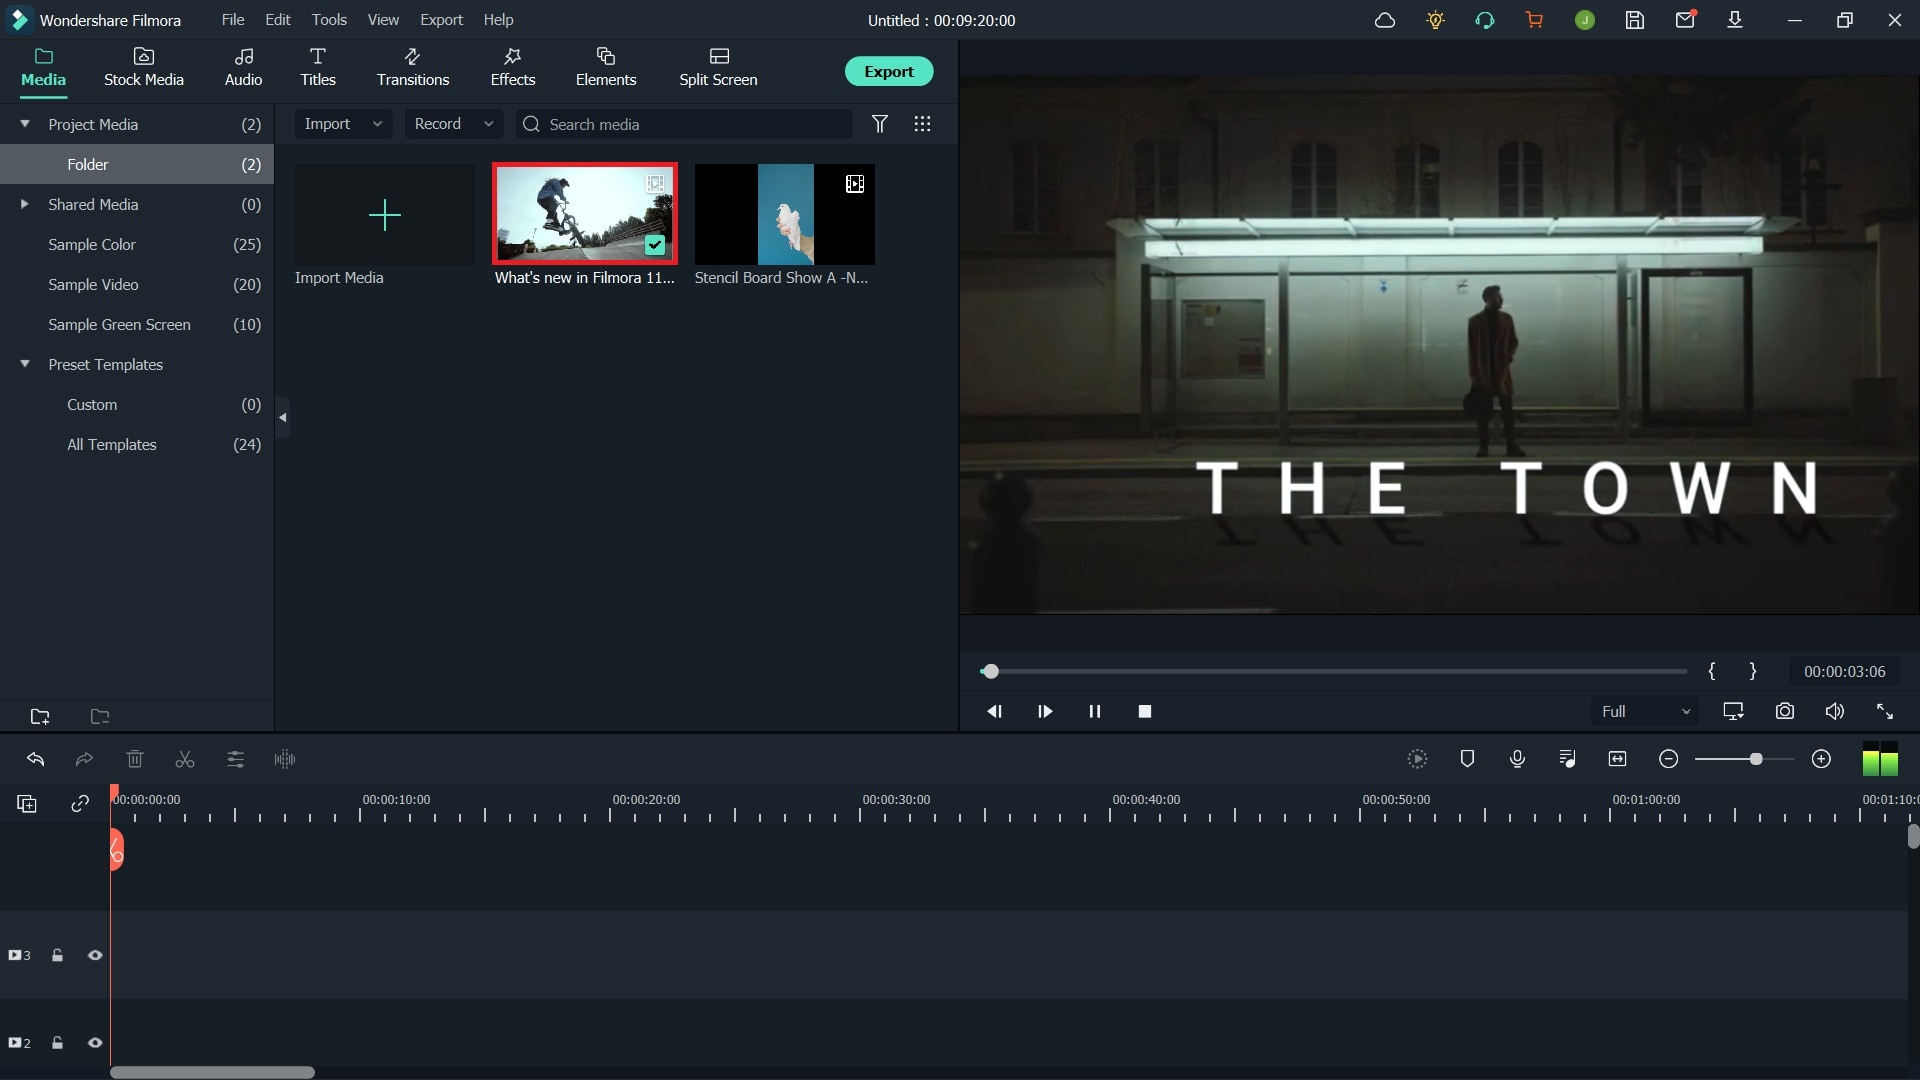
Thumbnail created from a photo in Filmora
Or, you can extract frames from the video and use it as a thumbnail and upload it to YouTube later.
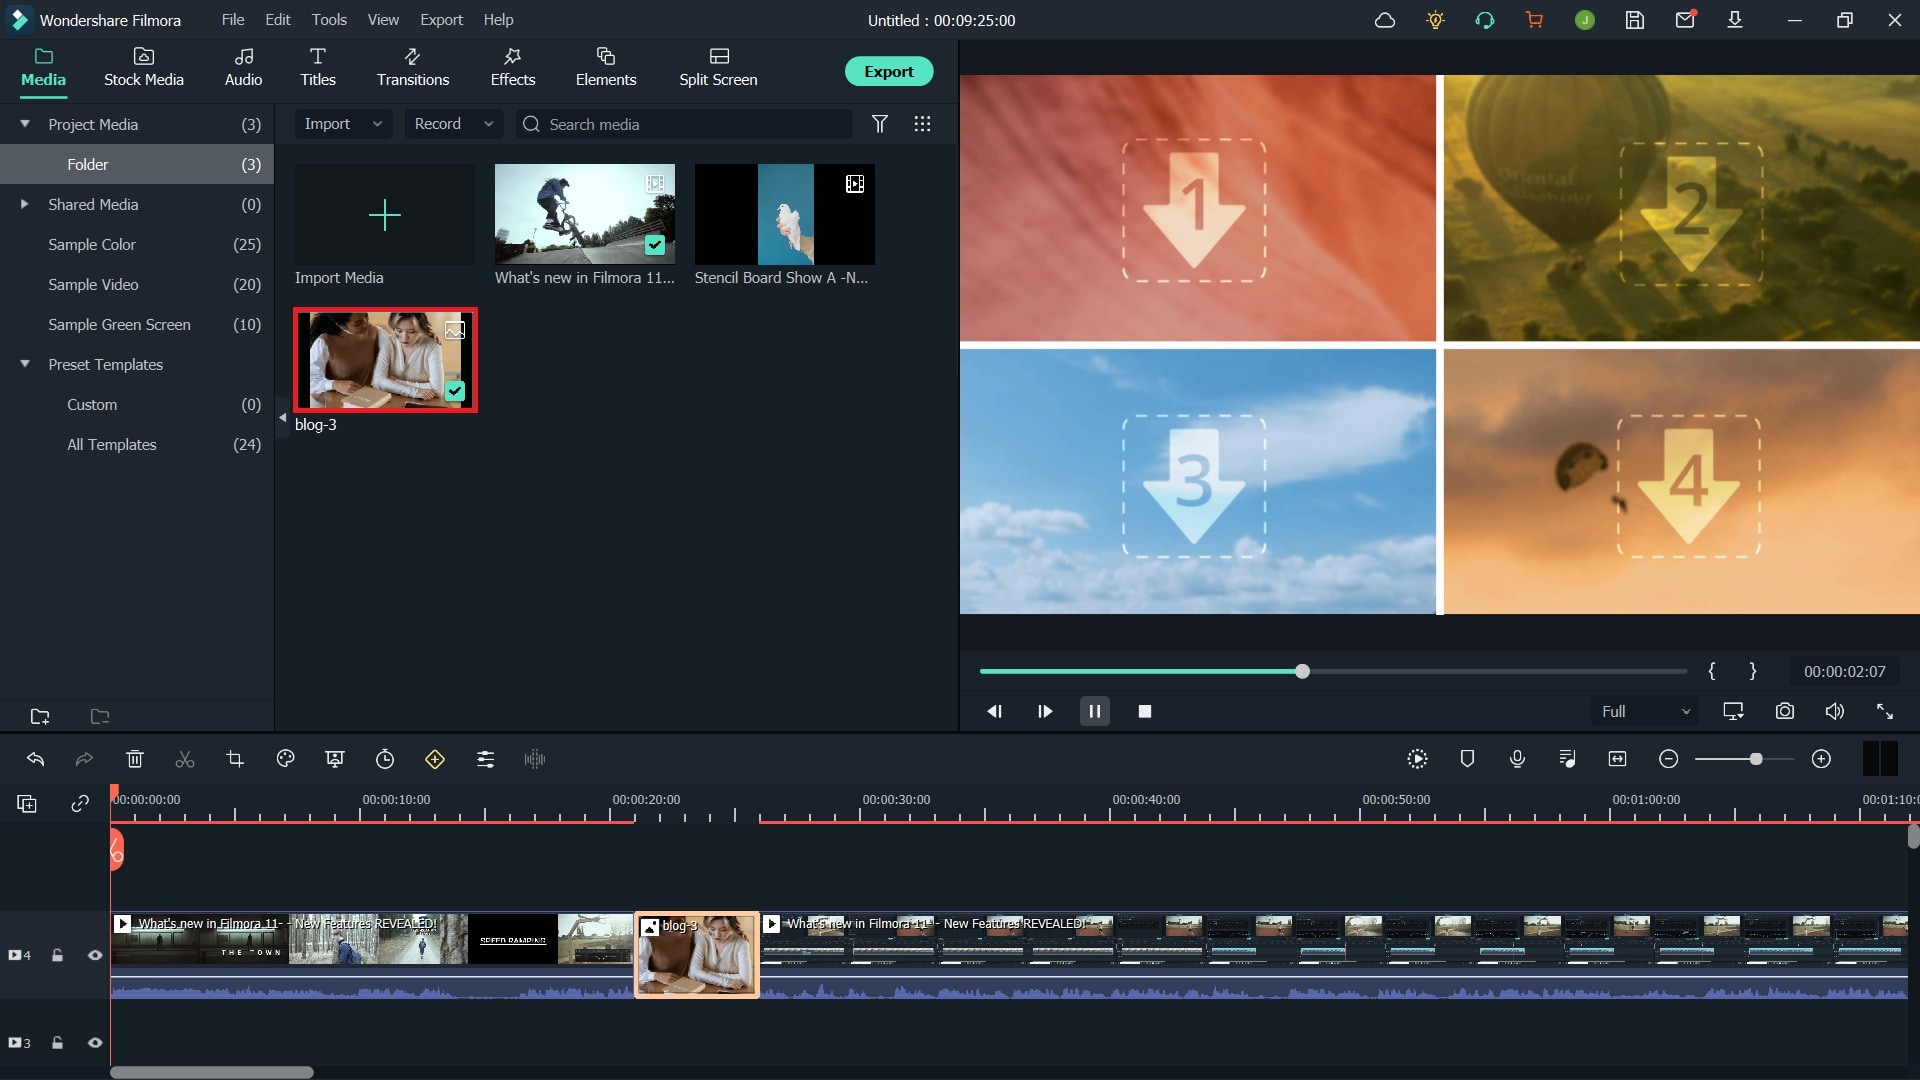
Thumbnail extracted from video footage in Filmora
One more creative way is to compositevideo footage with the green screen feature .
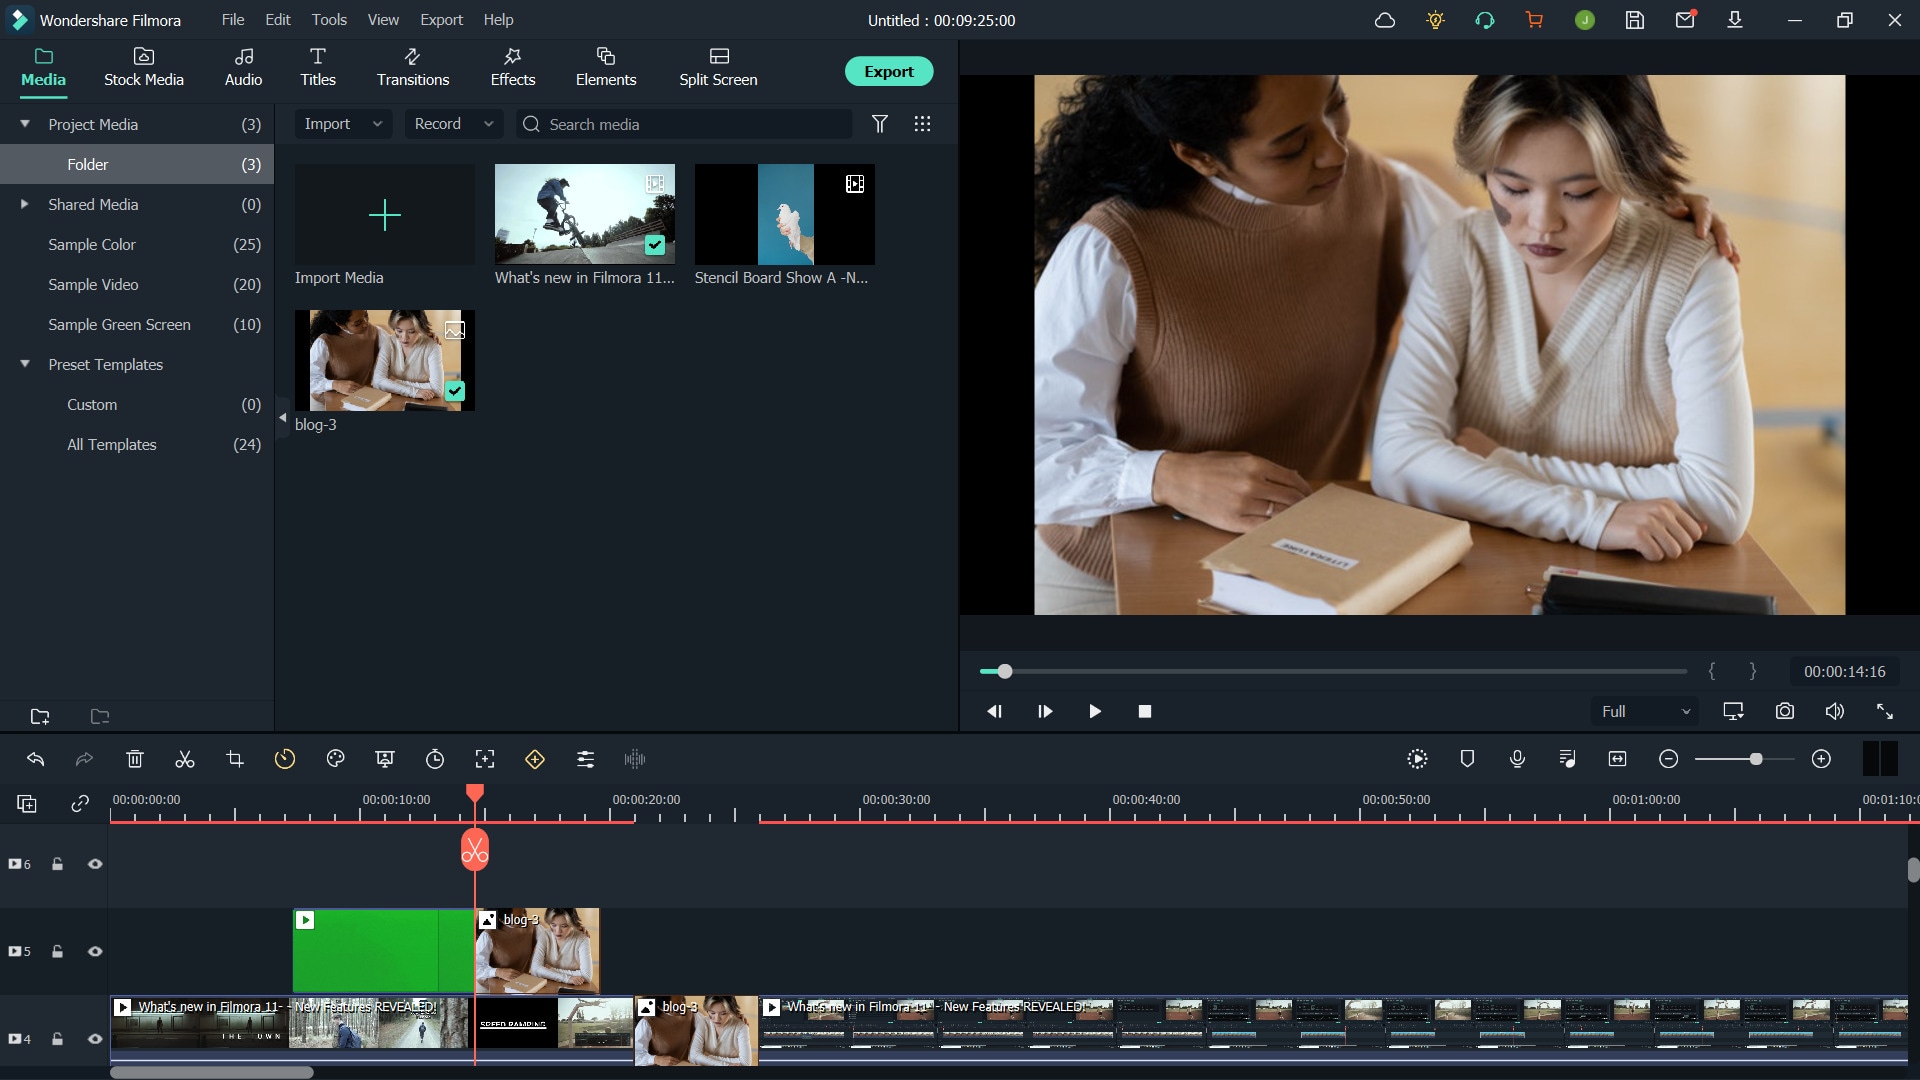
Use Green Screen to Create Video Thumbnail in Filmora
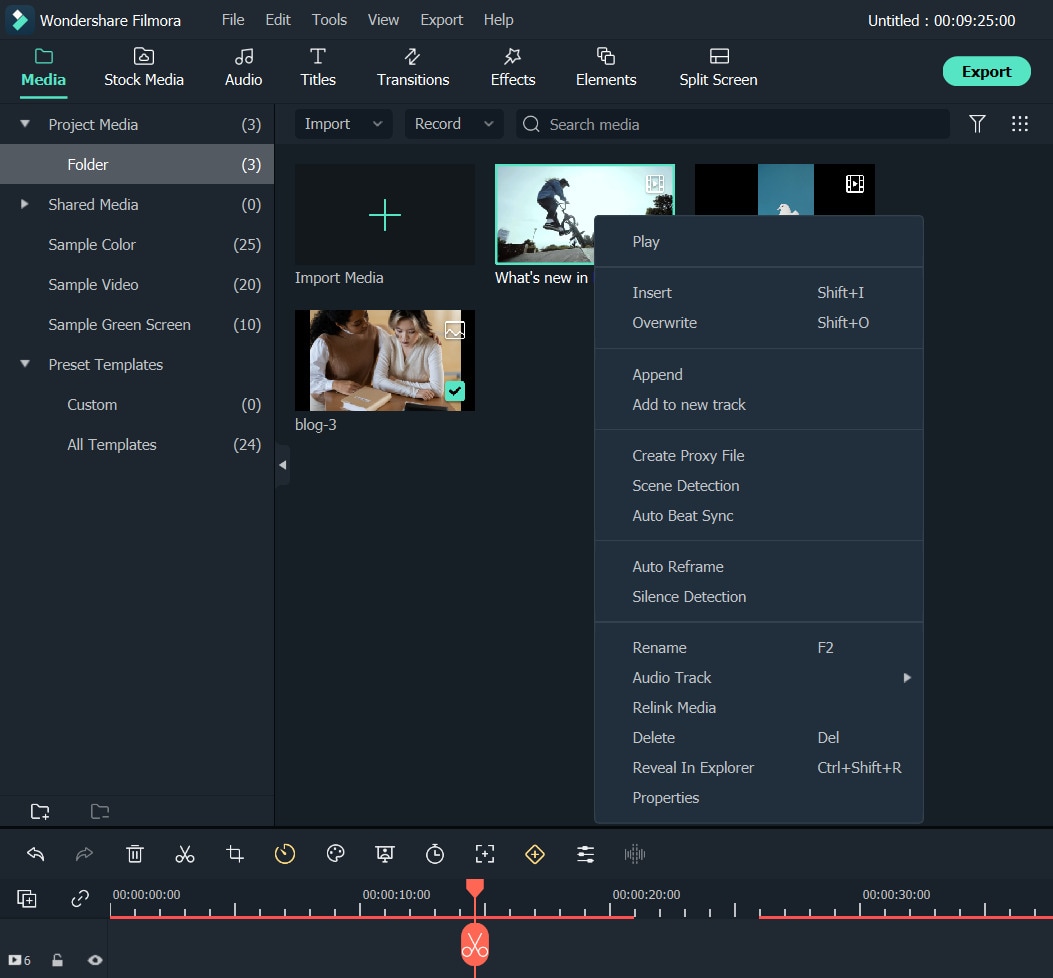
Where to find the thumbnail photo in Wondershare Filmora?
After clicking the Camera icon in Filmora to take a screenshot, you can find the photos by right-clicking the image in the Media library and then selecting Reveal in Explorer to check it.
Download Mac Version ](https://tools.techidaily.com/wondershare/filmora/download/ )
Part 3: FAQs About YouTube Thumbnail
1. What Does Thumbnail Mean on YouTube?
Thumbnails are reduced-size versions of images or videos. The name is an allusion to images being reduced to roughly the size of a human thumbnail. Thumbnails have special significance in YouTube SEO. They are used for drawing the viewers’ attention. A well-made thumbnail can bring millions of views for a YouTuber .
2. Which Is the Best Thumbnail Maker for YouTube?
Besides the thumbnail maker introduced above, the Filmora video editor and be used as an excellent thumbnail maker as well. Instead of going through the hassle of installing or subscribing to a separate program or website, it is better to use the extensive features of Filmora. It can take free snapshots for you, which you can modify within Filmora. There are stunning title templates, effects, overlays, transitions, and a large library of stock content at your service. From Part 2 in this article, you can see that making a YouTube thumbnail in Filmora is easy and efficient.
Richard Bennett
Richard Bennett is a writer and a lover of all things video.
Follow @Richard Bennett
Richard Bennett
Mar 27, 2024• Proven solutions
Video thumbnails are vital to get your videos more views. Many successful YouTubers make nice thumbnails which help them get lots of views and thus tons of subscribers.
If you are searching for software tools that can assist in the creation of YouTube video thumbnails, then you are on the right page because the details available below will provide you with complete information about the top 10+ highly rated YouTube Thumbnail Makers on both desktop and mobile devices. Some of them are free to create YouTube thumbnails; others may need to pay to get more advanced features. Besides, I’ll also show you how to create a thumbnail in the Filmora video editor in detail.
- Part 1: Best Free YouTube Thumbnail Makers for Online Users
- Part 2: How to Make Video Thumbnail with Wondershare Filmora [Creative Ways]
- Part 3: FAQs About YouTube Thumbnail
Before we get started, it is highly recommended to watch this video, teaching you how to make a YouTube Thumbnail in 30 seconds with Filmora.
You might be interested in
- How to Make Fortnite Thumbnail Super Easy and Free >>
- Best Size, Best Practices of Making YouTube Thumbnail >>
Part 1:10+ Free YouTube Thumbnail Makers for Windows/Mac/Online/Android/iPhone/iPad
In this part, we will share with you some Free YouTube Thumbnail Makers that you can use. Some of them are online solutions, so there is no need to download them, some of them can be downloaded on Windows or Mac computers.
If you prefer to edit videos on mobile devices, then it is good to have an app that allows you to create video thumbnails for YouTube videos. So in this part, we have included some video thumbnail maker apps that you can use on iPhone and Android phones.
1. Canva
It is a free thumbnail maker that can be accessed from its official website at Canva.com. This Video Thumbnail Maker is useful for graphic designers as it offers incredible features. The simple to use drag and drop type functions are wonderful, and the effects available for your Thumbnail Creation include free stock-type photos, Illustrations, Lines, Shapes, Frames, Grids, Backgrounds, Text, etc. The quick customer support facility is appreciable. Note: You need to sign up to use the thumbnail templates.
Main Features of this free YouTube Thumbnail Maker:
- It offers a customized YouTube thumbnail design
- You can change images, colors and fonts easily
- You can get more styles and templates if you pay
- Registration needed
2. Wondershare PixStudio
Wondershare PixStudio is an all-in-one and powerful online graphic design maker for everyone. It has various types of templates for YouTube Thumbnails, Logos, Posters, etc. You can create a beautiful design by simply dragging and dropping the elements and photos. The online platform is free to use all templates, just One-Click to download your creations and share to your Facebook, Instagram Story, YouTube Thumbnails, etc. immediately.
Features :
- Various types of templates
- Simple and Fast Design
- Background remover
Available:
Online
iPhone/iPad
Android
3. PicMonkey
This online thumbnail maker provides numerous filters, exclusive overlays, fonts, frames, and extra beautifying touch-up type tools to users with a single registration to Picmonkey’s premium membership. The exclusive effects like Ombre, zombify, premium fonts and Mirror are a really good collection of this tool. Now you can easily design beautiful collages, edit your memories, and create professional thumbnails with Picmonkey.com. Because of its wide range of options, it is probably the second most popular option for YouTubers who want to make professional thumbnails, right after Canva. One major difference between Picmonkey and Canva is that Picmonkey is no longer free. It costs $4 per month.
Features:
- As a youtube thumbnail maker, you also can touch up facial beautification
- Design tools make creative logos
- Provides 100+ designer-crafted thumbnail templates
Available :
Online
iPhone/iPad
Android
4. Fotor
It is possible to get something outstanding even out of your simple content without making much effort because Fotor serves you with all advanced features, and it covers attractive themes from all over the world. Fotor allows you to re-discover your art and skills without any limitation as it offers all quick editing services online. It is very interactive and simple to use with all rich features, so even beginners who haven’t made any thumbnail before can make a video thumbnail with it easily.
Features:
- Your thumbnail will be saved on the cloud
- Fast processing speed while exporting your work
- Provides YouTube thumbnail templates for different scenarios
Available :
Online
iPhone/iPad
Android
5. Fotojet
The fotojet.com online tool provides numerous facilities, whereas it is preferably used for collage making, graphic designing, and as a photo editor. With this advanced thumbnail creator tool, now you can easily rotate, crop, resize or filter your images while creating direct posts for social media pages such as Instagram, Facebook, etc. Fotojet.com possesses more than 600 stunning collage making templates that are suitable for your special events.
Features:
- It owns many templates for you to use
- Easy to have a high-quality thumbnail with only a few clicks
- 3 Steps to make a YouTube thumbnail
Available :
Online
Windows
Mac
6. Backgrounder
It allows you to design masterpieces of customized professional art, avatars, and thumbnails for videos on YouTube, Facebook, Twitter, etc. It is simple to use and contains an interactive user interface that is suitable for professionals as well as beginners.
Features:
- It owns a community that you can share works with other people
- The interface is extremely straightforward
Available :
Online
7. Pixlr:
It is a specially designs app version of well known Pixlr website where you can feel free to add overlays to your thumbnails. The choice of filters is also good for her with a high-end resolution as compared to available online solutions.
Features:
- Its free effects are a great source to come up with a new YouTube thumbnail
- Comprehensive editing tools are handy to use every day
Available :
Online
iPhone/iPad
Android
8. Photo Editor:
Photo Editor is one of the most popular applications that assist users in the easy addition of stickers, frames, etc while it makes adjustment of redeye, brightness, and sharpness much easier. Most people love this application more due to its ability to create memes with available images and text for those images can be adjusted easily. The photo editor also makes it much easier to share edited stuff on Instagram and the quality of edited images use to be very high in this case.
Features:
- Color splash is a great tool to brighten up your thumbnail
- You can easily crop, rotate and flip
Available :
iPhone/iPad
9. Insta Collage:
The name of this application describes its most special feature that is it allows users to create wonderful collages within very little time. This tool comes with easy editing and sharing features so that users can have an easy interface on other platforms too. There are lots of effects that can be added to images while designing thumbnails and it is rated to have an outstanding quality of results.
Features:
- The personalized layout will give you a catchy thumbnail
- It owns 30 patterns and 18 frames to select
Available :
Android
10. Cropic:
Here is one more application for you that you will need for easy customization as well as fast sharing to YouTube as well as Instagram. Users can bring all size types to this platform, and it is also possible to add text at the time of editing. This tool is suggested for beginners as well as professionals due to its great results.
Features:
- You can scale the image by hand and cut it
- Pro version is more powerful for supporting 1224x1224 pixels
Available :
iPhone/iPad
With all these available software tools, it becomes much easier to create video Thumbnails for YouTube. The easy-to-follow steps are well described in different articles on the internet, but first of all, you need to make a selection between whether you need to use the online tool or wish to download the app on your device.
For the second case, you need to spare some memory in your device, whereas for the first one it demands a fast internet connection for easy services. Besides those specially designed YouTube Thumbnail makers, you can also create a thumbnail in Filmora if you’ve already installed it.
11. Snappa:
If you’re looking for a tool that can be upgraded later, then Snappa could be for you. Offering users both free and paid functions, Snappa will allow users to generate some truly alluring thumbnails, while still being able to use the tools for work on other social media platforms.
Features:
- Pre-Made Templates Available
- Easily Customize Backgrounds
- Place Custom Text Anywhere You Want
- Create a Truly Bespoke YouTube Thumbnail
Available :
Online
iPhone/iPad
Android
12. Adobe Spark:
Not only is Adobe recognized for creating images in many different contexts, but it is also able to offer YouTubers a free tool to ensure that their video thumbnails are catching the eye of social network visitors.
Features:
- A Basic and Easy-To-Use Platform
- Ideal for Beginners
- Customize Colors, Backgrounds, and Text with Ease
- Add Additional Images if Needed
Available :
Windows 7 or newer
Mac OS X
Chromebook
Part 2: How to Make YouTube Thumbnails in Wondershare Filmora?
Filmora is easy to use and powerful video editing software for your YouTube videos, which allows you not only to cut, rotate, crop, reverse, or speed up your videos, but also to apply some advanced editing effects like green screen, PIP, audio editing, etc. within clicks.
Here are several creative ways of making thumbnails in Filmora. You can easily create a thumbnail in 30 seconds with Filmora’s new feature, AI portrait.
You can add your image or background image to Filmora and then add some filters, texts, overlay, or elements to the photo, and then take a snapshot, since Filmora features the snapshot tool which allows you to pick up the most attractive images from the video and use it as a video thumbnail.
Thumbnail created from a photo in Filmora
Or, you can extract frames from the video and use it as a thumbnail and upload it to YouTube later.
Thumbnail extracted from video footage in Filmora
One more creative way is to compositevideo footage with the green screen feature .
Use Green Screen to Create Video Thumbnail in Filmora
Where to find the thumbnail photo in Wondershare Filmora?
After clicking the Camera icon in Filmora to take a screenshot, you can find the photos by right-clicking the image in the Media library and then selecting Reveal in Explorer to check it.
Download Mac Version ](https://tools.techidaily.com/wondershare/filmora/download/ )
Part 3: FAQs About YouTube Thumbnail
1. What Does Thumbnail Mean on YouTube?
Thumbnails are reduced-size versions of images or videos. The name is an allusion to images being reduced to roughly the size of a human thumbnail. Thumbnails have special significance in YouTube SEO. They are used for drawing the viewers’ attention. A well-made thumbnail can bring millions of views for a YouTuber .
2. Which Is the Best Thumbnail Maker for YouTube?
Besides the thumbnail maker introduced above, the Filmora video editor and be used as an excellent thumbnail maker as well. Instead of going through the hassle of installing or subscribing to a separate program or website, it is better to use the extensive features of Filmora. It can take free snapshots for you, which you can modify within Filmora. There are stunning title templates, effects, overlays, transitions, and a large library of stock content at your service. From Part 2 in this article, you can see that making a YouTube thumbnail in Filmora is easy and efficient.
Richard Bennett
Richard Bennett is a writer and a lover of all things video.
Follow @Richard Bennett
Richard Bennett
Mar 27, 2024• Proven solutions
Video thumbnails are vital to get your videos more views. Many successful YouTubers make nice thumbnails which help them get lots of views and thus tons of subscribers.
If you are searching for software tools that can assist in the creation of YouTube video thumbnails, then you are on the right page because the details available below will provide you with complete information about the top 10+ highly rated YouTube Thumbnail Makers on both desktop and mobile devices. Some of them are free to create YouTube thumbnails; others may need to pay to get more advanced features. Besides, I’ll also show you how to create a thumbnail in the Filmora video editor in detail.
- Part 1: Best Free YouTube Thumbnail Makers for Online Users
- Part 2: How to Make Video Thumbnail with Wondershare Filmora [Creative Ways]
- Part 3: FAQs About YouTube Thumbnail
Before we get started, it is highly recommended to watch this video, teaching you how to make a YouTube Thumbnail in 30 seconds with Filmora.
You might be interested in
- How to Make Fortnite Thumbnail Super Easy and Free >>
- Best Size, Best Practices of Making YouTube Thumbnail >>
Part 1:10+ Free YouTube Thumbnail Makers for Windows/Mac/Online/Android/iPhone/iPad
In this part, we will share with you some Free YouTube Thumbnail Makers that you can use. Some of them are online solutions, so there is no need to download them, some of them can be downloaded on Windows or Mac computers.
If you prefer to edit videos on mobile devices, then it is good to have an app that allows you to create video thumbnails for YouTube videos. So in this part, we have included some video thumbnail maker apps that you can use on iPhone and Android phones.
1. Canva
It is a free thumbnail maker that can be accessed from its official website at Canva.com. This Video Thumbnail Maker is useful for graphic designers as it offers incredible features. The simple to use drag and drop type functions are wonderful, and the effects available for your Thumbnail Creation include free stock-type photos, Illustrations, Lines, Shapes, Frames, Grids, Backgrounds, Text, etc. The quick customer support facility is appreciable. Note: You need to sign up to use the thumbnail templates.
Main Features of this free YouTube Thumbnail Maker:
- It offers a customized YouTube thumbnail design
- You can change images, colors and fonts easily
- You can get more styles and templates if you pay
- Registration needed
2. Wondershare PixStudio
Wondershare PixStudio is an all-in-one and powerful online graphic design maker for everyone. It has various types of templates for YouTube Thumbnails, Logos, Posters, etc. You can create a beautiful design by simply dragging and dropping the elements and photos. The online platform is free to use all templates, just One-Click to download your creations and share to your Facebook, Instagram Story, YouTube Thumbnails, etc. immediately.
Features :
- Various types of templates
- Simple and Fast Design
- Background remover
Available:
Online
iPhone/iPad
Android
3. PicMonkey
This online thumbnail maker provides numerous filters, exclusive overlays, fonts, frames, and extra beautifying touch-up type tools to users with a single registration to Picmonkey’s premium membership. The exclusive effects like Ombre, zombify, premium fonts and Mirror are a really good collection of this tool. Now you can easily design beautiful collages, edit your memories, and create professional thumbnails with Picmonkey.com. Because of its wide range of options, it is probably the second most popular option for YouTubers who want to make professional thumbnails, right after Canva. One major difference between Picmonkey and Canva is that Picmonkey is no longer free. It costs $4 per month.
Features:
- As a youtube thumbnail maker, you also can touch up facial beautification
- Design tools make creative logos
- Provides 100+ designer-crafted thumbnail templates
Available :
Online
iPhone/iPad
Android
4. Fotor
It is possible to get something outstanding even out of your simple content without making much effort because Fotor serves you with all advanced features, and it covers attractive themes from all over the world. Fotor allows you to re-discover your art and skills without any limitation as it offers all quick editing services online. It is very interactive and simple to use with all rich features, so even beginners who haven’t made any thumbnail before can make a video thumbnail with it easily.
Features:
- Your thumbnail will be saved on the cloud
- Fast processing speed while exporting your work
- Provides YouTube thumbnail templates for different scenarios
Available :
Online
iPhone/iPad
Android
5. Fotojet
The fotojet.com online tool provides numerous facilities, whereas it is preferably used for collage making, graphic designing, and as a photo editor. With this advanced thumbnail creator tool, now you can easily rotate, crop, resize or filter your images while creating direct posts for social media pages such as Instagram, Facebook, etc. Fotojet.com possesses more than 600 stunning collage making templates that are suitable for your special events.
Features:
- It owns many templates for you to use
- Easy to have a high-quality thumbnail with only a few clicks
- 3 Steps to make a YouTube thumbnail
Available :
Online
Windows
Mac
6. Backgrounder
It allows you to design masterpieces of customized professional art, avatars, and thumbnails for videos on YouTube, Facebook, Twitter, etc. It is simple to use and contains an interactive user interface that is suitable for professionals as well as beginners.
Features:
- It owns a community that you can share works with other people
- The interface is extremely straightforward
Available :
Online
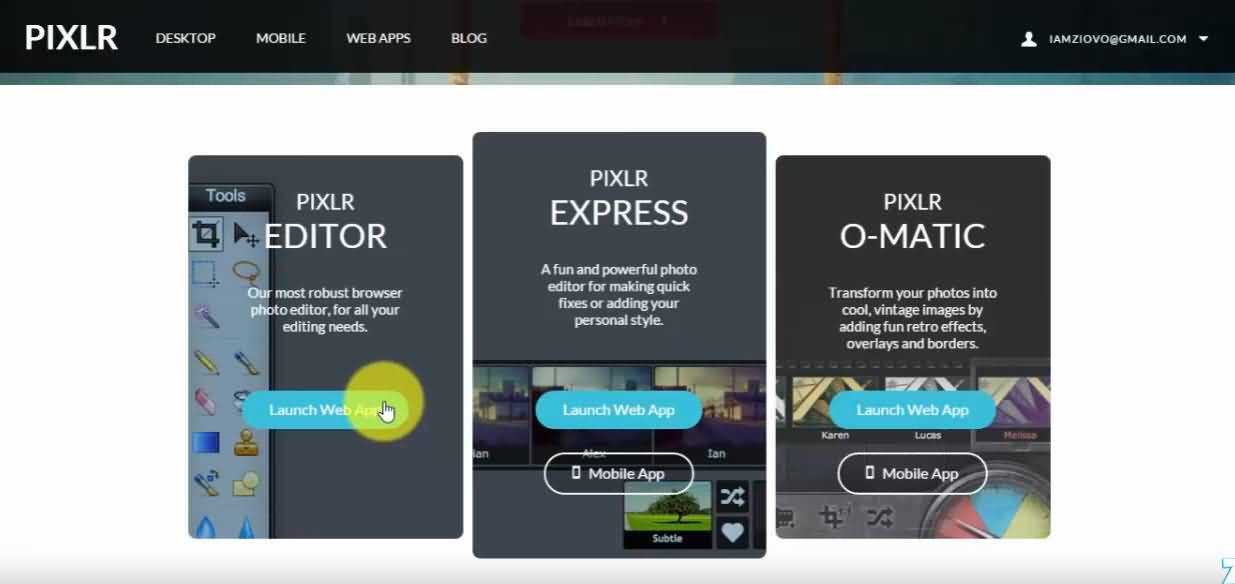
7. Pixlr:
It is a specially designs app version of well known Pixlr website where you can feel free to add overlays to your thumbnails. The choice of filters is also good for her with a high-end resolution as compared to available online solutions.
Features:
- Its free effects are a great source to come up with a new YouTube thumbnail
- Comprehensive editing tools are handy to use every day
Available :
Online
iPhone/iPad
Android
8. Photo Editor:
Photo Editor is one of the most popular applications that assist users in the easy addition of stickers, frames, etc while it makes adjustment of redeye, brightness, and sharpness much easier. Most people love this application more due to its ability to create memes with available images and text for those images can be adjusted easily. The photo editor also makes it much easier to share edited stuff on Instagram and the quality of edited images use to be very high in this case.
Features:
- Color splash is a great tool to brighten up your thumbnail
- You can easily crop, rotate and flip
Available :
iPhone/iPad
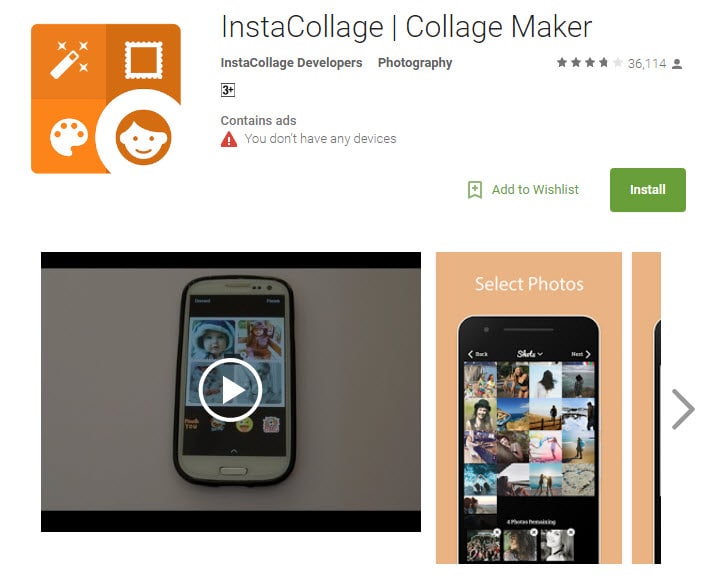
9. Insta Collage:
The name of this application describes its most special feature that is it allows users to create wonderful collages within very little time. This tool comes with easy editing and sharing features so that users can have an easy interface on other platforms too. There are lots of effects that can be added to images while designing thumbnails and it is rated to have an outstanding quality of results.
Features:
- The personalized layout will give you a catchy thumbnail
- It owns 30 patterns and 18 frames to select
Available :
Android
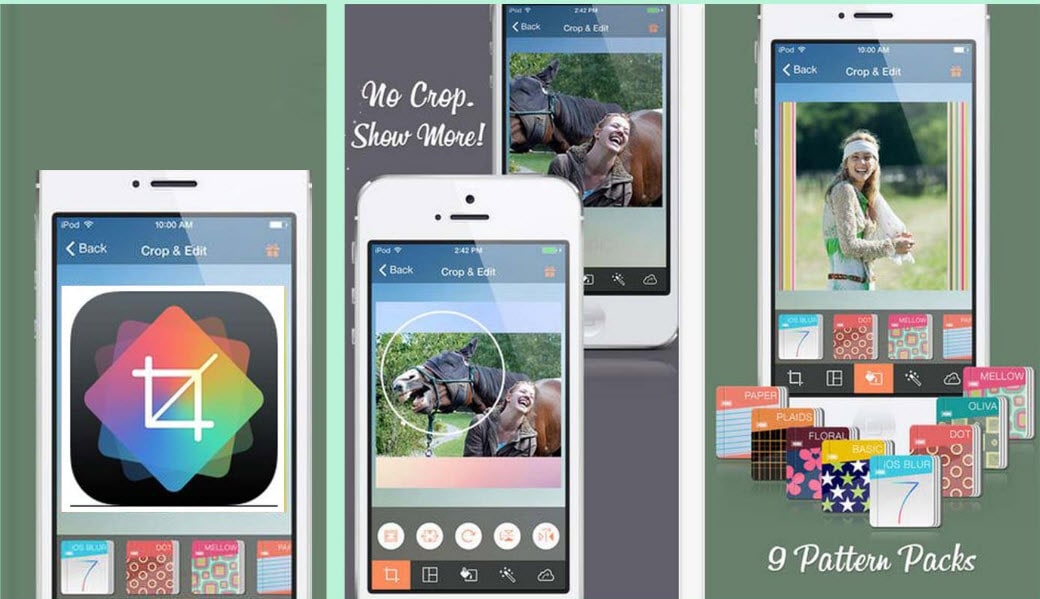
10. Cropic:
Here is one more application for you that you will need for easy customization as well as fast sharing to YouTube as well as Instagram. Users can bring all size types to this platform, and it is also possible to add text at the time of editing. This tool is suggested for beginners as well as professionals due to its great results.
Features:
- You can scale the image by hand and cut it
- Pro version is more powerful for supporting 1224x1224 pixels
Available :
iPhone/iPad
With all these available software tools, it becomes much easier to create video Thumbnails for YouTube. The easy-to-follow steps are well described in different articles on the internet, but first of all, you need to make a selection between whether you need to use the online tool or wish to download the app on your device.
For the second case, you need to spare some memory in your device, whereas for the first one it demands a fast internet connection for easy services. Besides those specially designed YouTube Thumbnail makers, you can also create a thumbnail in Filmora if you’ve already installed it.
11. Snappa:
If you’re looking for a tool that can be upgraded later, then Snappa could be for you. Offering users both free and paid functions, Snappa will allow users to generate some truly alluring thumbnails, while still being able to use the tools for work on other social media platforms.
Features:
- Pre-Made Templates Available
- Easily Customize Backgrounds
- Place Custom Text Anywhere You Want
- Create a Truly Bespoke YouTube Thumbnail
Available :
Online
iPhone/iPad
Android
12. Adobe Spark:
Not only is Adobe recognized for creating images in many different contexts, but it is also able to offer YouTubers a free tool to ensure that their video thumbnails are catching the eye of social network visitors.
Features:
- A Basic and Easy-To-Use Platform
- Ideal for Beginners
- Customize Colors, Backgrounds, and Text with Ease
- Add Additional Images if Needed
Available :
Windows 7 or newer
Mac OS X
Chromebook
Part 2: How to Make YouTube Thumbnails in Wondershare Filmora?
Filmora is easy to use and powerful video editing software for your YouTube videos, which allows you not only to cut, rotate, crop, reverse, or speed up your videos, but also to apply some advanced editing effects like green screen, PIP, audio editing, etc. within clicks.
Here are several creative ways of making thumbnails in Filmora. You can easily create a thumbnail in 30 seconds with Filmora’s new feature, AI portrait.
You can add your image or background image to Filmora and then add some filters, texts, overlay, or elements to the photo, and then take a snapshot, since Filmora features the snapshot tool which allows you to pick up the most attractive images from the video and use it as a video thumbnail.
Thumbnail created from a photo in Filmora
Or, you can extract frames from the video and use it as a thumbnail and upload it to YouTube later.
Thumbnail extracted from video footage in Filmora
One more creative way is to compositevideo footage with the green screen feature .
Use Green Screen to Create Video Thumbnail in Filmora
Where to find the thumbnail photo in Wondershare Filmora?
After clicking the Camera icon in Filmora to take a screenshot, you can find the photos by right-clicking the image in the Media library and then selecting Reveal in Explorer to check it.
Download Mac Version ](https://tools.techidaily.com/wondershare/filmora/download/ )
Part 3: FAQs About YouTube Thumbnail
1. What Does Thumbnail Mean on YouTube?
Thumbnails are reduced-size versions of images or videos. The name is an allusion to images being reduced to roughly the size of a human thumbnail. Thumbnails have special significance in YouTube SEO. They are used for drawing the viewers’ attention. A well-made thumbnail can bring millions of views for a YouTuber .
2. Which Is the Best Thumbnail Maker for YouTube?
Besides the thumbnail maker introduced above, the Filmora video editor and be used as an excellent thumbnail maker as well. Instead of going through the hassle of installing or subscribing to a separate program or website, it is better to use the extensive features of Filmora. It can take free snapshots for you, which you can modify within Filmora. There are stunning title templates, effects, overlays, transitions, and a large library of stock content at your service. From Part 2 in this article, you can see that making a YouTube thumbnail in Filmora is easy and efficient.
Richard Bennett
Richard Bennett is a writer and a lover of all things video.
Follow @Richard Bennett
Richard Bennett
Mar 27, 2024• Proven solutions
Video thumbnails are vital to get your videos more views. Many successful YouTubers make nice thumbnails which help them get lots of views and thus tons of subscribers.
If you are searching for software tools that can assist in the creation of YouTube video thumbnails, then you are on the right page because the details available below will provide you with complete information about the top 10+ highly rated YouTube Thumbnail Makers on both desktop and mobile devices. Some of them are free to create YouTube thumbnails; others may need to pay to get more advanced features. Besides, I’ll also show you how to create a thumbnail in the Filmora video editor in detail.
- Part 1: Best Free YouTube Thumbnail Makers for Online Users
- Part 2: How to Make Video Thumbnail with Wondershare Filmora [Creative Ways]
- Part 3: FAQs About YouTube Thumbnail
Before we get started, it is highly recommended to watch this video, teaching you how to make a YouTube Thumbnail in 30 seconds with Filmora.
You might be interested in
- How to Make Fortnite Thumbnail Super Easy and Free >>
- Best Size, Best Practices of Making YouTube Thumbnail >>
Part 1:10+ Free YouTube Thumbnail Makers for Windows/Mac/Online/Android/iPhone/iPad
In this part, we will share with you some Free YouTube Thumbnail Makers that you can use. Some of them are online solutions, so there is no need to download them, some of them can be downloaded on Windows or Mac computers.
If you prefer to edit videos on mobile devices, then it is good to have an app that allows you to create video thumbnails for YouTube videos. So in this part, we have included some video thumbnail maker apps that you can use on iPhone and Android phones.
1. Canva
It is a free thumbnail maker that can be accessed from its official website at Canva.com. This Video Thumbnail Maker is useful for graphic designers as it offers incredible features. The simple to use drag and drop type functions are wonderful, and the effects available for your Thumbnail Creation include free stock-type photos, Illustrations, Lines, Shapes, Frames, Grids, Backgrounds, Text, etc. The quick customer support facility is appreciable. Note: You need to sign up to use the thumbnail templates.
Main Features of this free YouTube Thumbnail Maker:
- It offers a customized YouTube thumbnail design
- You can change images, colors and fonts easily
- You can get more styles and templates if you pay
- Registration needed
2. Wondershare PixStudio
Wondershare PixStudio is an all-in-one and powerful online graphic design maker for everyone. It has various types of templates for YouTube Thumbnails, Logos, Posters, etc. You can create a beautiful design by simply dragging and dropping the elements and photos. The online platform is free to use all templates, just One-Click to download your creations and share to your Facebook, Instagram Story, YouTube Thumbnails, etc. immediately.
Features :
- Various types of templates
- Simple and Fast Design
- Background remover
Available:
Online
iPhone/iPad
Android
3. PicMonkey
This online thumbnail maker provides numerous filters, exclusive overlays, fonts, frames, and extra beautifying touch-up type tools to users with a single registration to Picmonkey’s premium membership. The exclusive effects like Ombre, zombify, premium fonts and Mirror are a really good collection of this tool. Now you can easily design beautiful collages, edit your memories, and create professional thumbnails with Picmonkey.com. Because of its wide range of options, it is probably the second most popular option for YouTubers who want to make professional thumbnails, right after Canva. One major difference between Picmonkey and Canva is that Picmonkey is no longer free. It costs $4 per month.
Features:
- As a youtube thumbnail maker, you also can touch up facial beautification
- Design tools make creative logos
- Provides 100+ designer-crafted thumbnail templates
Available :
Online
iPhone/iPad
Android
4. Fotor
It is possible to get something outstanding even out of your simple content without making much effort because Fotor serves you with all advanced features, and it covers attractive themes from all over the world. Fotor allows you to re-discover your art and skills without any limitation as it offers all quick editing services online. It is very interactive and simple to use with all rich features, so even beginners who haven’t made any thumbnail before can make a video thumbnail with it easily.
Features:
- Your thumbnail will be saved on the cloud
- Fast processing speed while exporting your work
- Provides YouTube thumbnail templates for different scenarios
Available :
Online
iPhone/iPad
Android
5. Fotojet
The fotojet.com online tool provides numerous facilities, whereas it is preferably used for collage making, graphic designing, and as a photo editor. With this advanced thumbnail creator tool, now you can easily rotate, crop, resize or filter your images while creating direct posts for social media pages such as Instagram, Facebook, etc. Fotojet.com possesses more than 600 stunning collage making templates that are suitable for your special events.
Features:
- It owns many templates for you to use
- Easy to have a high-quality thumbnail with only a few clicks
- 3 Steps to make a YouTube thumbnail
Available :
Online
Windows
Mac
6. Backgrounder
It allows you to design masterpieces of customized professional art, avatars, and thumbnails for videos on YouTube, Facebook, Twitter, etc. It is simple to use and contains an interactive user interface that is suitable for professionals as well as beginners.
Features:
- It owns a community that you can share works with other people
- The interface is extremely straightforward
Available :
Online
7. Pixlr:
It is a specially designs app version of well known Pixlr website where you can feel free to add overlays to your thumbnails. The choice of filters is also good for her with a high-end resolution as compared to available online solutions.
Features:
- Its free effects are a great source to come up with a new YouTube thumbnail
- Comprehensive editing tools are handy to use every day
Available :
Online
iPhone/iPad
Android
8. Photo Editor:
Photo Editor is one of the most popular applications that assist users in the easy addition of stickers, frames, etc while it makes adjustment of redeye, brightness, and sharpness much easier. Most people love this application more due to its ability to create memes with available images and text for those images can be adjusted easily. The photo editor also makes it much easier to share edited stuff on Instagram and the quality of edited images use to be very high in this case.
Features:
- Color splash is a great tool to brighten up your thumbnail
- You can easily crop, rotate and flip
Available :
iPhone/iPad
9. Insta Collage:
The name of this application describes its most special feature that is it allows users to create wonderful collages within very little time. This tool comes with easy editing and sharing features so that users can have an easy interface on other platforms too. There are lots of effects that can be added to images while designing thumbnails and it is rated to have an outstanding quality of results.
Features:
- The personalized layout will give you a catchy thumbnail
- It owns 30 patterns and 18 frames to select
Available :
Android
10. Cropic:
Here is one more application for you that you will need for easy customization as well as fast sharing to YouTube as well as Instagram. Users can bring all size types to this platform, and it is also possible to add text at the time of editing. This tool is suggested for beginners as well as professionals due to its great results.
Features:
- You can scale the image by hand and cut it
- Pro version is more powerful for supporting 1224x1224 pixels
Available :
iPhone/iPad
With all these available software tools, it becomes much easier to create video Thumbnails for YouTube. The easy-to-follow steps are well described in different articles on the internet, but first of all, you need to make a selection between whether you need to use the online tool or wish to download the app on your device.
For the second case, you need to spare some memory in your device, whereas for the first one it demands a fast internet connection for easy services. Besides those specially designed YouTube Thumbnail makers, you can also create a thumbnail in Filmora if you’ve already installed it.
11. Snappa:
If you’re looking for a tool that can be upgraded later, then Snappa could be for you. Offering users both free and paid functions, Snappa will allow users to generate some truly alluring thumbnails, while still being able to use the tools for work on other social media platforms.
Features:
- Pre-Made Templates Available
- Easily Customize Backgrounds
- Place Custom Text Anywhere You Want
- Create a Truly Bespoke YouTube Thumbnail
Available :
Online
iPhone/iPad
Android
12. Adobe Spark:
Not only is Adobe recognized for creating images in many different contexts, but it is also able to offer YouTubers a free tool to ensure that their video thumbnails are catching the eye of social network visitors.
Features:
- A Basic and Easy-To-Use Platform
- Ideal for Beginners
- Customize Colors, Backgrounds, and Text with Ease
- Add Additional Images if Needed
Available :
Windows 7 or newer
Mac OS X
Chromebook
Part 2: How to Make YouTube Thumbnails in Wondershare Filmora?
Filmora is easy to use and powerful video editing software for your YouTube videos, which allows you not only to cut, rotate, crop, reverse, or speed up your videos, but also to apply some advanced editing effects like green screen, PIP, audio editing, etc. within clicks.
Here are several creative ways of making thumbnails in Filmora. You can easily create a thumbnail in 30 seconds with Filmora’s new feature, AI portrait.
You can add your image or background image to Filmora and then add some filters, texts, overlay, or elements to the photo, and then take a snapshot, since Filmora features the snapshot tool which allows you to pick up the most attractive images from the video and use it as a video thumbnail.
Thumbnail created from a photo in Filmora
Or, you can extract frames from the video and use it as a thumbnail and upload it to YouTube later.
Thumbnail extracted from video footage in Filmora
One more creative way is to compositevideo footage with the green screen feature .
Use Green Screen to Create Video Thumbnail in Filmora
Where to find the thumbnail photo in Wondershare Filmora?
After clicking the Camera icon in Filmora to take a screenshot, you can find the photos by right-clicking the image in the Media library and then selecting Reveal in Explorer to check it.
Download Mac Version ](https://tools.techidaily.com/wondershare/filmora/download/ )
Part 3: FAQs About YouTube Thumbnail
1. What Does Thumbnail Mean on YouTube?
Thumbnails are reduced-size versions of images or videos. The name is an allusion to images being reduced to roughly the size of a human thumbnail. Thumbnails have special significance in YouTube SEO. They are used for drawing the viewers’ attention. A well-made thumbnail can bring millions of views for a YouTuber .
2. Which Is the Best Thumbnail Maker for YouTube?
Besides the thumbnail maker introduced above, the Filmora video editor and be used as an excellent thumbnail maker as well. Instead of going through the hassle of installing or subscribing to a separate program or website, it is better to use the extensive features of Filmora. It can take free snapshots for you, which you can modify within Filmora. There are stunning title templates, effects, overlays, transitions, and a large library of stock content at your service. From Part 2 in this article, you can see that making a YouTube thumbnail in Filmora is easy and efficient.
Richard Bennett
Richard Bennett is a writer and a lover of all things video.
Follow @Richard Bennett
Also read:
- Mastering Video Thumbnail Creation for Maximum Clicks
- In 2024, Crafting Intriguing YouTube Intros Without Spending
- Turning Views Into Vouchers YouTube Marketing
- [New] Elevate YouTube Video Quality, Minimize Distractions
- 2024 Approved Elevate Your Video Entrance with These Tools
- [Updated] Essential Steps to Add Custom Imagery in YouTube Videos
- [Updated] Elevate Your Watchlist Experience with YouTube's AV1 Settings
- Break Free From YouTube with These Best 27 Video Streamers for 2024
- 2024 Approved Easily Download Your Favorites Handpicked Tools Reviewed
- More than Clicks What Determines YouTube's View Numbers
- 2024 Approved Can You Receive a Monthly Check From YouTube?
- Mastering YouTube Shorts Effective Income Strategies
- The Insider Guide to Regular Broadcast Etiquette
- In 2024, Does Paying Regularly For YouTube Premium Give You More Than Just An Ad-Free View?
- Sensational Sequences YouTube’s Greatest Magic Showcase
- [New] Digital Audience Accolades for Content Makers
- [Updated] Audiovisual Authority The Finest Computers for Professional Edits
- Elevate Your Brand Discovering the Essential 5 YouTube Strategies for 2024
- [Updated] Break Free From YouTube with These Best 27 Video Streamers
- [New] 6 YouTuber Quizzes to Know What Type of YouTuber You Are
- [New] Earning in a World Dominated by YouTubers
- Essential Tips for YouTube Thumbnail Design for 2024
- [Updated] Customize and Upload Longer YouTube Content
- 2024 Approved Building a Custom Link for YouTube's Auto-Subscribe
- [New] Essential Steps for Seamlessly Clearing YouTube Feedback
- Top 5 Essential Filming Accessories for Online Creators
- [Updated] Crafting a Hit-List Youtube's Way for Fans
- In 2024, Crafting Perfect YouTube Short Content Lessons
- The Key to Click-Through Success Top Thumbnail Size Recommendations
- Advanced Strategies for Saving VR Gameplay Moments
- [Updated] 2024 Approved Interpreting the Functionality Behind Blue Icons in Chat Apps
- Updated 2024 Approved Elite Vocal Modification App to Elevate Your Stage Presence
- How to Transfer Data from Xiaomi Civi 3 to Samsung Phone | Dr.fone
- In 2024, 9 Best Free Android Monitoring Apps to Monitor Phone Remotely For your Meizu 21 | Dr.fone
- [Updated] SnapSnatcher - Live Stream Repository
- [New] Understanding & Implementing Discord Text Styles
- How To Unlock The iPhone 7 SIM Lock 4 Easy Methods
- In 2024, How to Track WhatsApp Messages on Xiaomi Redmi 12 Without Them Knowing? | Dr.fone
- Updated Screen Proportion Calculators Finding the Perfect Ratio for 2024
- In 2024, How to Track OnePlus Ace 3 Location by Number | Dr.fone
- [Updated] Quick-React Guide Efficiently Answering Discord Messages for 2024
- Hassle-Free Ways to Remove FRP Lock from Xiaomi Phones with/without a PC
- Downloading SamFw FRP Tool 3.0 for Google Pixel Fold
- [New] The Ultimate Strategy for Highlight Image Success in Instagram
- [New] In 2024, Social Expansion The Desktop & Mobile Guide
- [New] Resolve Deceptive User Appearance Within Chat Environments
- [Updated] Fresh Social Media Perspectives Without the Need for TikTok
- The Ultimate Guide to Nubia Red Magic 9 Pro+ Pattern Lock Screen Everything You Need to Know
- [Updated] Stepwise Guide to Documenting Team Sessions (Desktop/Mobile)
- [Updated] 2024 Approved Guide to Initiating and Archiving Webinars Economically
- Beyond Basic Usage Mastering Instagram's Interrogation Icon for 2024
- [Updated] In 2024, Ultimate Racing Game Compilation
- [New] Maximize Your Google Meet Experience, Without Paying a Penny for 2024
- Hassle-Free Ways to Remove FRP Lock on Nokia 130 Musicwith/without a PC
- In 2024, Mastering Android Device Manager The Ultimate Guide to Unlocking Your Vivo X Flip Device
- In 2024, Navigating Digital Discussions with Ease Essential Advice for Successful Zoom Meetings
- [New] 2024 Approved Vimeo's Global Distribution Guide
- Easy Tutorial for Activating iCloud from iPhone 14 Plus Safe and Legal
- Title: "From Stir to Screen Masterful Cooking Videos"
- Author: Steven
- Created at : 2024-05-25 19:23:25
- Updated at : 2024-05-26 19:23:25
- Link: https://youtube-clips.techidaily.com/from-stir-to-screen-masterful-cooking-videos/
- License: This work is licensed under CC BY-NC-SA 4.0.
