
:max_bytes(150000):strip_icc()/AI_Choreograph_GettyImagesPlus-1473211827_CROPPED-137fc9eef04a43a79554344a6f11d1b7.jpg)
"Expert Advice Incorporating Narrative Elements Into YouTube Videos"
Expert Advice: Incorporating Narrative Elements Into YouTube Videos
How to Add Text to YouTube Video Before or After Uploading

Richard Bennett
Mar 27, 2024• Proven solutions
A great way to emphasize something you say in your vlog is to have your words appear next to you as you say them . Adding text to YouTube videos can look really professional. You might put a title at the beginning of your video, use bullet points to help people keep track of your monologue, or to highlight an important point by writing it on your screen. When you use text in your videos there are a few things you need to keep in mind. In this article, I will share with you 2 ways to add text/subtitles/captions to YouTube videos, whether you need to add text to the video during editing and upload it to YouTube later, or you have uploaded the video to YouTube already and want to add some captions and subtitles to complement it.
- Part 1: Add text to video before uploading YouTube
- Part 2: Add Text to YouTube video after uploading
- Part 3: Top 3 YouTube Video Text Tips
How to Add Text to YouTube Video Before Uploading
Before uploading the video to YouTube, it is recommended to add text to the video first. You can add simple texts and captions to videos with the free video editing software. To add more text effects to the video, you can use Filmora, Sony Vegas Movie Studio and Adobe Premiere CC based on your video editing skills and needs. These software programs are great video editors, which can help you input text easily.
1. Use Filmora to Add text to Videos
There are plenty of Text effects built in Filmora, you can apply motions and animation to texts, titles, subtitles, end credits and openers as well. Each title preset will present different effects. You can add multiple text boxes and place the text to any position in need. Besides writing texts to video, you can select the target font, size and color and customize the text effect in detail as well. To add text to a video in Filmora is easy, just follow the steps below:

- Open up Filmora and drag a clip into your timeline. Then, go to Text/Credit.
- Find a style that you like and drag it into your timeline where you want your text to appear. Make sure your text is selected in your timeline and click the Advanced Text Editing icon, which looks like a pen and paper.
- Insert your own words and drag your text to where you want it on the screen. Adjust the size by dragging the blue squares which surround your text.
- To change the color of your text, go into the Customize menu. You will find it near the top left of your screen. While you are in Customize there will be a section called Fill. This is where you select the color of your text. You can even change the fill type to ‘gradient fill’ and have your text transition between two colors.
- All of Filmora’s text options are animated – they fade, move around the screen, or perform some other type of action as they appear and disappear. To change the animation of your text select Animation next to Customize. A selection of different animations will appear. Double click on the one you want to apply to your text.
 Download Mac Version ](https://tools.techidaily.com/wondershare/filmora/download/ )
Check the detailed steps of how to add text to video in Filmora.
2. Use Windows Movie Maker
As a simple video editing software, Windows Movie Maker also allows you to add text to videos. It provides 3 different options for you to add Title, Caption and Credits to the YouTube videos. You can follow the steps below to add text to the video in WMM.

- To start, launch the Windows Movie Maker.
- After, select import video to insert the video that you want to add text with.
- Select edit movie then click make credits or titles.
- Then add the text that you want to include.
For the step by step tutorial of adding text to YouTube video, check How to Add Text to Video with Windows Movie Maker . Besides adding text to video, you can use Windows Movie Maker to edit YouTube video further. Learn How to trim, cut, combine, split video and add transitions and upload video to YouTube in Windows Movie Maker?
3. Use Sony Vegas Movie Studio
Adding text to YouTube videos in Sony Vegas is not so complicated if you are new to this software. You can adjust the color, size, font and duration of the text effect and add fade in and fade out effects. Follow the steps below to add texts to video in Vegas:

- Launch Sony Vegas Movie Studio.
- Click the View Menu then select Media Generators.
- Choose the generator that you want to use.
- After, drag the generator you have chosen on the timeline.
- Then, the video event FX dialogue box will appear.
- Enter the text that you want and modify it by changing the font, size and style.
4. Use Adobe Premiere CC
For professionals who are looking for a professional way to adding text to video and also have a sufficient budget, Adobe Premiere CC is always recommended. You can check the video and the steps below to add text to video in Premiere:
- Click open or create a project.
- Click the file menu then choose new and title.
- After, the text window will appear then utilize the text tool to add text.
- You can also edit your text using the commands that are provided in the Title Menu.
- Save the text that you have made by clicking the file menu then choose Save As.
How to Add Text to video in YouTube after uploading
Sometimes, we have uploaded a video to YouTube and then want to add subtitles/cc to the video later. The good news is that YouTube is not only a site for videos but is also the place where you can edit your videos in an instant. As you have read, adding text and captions to the uploaded YouTube videos is just a breeze.
Of course, you can only add and edit texts and captions to the video under your YouTube account. Here are the steps on how you can add text to your videos with YouTube Video Editor after the video is uploaded.
- Go to youtube.com then sign in to your account. After sign in your YouTube account, click your avatar and select Creator Studio to enter the creator studio interface.
- Click the Video Manager tab and in Videos section you will see all your videos uploaded to YouTube. Select the video that you want to add captions to and then select Subtitles/CC after clicking Edit button.
- Add Captions/Subtitles

While YouTube may have already created the subtitles automatically for your video with its speech recognition technology. If it does, you will see something like Published: English (Automatic) to the right of your video. If the automatically generated subtitles is not correct, you can edit it to improve the accuracy. Select the line that needs modification to make the edits.
If there is no auto-subtitles, you can choose from 3 ways to add subtitles and closed captions to the video: Upload a file, Transcribe and auto-sync and create new subtitles or CC.

Upload a file: upload a text transcript or timed subtitles file.
Transcribe and auto-sync: Type or paste in a full transcript of the video and subtitle timings will be set automatically.
Create new subtitles or CC: Create subtitles and closed captions by typing them in as you watch the video.
If you already have a caption file which contains both text and time codes, just click Upload a file and upload the text to the video.
- Once everything is okay, you can change the name of the video and you can do it in the box beside Project.
Cons of Using YouTube Video Editor
When you make use of this editor, you cannot shorten the clips for music. Moreover, since it is an online editor, you need to refresh the page in order to do the changes. Aside from YouTube Video Editor, you can use Adobe Premier Pro, MAGIX Vegas Pro, OpenShot and Avidemux.
From 20th September 2017 users will no longer be able to use the complementary editing suite. Check the best YouTube video editor alternatives from this complete guide to find out more YouTube video editor alternatives if you want to add text to video with more features and customization.
Top 3 Tips for Adding Text to YouTube Videos
1. Leave Room
If you know you are going to add text to your video then make sure you leave room for it in your frame. Consider standing off to one side instead of directly in front of your camera. You do not want to have to choose between not using text, making your text really small, or placing it over your face.
While planning out your frame and leaving room for your text, consider what color you are going to make the words and whether it will stand out and look good against your background.
2. Bigger is Better
People should be able to read your text without putting in any extra effort, such as straining their eyes to make out small words. If it takes effort to read your text then a lot of people will just ignore it. Your text should be big enough that somebody watching your video on their smartphone screen – where everything is shrunk down – can read it easily.
It is easier to make your text larger when you stick to titles, keywords, and short sentences.
3. Do Not Overuse
Text is a great tool for making something stand out. However, if you try to use text to emphasize too much of what you say it will lose its effect. Text does not stand out anymore once viewers get too used to seeing it. Too much text can even get annoying and cause people to click away from your videos.
Try to use text to emphasize only the most important things you say.

Richard Bennett
Richard Bennett is a writer and a lover of all things video.
Follow @Richard Bennett
Richard Bennett
Mar 27, 2024• Proven solutions
A great way to emphasize something you say in your vlog is to have your words appear next to you as you say them . Adding text to YouTube videos can look really professional. You might put a title at the beginning of your video, use bullet points to help people keep track of your monologue, or to highlight an important point by writing it on your screen. When you use text in your videos there are a few things you need to keep in mind. In this article, I will share with you 2 ways to add text/subtitles/captions to YouTube videos, whether you need to add text to the video during editing and upload it to YouTube later, or you have uploaded the video to YouTube already and want to add some captions and subtitles to complement it.
- Part 1: Add text to video before uploading YouTube
- Part 2: Add Text to YouTube video after uploading
- Part 3: Top 3 YouTube Video Text Tips
How to Add Text to YouTube Video Before Uploading
Before uploading the video to YouTube, it is recommended to add text to the video first. You can add simple texts and captions to videos with the free video editing software. To add more text effects to the video, you can use Filmora, Sony Vegas Movie Studio and Adobe Premiere CC based on your video editing skills and needs. These software programs are great video editors, which can help you input text easily.
1. Use Filmora to Add text to Videos
There are plenty of Text effects built in Filmora, you can apply motions and animation to texts, titles, subtitles, end credits and openers as well. Each title preset will present different effects. You can add multiple text boxes and place the text to any position in need. Besides writing texts to video, you can select the target font, size and color and customize the text effect in detail as well. To add text to a video in Filmora is easy, just follow the steps below:
- Open up Filmora and drag a clip into your timeline. Then, go to Text/Credit.
- Find a style that you like and drag it into your timeline where you want your text to appear. Make sure your text is selected in your timeline and click the Advanced Text Editing icon, which looks like a pen and paper.
- Insert your own words and drag your text to where you want it on the screen. Adjust the size by dragging the blue squares which surround your text.
- To change the color of your text, go into the Customize menu. You will find it near the top left of your screen. While you are in Customize there will be a section called Fill. This is where you select the color of your text. You can even change the fill type to ‘gradient fill’ and have your text transition between two colors.
- All of Filmora’s text options are animated – they fade, move around the screen, or perform some other type of action as they appear and disappear. To change the animation of your text select Animation next to Customize. A selection of different animations will appear. Double click on the one you want to apply to your text.
Download Mac Version ](https://tools.techidaily.com/wondershare/filmora/download/ )
Check the detailed steps of how to add text to video in Filmora.
2. Use Windows Movie Maker
As a simple video editing software, Windows Movie Maker also allows you to add text to videos. It provides 3 different options for you to add Title, Caption and Credits to the YouTube videos. You can follow the steps below to add text to the video in WMM.
- To start, launch the Windows Movie Maker.
- After, select import video to insert the video that you want to add text with.
- Select edit movie then click make credits or titles.
- Then add the text that you want to include.
For the step by step tutorial of adding text to YouTube video, check How to Add Text to Video with Windows Movie Maker . Besides adding text to video, you can use Windows Movie Maker to edit YouTube video further. Learn How to trim, cut, combine, split video and add transitions and upload video to YouTube in Windows Movie Maker?
3. Use Sony Vegas Movie Studio
Adding text to YouTube videos in Sony Vegas is not so complicated if you are new to this software. You can adjust the color, size, font and duration of the text effect and add fade in and fade out effects. Follow the steps below to add texts to video in Vegas:
- Launch Sony Vegas Movie Studio.
- Click the View Menu then select Media Generators.
- Choose the generator that you want to use.
- After, drag the generator you have chosen on the timeline.
- Then, the video event FX dialogue box will appear.
- Enter the text that you want and modify it by changing the font, size and style.
4. Use Adobe Premiere CC
For professionals who are looking for a professional way to adding text to video and also have a sufficient budget, Adobe Premiere CC is always recommended. You can check the video and the steps below to add text to video in Premiere:
- Click open or create a project.
- Click the file menu then choose new and title.
- After, the text window will appear then utilize the text tool to add text.
- You can also edit your text using the commands that are provided in the Title Menu.
- Save the text that you have made by clicking the file menu then choose Save As.
How to Add Text to video in YouTube after uploading
Sometimes, we have uploaded a video to YouTube and then want to add subtitles/cc to the video later. The good news is that YouTube is not only a site for videos but is also the place where you can edit your videos in an instant. As you have read, adding text and captions to the uploaded YouTube videos is just a breeze.
Of course, you can only add and edit texts and captions to the video under your YouTube account. Here are the steps on how you can add text to your videos with YouTube Video Editor after the video is uploaded.
- Go to youtube.com then sign in to your account. After sign in your YouTube account, click your avatar and select Creator Studio to enter the creator studio interface.
- Click the Video Manager tab and in Videos section you will see all your videos uploaded to YouTube. Select the video that you want to add captions to and then select Subtitles/CC after clicking Edit button.
- Add Captions/Subtitles
While YouTube may have already created the subtitles automatically for your video with its speech recognition technology. If it does, you will see something like Published: English (Automatic) to the right of your video. If the automatically generated subtitles is not correct, you can edit it to improve the accuracy. Select the line that needs modification to make the edits.
If there is no auto-subtitles, you can choose from 3 ways to add subtitles and closed captions to the video: Upload a file, Transcribe and auto-sync and create new subtitles or CC.
Upload a file: upload a text transcript or timed subtitles file.
Transcribe and auto-sync: Type or paste in a full transcript of the video and subtitle timings will be set automatically.
Create new subtitles or CC: Create subtitles and closed captions by typing them in as you watch the video.
If you already have a caption file which contains both text and time codes, just click Upload a file and upload the text to the video.
- Once everything is okay, you can change the name of the video and you can do it in the box beside Project.
Cons of Using YouTube Video Editor
When you make use of this editor, you cannot shorten the clips for music. Moreover, since it is an online editor, you need to refresh the page in order to do the changes. Aside from YouTube Video Editor, you can use Adobe Premier Pro, MAGIX Vegas Pro, OpenShot and Avidemux.
From 20th September 2017 users will no longer be able to use the complementary editing suite. Check the best YouTube video editor alternatives from this complete guide to find out more YouTube video editor alternatives if you want to add text to video with more features and customization.
Top 3 Tips for Adding Text to YouTube Videos
1. Leave Room
If you know you are going to add text to your video then make sure you leave room for it in your frame. Consider standing off to one side instead of directly in front of your camera. You do not want to have to choose between not using text, making your text really small, or placing it over your face.
While planning out your frame and leaving room for your text, consider what color you are going to make the words and whether it will stand out and look good against your background.
2. Bigger is Better
People should be able to read your text without putting in any extra effort, such as straining their eyes to make out small words. If it takes effort to read your text then a lot of people will just ignore it. Your text should be big enough that somebody watching your video on their smartphone screen – where everything is shrunk down – can read it easily.
It is easier to make your text larger when you stick to titles, keywords, and short sentences.
3. Do Not Overuse
Text is a great tool for making something stand out. However, if you try to use text to emphasize too much of what you say it will lose its effect. Text does not stand out anymore once viewers get too used to seeing it. Too much text can even get annoying and cause people to click away from your videos.
Try to use text to emphasize only the most important things you say.
Richard Bennett
Richard Bennett is a writer and a lover of all things video.
Follow @Richard Bennett
Enhance Video Storytelling with Smart Chapter Insertion Techniques on YouTube
How to Add Chapters to YouTube Videos
Richard Bennett
Mar 27, 2024• Proven solutions
If you have seen chapter markers on YouTube of our official channel, you might be wondering how someone can create chapters on YouTube? What is the way to mark different parts of the videos, and how can you add markers to all the existing videos on YouTube? Don’t worry; this article will discuss everything about YouTube chapters that you need to know. Keep reading to find all the details and learn the step-by-step instructions to add chapters to your YouTube videos for better engagement.
- Part 1: What Are YouTube Chapters?
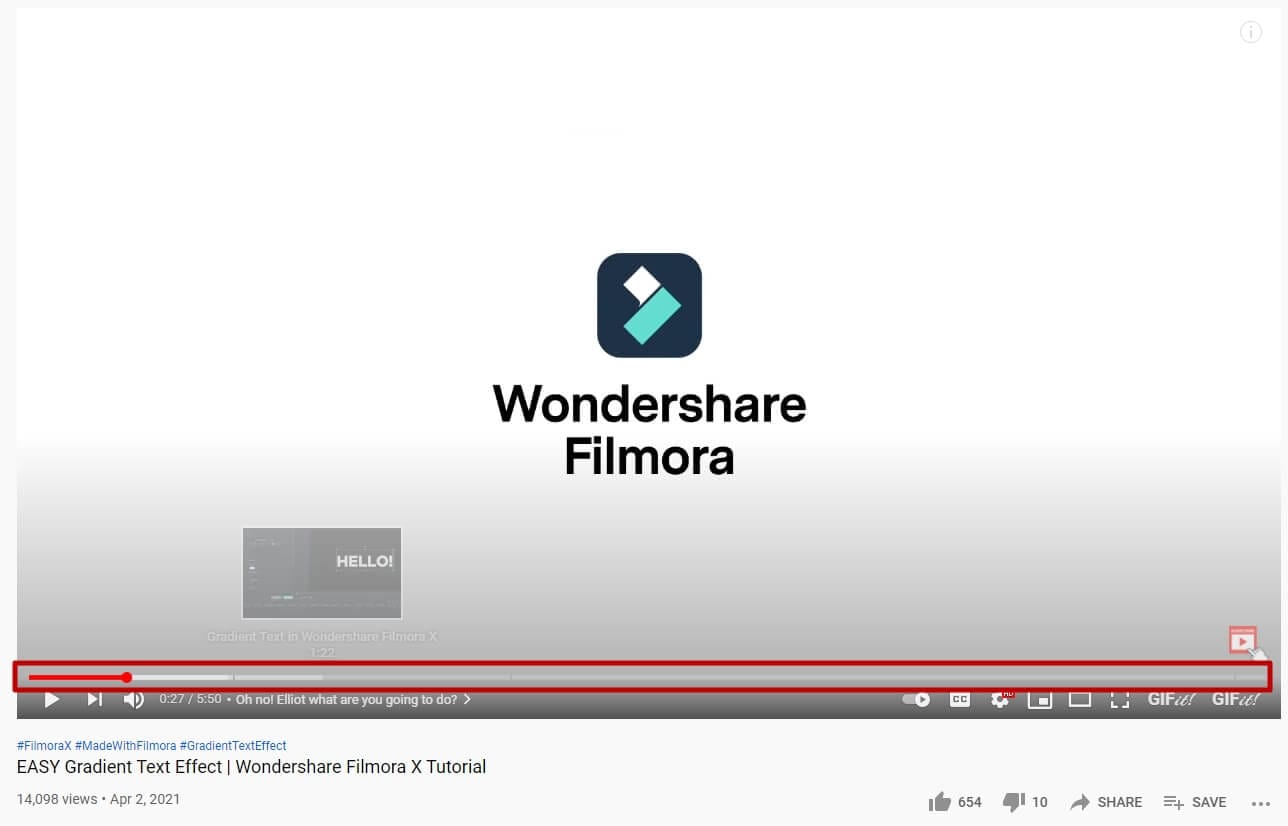
- Part 2: How to Add Chapter to YouTube Video Progress Bar?
- Part 3: Why Add Chapters to Videos?
- Part 4: When Add Chapters on YouTube?
- Part 5: Will Chapter Decrease Watching Time?
- Part 6: Video Chapter Adding Tips
- Part 7: Why YouTube Chapter is Not Working?
Part 1: What Are YouTube Chapters?
YouTube video chapters are an excellent way to optimize your YouTube content. When you have chapters for your YouTube video, each chapter will have an individual preview. Chapters will break your YouTube video into multiple parts allowing your audience to have better context and information.
As per YouTube, chapters let the audience navigate better through videos. Chapters will let your audience watch different video parts, which will eventually lead to better engagement. If you want to organize your YouTube content, chapters are one of the best ways to go about it. By using labeled timestamps, your video will be divided into multiple sections. Your audience will be able to see the preview of the content and easily skip to the part they want to see within the video’s progress bar.
Part 2: How to Add Chapter to YouTube Video Progress Bar?
If you are a YouTube creator and want to know how you can add chapters to your YouTube content, here’s what you need to do. Follow these instructions carefully:
Step 1: First things first, please sign in to your YouTube account.
Step 2: Select the video that you want to edit and add chapters.
Step 3: Click on the edit video option. This option will be there under the video.
Step 4: On the add details page, you will see the description box. Here, you need to add the list of titles and timestamps.

Please keep in mind that you must add the first timestamp with “00:00”. You will have to add a minimum of three timestamps with a minimum of 10 seconds for each chapter. Here is how it looks like in the description after published.

Part 3: Why YouTubers Should Add Chapters to videos?
There are two primary advantages of adding chapters to your YouTube videos. Apart from making your YouTube video look organized and neat, chapters will let you provide a better user experience to everyone watching your video because they will find all the information about your video faster and easier within a video. And the second benefit is that your YouTube video will show up in search results. This is a way to optimize your content for more users to find your content.
YouTube chapters are beneficial for both creators and viewers. On the progress bar, these clickable chapters can be added. This will allow a viewer to skip and scrub through a video quickly and skip to parts they actually want to watch.
This feature is quite helpful for videos that are pretty long. Chapters will let you segment the videos into important chapters so that the viewer can rewatch already watched chapters or skip to other chapters in the video. YouTube chapters have been recently added to this platform for better navigation and engagement.
Better User Experience for Users
Just like Google wants browsers to find what they are looking for when they add a keyword, YouTube also wants to help viewers find what they are looking for. Chapters can be immensely beneficial for extended content. For example, if you are uploading a video of your convert video, let the users jump straight to their favorite songs.
Even in tutorial video content, viewers will now have a chance to get straight to the main part of the video. With chapters being added, viewers will have an opportunity to decide whether they want to watch the whole video or not. They won’t have to keep skipping one part to another blindly. Chapters will allow them to find what they are looking for in an instant.
For Creators: Increased Visibility
If you know about the Google algorithm, you must be aware that it regularly changes its algorithm to let people find the information they are looking for easily. Adding chapters to your video will encourage Google to display them more often when someone searches for them, and this will include adding your videos to its featured snippets.
While adding chapters, you need to make sure that it is labeled with correct keywords, and it is clear and descriptive. YouTube videos are often showed as Google snippet when someone tries to find something on the search engine. Adding a chapter will let Google understand the content better, thereby letting your videos gain more search traffic.
Part 4: When should I add or not chapters on YouTube?
If you are wondering whether all videos on YouTube should have chapters, the answer to this is no. A two minutes long video won’t require chapters because it won’t make sense. Think about whether you would want your audience to have reduced watch time. Another thing to pay attention to is audience retention.
We mentioned earlier that adding chapters to long videos will be a good idea, but before you jump in and start adding chapters, you need to understand whether it will help you and should be done in your particular case?
If you are uploading a video on education, science and technology, how-to, news and politics, Q and A, and other similar videos, adding chapters will definitely help. In these kinds of videos, you will let your audience rewatch a section they liked the most over and over again.
However, if you are uploading music, entertainment, comedy, and film and animation videos, we will recommend not to add chapters because this will reduce the watch time.
Part 5: Do YouTube Video Chapters Decrease Channel Watch Time?
One of the most commonly asked questions regarding adding chapters to YouTube videos is whether it will reduce the watch time of a video. Video chapters are a pretty good feature and can enable your videos to engage with the viewers.
Since chapters allow your audience to skip through video content, they are not really watching the whole video, which can’t be suitable for audience retention! Here’s what we have to say to this: don’t put your 100% focus on watch time right now. Your focus should be creating informative and engaging content, which will keep your audience hooked to their screens. Even if you add chapters, if your audience doesn’t find it engaging, they will choose not to go on with the content.
Video chapters are a tiny part of the overall content. Chapters provide value to your audience, and you should try them. If you are uploading a concise video, animation video, funny video, and more, don’t add chapters.
Even some of the most watched videos on YouTube have chapters. Learn from them. These video makers could have thought about numbers rather than giving value to their audience, but they did just the opposite, and here they are with over a million views!
Part 6: Tips for adding chapters to YouTube video
Each video on YouTube is different, and that’s why there is no one-size-fits-all answer. There are some cases where you should not think about adding chapters at all. Whereas in other cases, you will have to experiment a bit before adding chapters.
Here are some tips that will help you.
Do Some Testing
Before adding chapters to a new video that you are thinking to upload, try adding chapters to an old video. See what happens to that video. Have the views increased? How about average view duration? Track these metrics first, and then try adding chapters to your upcoming videos to benefit from videos. Along with these metrics, you will also have to evaluate if adding chapters decreases or increases the watch time and number of views.
Label Your Chapters Using Keywords
Another thing to do that will help you have better traction is using a good keyword strategy. Look at what people are using while searching for content, which is similar to yours? Using names based on keywords that have better search volume will help your videos to rank higher.
Part 7: Why Video Chapter is Not working? [Problem solved]
There are a few mandatory things that you need to do before adding chapters to your YouTube video. Here are some of the common reasons why the video chapter is not working. See if any one of them is true in your case, and rectify it right away.
- Your video doesn’t have the 00:00 timestamp.
- Your video has less than three chapters.
- You have added a chapter that is less than 10 seconds long.
- You have not added the timestamps in chronological order.
- Rather than using “:” you have entered “.” for timecodes.
- If your channel has active copyright strikes, video chapters won’t work.
- Your channel doesn’t have more than 1k subscribers.
- Your video chapters are not suitable for some viewers.
Richard Bennett
Richard Bennett is a writer and a lover of all things video.
Follow @Richard Bennett
Richard Bennett
Mar 27, 2024• Proven solutions
If you have seen chapter markers on YouTube of our official channel, you might be wondering how someone can create chapters on YouTube? What is the way to mark different parts of the videos, and how can you add markers to all the existing videos on YouTube? Don’t worry; this article will discuss everything about YouTube chapters that you need to know. Keep reading to find all the details and learn the step-by-step instructions to add chapters to your YouTube videos for better engagement.
- Part 1: What Are YouTube Chapters?
- Part 2: How to Add Chapter to YouTube Video Progress Bar?
- Part 3: Why Add Chapters to Videos?
- Part 4: When Add Chapters on YouTube?
- Part 5: Will Chapter Decrease Watching Time?
- Part 6: Video Chapter Adding Tips
- Part 7: Why YouTube Chapter is Not Working?
Part 1: What Are YouTube Chapters?
YouTube video chapters are an excellent way to optimize your YouTube content. When you have chapters for your YouTube video, each chapter will have an individual preview. Chapters will break your YouTube video into multiple parts allowing your audience to have better context and information.
As per YouTube, chapters let the audience navigate better through videos. Chapters will let your audience watch different video parts, which will eventually lead to better engagement. If you want to organize your YouTube content, chapters are one of the best ways to go about it. By using labeled timestamps, your video will be divided into multiple sections. Your audience will be able to see the preview of the content and easily skip to the part they want to see within the video’s progress bar.
Part 2: How to Add Chapter to YouTube Video Progress Bar?
If you are a YouTube creator and want to know how you can add chapters to your YouTube content, here’s what you need to do. Follow these instructions carefully:
Step 1: First things first, please sign in to your YouTube account.
Step 2: Select the video that you want to edit and add chapters.
Step 3: Click on the edit video option. This option will be there under the video.
Step 4: On the add details page, you will see the description box. Here, you need to add the list of titles and timestamps.
Please keep in mind that you must add the first timestamp with “00:00”. You will have to add a minimum of three timestamps with a minimum of 10 seconds for each chapter. Here is how it looks like in the description after published.
Part 3: Why YouTubers Should Add Chapters to videos?
There are two primary advantages of adding chapters to your YouTube videos. Apart from making your YouTube video look organized and neat, chapters will let you provide a better user experience to everyone watching your video because they will find all the information about your video faster and easier within a video. And the second benefit is that your YouTube video will show up in search results. This is a way to optimize your content for more users to find your content.
YouTube chapters are beneficial for both creators and viewers. On the progress bar, these clickable chapters can be added. This will allow a viewer to skip and scrub through a video quickly and skip to parts they actually want to watch.
This feature is quite helpful for videos that are pretty long. Chapters will let you segment the videos into important chapters so that the viewer can rewatch already watched chapters or skip to other chapters in the video. YouTube chapters have been recently added to this platform for better navigation and engagement.
Better User Experience for Users
Just like Google wants browsers to find what they are looking for when they add a keyword, YouTube also wants to help viewers find what they are looking for. Chapters can be immensely beneficial for extended content. For example, if you are uploading a video of your convert video, let the users jump straight to their favorite songs.
Even in tutorial video content, viewers will now have a chance to get straight to the main part of the video. With chapters being added, viewers will have an opportunity to decide whether they want to watch the whole video or not. They won’t have to keep skipping one part to another blindly. Chapters will allow them to find what they are looking for in an instant.
For Creators: Increased Visibility
If you know about the Google algorithm, you must be aware that it regularly changes its algorithm to let people find the information they are looking for easily. Adding chapters to your video will encourage Google to display them more often when someone searches for them, and this will include adding your videos to its featured snippets.
While adding chapters, you need to make sure that it is labeled with correct keywords, and it is clear and descriptive. YouTube videos are often showed as Google snippet when someone tries to find something on the search engine. Adding a chapter will let Google understand the content better, thereby letting your videos gain more search traffic.
Part 4: When should I add or not chapters on YouTube?
If you are wondering whether all videos on YouTube should have chapters, the answer to this is no. A two minutes long video won’t require chapters because it won’t make sense. Think about whether you would want your audience to have reduced watch time. Another thing to pay attention to is audience retention.
We mentioned earlier that adding chapters to long videos will be a good idea, but before you jump in and start adding chapters, you need to understand whether it will help you and should be done in your particular case?
If you are uploading a video on education, science and technology, how-to, news and politics, Q and A, and other similar videos, adding chapters will definitely help. In these kinds of videos, you will let your audience rewatch a section they liked the most over and over again.
However, if you are uploading music, entertainment, comedy, and film and animation videos, we will recommend not to add chapters because this will reduce the watch time.
Part 5: Do YouTube Video Chapters Decrease Channel Watch Time?
One of the most commonly asked questions regarding adding chapters to YouTube videos is whether it will reduce the watch time of a video. Video chapters are a pretty good feature and can enable your videos to engage with the viewers.
Since chapters allow your audience to skip through video content, they are not really watching the whole video, which can’t be suitable for audience retention! Here’s what we have to say to this: don’t put your 100% focus on watch time right now. Your focus should be creating informative and engaging content, which will keep your audience hooked to their screens. Even if you add chapters, if your audience doesn’t find it engaging, they will choose not to go on with the content.
Video chapters are a tiny part of the overall content. Chapters provide value to your audience, and you should try them. If you are uploading a concise video, animation video, funny video, and more, don’t add chapters.
Even some of the most watched videos on YouTube have chapters. Learn from them. These video makers could have thought about numbers rather than giving value to their audience, but they did just the opposite, and here they are with over a million views!
Part 6: Tips for adding chapters to YouTube video
Each video on YouTube is different, and that’s why there is no one-size-fits-all answer. There are some cases where you should not think about adding chapters at all. Whereas in other cases, you will have to experiment a bit before adding chapters.
Here are some tips that will help you.
Do Some Testing
Before adding chapters to a new video that you are thinking to upload, try adding chapters to an old video. See what happens to that video. Have the views increased? How about average view duration? Track these metrics first, and then try adding chapters to your upcoming videos to benefit from videos. Along with these metrics, you will also have to evaluate if adding chapters decreases or increases the watch time and number of views.
Label Your Chapters Using Keywords
Another thing to do that will help you have better traction is using a good keyword strategy. Look at what people are using while searching for content, which is similar to yours? Using names based on keywords that have better search volume will help your videos to rank higher.
Part 7: Why Video Chapter is Not working? [Problem solved]
There are a few mandatory things that you need to do before adding chapters to your YouTube video. Here are some of the common reasons why the video chapter is not working. See if any one of them is true in your case, and rectify it right away.
- Your video doesn’t have the 00:00 timestamp.
- Your video has less than three chapters.
- You have added a chapter that is less than 10 seconds long.
- You have not added the timestamps in chronological order.
- Rather than using “:” you have entered “.” for timecodes.
- If your channel has active copyright strikes, video chapters won’t work.
- Your channel doesn’t have more than 1k subscribers.
- Your video chapters are not suitable for some viewers.
Richard Bennett
Richard Bennett is a writer and a lover of all things video.
Follow @Richard Bennett
Also read:
- Essential Choice 10 FREE YouTube Subtitle Extractors for 2024
- In 2024, Boosting Buzz & Views Masterful Strategies for YouTube Success
- [New] Ace Your Marketing Game Top 5 YouTube Techniques Unveiled
- 2024 Approved Digital Delegates Top YouTube Creators by Followers
- 2024 Approved Avoiding Common Pitfalls in Uploading HD Videos to YouTube
- Dynamic Shots Infusing Energy Into Your YouTube Videos
- [Updated] Channel Combat Determining Which Earns More From Videos—Dailymotion or YouTube
- [Updated] Enhance Every Viewing Moment with These Top 6 Free Platforms for YouTube Short Downloads
- In 2024, A Compre Written by Daniel Kelley
- Fast Track to Short Video Treasure Troves (Free Access)
- [Updated] Crafting YouTube Masterpieces with Powerful Hashtag Strategies
- [New] Discover the Power of YouTube Editing A Compre Written in Code The Intricacies of JavaScript Functions
- Selecting the Best Free Melodies for Your YouTube Video
- What Is Filmora Certified Creative Program and How to Become an FCC?
- Decoding the Core Contrasts Between YouTube and DailyMention
- [New] Discovering Income Monetization Through YouTube Sponsored Videos?
- Maximizing Your Experience with YouTube TV
- Optimal 7 DSLR Selections For In-Depth Vlog Documentaries
- 15 Must-Have Openers for Maximum YouTube Engagement for 2024
- [Updated] Drafting Dynamic Denouements
- Top Gaming Monitors for Xbox Series X - A Buyer's Guide
- Overview of the Best Tecno Pop 8 Screen Mirroring App | Dr.fone
- How to Flash Dead Realme Narzo N53 Safely | Dr.fone
- [Updated] 2024 Approved EyeSharp Record ChromeOS Native Cam
- FaceTime Call Recording Securing Your Conversations for 2024
- The way to recover deleted contacts on Lava Blaze Pro 5G without backup.
- [Updated] 2024 Approved Your Blueprint to Mastering the Snapchat Boomerang Skill
- New In 2024, AIFF Converter Showdown Top Picks and In-Depth Reviews
- Top 4 Android System Repair Software for Nokia G310 Bricked Devices | Dr.fone
- The Unseen Secrets of Optimizing Win11 Performance
- How to Downgrade iPhone 15 Pro Max without Losing Anything? | Dr.fone
- [Updated] Copyright Woes Instant Video Ban for 2024
- Hard Resetting an Nokia C300 Device Made Easy | Dr.fone
- [New] In 2024, Guiding iPhone & Android Owners to Fix Video Sending Problems in FB Chat
- [Updated] In 2024, OBS Studio vs Fraps – Which Is A Better
- In 2024, How to Transfer Data After Switching From Tecno Spark 10C to Latest Samsung | Dr.fone
- New Embark on a Complimentary Audacity Adventure Capturing Every Note for 2024
- [Updated] Crafting an Auditory Ambiance for Your Vimeo Video Pieces for 2024
- [Updated] How to Livestream Wisdom Without Wealth Waste for 2024
- In 2024, Full Tutorial to Bypass Your Infinix Note 30 VIP Face Lock?
- Title: "Expert Advice Incorporating Narrative Elements Into YouTube Videos"
- Author: Steven
- Created at : 2024-05-25 19:19:52
- Updated at : 2024-05-26 19:19:52
- Link: https://youtube-clips.techidaily.com/expert-advice-incorporating-narrative-elements-into-youtube-videos/
- License: This work is licensed under CC BY-NC-SA 4.0.
