
:max_bytes(150000):strip_icc()/TheGoodBrigade_Kidsonlaptopsincar_GettyImages-1297084394_CROPPED2-9566c364cf9344a288febcca577b171f.jpg)
Enhancing Viewership with Informative YouTube Video Captions
Enhancing Viewership with Informative YouTube Video Captions
How to Add Text to YouTube Video Before or After Uploading

Richard Bennett
Mar 27, 2024• Proven solutions
A great way to emphasize something you say in your vlog is to have your words appear next to you as you say them . Adding text to YouTube videos can look really professional. You might put a title at the beginning of your video, use bullet points to help people keep track of your monologue, or to highlight an important point by writing it on your screen. When you use text in your videos there are a few things you need to keep in mind. In this article, I will share with you 2 ways to add text/subtitles/captions to YouTube videos, whether you need to add text to the video during editing and upload it to YouTube later, or you have uploaded the video to YouTube already and want to add some captions and subtitles to complement it.
- Part 1: Add text to video before uploading YouTube
- Part 2: Add Text to YouTube video after uploading
- Part 3: Top 3 YouTube Video Text Tips
How to Add Text to YouTube Video Before Uploading
Before uploading the video to YouTube, it is recommended to add text to the video first. You can add simple texts and captions to videos with the free video editing software. To add more text effects to the video, you can use Filmora, Sony Vegas Movie Studio and Adobe Premiere CC based on your video editing skills and needs. These software programs are great video editors, which can help you input text easily.
1. Use Filmora to Add text to Videos
There are plenty of Text effects built in Filmora, you can apply motions and animation to texts, titles, subtitles, end credits and openers as well. Each title preset will present different effects. You can add multiple text boxes and place the text to any position in need. Besides writing texts to video, you can select the target font, size and color and customize the text effect in detail as well. To add text to a video in Filmora is easy, just follow the steps below:

- Open up Filmora and drag a clip into your timeline. Then, go to Text/Credit.
- Find a style that you like and drag it into your timeline where you want your text to appear. Make sure your text is selected in your timeline and click the Advanced Text Editing icon, which looks like a pen and paper.
- Insert your own words and drag your text to where you want it on the screen. Adjust the size by dragging the blue squares which surround your text.
- To change the color of your text, go into the Customize menu. You will find it near the top left of your screen. While you are in Customize there will be a section called Fill. This is where you select the color of your text. You can even change the fill type to ‘gradient fill’ and have your text transition between two colors.
- All of Filmora’s text options are animated – they fade, move around the screen, or perform some other type of action as they appear and disappear. To change the animation of your text select Animation next to Customize. A selection of different animations will appear. Double click on the one you want to apply to your text.
 Download Mac Version ](https://tools.techidaily.com/wondershare/filmora/download/ )
Check the detailed steps of how to add text to video in Filmora.
2. Use Windows Movie Maker
As a simple video editing software, Windows Movie Maker also allows you to add text to videos. It provides 3 different options for you to add Title, Caption and Credits to the YouTube videos. You can follow the steps below to add text to the video in WMM.

- To start, launch the Windows Movie Maker.
- After, select import video to insert the video that you want to add text with.
- Select edit movie then click make credits or titles.
- Then add the text that you want to include.
For the step by step tutorial of adding text to YouTube video, check How to Add Text to Video with Windows Movie Maker . Besides adding text to video, you can use Windows Movie Maker to edit YouTube video further. Learn How to trim, cut, combine, split video and add transitions and upload video to YouTube in Windows Movie Maker?
3. Use Sony Vegas Movie Studio
Adding text to YouTube videos in Sony Vegas is not so complicated if you are new to this software. You can adjust the color, size, font and duration of the text effect and add fade in and fade out effects. Follow the steps below to add texts to video in Vegas:

- Launch Sony Vegas Movie Studio.
- Click the View Menu then select Media Generators.
- Choose the generator that you want to use.
- After, drag the generator you have chosen on the timeline.
- Then, the video event FX dialogue box will appear.
- Enter the text that you want and modify it by changing the font, size and style.
4. Use Adobe Premiere CC
For professionals who are looking for a professional way to adding text to video and also have a sufficient budget, Adobe Premiere CC is always recommended. You can check the video and the steps below to add text to video in Premiere:
- Click open or create a project.
- Click the file menu then choose new and title.
- After, the text window will appear then utilize the text tool to add text.
- You can also edit your text using the commands that are provided in the Title Menu.
- Save the text that you have made by clicking the file menu then choose Save As.
How to Add Text to video in YouTube after uploading
Sometimes, we have uploaded a video to YouTube and then want to add subtitles/cc to the video later. The good news is that YouTube is not only a site for videos but is also the place where you can edit your videos in an instant. As you have read, adding text and captions to the uploaded YouTube videos is just a breeze.
Of course, you can only add and edit texts and captions to the video under your YouTube account. Here are the steps on how you can add text to your videos with YouTube Video Editor after the video is uploaded.
- Go to youtube.com then sign in to your account. After sign in your YouTube account, click your avatar and select Creator Studio to enter the creator studio interface.
- Click the Video Manager tab and in Videos section you will see all your videos uploaded to YouTube. Select the video that you want to add captions to and then select Subtitles/CC after clicking Edit button.
- Add Captions/Subtitles

While YouTube may have already created the subtitles automatically for your video with its speech recognition technology. If it does, you will see something like Published: English (Automatic) to the right of your video. If the automatically generated subtitles is not correct, you can edit it to improve the accuracy. Select the line that needs modification to make the edits.
If there is no auto-subtitles, you can choose from 3 ways to add subtitles and closed captions to the video: Upload a file, Transcribe and auto-sync and create new subtitles or CC.

Upload a file: upload a text transcript or timed subtitles file.
Transcribe and auto-sync: Type or paste in a full transcript of the video and subtitle timings will be set automatically.
Create new subtitles or CC: Create subtitles and closed captions by typing them in as you watch the video.
If you already have a caption file which contains both text and time codes, just click Upload a file and upload the text to the video.
- Once everything is okay, you can change the name of the video and you can do it in the box beside Project.
Cons of Using YouTube Video Editor
When you make use of this editor, you cannot shorten the clips for music. Moreover, since it is an online editor, you need to refresh the page in order to do the changes. Aside from YouTube Video Editor, you can use Adobe Premier Pro, MAGIX Vegas Pro, OpenShot and Avidemux.
From 20th September 2017 users will no longer be able to use the complementary editing suite. Check the best YouTube video editor alternatives from this complete guide to find out more YouTube video editor alternatives if you want to add text to video with more features and customization.
Top 3 Tips for Adding Text to YouTube Videos
1. Leave Room
If you know you are going to add text to your video then make sure you leave room for it in your frame. Consider standing off to one side instead of directly in front of your camera. You do not want to have to choose between not using text, making your text really small, or placing it over your face.
While planning out your frame and leaving room for your text, consider what color you are going to make the words and whether it will stand out and look good against your background.
2. Bigger is Better
People should be able to read your text without putting in any extra effort, such as straining their eyes to make out small words. If it takes effort to read your text then a lot of people will just ignore it. Your text should be big enough that somebody watching your video on their smartphone screen – where everything is shrunk down – can read it easily.
It is easier to make your text larger when you stick to titles, keywords, and short sentences.
3. Do Not Overuse
Text is a great tool for making something stand out. However, if you try to use text to emphasize too much of what you say it will lose its effect. Text does not stand out anymore once viewers get too used to seeing it. Too much text can even get annoying and cause people to click away from your videos.
Try to use text to emphasize only the most important things you say.

Richard Bennett
Richard Bennett is a writer and a lover of all things video.
Follow @Richard Bennett
Richard Bennett
Mar 27, 2024• Proven solutions
A great way to emphasize something you say in your vlog is to have your words appear next to you as you say them . Adding text to YouTube videos can look really professional. You might put a title at the beginning of your video, use bullet points to help people keep track of your monologue, or to highlight an important point by writing it on your screen. When you use text in your videos there are a few things you need to keep in mind. In this article, I will share with you 2 ways to add text/subtitles/captions to YouTube videos, whether you need to add text to the video during editing and upload it to YouTube later, or you have uploaded the video to YouTube already and want to add some captions and subtitles to complement it.
- Part 1: Add text to video before uploading YouTube
- Part 2: Add Text to YouTube video after uploading
- Part 3: Top 3 YouTube Video Text Tips
How to Add Text to YouTube Video Before Uploading
Before uploading the video to YouTube, it is recommended to add text to the video first. You can add simple texts and captions to videos with the free video editing software. To add more text effects to the video, you can use Filmora, Sony Vegas Movie Studio and Adobe Premiere CC based on your video editing skills and needs. These software programs are great video editors, which can help you input text easily.
1. Use Filmora to Add text to Videos
There are plenty of Text effects built in Filmora, you can apply motions and animation to texts, titles, subtitles, end credits and openers as well. Each title preset will present different effects. You can add multiple text boxes and place the text to any position in need. Besides writing texts to video, you can select the target font, size and color and customize the text effect in detail as well. To add text to a video in Filmora is easy, just follow the steps below:
- Open up Filmora and drag a clip into your timeline. Then, go to Text/Credit.
- Find a style that you like and drag it into your timeline where you want your text to appear. Make sure your text is selected in your timeline and click the Advanced Text Editing icon, which looks like a pen and paper.
- Insert your own words and drag your text to where you want it on the screen. Adjust the size by dragging the blue squares which surround your text.
- To change the color of your text, go into the Customize menu. You will find it near the top left of your screen. While you are in Customize there will be a section called Fill. This is where you select the color of your text. You can even change the fill type to ‘gradient fill’ and have your text transition between two colors.
- All of Filmora’s text options are animated – they fade, move around the screen, or perform some other type of action as they appear and disappear. To change the animation of your text select Animation next to Customize. A selection of different animations will appear. Double click on the one you want to apply to your text.
Download Mac Version ](https://tools.techidaily.com/wondershare/filmora/download/ )
Check the detailed steps of how to add text to video in Filmora.
2. Use Windows Movie Maker
As a simple video editing software, Windows Movie Maker also allows you to add text to videos. It provides 3 different options for you to add Title, Caption and Credits to the YouTube videos. You can follow the steps below to add text to the video in WMM.
- To start, launch the Windows Movie Maker.
- After, select import video to insert the video that you want to add text with.
- Select edit movie then click make credits or titles.
- Then add the text that you want to include.
For the step by step tutorial of adding text to YouTube video, check How to Add Text to Video with Windows Movie Maker . Besides adding text to video, you can use Windows Movie Maker to edit YouTube video further. Learn How to trim, cut, combine, split video and add transitions and upload video to YouTube in Windows Movie Maker?
3. Use Sony Vegas Movie Studio
Adding text to YouTube videos in Sony Vegas is not so complicated if you are new to this software. You can adjust the color, size, font and duration of the text effect and add fade in and fade out effects. Follow the steps below to add texts to video in Vegas:
- Launch Sony Vegas Movie Studio.
- Click the View Menu then select Media Generators.
- Choose the generator that you want to use.
- After, drag the generator you have chosen on the timeline.
- Then, the video event FX dialogue box will appear.
- Enter the text that you want and modify it by changing the font, size and style.
4. Use Adobe Premiere CC
For professionals who are looking for a professional way to adding text to video and also have a sufficient budget, Adobe Premiere CC is always recommended. You can check the video and the steps below to add text to video in Premiere:
- Click open or create a project.
- Click the file menu then choose new and title.
- After, the text window will appear then utilize the text tool to add text.
- You can also edit your text using the commands that are provided in the Title Menu.
- Save the text that you have made by clicking the file menu then choose Save As.
How to Add Text to video in YouTube after uploading
Sometimes, we have uploaded a video to YouTube and then want to add subtitles/cc to the video later. The good news is that YouTube is not only a site for videos but is also the place where you can edit your videos in an instant. As you have read, adding text and captions to the uploaded YouTube videos is just a breeze.
Of course, you can only add and edit texts and captions to the video under your YouTube account. Here are the steps on how you can add text to your videos with YouTube Video Editor after the video is uploaded.
- Go to youtube.com then sign in to your account. After sign in your YouTube account, click your avatar and select Creator Studio to enter the creator studio interface.
- Click the Video Manager tab and in Videos section you will see all your videos uploaded to YouTube. Select the video that you want to add captions to and then select Subtitles/CC after clicking Edit button.
- Add Captions/Subtitles
While YouTube may have already created the subtitles automatically for your video with its speech recognition technology. If it does, you will see something like Published: English (Automatic) to the right of your video. If the automatically generated subtitles is not correct, you can edit it to improve the accuracy. Select the line that needs modification to make the edits.
If there is no auto-subtitles, you can choose from 3 ways to add subtitles and closed captions to the video: Upload a file, Transcribe and auto-sync and create new subtitles or CC.
Upload a file: upload a text transcript or timed subtitles file.
Transcribe and auto-sync: Type or paste in a full transcript of the video and subtitle timings will be set automatically.
Create new subtitles or CC: Create subtitles and closed captions by typing them in as you watch the video.
If you already have a caption file which contains both text and time codes, just click Upload a file and upload the text to the video.
- Once everything is okay, you can change the name of the video and you can do it in the box beside Project.
Cons of Using YouTube Video Editor
When you make use of this editor, you cannot shorten the clips for music. Moreover, since it is an online editor, you need to refresh the page in order to do the changes. Aside from YouTube Video Editor, you can use Adobe Premier Pro, MAGIX Vegas Pro, OpenShot and Avidemux.
From 20th September 2017 users will no longer be able to use the complementary editing suite. Check the best YouTube video editor alternatives from this complete guide to find out more YouTube video editor alternatives if you want to add text to video with more features and customization.
Top 3 Tips for Adding Text to YouTube Videos
1. Leave Room
If you know you are going to add text to your video then make sure you leave room for it in your frame. Consider standing off to one side instead of directly in front of your camera. You do not want to have to choose between not using text, making your text really small, or placing it over your face.
While planning out your frame and leaving room for your text, consider what color you are going to make the words and whether it will stand out and look good against your background.
2. Bigger is Better
People should be able to read your text without putting in any extra effort, such as straining their eyes to make out small words. If it takes effort to read your text then a lot of people will just ignore it. Your text should be big enough that somebody watching your video on their smartphone screen – where everything is shrunk down – can read it easily.
It is easier to make your text larger when you stick to titles, keywords, and short sentences.
3. Do Not Overuse
Text is a great tool for making something stand out. However, if you try to use text to emphasize too much of what you say it will lose its effect. Text does not stand out anymore once viewers get too used to seeing it. Too much text can even get annoying and cause people to click away from your videos.
Try to use text to emphasize only the most important things you say.
Richard Bennett
Richard Bennett is a writer and a lover of all things video.
Follow @Richard Bennett
Behind the Screen: A Strategic Approach for Secret YouTube Videos
You may have noticed that some videos in your YouTube playlist are unavailable. This is because the platform allows content creators to categorize their videos into public, private, or unlisted based on their preferences.
To help you uncover the content that you otherwise wouldn’t have access to, we’ve compiled a detailed guide to show you how to find YouTube hidden videos. We’ve also explained why so many unlisted videos are now labeled as private.
So, let’s get started with our guide without any further delay!
4 Types of Videos on YouTube
Firstly, let’s learn about the background of the types of YouTube videos. YouTube videos fall into the following four broad categories:
Public Videos: YouTube contains videos on many themes and topics. It makes it impossible to watch all uploaded content under a specific category.
So, whenever you search for a video or theme, a list of content is displayed in the search result: “Public Videos.” It means that they are visible to everyone around the globe (depending on the terms and conditions). Moreover, you can share, like, unlike, download, or add these videos to your playlists for later watching.
Private Videos: Private videos on YouTube can only be seen by people invited by the person who uploaded the video. This means that only those with access to the video’s shareable link can watch it.
Private videos are not visible to the public or to people who are not logged into YouTube. Hence, it is a great way to share sensitive or personal information with a select group.
Unlisted Video Unlisted videos on YouTube are not publicly visible on the site. They can only be seen by people who have the URL. This category works as a bridge between private and public videos. It is accessible only through sharable links without appealing in any YouTube public playlist or search result.
You might upload an unlisted video to YouTube if you do not want everyone to see it. However, you still want to share it with specific people, like your friends or family. You might also use an unlisted video to test out a new idea before making it public on the video-sharing platform.
Age-Restricted Videos: Age-restricted videos on YouTube are not suitable for all audiences. It may contain content that includes violence, profanity, sexual content, and other inappropriate material. YouTube requires that users be at least 18 years old to view these types of videos.
If you search on YouTube and come across an age-restricted video, you will be asked to confirm your age before viewing its content.

How To Find Unlisted YouTube Videos
Now that we’ve learned about the four types of YouTube content, let’s discuss how you can find unlisted YouTube videos:
How To Find Other People’s Unlisted YouTube Videos?
Since unavailable videos in YouTube playlists are hidden from general public viewers, you cannot find them on YouTube or Google search results.
However, the following workaround can help you watch these YouTube videos without facing much trouble:
Step 1: First, open a browser on your PC and visit the Unlisted Videos website. This platform contains over 600,000 unlisted YouTube videos from 2016 and earlier. You can also submit your unlisted video on the site.

Step 2: Use the search bar at the top of your screen to search for other people’s YouTube playlists. You can also click the “All Video” or “Random Videos” option to find the hidden content of a user.
How To See Unlisted Videos on My YouTube Channel?
To see your unlisted videos on your YouTube channel, do the following steps in sequence:
Step 1: In the first step, install the YouTube Studio app on your mobile device or visit its website using a browser on your computer. Next, launch the app and sign in to your channel’s account using your email and password.
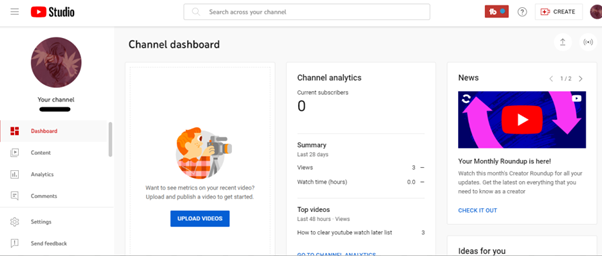
Step 2: In the next step, tap/ click the “Content” tab and tap/click the “Funnel” icon at the top of the video list to access the visibility options.
Step 3:
- Now, choose the “Visibility” option.
- Select “Unlisted” to change the visibility.
- Click the “Save” option to apply changes.
- See the hidden videos on your channel.

Since YouTube has marked the videos uploaded before 2017 as private as of July 2021, you can find your old unlisted videos under the “Private” list. To access it, choose “Private” as the visibility option.
How To Find Unlisted YouTube Videos with Google
Sometimes, unlisted YouTube videos appear on Google when someone shares the link to them on a public forum or website.
To confirm this, open a browser on your computer or a mobile device, head to the Google website, and search for your query. With some luck, you can find these unlisted YouTube videos in the search results.
You May Want to Know: Why Are So Many Unlisted Videos Now Private?
All unlisted videos uploaded to YouTube before January 2017 were switched to private. Therefore, if you have any older unlisted videos added to your Playlist or embedded on your website, you won’t be able to access them now.
However, the channel’s owner can restore access to the video by switching it back to unlisted or public. If now, the video will be labeled as “Private” indefinitely or until its settings are changed.
Conclusion
In this detailed guide, we’ve explored the four types of videos on YouTube and how to find YouTube hidden videos in three different ways. We’ve also explained why so many videos are now listed as “Private” and inaccessible.
Hopefully, you’ve found this article helpful and can now access the unlisted videos on YouTube without hassle.
You may have noticed that some videos in your YouTube playlist are unavailable. This is because the platform allows content creators to categorize their videos into public, private, or unlisted based on their preferences.
To help you uncover the content that you otherwise wouldn’t have access to, we’ve compiled a detailed guide to show you how to find YouTube hidden videos. We’ve also explained why so many unlisted videos are now labeled as private.
So, let’s get started with our guide without any further delay!
4 Types of Videos on YouTube
Firstly, let’s learn about the background of the types of YouTube videos. YouTube videos fall into the following four broad categories:
Public Videos: YouTube contains videos on many themes and topics. It makes it impossible to watch all uploaded content under a specific category.
So, whenever you search for a video or theme, a list of content is displayed in the search result: “Public Videos.” It means that they are visible to everyone around the globe (depending on the terms and conditions). Moreover, you can share, like, unlike, download, or add these videos to your playlists for later watching.
Private Videos: Private videos on YouTube can only be seen by people invited by the person who uploaded the video. This means that only those with access to the video’s shareable link can watch it.
Private videos are not visible to the public or to people who are not logged into YouTube. Hence, it is a great way to share sensitive or personal information with a select group.
Unlisted Video Unlisted videos on YouTube are not publicly visible on the site. They can only be seen by people who have the URL. This category works as a bridge between private and public videos. It is accessible only through sharable links without appealing in any YouTube public playlist or search result.
You might upload an unlisted video to YouTube if you do not want everyone to see it. However, you still want to share it with specific people, like your friends or family. You might also use an unlisted video to test out a new idea before making it public on the video-sharing platform.
Age-Restricted Videos: Age-restricted videos on YouTube are not suitable for all audiences. It may contain content that includes violence, profanity, sexual content, and other inappropriate material. YouTube requires that users be at least 18 years old to view these types of videos.
If you search on YouTube and come across an age-restricted video, you will be asked to confirm your age before viewing its content.
How To Find Unlisted YouTube Videos
Now that we’ve learned about the four types of YouTube content, let’s discuss how you can find unlisted YouTube videos:
How To Find Other People’s Unlisted YouTube Videos?
Since unavailable videos in YouTube playlists are hidden from general public viewers, you cannot find them on YouTube or Google search results.
However, the following workaround can help you watch these YouTube videos without facing much trouble:
Step 1: First, open a browser on your PC and visit the Unlisted Videos website. This platform contains over 600,000 unlisted YouTube videos from 2016 and earlier. You can also submit your unlisted video on the site.
Step 2: Use the search bar at the top of your screen to search for other people’s YouTube playlists. You can also click the “All Video” or “Random Videos” option to find the hidden content of a user.
How To See Unlisted Videos on My YouTube Channel?
To see your unlisted videos on your YouTube channel, do the following steps in sequence:
Step 1: In the first step, install the YouTube Studio app on your mobile device or visit its website using a browser on your computer. Next, launch the app and sign in to your channel’s account using your email and password.
Step 2: In the next step, tap/ click the “Content” tab and tap/click the “Funnel” icon at the top of the video list to access the visibility options.
Step 3:
- Now, choose the “Visibility” option.
- Select “Unlisted” to change the visibility.
- Click the “Save” option to apply changes.
- See the hidden videos on your channel.
Since YouTube has marked the videos uploaded before 2017 as private as of July 2021, you can find your old unlisted videos under the “Private” list. To access it, choose “Private” as the visibility option.
How To Find Unlisted YouTube Videos with Google
Sometimes, unlisted YouTube videos appear on Google when someone shares the link to them on a public forum or website.
To confirm this, open a browser on your computer or a mobile device, head to the Google website, and search for your query. With some luck, you can find these unlisted YouTube videos in the search results.
You May Want to Know: Why Are So Many Unlisted Videos Now Private?
All unlisted videos uploaded to YouTube before January 2017 were switched to private. Therefore, if you have any older unlisted videos added to your Playlist or embedded on your website, you won’t be able to access them now.
However, the channel’s owner can restore access to the video by switching it back to unlisted or public. If now, the video will be labeled as “Private” indefinitely or until its settings are changed.
Conclusion
In this detailed guide, we’ve explored the four types of videos on YouTube and how to find YouTube hidden videos in three different ways. We’ve also explained why so many videos are now listed as “Private” and inaccessible.
Hopefully, you’ve found this article helpful and can now access the unlisted videos on YouTube without hassle.
Also read:
- Expert Tips for Harnessing the Power of Top 9 Free YouTube Makers
- [New] Digital Diving Into YouTube’s Veiled Video Vaults
- [Updated] Evaluating TSeries' Business Model with YouTube Viewership Metrics
- Economical Audio Devices for Vloggers on a Budget for 2024
- The Ultimate Power Ranking Top 10 YouTube Channels by Views & Subs
- 2024 Approved Elevate Your Hiring Game with the Best Vids in Town
- [Updated] Audiovisual Perfection Leading Audio Enhancement Apps
- The Softer Side of Promotion Elevating Your Audience Count
- Tailoring Talent to Treasure The Proactive Pursuit of Video Profitability
- [Updated] Essential 8 Tools Linux-Based Edits Software
- [Updated] Direct From Google Meet Securely Live Stream on YouTube
- 2024 Approved DIY YouTube Trailer Production via Filmora Software
- [Updated] Enhancing Video Content Through Effective Use of Cards/Annotations
- Quick Steps to Record iPhone/iPad Screens for Online Videos
- Unlocking the Mysteries Behind YouTube Wealth - Ajey Nagar Edition
- 2024 Approved Break It Down Streamlining Video Length with Efficient Chapter Breaks on YouTube
- [Updated] Discovering Calmer Video Consumption Three Ways to Pause Time (56 Chars, Slightly over but a Minor Exception Due to Title Length)
- 2024 Approved Elevate Video Popularity with Strategic #Hashtags
- [New] Capture & Conquer Speedy Photos on Windows 11
- One-Stop Video Editing Shop 35 Editors for Every Operating System for 2024
- [Updated] ScreenRecorder Ultimate Clear Viewing Tool
- Updated In 2024, Indie Filmmakers Toolkit Top 7 Low-Cost Video Production Software
- [New] Discovering the Future of Broadcast Roku & Facebook LIVE for 2024
- In 2024, How To Remove Screen Lock PIN On Oppo F25 Pro 5G Like A Pro 5 Easy Ways
- [New] Capturing Instagram Content on Computers Techniques and Tools
- [Updated] The Art of Combining Spotify and Discord for 2024
- How to recover old call logs from your Tecno Spark 10 5G?
- In 2024, Unleash Your Creativity Best Vignette Apps for iOS and Android Users
- [New] 2024 Approved Screenshots & Beyond Advanced Screen Recording for Apple Products
- How to Track Infinix Smart 8 Pro Location by Number | Dr.fone
- In 2024, How to Transfer Contacts from Poco X6 to iPhone XS/11 | Dr.fone
- Updated In 2024, Create Risograph Effect In Photoshop A Beginners Guide
- [Updated] Navigating Instagram's Reel Arena with Precision for 2024
- [Updated] FreeRecorder X Unveiled Features and Performance
- Updated The Ultimate List of Internet Locales That Promote In-Person Friendships
- Title: Enhancing Viewership with Informative YouTube Video Captions
- Author: Steven
- Created at : 2024-05-25 19:16:44
- Updated at : 2024-05-26 19:16:44
- Link: https://youtube-clips.techidaily.com/enhancing-viewership-with-informative-youtube-video-captions/
- License: This work is licensed under CC BY-NC-SA 4.0.
