Enhancing Video Quality with Right Lighting
Enhancing Video Quality with Right Lighting
Lighting Tips for Vlogging: How to Light

Richard Bennett
Mar 27, 2024• Proven solutions
One of the best things you can do for your video quality is to ensure you have great lighting. Viewers find poor lighting distracting and it’s hard for them to see how great your content is if they are busy thinking about why your video is so dark. By creating a great lighting set up you can ensure that the people watching your videos are only thinking about how much they’re enjoying them.
Going outside and using natural light is the cheapest way to get a lot of light for your videos. If your vlog is not suited to the great outdoors then you need to get more strategic. You can turn on all the lights in your living room and still end up with a dark, grainy, video.
Video Lighting Basics: Three Point Lighting

The most common technique of lighting a scene is called three-point lighting. It involves three different sources of light in the shot and is used by portrait photographers, which is also a great method for lighting your vlog.
The brightest source of light is also known as the key light which need to be high quality. A window will work, but if you do not have access to one where you are filming then consider an LED panel light or a softbox light like the ones used in portrait photography.
This first light will create a dramatic shadow across half of your face. You want to reduce this shadow, but not get rid of it completely.
Rather than setting up another light source on the opposite side of the camera, put up a reflector to bounce some light back onto your face. This reflector is called your ‘Fill Light’.
The fill light is less bright than the primary source of light and it is placed on the side opposite to the key light. Its purpose is to reduce shadows produced by the key light and the reflector will need to be mounted on a stand.
The final step to creating three point lighting is to set up another light behind you. This is your ‘Backlight’, and it will help you stand out from your background. Backlight or Hair light is always placed behind and above the subject to create separation between the subject in the shot and the background. This basic lighting technique can be applied in almost every scene you shoot, which is why it is important to keep an open mind and to continue experimenting with possible light setups.
Watch Video! Top Lighting Tips for Vlogging
Lightning Tips for Aspiring YouTube Videographers
Becoming the master of light will take some time and practice, so it is crucial to remain curious and anxious to learn new tricks throughout that process if you want to continually become better. These tips will help you make the first steps on that journey.
1. Focus Your Key Light
Try to focus your Key Light so that it lights only you and not your background. Do this by mounting anything that can cast a shadow onto your Key Light to control the area where the light hits. If you are using a window for your Key Light then you can use a curtain. If you use a softbox light then your light will already be somewhat focused.
2. Use Natural Lighting
The light provided by the Sun is still the best light source, you can have in your video. The trouble is that natural light changes quickly, which makes it highly unpredictable. The best way to deal with this challenge is to come prepared to the set and to get the shot you want as quickly as you can.
3. Try DIY Lightning
Literally, anything from candles to LED light bulbs can serve as a source of light in a shot. You just need to pay attention to the light temperature, because warmer light sources may highlight reds and yellows that can make your footage look less realistic.
4. Use Lightning Kits
This is by far the best option if you want to be in complete control of the light on your set. You can adjust the intensity of the lights, use filters, diffusers and all sorts of other accessories to create the light that flatters the subjects of your videos. The only downside is that you’ll have to spend a considerable amount of money if you want to have a professional lighting kit.
5. Set up reflectors
Sets of reflectors are often under $50, so they are fairly affordable. However, some vloggers choose to forgo purchasing reflectors and make their own out of tinfoil.

If your strong main light is too hard on your eyes then you can use a translucent ‘reflector’ to soften it. Set your translucent reflector, or other screen, up in front of your main light to diffuse it.
If you are hosting a beauty vlog then you might consider a slightly different set up. Instead of having your main light off to one side set it up directly in front of you so your entire face is lit evenly. It is still a good idea to use fill lights in this set up to give you some dimension, and a backlight is even more essential for helping you stand out from the background. The even light hitting your face will also make you look flat if you do not use a backlight.

If you are using all of the lighting options available to you and your video still looks too dark then you can try brightening it by opening up the aperture of your camera lens/setting a lower f-stop. Letting more light into your camera can help your footage look brighter, although you also run the risk of making things look overexposed/ washed out if you are not careful.
If you are stuck shooting in low light conditions it is best to use a lens with a wider aperture/lower f-stop. This will make the best of the light you do have.
Richard Bennett
Richard Bennett is a writer and a lover of all things video.
Follow @Richard Bennett
Richard Bennett
Mar 27, 2024• Proven solutions
One of the best things you can do for your video quality is to ensure you have great lighting. Viewers find poor lighting distracting and it’s hard for them to see how great your content is if they are busy thinking about why your video is so dark. By creating a great lighting set up you can ensure that the people watching your videos are only thinking about how much they’re enjoying them.
Going outside and using natural light is the cheapest way to get a lot of light for your videos. If your vlog is not suited to the great outdoors then you need to get more strategic. You can turn on all the lights in your living room and still end up with a dark, grainy, video.
Video Lighting Basics: Three Point Lighting
The most common technique of lighting a scene is called three-point lighting. It involves three different sources of light in the shot and is used by portrait photographers, which is also a great method for lighting your vlog.
The brightest source of light is also known as the key light which need to be high quality. A window will work, but if you do not have access to one where you are filming then consider an LED panel light or a softbox light like the ones used in portrait photography.
This first light will create a dramatic shadow across half of your face. You want to reduce this shadow, but not get rid of it completely.
Rather than setting up another light source on the opposite side of the camera, put up a reflector to bounce some light back onto your face. This reflector is called your ‘Fill Light’.
The fill light is less bright than the primary source of light and it is placed on the side opposite to the key light. Its purpose is to reduce shadows produced by the key light and the reflector will need to be mounted on a stand.
The final step to creating three point lighting is to set up another light behind you. This is your ‘Backlight’, and it will help you stand out from your background. Backlight or Hair light is always placed behind and above the subject to create separation between the subject in the shot and the background. This basic lighting technique can be applied in almost every scene you shoot, which is why it is important to keep an open mind and to continue experimenting with possible light setups.
Watch Video! Top Lighting Tips for Vlogging
Lightning Tips for Aspiring YouTube Videographers
Becoming the master of light will take some time and practice, so it is crucial to remain curious and anxious to learn new tricks throughout that process if you want to continually become better. These tips will help you make the first steps on that journey.
1. Focus Your Key Light
Try to focus your Key Light so that it lights only you and not your background. Do this by mounting anything that can cast a shadow onto your Key Light to control the area where the light hits. If you are using a window for your Key Light then you can use a curtain. If you use a softbox light then your light will already be somewhat focused.
2. Use Natural Lighting
The light provided by the Sun is still the best light source, you can have in your video. The trouble is that natural light changes quickly, which makes it highly unpredictable. The best way to deal with this challenge is to come prepared to the set and to get the shot you want as quickly as you can.
3. Try DIY Lightning
Literally, anything from candles to LED light bulbs can serve as a source of light in a shot. You just need to pay attention to the light temperature, because warmer light sources may highlight reds and yellows that can make your footage look less realistic.
4. Use Lightning Kits
This is by far the best option if you want to be in complete control of the light on your set. You can adjust the intensity of the lights, use filters, diffusers and all sorts of other accessories to create the light that flatters the subjects of your videos. The only downside is that you’ll have to spend a considerable amount of money if you want to have a professional lighting kit.
5. Set up reflectors
Sets of reflectors are often under $50, so they are fairly affordable. However, some vloggers choose to forgo purchasing reflectors and make their own out of tinfoil.
If your strong main light is too hard on your eyes then you can use a translucent ‘reflector’ to soften it. Set your translucent reflector, or other screen, up in front of your main light to diffuse it.
If you are hosting a beauty vlog then you might consider a slightly different set up. Instead of having your main light off to one side set it up directly in front of you so your entire face is lit evenly. It is still a good idea to use fill lights in this set up to give you some dimension, and a backlight is even more essential for helping you stand out from the background. The even light hitting your face will also make you look flat if you do not use a backlight.
If you are using all of the lighting options available to you and your video still looks too dark then you can try brightening it by opening up the aperture of your camera lens/setting a lower f-stop. Letting more light into your camera can help your footage look brighter, although you also run the risk of making things look overexposed/ washed out if you are not careful.
If you are stuck shooting in low light conditions it is best to use a lens with a wider aperture/lower f-stop. This will make the best of the light you do have.
Richard Bennett
Richard Bennett is a writer and a lover of all things video.
Follow @Richard Bennett
Positive Interaction, Not Pressure: A Subscription Success Story
How to Get People to Subscribe to Your YouTube Channel
Richard Bennett
Oct 26, 2023• Proven solutions
The following is a step-by-step tutorial on how to get more subscribers by asking the right way. People are more likely to do something if you give them a bit of a nudge, and that includes subscribing to your YouTube channel.
There are people who think that if people like their videos they’ll subscribe, so they shouldn’t bother people by asking. This is, simply put, wrong. When people are browsing YouTube their minds are on what video they want to watch next, not whether or not they want to subscribe – unless you remind them.
What is a ‘Call To Action’?
It has become the norm for YouTubers to ask viewers to subscribe in their sign-offs. A typical CTA (‘call to action’) goes something like this:
“Thanks for watching. If you liked this video, make sure to subscribe for more!”
That’s great. At the end of a video is a good place to ask people to subscribe, but is it the best and only place you should be reminding them? If you take a peek at your analytics and you might find that most of your viewers aren’t watching to the ends of your videos (people have short attention spans).
A More Effective Way of Asking For Subscribers
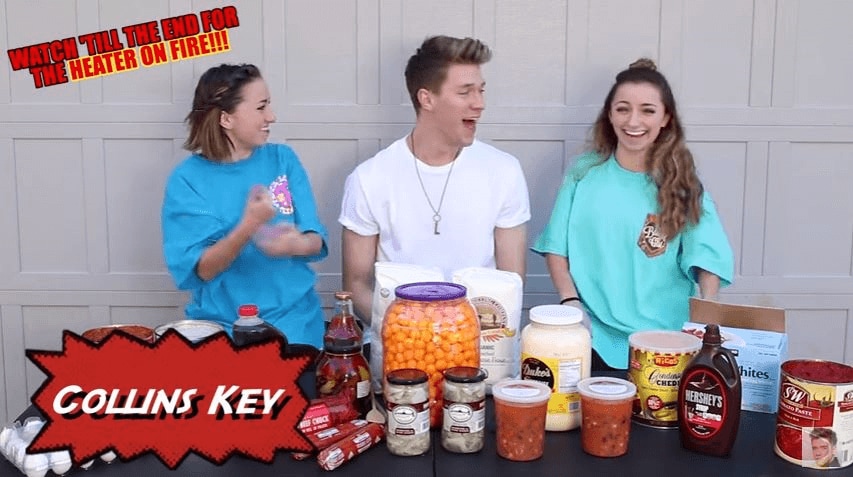
Collins Key is one YouTuber who has mastered asking for subscribers early on, and given that he has over 7 million subscribers himself I’d say it’s working out. Check out the technique in this video collab with Brooklyn and Bailey:
Step 1: How to Hook The Viewer
As you can see, the video starts with a ‘flash forward’ to one of the twins saying the heater is on fire and then a reminder of what’s going to happen later – the heater catching fire – is written in the top left of the screen so it stays on the viewers’ mind. This is one way in which the viewer is immediately hooked.
Step 2: Get to The Point Quickly
Shortly after, while still in the first 30 seconds of the video, Collins gets right to the point and introduces the Twin Telepathy Challenge promised in the title of the video. The hook with the heater catching fire is effective, but it’s not essential. It happens to suit Collins’ style, and it happens to have happened. Getting to the main point of the video quickly – usually in the first 15 seconds, not the first 30 (it’s in the first 15 seconds that most viewers click away) – is vital. People click on videos for a reason, and if they don’t see a sign of that payoff quickly they’ll leave.
Step 3: Create A Moment - Make Subscribing Part of the Experience
It’s only after hooking the viewer in and reiterating the promise of the title that Collins asks viewers to subscribe. The really clever thing about how he asks is that he carves out time in the video for the viewer to comply with his request. He gives 5 seconds and does a countdown.
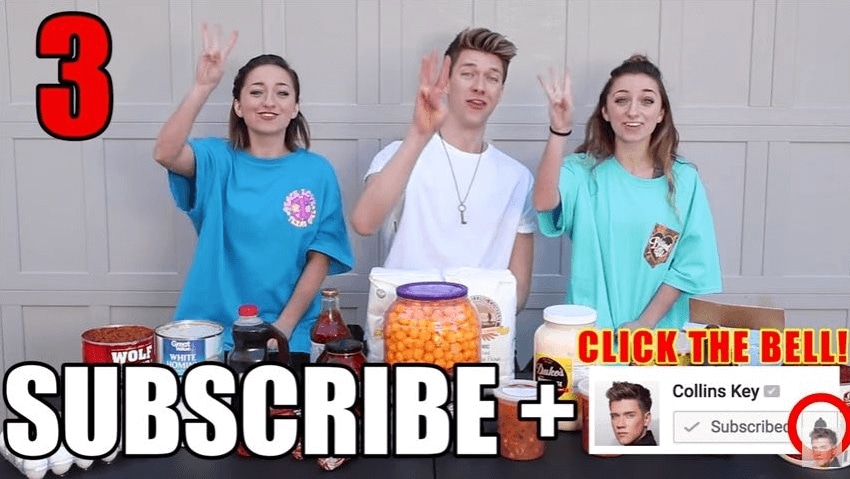
Collins Key has been one of the fastest-growing channels on YouTube. He does not implement this strategy in every video, but it’s not a stretch to think it’s had something to do with his success. Instead of simply asking you to subscribe at the end of the video, he creates a part of the video early on – before people who don’t watch until the end will have clicked away – where you feel as if you’re ‘supposed to’ subscribe.
Polish Your YouTube Videos with Filmora
Even with the above tricks, you may not get the subscribers as you wish unless you can make sure your videos and contents are of high quality. As YouTube is getting more and more popular and more YouTubers are competing for subscribers, you will need to polish your YouTube videos.
As one of the most widely used video editing software in YouTube video editing, Filmora video editor provides lots of templates and effects with an intuitive interface, which saves much time. Its features like motion tracking, audio ducking, keyframing, color matching and effects will help make your video impressive enough to get pepople to subscribe to your channel.
Here is a tutorial video about how to use Filmora to edit your YouTube video. Check it out and try Filmora if you are interested.


That’s how you can get more YouTube subscribers by asking the right way. You may follow the instructions and try it yourself. Do not forget to track your YouTube subscribers in real time to make necessary adjustments.
Richard Bennett
Richard Bennett is a writer and a lover of all things video.
Follow @Richard Bennett
Richard Bennett
Oct 26, 2023• Proven solutions
The following is a step-by-step tutorial on how to get more subscribers by asking the right way. People are more likely to do something if you give them a bit of a nudge, and that includes subscribing to your YouTube channel.
There are people who think that if people like their videos they’ll subscribe, so they shouldn’t bother people by asking. This is, simply put, wrong. When people are browsing YouTube their minds are on what video they want to watch next, not whether or not they want to subscribe – unless you remind them.
What is a ‘Call To Action’?
It has become the norm for YouTubers to ask viewers to subscribe in their sign-offs. A typical CTA (‘call to action’) goes something like this:
“Thanks for watching. If you liked this video, make sure to subscribe for more!”
That’s great. At the end of a video is a good place to ask people to subscribe, but is it the best and only place you should be reminding them? If you take a peek at your analytics and you might find that most of your viewers aren’t watching to the ends of your videos (people have short attention spans).
A More Effective Way of Asking For Subscribers
Collins Key is one YouTuber who has mastered asking for subscribers early on, and given that he has over 7 million subscribers himself I’d say it’s working out. Check out the technique in this video collab with Brooklyn and Bailey:
Step 1: How to Hook The Viewer
As you can see, the video starts with a ‘flash forward’ to one of the twins saying the heater is on fire and then a reminder of what’s going to happen later – the heater catching fire – is written in the top left of the screen so it stays on the viewers’ mind. This is one way in which the viewer is immediately hooked.
Step 2: Get to The Point Quickly
Shortly after, while still in the first 30 seconds of the video, Collins gets right to the point and introduces the Twin Telepathy Challenge promised in the title of the video. The hook with the heater catching fire is effective, but it’s not essential. It happens to suit Collins’ style, and it happens to have happened. Getting to the main point of the video quickly – usually in the first 15 seconds, not the first 30 (it’s in the first 15 seconds that most viewers click away) – is vital. People click on videos for a reason, and if they don’t see a sign of that payoff quickly they’ll leave.
Step 3: Create A Moment - Make Subscribing Part of the Experience
It’s only after hooking the viewer in and reiterating the promise of the title that Collins asks viewers to subscribe. The really clever thing about how he asks is that he carves out time in the video for the viewer to comply with his request. He gives 5 seconds and does a countdown.
Collins Key has been one of the fastest-growing channels on YouTube. He does not implement this strategy in every video, but it’s not a stretch to think it’s had something to do with his success. Instead of simply asking you to subscribe at the end of the video, he creates a part of the video early on – before people who don’t watch until the end will have clicked away – where you feel as if you’re ‘supposed to’ subscribe.
Polish Your YouTube Videos with Filmora
Even with the above tricks, you may not get the subscribers as you wish unless you can make sure your videos and contents are of high quality. As YouTube is getting more and more popular and more YouTubers are competing for subscribers, you will need to polish your YouTube videos.
As one of the most widely used video editing software in YouTube video editing, Filmora video editor provides lots of templates and effects with an intuitive interface, which saves much time. Its features like motion tracking, audio ducking, keyframing, color matching and effects will help make your video impressive enough to get pepople to subscribe to your channel.
Here is a tutorial video about how to use Filmora to edit your YouTube video. Check it out and try Filmora if you are interested.
That’s how you can get more YouTube subscribers by asking the right way. You may follow the instructions and try it yourself. Do not forget to track your YouTube subscribers in real time to make necessary adjustments.
Richard Bennett
Richard Bennett is a writer and a lover of all things video.
Follow @Richard Bennett
Also read:
- [New] In 2024, Unleashing Your Gaming Potential with FBX
- [Updated] Achieve Professional Aesthetics Embedding Watermarks & Branding in Videos
- [Updated] Charting Your Course in the World of YouTube Tracking Success & Monetary Value
- [Updated] Foremost 6 Online Spaces Dominating B2B Interactions
- [Updated] In 2024, Exchanging Visuals Android-iPhone Content Transfer
- [Updated] Vloggers' Fears Decoded Combat Strategies for Everyone
- 10 Free Location Spoofers to Fake GPS Location on your Honor 100 Pro | Dr.fone
- 2024 Approved Captivating Audiencvith Effective Thumbnail Sizes
- 2024 Approved Enhancing Video Reach Tactics Against Bot Visitors
- Beginners’ Guide How To Create a YouTube Channel and Make Money
- Chatbot Face-Off: Can Claude AI Outperform ChatGPT?
- Elevating the Chilly Selecting Five Warm Video Backgrounds for 2024
- Enhancing Presentations Adding YouTube to Google Slides
- Enhancing Visual Quality in Outriders - Fixing Screen Distortion Issues
- How To Free Up iPhone 11 Pro Space | Dr.fone
- In 2024, Best 10 Mock Location Apps Worth Trying On Infinix Zero 30 5G | Dr.fone
- In 2024, Dissecting Video Platform Features YouTube Vs. DailyMention
- Title: Enhancing Video Quality with Right Lighting
- Author: Steven
- Created at : 2025-01-24 02:44:37
- Updated at : 2025-01-30 02:09:38
- Link: https://youtube-clips.techidaily.com/enhancing-video-quality-with-right-lighting/
- License: This work is licensed under CC BY-NC-SA 4.0.