
:max_bytes(150000):strip_icc()/unnamed-ab349991a4d748a38dc0028fbb611036.png)
Efficiently Uploading YouTube Vids to Insta Profile for 2024
Efficiently Uploading YouTube Vids to Insta Profile
How to Post a Video From YouTube on Instagram

Shanoon Cox
Mar 27, 2024• Proven solutions
Have you ever noticed the trend that people spend more time on video content instead of reading blogs? Actually, the diversity of the videos on YouTube makes it a valuable resource for highly skilled professionals as well as an endless source of entertainment.
That is why sharing a YouTube video to Instagram can be beneficial for entrepreneurs, businessmen, and people who are looking for a way to amuse their Instagram followers. In this article, we are going to take you through all the steps you’ll need to take in order to post a video from YouTube to Instagram.

The video tutorial below will show you the detailed information abouthow to Edit videos for Instagram with Filmora on your computer since it allows you to edit both 1:1, 9:16, 16:9, and 4:3 aspect ratio videos.
 Download Mac Version ](https://tools.techidaily.com/wondershare/filmora/download/ )
How to Post a YouTube Video on Instagram
Sharing YouTube videos to Instagram directly isn’t possible yet, and for that reason, if you want to feature YouTube videos on your Instagram you’ll have to go through a three-step process. However, this process is fairly simple, although some methods may be more complex than others and require you to spend a considerable amount of time on downloading and editing the files you want to share on your Instagram account.
- Step 1: Download Videos from YouTube
- Step 2: Edit and Convert Your Files
- Step 3: Upload the Videos to Instagram
Step 1: Download Videos from YouTube
In order to post a YouTube video to Instagram, you have to download the video you want to share, adjust it to the platform’s video requirements, and then finally upload it.
1. Downloading YouTube video to your PC
There are several different methods you can use to download a YouTube video to your computer, but using websites such as ClipConverter , Zamzar , or OnlineVideoConverter that enable you to download and convert video files is probably one of the easiest and fastest ways to achieve your goal.
- Choose one of the reliable online downloaders mentioned above and simply paste the video’s URL into its input box.
- Figure out which video format you’d like to convert the YouTube video and MP4 file extension is advised because it is most frequently used for Instagram videos.
- The online converter will either enable you to download the files directly to a hard drive on your PC or to send the links of the converted video files to your email.
2. Downloading YouTube videos to a mobile device
Download instructions for iPhones: The process of downloading videos from YouTube with iPhones or iPads is not very simple because you’ll have to go through several stages of the process before you can view the video file from your device.
- After installing the Documents 6 app, launch the app and use its web browser, an icon that looks like a compass, to navigate to theSavefrom.net .
- You can copy the link of the YouTube video, by launching the YouTube app on your iPhone, accessing the Share option, and selecting the Copy Link feature. Alternatively, you can launch the Safari web browser on your device, play the YouTube video you’d like to download, and copy the URL of the video you’d like to download.
- After you’ve copied the YouTube link, head back to the Documents 6 app and paste the link to the input box on the Savefrom.net window, you’ve already opened in the Documents 6 app. You’ll be able to choose from several size options, like 1280p or 480p.
- Select the file size that best suits the purpose for which you are going to use the video, and then proceed to tap on the Download option, and select Done to start downloading the YouTube video file.
- Go to the Downloads menu in the Documents 6 app and locate the video you just downloaded. Tap and hold the file, and drag it upward until you spot the folder list. Access the Photos app from the folder list and place the file in the Camera Roll.
Learn more tips and tricks about How to download YouTube videos on iPhone
Download instructions for Android devices: YouTube video files are much easier to download from Android Smartphones since you can find a number of different apps that will enable you to download the files you want to share directly from YouTube.
However, Google, like Apple isn’t too keen on apps that let you download YouTube videos freely, which is the reason why you’ll have to spend some time looking for the right app.
If you have trouble finding the right app for the job on Google Play you can try getting TubeMate from the app’s official website.
More tips and tricks about Downloading YouTube videos on Android phones
Step 2: Edit and Convert the Files to Meet Instagram’s Video Requirements
As you probably know the maximum duration of a video on Instagram is limited to one minute, which means that you’ll probably have to cut the parts of a YouTube video you downloaded in order to be able to post it on your Instagram account.
This process will be much easier if you use a PC or Mac-based video editing software like Wondershare Filmora because changing the video file extension or the duration of a video will be much quicker and simpler than if you opt to use some of thevideo editing apps that are available for iPhones and Android Smartphones.

However, if you would still like to go through the process of editing the YouTube video you’d like to post on Instagram directly from the Smartphone you can use apps like iMovie , Videoshop, orFilmora to change the duration of the video.
Altering the file extension of a video to commonly used mp4 files and the size of 1080 pixels X 566 pixels may prove to be a little more complicated than it would be with a PC or Mac-based video editing software.
Step 3: Upload the video to Instagram
Here comes the final step of posting YouTube videos to Instagram. The file you want to post should be already placed on your Camera Roll, so you just need to launch the Instagram app from your Android phone or iPhone and click on the + icon located on the app’s toolbar at the bottom of the screen.
Select the Library option, and tap on the video file you’d like to post to your Instagram account. Click on Next and proceed to add a description to your post as well as tags that will enable your video to reach a wider audience.
It is important to keep in mind that posting YouTube videos you don’t have permission to use on your Instagram account is not advisable because copyright infringement is a serious offense that may result in severe penalties.
Being unique and producing the content specifically made for Instagram is a much better and much safer option at this point until Instagram decides to make sharing YouTube videos a simple process that requires you to just click on the Share button below the YouTube video you want to share to Instagram.
The video tutorial below shows you how to edit and export video clips for sharing on Instagram. Watch it and learn how to add extra filters and visual effects to make it more fantastic.
You may also like: 8 Best Facebook Scheduler>>
15 Best Facebook Analyzers>>
How to Create Square Videos for Facebook >>
Facebook Insights: How to Use it for Beginners >>
Instagram Video Dimensions & Story Size [The Ultimate Guide for Perfect Posts] >>
Shanoon Cox
Shanoon Cox is a writer and a lover of all things video.
Follow @Shanoon Cox
Shanoon Cox
Mar 27, 2024• Proven solutions
Have you ever noticed the trend that people spend more time on video content instead of reading blogs? Actually, the diversity of the videos on YouTube makes it a valuable resource for highly skilled professionals as well as an endless source of entertainment.
That is why sharing a YouTube video to Instagram can be beneficial for entrepreneurs, businessmen, and people who are looking for a way to amuse their Instagram followers. In this article, we are going to take you through all the steps you’ll need to take in order to post a video from YouTube to Instagram.
The video tutorial below will show you the detailed information abouthow to Edit videos for Instagram with Filmora on your computer since it allows you to edit both 1:1, 9:16, 16:9, and 4:3 aspect ratio videos.
Download Mac Version ](https://tools.techidaily.com/wondershare/filmora/download/ )
How to Post a YouTube Video on Instagram
Sharing YouTube videos to Instagram directly isn’t possible yet, and for that reason, if you want to feature YouTube videos on your Instagram you’ll have to go through a three-step process. However, this process is fairly simple, although some methods may be more complex than others and require you to spend a considerable amount of time on downloading and editing the files you want to share on your Instagram account.
- Step 1: Download Videos from YouTube
- Step 2: Edit and Convert Your Files
- Step 3: Upload the Videos to Instagram
Step 1: Download Videos from YouTube
In order to post a YouTube video to Instagram, you have to download the video you want to share, adjust it to the platform’s video requirements, and then finally upload it.
1. Downloading YouTube video to your PC
There are several different methods you can use to download a YouTube video to your computer, but using websites such as ClipConverter , Zamzar , or OnlineVideoConverter that enable you to download and convert video files is probably one of the easiest and fastest ways to achieve your goal.
- Choose one of the reliable online downloaders mentioned above and simply paste the video’s URL into its input box.
- Figure out which video format you’d like to convert the YouTube video and MP4 file extension is advised because it is most frequently used for Instagram videos.
- The online converter will either enable you to download the files directly to a hard drive on your PC or to send the links of the converted video files to your email.
2. Downloading YouTube videos to a mobile device
Download instructions for iPhones: The process of downloading videos from YouTube with iPhones or iPads is not very simple because you’ll have to go through several stages of the process before you can view the video file from your device.
- After installing the Documents 6 app, launch the app and use its web browser, an icon that looks like a compass, to navigate to theSavefrom.net .
- You can copy the link of the YouTube video, by launching the YouTube app on your iPhone, accessing the Share option, and selecting the Copy Link feature. Alternatively, you can launch the Safari web browser on your device, play the YouTube video you’d like to download, and copy the URL of the video you’d like to download.
- After you’ve copied the YouTube link, head back to the Documents 6 app and paste the link to the input box on the Savefrom.net window, you’ve already opened in the Documents 6 app. You’ll be able to choose from several size options, like 1280p or 480p.
- Select the file size that best suits the purpose for which you are going to use the video, and then proceed to tap on the Download option, and select Done to start downloading the YouTube video file.
- Go to the Downloads menu in the Documents 6 app and locate the video you just downloaded. Tap and hold the file, and drag it upward until you spot the folder list. Access the Photos app from the folder list and place the file in the Camera Roll.
Learn more tips and tricks about How to download YouTube videos on iPhone
Download instructions for Android devices: YouTube video files are much easier to download from Android Smartphones since you can find a number of different apps that will enable you to download the files you want to share directly from YouTube.
However, Google, like Apple isn’t too keen on apps that let you download YouTube videos freely, which is the reason why you’ll have to spend some time looking for the right app.
If you have trouble finding the right app for the job on Google Play you can try getting TubeMate from the app’s official website.
More tips and tricks about Downloading YouTube videos on Android phones
Step 2: Edit and Convert the Files to Meet Instagram’s Video Requirements
As you probably know the maximum duration of a video on Instagram is limited to one minute, which means that you’ll probably have to cut the parts of a YouTube video you downloaded in order to be able to post it on your Instagram account.
This process will be much easier if you use a PC or Mac-based video editing software like Wondershare Filmora because changing the video file extension or the duration of a video will be much quicker and simpler than if you opt to use some of thevideo editing apps that are available for iPhones and Android Smartphones.
However, if you would still like to go through the process of editing the YouTube video you’d like to post on Instagram directly from the Smartphone you can use apps like iMovie , Videoshop, orFilmora to change the duration of the video.
Altering the file extension of a video to commonly used mp4 files and the size of 1080 pixels X 566 pixels may prove to be a little more complicated than it would be with a PC or Mac-based video editing software.
Step 3: Upload the video to Instagram
Here comes the final step of posting YouTube videos to Instagram. The file you want to post should be already placed on your Camera Roll, so you just need to launch the Instagram app from your Android phone or iPhone and click on the + icon located on the app’s toolbar at the bottom of the screen.
Select the Library option, and tap on the video file you’d like to post to your Instagram account. Click on Next and proceed to add a description to your post as well as tags that will enable your video to reach a wider audience.
It is important to keep in mind that posting YouTube videos you don’t have permission to use on your Instagram account is not advisable because copyright infringement is a serious offense that may result in severe penalties.
Being unique and producing the content specifically made for Instagram is a much better and much safer option at this point until Instagram decides to make sharing YouTube videos a simple process that requires you to just click on the Share button below the YouTube video you want to share to Instagram.
The video tutorial below shows you how to edit and export video clips for sharing on Instagram. Watch it and learn how to add extra filters and visual effects to make it more fantastic.
You may also like: 8 Best Facebook Scheduler>>
15 Best Facebook Analyzers>>
How to Create Square Videos for Facebook >>
Facebook Insights: How to Use it for Beginners >>
Instagram Video Dimensions & Story Size [The Ultimate Guide for Perfect Posts] >>
Shanoon Cox
Shanoon Cox is a writer and a lover of all things video.
Follow @Shanoon Cox
Premier Alternatives to YouTube’s Top 5 Video Editors
Best 5 YouTube Video Editor Alternatives

Richard Bennett
Mar 27, 2024• Proven solutions
YouTube provides a free tool that allows the user to create a video by putting together various clips and then publish them with a single click. All the uploads that the user has made before are added to the YouTube Video Editor. The tool allows the user to combine, trim, add music and customize. However, its functionality is limited to just that, and that’s why people are looking for the best YouTube Video Editor alternative.
Note: From 20th September 2017 users will no longer be able to use the complimentary editing suite. Check the best YouTube video editor alternatives from this complete guide.
Some of the cons of the YouTube Video Editor are:
- It doesn’t have advanced editing features.
- It requires Internet connection to use.
- It is slow.
- Users can only edit videos that were already uploaded to their YouTube account.
Best 5 YouTube Video Editor Alternatives
The good news is that there are good offline YouTube Video Editor Alternatives out there. Below are the top five:
1. Wondershare Filmora
Wondershare Filmora is one of the most popular YouTube Video Editor alternatives. It is available for both Windows and Mac platforms. The best thing about Wondershare Filmora is that it is easy to use. And at the same time, it has more features than the YouTube Video Editor.
Download Mac Version ](https://tools.techidaily.com/wondershare/filmora/download/ )
Some of the key features of Filmora include:
- Allows the user to crop, cut, and combine video clips in just a few clicks
- Supports the addition of multiple audio and video tracks
- Choose from various overlays and filters
- Supports face off, green screen, and PIP effects
- Supports a wide range of video formats that include MP4, AVI, MOV, MKV, and WMV, just to name a few
- Burn video to DVD, or instantly upload it to YouTube, Facebook, and Vimeo
2. WeVideo
Another YouTube Video Editor alternative is WeVideo . It is a cloud-based video editor that allows the user to do the editing in any web browser. Just like the YouTube editing tool, the user must first upload the clips online in order to edit them, and create a video.
Pros:
One advantage of WeVideo is that it allows different users to collaborate in making a single video. A user can invite others to upload clips to the project, or even make different videos based on the same clips.
Cons:
And because it is a cloud-based video editor, it requires an Internet connection in order to get the clips and do the editing. Not only that, the videos must be uploaded before they can be used. And there are cases in which a five-minute video will require hours of raw footages. Users with slow upload speeds will take hours before they can start editing. And users of the free version can only export 480p videos that have a watermark. Users need to pay for the full version.
3. Loopster
Loopster is a mobile app that can be a YouTube Video Editor alternative. It is available for both the Android and iOS platforms. The tool allows the user to rotate, splice and add sound effects, zoom, and crop videos directly from one’s smartphone. It comes with advanced features that include title screens, slow motion effect, and bubble text. The app also lets the user record video and sounds directly. After editing the video, the app can export it directly to Facebook or YouTube.
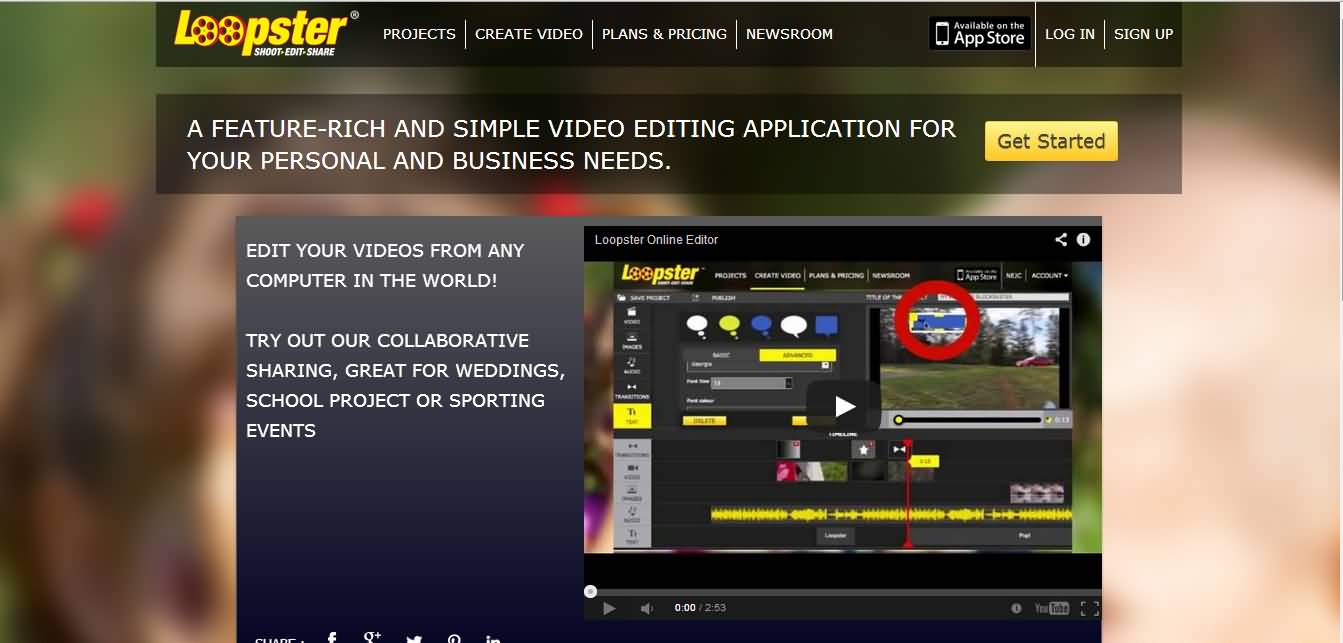
Pros:
It does what it was designed to do when it is working. It is user-friendly and comes with a tutorial. It also works even if the smartphone is not connected to the internet. Editing is done offline. And best of all, it is free.
Cons:
One the downside, it looks like the developer is no longer updating the app. Some users experience crashes and other bugs. There are also some users that stated that the slow motion effect didn’t work for them, which is why they can’t recommend it as a YouTube Video Editor alternative.
4. Tubechop
Tubechop allows the user to trim a video from any YouTube video and then share it. There are some videos that are just too long, and you want to cut it to the section that you find interesting.
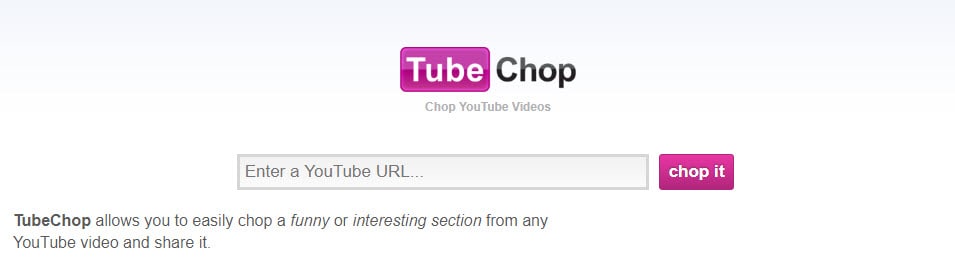
Pros:
Just like the other YouTube Video Editor alternatives, Tubechop is easy to use. The user just needs to enter the YouTube URL of the video, and then indicate the section that’s interesting, and that’s it.
Cons:
However, Tubechop doesn’t allow users to download the resulting video. Tubechop only provides a link that allows users to view the chopped video. And when the original video is deleted, the chopped version will also be deleted.
5. Viddyad
Viddyad is another cloud-based platform that lets users convert images, music, clips, and animated effects into a video. It is said to be the best way to create video ads for businesses.

Pros:
There are several templates to choose from. Users can create video ads by adding videos, text, voiceover, special effects, music, and images. The platform also provides access to millions of image and video stock.
Cons:
Viddyad is a YouTube Video Editor alternative for businesses that want to create video ads. It might not be the right video editor for individuals who just want to create and share their personal videos.
Richard Bennett
Richard Bennett is a writer and a lover of all things video.
Follow @Richard Bennett
Richard Bennett
Mar 27, 2024• Proven solutions
YouTube provides a free tool that allows the user to create a video by putting together various clips and then publish them with a single click. All the uploads that the user has made before are added to the YouTube Video Editor. The tool allows the user to combine, trim, add music and customize. However, its functionality is limited to just that, and that’s why people are looking for the best YouTube Video Editor alternative.
Note: From 20th September 2017 users will no longer be able to use the complimentary editing suite. Check the best YouTube video editor alternatives from this complete guide.
Some of the cons of the YouTube Video Editor are:
- It doesn’t have advanced editing features.
- It requires Internet connection to use.
- It is slow.
- Users can only edit videos that were already uploaded to their YouTube account.
Best 5 YouTube Video Editor Alternatives
The good news is that there are good offline YouTube Video Editor Alternatives out there. Below are the top five:
1. Wondershare Filmora
Wondershare Filmora is one of the most popular YouTube Video Editor alternatives. It is available for both Windows and Mac platforms. The best thing about Wondershare Filmora is that it is easy to use. And at the same time, it has more features than the YouTube Video Editor.
Download Mac Version ](https://tools.techidaily.com/wondershare/filmora/download/ )
Some of the key features of Filmora include:
- Allows the user to crop, cut, and combine video clips in just a few clicks
- Supports the addition of multiple audio and video tracks
- Choose from various overlays and filters
- Supports face off, green screen, and PIP effects
- Supports a wide range of video formats that include MP4, AVI, MOV, MKV, and WMV, just to name a few
- Burn video to DVD, or instantly upload it to YouTube, Facebook, and Vimeo
2. WeVideo
Another YouTube Video Editor alternative is WeVideo . It is a cloud-based video editor that allows the user to do the editing in any web browser. Just like the YouTube editing tool, the user must first upload the clips online in order to edit them, and create a video.
Pros:
One advantage of WeVideo is that it allows different users to collaborate in making a single video. A user can invite others to upload clips to the project, or even make different videos based on the same clips.
Cons:
And because it is a cloud-based video editor, it requires an Internet connection in order to get the clips and do the editing. Not only that, the videos must be uploaded before they can be used. And there are cases in which a five-minute video will require hours of raw footages. Users with slow upload speeds will take hours before they can start editing. And users of the free version can only export 480p videos that have a watermark. Users need to pay for the full version.
3. Loopster
Loopster is a mobile app that can be a YouTube Video Editor alternative. It is available for both the Android and iOS platforms. The tool allows the user to rotate, splice and add sound effects, zoom, and crop videos directly from one’s smartphone. It comes with advanced features that include title screens, slow motion effect, and bubble text. The app also lets the user record video and sounds directly. After editing the video, the app can export it directly to Facebook or YouTube.
Pros:
It does what it was designed to do when it is working. It is user-friendly and comes with a tutorial. It also works even if the smartphone is not connected to the internet. Editing is done offline. And best of all, it is free.
Cons:
One the downside, it looks like the developer is no longer updating the app. Some users experience crashes and other bugs. There are also some users that stated that the slow motion effect didn’t work for them, which is why they can’t recommend it as a YouTube Video Editor alternative.
4. Tubechop
Tubechop allows the user to trim a video from any YouTube video and then share it. There are some videos that are just too long, and you want to cut it to the section that you find interesting.
Pros:
Just like the other YouTube Video Editor alternatives, Tubechop is easy to use. The user just needs to enter the YouTube URL of the video, and then indicate the section that’s interesting, and that’s it.
Cons:
However, Tubechop doesn’t allow users to download the resulting video. Tubechop only provides a link that allows users to view the chopped video. And when the original video is deleted, the chopped version will also be deleted.
5. Viddyad
Viddyad is another cloud-based platform that lets users convert images, music, clips, and animated effects into a video. It is said to be the best way to create video ads for businesses.
Pros:
There are several templates to choose from. Users can create video ads by adding videos, text, voiceover, special effects, music, and images. The platform also provides access to millions of image and video stock.
Cons:
Viddyad is a YouTube Video Editor alternative for businesses that want to create video ads. It might not be the right video editor for individuals who just want to create and share their personal videos.
Richard Bennett
Richard Bennett is a writer and a lover of all things video.
Follow @Richard Bennett
Also read:
- In 2024, Disable Non-Specific YouTube Video Alerts
- In 2024, Beyond the Watch Party A Comparison of 27 Video Streaming Alternatives
- The Smartest Approach to Launching Your YouTube Business/Personal Brand From Phone
- 2024 Approved A Step-by-Step Guide to Dominating the YouTube Viewership Game
- Zero-Price Path to Enhanced YouTube Video Analysis
- Smart Money-Making on Youtube Shorts
- 2024 Approved Discovering Your Curated Collection of Tunes in YouTube's Depths
- 2024 Approved A Comprehensive Tutorial for Transforming Vids Into Dollars
- Relaxation Station YouTube's Finest Film Series, All-Access
- Effortlessly Create Engaging YouTube Thumbnails for 2024
- IOS Video Mastery A Step-by-Step Guide for YouTube Uploaders
- In 2024, Channel Your Creativity Crafting YouTube Trailers in Filmora
- [Updated] Comic Corner Best Funny Content on the Planet Web
- [New] Essential Steps for Seamlessly Clearing YouTube Feedback
- Direct Transfer of YouTube Playlists - Stepwise Processing
- Expert Recommendations for Efficient GIF Makers
- In 2024, Breaking Even on YouTube Key View Figures Explored
- Earnings Analysis YouTube Views vs Financial Gain for 2024
- In 2024, Essential Anime Youtube Channels for Daily Happiness
- Explore 10 Premier Historical Youtube Networks
- Enhance Video Visibility with Effective Thumbnail Scaling
- Wizards' Cuts Ultimate Video Editor Tricks
- Crafting Captivating Openings Top Free Intra Makers List for 2024
- In 2024, Dancefloor Dynamics Top-Rated DJ Video Selections
- 2024 Approved Chilly Ambiance Ideal Winter BGs for Videos
- Gastronomy Goals Attractive Food Network Branding Ideas
- Deciphering the Best YouTube Video Trackers for Success for 2024
- [Updated] Engaging Vlogger Subjects Each Day
- [New] Aesthetic Alchemy Transforming YouTube Videos
- Elevate Your Channels - Templates at No Charge for 2024
- Cementing Your Place in YouTube by Mastering Creative Studio Techniques for 2024
- [New] Elevate Your Content YouTube's Keyword Strategies Exposed
- Seamless Video Production YouTube Studio's Cutting-Edge Editing
- Warriors of Cyberspace Top Ten Female YouTubers
- Mirrorless Evolution Overshadowing Traditional DSLR Videography
- Elevating Your Content with Engaging Haul Creation for 2024
- [Updated] 7 Star-Rated Apps for Effortless YouTube LIVE Broadcast From iPhone and Android
- Achieve More Engagement on YouTube Learn the Best Thumbnail Size
- [New] Disrupt Bot Patterns for Natural Viewer Increase
- Content Creation Conundrums Understanding the Differences Between IGTV and YouTube for 2024
- Revolutionize Video Closings - Exclusive End Screen Templates
- Step-by-Step Guide YouTube Videos in AVI Format
- Does Recording Your Viewed YouTube Content Violate Laws?
- Charting New Territory Strategies for YouTube Keyword Research for 2024
- 2024 Approved Do YouTubers Get Paid Monthly?
- In 2024, Engage More, Dissuade Less Top 6 Ways to Increase Watch Time and Stayers
- The Editor's Journey Creating Impactful Videos for YouTube with PC
- [Updated] Boosting Your Presence on FB with Virality Techniques
- New 2024 Approved Chromebook Video Editing Essentials 10 Free Tools You Need
- [Updated] In 2024, The Cutting-Edge Creatives on Your Feed
- The Easiest Methods to Hard Reset Vivo S17e | Dr.fone
- Updated In 2024, Explore the Leading Websites for Legal Montage Music Downloads
- Instagram Content Top 15 Download Apps Unveiled for 2024
- [New] In 2024, Recording Excellence A Compreranimal Guide to Faces on Film
- New Premium Pop Harmony Selections The Best Sounds for Video Scenes
- [New] Ethical Buyers of TikTok Popularity Boost for 2024
- New 2024 Approved Virtualdub vs Other Video Editors A 2023 Comparison and Review
- In 2024, Fixing Foneazy MockGo Not Working On ZTE Axon 40 Lite | Dr.fone
- 3 Solutions to Find Your Vivo Y56 5G Current Location of a Mobile Number | Dr.fone
- [New] 2024 Approved How to Proficiently Use Twitter Archives?
- Updated 2024 Approved The Latest 100+ Best TikTok Captions to Improve Your Next Post
- In 2024, Top IMEI Unlokers for iPhone 13 Pro and Android Phones
- 9 Best Phone Monitoring Apps for Tecno Pop 8 | Dr.fone
- 8 Quick Fixes Unfortunately, Snapchat has Stopped on Lava Blaze 2 | Dr.fone
- Updated Refine Your Footage How to Stabilize Videos Like a Pro in AE for 2024
- [New] In 2024, Cutting-Edge TikTok Techniques for New Video Borders
- [Updated] Invisible Viewers of Fb Episodes for 2024
- In 2024, The Magnificent Art of Pokemon Go Streaming On Vivo Y27s? | Dr.fone
- [New] HighSpeed SlowScene Videograph for 2024
- Elevate Your WhatsApp Status Game with These Top Apps
- 2024 Approved Elevate Presentations Harnessing Aiseesoft Screen Recordings
- [Updated] Convert Facebook HD Videos to MP4, 720P/1080p – No Cost Required
- Harvest Hangouts The Most Friendly Farm Gaming Experiences
- [Updated] 2024 Approved Expert Tips for Automated Google Meet Timings
- New Guide How To Check iCloud Activation Lock Status On Your iPhone 13 Pro
- Wondering the Best Alternative to Hola On Motorola Defy 2? Here Is the Answer | Dr.fone
- [Updated] 2024 Approved 4 Ways to Go Live on TikTok on Computer
- 5 Easy Ways to Copy Contacts from Realme Note 50 to iPhone 14 and 15 | Dr.fone
- Elevate Your Social Media Presence H-Videos Reimagined for IGTV for 2024
- Claim the Crown Strategies for Staff-Picked Videos at Vimeo for 2024
- In 2024, Best Bargain 4K Camera Deals
- [New] Unparalleled Screenshot Solutions for Discord Users
- Updated Maximizing Mobile Real Estate Aspect Ratio Design Tips for 2024
- [New] Navigating Rights in Instagram Songs for 2024
- How to Change Your Status on Discord?
- 2024 Approved Bokeh Beauty Tips for Engaging Instagram Stories
- [New] Smart Shoppers' Guide to Top Gaming Mice & Keyboards for 2024
- Title: Efficiently Uploading YouTube Vids to Insta Profile for 2024
- Author: Steven
- Created at : 2024-05-25 19:11:46
- Updated at : 2024-05-26 19:11:46
- Link: https://youtube-clips.techidaily.com/efficiently-uploading-youtube-vids-to-insta-profile-for-2024/
- License: This work is licensed under CC BY-NC-SA 4.0.
