
:max_bytes(150000):strip_icc()/duckduckgo-5c172c22536e4ed6954e1c21b59978fc.jpg)
Effective YouTube Card Usage Guide
Effective YouTube Card Usage Guide
How to Use YouTube Cards and Annotations?

Richard Bennett
Oct 26, 2023• Proven solutions
YouTube Annotations and Cards are both tools for linking viewers to your other videos or to off-YouTube webpages. Two of the major differences between them are:
Annotations are not clickable on mobile devices.
You cannot choose the size or positioning of Cards.
This article will teach you about both Cards and Annotations and discuss the best uses for each of them.
Part 1: Annotations
Annotations are messages that float overtop of your videos in the YouTube player. Usually, annotations are clickable and take users to other content created by you.
Section 1: Types of Annotations
There are five types of YouTube annotations:
Notes are colored boxes placed over the top of your videos.
Speech Bubbles look like dialogue boxes in a comic strip. They have tails that you can adjust so it looks like one of the people in your video is saying what is written in the annotation.
Spotlights have a subtle border and are completely clear inside. Your text only appears when a viewer’s cursor hovers over top of these annotations.
Labels are like spotlights except that viewers do not have to hover over them for your text to be visible.
Any of these annotations can be used to link viewers to other videos, or as subscribe links. You can also add a simple Title to your video through the Annotations menu.
Section 2: How to Use Annotations
*Note: the above video mentions Pause annotations, which are no longer available.
Here are two of the best uses for annotations:
Clickable End Cards / Outros
One of the best ways you can use spotlight annotations is to create clickable end cards for your videos.
When your video finishes playing the YouTube player will display a selection of suggested videos that might direct viewers away from your channel. You can keep more of these viewers watching your content by creating your own ‘suggested videos’ card and putting it at the end of your videos.
Put thumbnails of two or three of your other videos on your end card, or use ‘picture-in-picture’ to actually imbed footage from them. Then, after you upload your video, go in and place clickable spotlight annotations over top of your video thumbnails.
This is one use for annotations that cannot be duplicated with cards.
Promoting Your Videos
You should not wait until the end of your video to start linking viewers to other content. Many viewers will click away before they see your end card because your video is not exactly what they were looking for. By placing note or speech bubble annotations occasionally throughout your videos you can catch some of these people before they click off of your channel.
This works especially well if you link to videos on similar subjects to the one you are annotating.
Instead of just linking to another video of yours, try to link to that video on a playlist. Once a viewer is on a playlist your videos will auto-play after each other, which is good for both your view count and watch time.
You can also use the newer YouTube Cards for this, but Annotations might still be a better choice because viewers only need to click once vs. twice for Cards.
Try both and see which performs best for your channel. It might be in your best interest to keep on using both as they target different audiences – Cards are clickable on mobile devices, for example, but Annotations are not.
Part 2: YouTube Cards
YouTube Cards are newer than annotations and a lot of people believe they will one day replace Annotations. While there are benefits to Cards – like embedding images to represent your links – you cannot choose the shape, size, or placement of them. This means they have limited uses.
When viewers click on a Card they are shown additional information and a thumbnail representing the page they will be taken to if they choose to click again. This extra step could be either help viewers decide to click your links or give them a second chance to decide they would rather not.
Section 1: When to Use Cards
A linked Annotation is simply a call to action viewers can click on. A Card is a call to action as well, but instead of taking the viewer directly to where its link leads when it is clicked a Card opens up into a larger version of itself with a thumbnail image.
Crowdfunding pages (Patreon is a great choice for video creators), charity fundraising pages, and merchandise stores are all examples of links that benefit from the format of YouTube Cards.
When you link a viewer to a non-YouTube page you break up their session time, which negatively impacts your watch time and SEO ranking. You want to make sure that the viewers you are directing away from YouTube are the ones most likely to convert after they leave. By ‘convert’ we mean to contribute to your Patreon campaign, donate to the charity you are promoting, or buy some of your merchandise.
Giving viewers more information and a thumbnail through a Card can help ensure the most interested viewers are the ones clicking your links.
If you want to find a video editing solution that empowers your imagination and creativity yet takes less effort, please try this robust and user-friendly video editing software Filmora, which is equipped with its own footage stock Wondershare Filmstock and will definitely enhance your productivity and helps you to make money by making videos much easier.


Richard Bennett
Richard Bennett is a writer and a lover of all things video.
Follow @Richard Bennett
Richard Bennett
Oct 26, 2023• Proven solutions
YouTube Annotations and Cards are both tools for linking viewers to your other videos or to off-YouTube webpages. Two of the major differences between them are:
Annotations are not clickable on mobile devices.
You cannot choose the size or positioning of Cards.
This article will teach you about both Cards and Annotations and discuss the best uses for each of them.
Part 1: Annotations
Annotations are messages that float overtop of your videos in the YouTube player. Usually, annotations are clickable and take users to other content created by you.
Section 1: Types of Annotations
There are five types of YouTube annotations:
Notes are colored boxes placed over the top of your videos.
Speech Bubbles look like dialogue boxes in a comic strip. They have tails that you can adjust so it looks like one of the people in your video is saying what is written in the annotation.
Spotlights have a subtle border and are completely clear inside. Your text only appears when a viewer’s cursor hovers over top of these annotations.
Labels are like spotlights except that viewers do not have to hover over them for your text to be visible.
Any of these annotations can be used to link viewers to other videos, or as subscribe links. You can also add a simple Title to your video through the Annotations menu.
Section 2: How to Use Annotations
*Note: the above video mentions Pause annotations, which are no longer available.
Here are two of the best uses for annotations:
Clickable End Cards / Outros
One of the best ways you can use spotlight annotations is to create clickable end cards for your videos.
When your video finishes playing the YouTube player will display a selection of suggested videos that might direct viewers away from your channel. You can keep more of these viewers watching your content by creating your own ‘suggested videos’ card and putting it at the end of your videos.
Put thumbnails of two or three of your other videos on your end card, or use ‘picture-in-picture’ to actually imbed footage from them. Then, after you upload your video, go in and place clickable spotlight annotations over top of your video thumbnails.
This is one use for annotations that cannot be duplicated with cards.
Promoting Your Videos
You should not wait until the end of your video to start linking viewers to other content. Many viewers will click away before they see your end card because your video is not exactly what they were looking for. By placing note or speech bubble annotations occasionally throughout your videos you can catch some of these people before they click off of your channel.
This works especially well if you link to videos on similar subjects to the one you are annotating.
Instead of just linking to another video of yours, try to link to that video on a playlist. Once a viewer is on a playlist your videos will auto-play after each other, which is good for both your view count and watch time.
You can also use the newer YouTube Cards for this, but Annotations might still be a better choice because viewers only need to click once vs. twice for Cards.
Try both and see which performs best for your channel. It might be in your best interest to keep on using both as they target different audiences – Cards are clickable on mobile devices, for example, but Annotations are not.
Part 2: YouTube Cards
YouTube Cards are newer than annotations and a lot of people believe they will one day replace Annotations. While there are benefits to Cards – like embedding images to represent your links – you cannot choose the shape, size, or placement of them. This means they have limited uses.
When viewers click on a Card they are shown additional information and a thumbnail representing the page they will be taken to if they choose to click again. This extra step could be either help viewers decide to click your links or give them a second chance to decide they would rather not.
Section 1: When to Use Cards
A linked Annotation is simply a call to action viewers can click on. A Card is a call to action as well, but instead of taking the viewer directly to where its link leads when it is clicked a Card opens up into a larger version of itself with a thumbnail image.
Crowdfunding pages (Patreon is a great choice for video creators), charity fundraising pages, and merchandise stores are all examples of links that benefit from the format of YouTube Cards.
When you link a viewer to a non-YouTube page you break up their session time, which negatively impacts your watch time and SEO ranking. You want to make sure that the viewers you are directing away from YouTube are the ones most likely to convert after they leave. By ‘convert’ we mean to contribute to your Patreon campaign, donate to the charity you are promoting, or buy some of your merchandise.
Giving viewers more information and a thumbnail through a Card can help ensure the most interested viewers are the ones clicking your links.
If you want to find a video editing solution that empowers your imagination and creativity yet takes less effort, please try this robust and user-friendly video editing software Filmora, which is equipped with its own footage stock Wondershare Filmstock and will definitely enhance your productivity and helps you to make money by making videos much easier.
Richard Bennett
Richard Bennett is a writer and a lover of all things video.
Follow @Richard Bennett
Turning Time on Its Ear: Unique Approaches to Reversed YouTube Content
How to Reverse YouTube Video in Creative Ways
Richard Bennett
Mar 27, 2024• Proven solutions
It could be a film or a reversed meme, a boomerang video on Instagram, or a rewind effect in a playback action. The reversing results make the clip compelling and creative. At present, many video creators find YouTube as a suitable platform for such rewind effects as it has millions of diverse genre video clips. Although the mechanism behind such an act can be quite confusing, it is no more if you get to know how to reverse YouTube videos at ease. Yes, video reversers are created and developed for such a purpose, and you can read below to understand how to play YouTube videos backward.
- Part 1: How to Reverse YouTube Video in the Quickest Way?
- Part 2: Reverse YouTube Videos More Creatively
How to Reverse YouTube Video in the Quickest Way?
Let’s take a look at some online tools that can play YouTube videos backward.
2. Kapwing
Kapwing is an online video reverser shared stage where you can create images, videos, and GIFs to share on social media. It suits to be perfect for any content that performs varied tasks with video editor tools like trimmer, resizes, studio, subtitles, and audio addition. Kapwing is an all-in-one workspace asset that is a single secure place to place over your backup safely facilitated with cross-device capability. To whatever field of interest you might belong to from a school student, professional, media, or a design team, Kapwing is the right platform ease-to-use.
3. Clideo
Like Kapwing, Clideo is an online video reverser tool that does multiple tasking like video converter, file converter, audio joiner, video maker, and a slideshow maker. We have taken up Clideo in our list as it follows a simple interface and comes up with useful tools of the loop, stops motion, and meme required in the present video creation industry. Supporting all video formats like MPG, MOV, and VOB, Clideo is a fast editor with a high-level of data protection. Developed by Softo Ltd., Clideo has got more than 4.1M users and had made up 25M videos.
Now, let’s take a simple guide to reverse a YouTube video quickly with Clideo.
Step 1: Enter the link, https://clideo.com/reverse-video on your desired web browser like Chrome or Firefox.
Now add the files from your desktop or your smartphone from the “Choose File” option or the drop-down choose your convenient option like Dropbox, Google Drive, or YouTube URL to reverse the video.
Source: clideo.com
Step 2: Paste the YouTube link on the search box, and the video will process.
Step 3: The YouTube video will now start to play from backward where you can reverse the speed by changing the levels from 0.5X to 2X.
You can make a preview by playing or pausing the timeline of the YouTube video.
Once satisfied, hit the “Reverse” button on the right corner of the screen.
Step 4: Before downloading the revered Youtube video, you can play it once, and upon satisfaction, tap the “Download” button else you can go on with the “Back to edit” option.
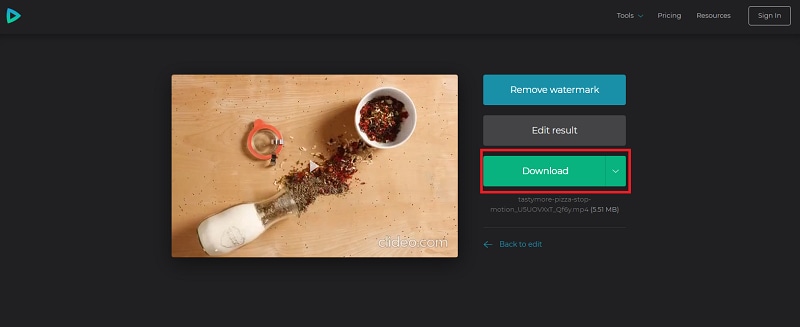
You can quickly reverse a YouTube video with Clideo in just three steps, along with a watermark removal facility.
Reverse YouTube Videos More Creatively
Want to embed more creativity in your YouTube video before reversing them? Get to know some of the YouTube video downloaders from this session.
Keepvid
Keepvid is an online video downloader that converts a video directly to MP4 & MP3. It allows you to download videos from 100+ sites, including YouTube, Facebook, Twitter, Vevo, Reddit, and BBC, irrespective of their video metadata. With Keepvid, you can listen to YouTube videos offline, save YouTube videos directly to MP3, download YouTube playlists everywhere, and anytime with the web-based lite-weight app.
YTD Video downloader
YTD video downloader has been in the market for years as a popular video downloader & converter. It is free to download software, allowing you to download video, audio, and playlist that could play offline. YTD video downloaded has gathered more than 200M users globally, supporting overall popular sites like Bing, Vimeo, TikTok, Yahoo, and Metacafe. With YTD, you can download the unlimited playlist and HD videos of 1080P at ultra-fast speed.
Want to reverse your YouTube video creatively and stunningly?
Wondershare Filmora is all you need, a complete pack of video/editing toolkit developed for the inspired that helps discover storytelling. It is a platform where you can create without limits, give life to your videos, craft fun in every clip, go beyond boundaries with endless possibilities, and make your epic story or adventure outstanding in the crowd. Filmora has a free version that allows you to access all the beautiful features like video reverse, ripple edit, trim, rotate, flip, zoom, edit, and audio ducking.
3.1How to Reverse Videos in Filmora?
Now that you have come to know about Filmora Wondershare, the best video reverser from the list, let’s directly jump over to a manual on how to reverse a YouTube video at ease.
Note: Before starting up, download and install the free version of Filmora on the device from https://filmora.wondershare.com/ .
Step 1: Open Filmora and click the “File” menu. Choose “New Project” from the drop-down.
Step 2: To import the YouTube video to the workplace, choose the “Import Media” option from the file menu.
From the drop-down, you can import files or folders at your convenience.
Step 3: Once the video is loaded on the media library, right-click on the track timeline and select the “Speed and Duration” option.
Tick the “Reverse Speed” checkbox and then hit the “OK” button.
Step 4: Doing so will play the YouTube video backward, and you can see the progress on the preview window.
Step 5: You can perfect your creation with filters or effects offered with Filmora.
Once done, click the “Export” option that will allow you to save the file in your destined format and export it.
You can upload the reversed YouTube video directly to your YouTube account or other social media apps with Filmora.
3.2Tips for Customizing the Reversing Videos
1. Add filters & effects: Adding filters and effects like Mosaic and Amaro can uplift your reversed video and make them attractive. Filmora has 200+ filters, utilities, overlays, and LUT.
2. Render/Perfect the audio: Audio is the backbone of the video that provokes and makes the creation sound perfect and outstanding. 76 in-built audio tracks included in Filmora consisting of tender, sentimental, folk, rock, and young categories.
3. Transform your video with transitions: While various ordinary videos crowd the Internet, make yours unique by transforming them with 3D effects and a slideshow. Filmora comes with 233 transitions like 3D, warp, dissolve & ripple slideshow, lifestyle, and still a lot more.
4. Perform video editing tricks: While trim, cut & merge, crop & flip, resize, delete, and watermark are pre-defined and traditional editing tools, why don’t you try something new like creating freeze frames, accessing sample colors, and zoom in/out timeline where Filmora has a toolkit more than what you expect.
Conclusion
Thanks to the technology behind video reversers like Clideo and Kapwing that does a great job of reversing the YouTube video online quickly. The alternatives YTD downloader and Keepvid also facilitates downloading your favorite videos from 100+ video streaming sites. However, if you aspire to become a creative & professional video creator expert in the field, Filmora from Wondershare stands as the best choice for all. Lastly, also note the tips discussed, and use Filmora today for a brighter career tomorrow.
Richard Bennett
Richard Bennett is a writer and a lover of all things video.
Follow @Richard Bennett
Richard Bennett
Mar 27, 2024• Proven solutions
It could be a film or a reversed meme, a boomerang video on Instagram, or a rewind effect in a playback action. The reversing results make the clip compelling and creative. At present, many video creators find YouTube as a suitable platform for such rewind effects as it has millions of diverse genre video clips. Although the mechanism behind such an act can be quite confusing, it is no more if you get to know how to reverse YouTube videos at ease. Yes, video reversers are created and developed for such a purpose, and you can read below to understand how to play YouTube videos backward.
- Part 1: How to Reverse YouTube Video in the Quickest Way?
- Part 2: Reverse YouTube Videos More Creatively
How to Reverse YouTube Video in the Quickest Way?
Let’s take a look at some online tools that can play YouTube videos backward.
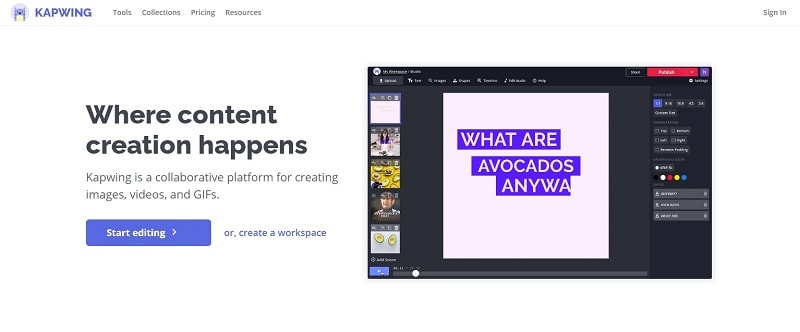
2. Kapwing
Kapwing is an online video reverser shared stage where you can create images, videos, and GIFs to share on social media. It suits to be perfect for any content that performs varied tasks with video editor tools like trimmer, resizes, studio, subtitles, and audio addition. Kapwing is an all-in-one workspace asset that is a single secure place to place over your backup safely facilitated with cross-device capability. To whatever field of interest you might belong to from a school student, professional, media, or a design team, Kapwing is the right platform ease-to-use.
3. Clideo
Like Kapwing, Clideo is an online video reverser tool that does multiple tasking like video converter, file converter, audio joiner, video maker, and a slideshow maker. We have taken up Clideo in our list as it follows a simple interface and comes up with useful tools of the loop, stops motion, and meme required in the present video creation industry. Supporting all video formats like MPG, MOV, and VOB, Clideo is a fast editor with a high-level of data protection. Developed by Softo Ltd., Clideo has got more than 4.1M users and had made up 25M videos.
Now, let’s take a simple guide to reverse a YouTube video quickly with Clideo.
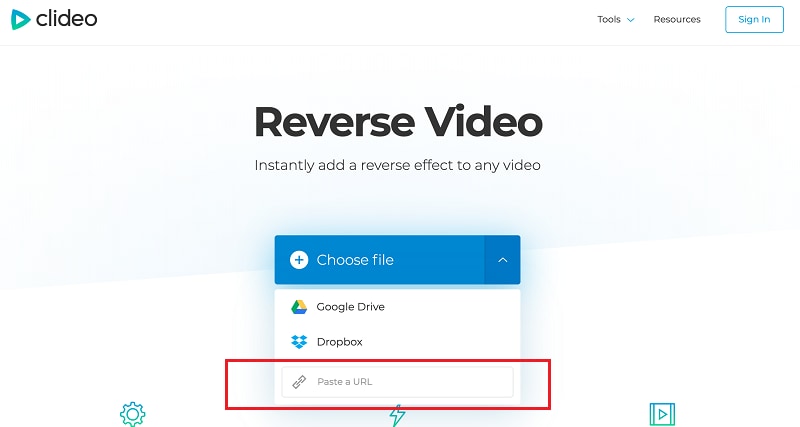
Step 1: Enter the link, https://clideo.com/reverse-video on your desired web browser like Chrome or Firefox.
Now add the files from your desktop or your smartphone from the “Choose File” option or the drop-down choose your convenient option like Dropbox, Google Drive, or YouTube URL to reverse the video.
Source: clideo.com
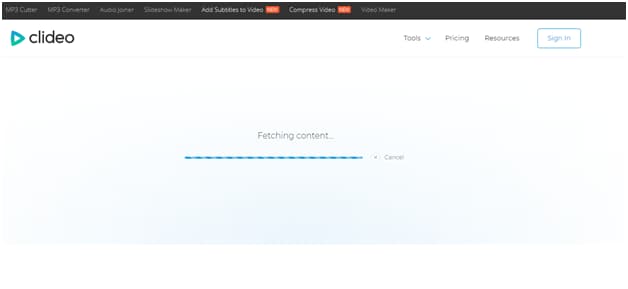
Step 2: Paste the YouTube link on the search box, and the video will process.
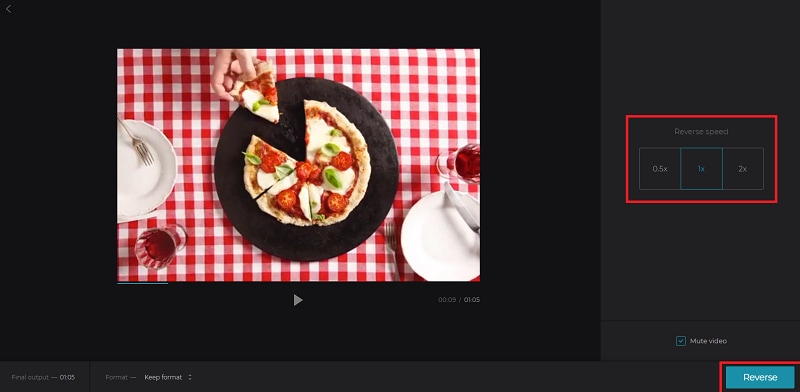
Step 3: The YouTube video will now start to play from backward where you can reverse the speed by changing the levels from 0.5X to 2X.
You can make a preview by playing or pausing the timeline of the YouTube video.
Once satisfied, hit the “Reverse” button on the right corner of the screen.
Step 4: Before downloading the revered Youtube video, you can play it once, and upon satisfaction, tap the “Download” button else you can go on with the “Back to edit” option.
You can quickly reverse a YouTube video with Clideo in just three steps, along with a watermark removal facility.
Reverse YouTube Videos More Creatively
Want to embed more creativity in your YouTube video before reversing them? Get to know some of the YouTube video downloaders from this session.
Keepvid
Keepvid is an online video downloader that converts a video directly to MP4 & MP3. It allows you to download videos from 100+ sites, including YouTube, Facebook, Twitter, Vevo, Reddit, and BBC, irrespective of their video metadata. With Keepvid, you can listen to YouTube videos offline, save YouTube videos directly to MP3, download YouTube playlists everywhere, and anytime with the web-based lite-weight app.
YTD Video downloader
YTD video downloader has been in the market for years as a popular video downloader & converter. It is free to download software, allowing you to download video, audio, and playlist that could play offline. YTD video downloaded has gathered more than 200M users globally, supporting overall popular sites like Bing, Vimeo, TikTok, Yahoo, and Metacafe. With YTD, you can download the unlimited playlist and HD videos of 1080P at ultra-fast speed.
Want to reverse your YouTube video creatively and stunningly?
Wondershare Filmora is all you need, a complete pack of video/editing toolkit developed for the inspired that helps discover storytelling. It is a platform where you can create without limits, give life to your videos, craft fun in every clip, go beyond boundaries with endless possibilities, and make your epic story or adventure outstanding in the crowd. Filmora has a free version that allows you to access all the beautiful features like video reverse, ripple edit, trim, rotate, flip, zoom, edit, and audio ducking.
3.1How to Reverse Videos in Filmora?
Now that you have come to know about Filmora Wondershare, the best video reverser from the list, let’s directly jump over to a manual on how to reverse a YouTube video at ease.
Note: Before starting up, download and install the free version of Filmora on the device from https://filmora.wondershare.com/ .
Step 1: Open Filmora and click the “File” menu. Choose “New Project” from the drop-down.
Step 2: To import the YouTube video to the workplace, choose the “Import Media” option from the file menu.
From the drop-down, you can import files or folders at your convenience.
Step 3: Once the video is loaded on the media library, right-click on the track timeline and select the “Speed and Duration” option.
Tick the “Reverse Speed” checkbox and then hit the “OK” button.
Step 4: Doing so will play the YouTube video backward, and you can see the progress on the preview window.
Step 5: You can perfect your creation with filters or effects offered with Filmora.
Once done, click the “Export” option that will allow you to save the file in your destined format and export it.
You can upload the reversed YouTube video directly to your YouTube account or other social media apps with Filmora.
3.2Tips for Customizing the Reversing Videos
1. Add filters & effects: Adding filters and effects like Mosaic and Amaro can uplift your reversed video and make them attractive. Filmora has 200+ filters, utilities, overlays, and LUT.
2. Render/Perfect the audio: Audio is the backbone of the video that provokes and makes the creation sound perfect and outstanding. 76 in-built audio tracks included in Filmora consisting of tender, sentimental, folk, rock, and young categories.
3. Transform your video with transitions: While various ordinary videos crowd the Internet, make yours unique by transforming them with 3D effects and a slideshow. Filmora comes with 233 transitions like 3D, warp, dissolve & ripple slideshow, lifestyle, and still a lot more.
4. Perform video editing tricks: While trim, cut & merge, crop & flip, resize, delete, and watermark are pre-defined and traditional editing tools, why don’t you try something new like creating freeze frames, accessing sample colors, and zoom in/out timeline where Filmora has a toolkit more than what you expect.
Conclusion
Thanks to the technology behind video reversers like Clideo and Kapwing that does a great job of reversing the YouTube video online quickly. The alternatives YTD downloader and Keepvid also facilitates downloading your favorite videos from 100+ video streaming sites. However, if you aspire to become a creative & professional video creator expert in the field, Filmora from Wondershare stands as the best choice for all. Lastly, also note the tips discussed, and use Filmora today for a brighter career tomorrow.
Richard Bennett
Richard Bennett is a writer and a lover of all things video.
Follow @Richard Bennett
Richard Bennett
Mar 27, 2024• Proven solutions
It could be a film or a reversed meme, a boomerang video on Instagram, or a rewind effect in a playback action. The reversing results make the clip compelling and creative. At present, many video creators find YouTube as a suitable platform for such rewind effects as it has millions of diverse genre video clips. Although the mechanism behind such an act can be quite confusing, it is no more if you get to know how to reverse YouTube videos at ease. Yes, video reversers are created and developed for such a purpose, and you can read below to understand how to play YouTube videos backward.
- Part 1: How to Reverse YouTube Video in the Quickest Way?
- Part 2: Reverse YouTube Videos More Creatively
How to Reverse YouTube Video in the Quickest Way?
Let’s take a look at some online tools that can play YouTube videos backward.
2. Kapwing
Kapwing is an online video reverser shared stage where you can create images, videos, and GIFs to share on social media. It suits to be perfect for any content that performs varied tasks with video editor tools like trimmer, resizes, studio, subtitles, and audio addition. Kapwing is an all-in-one workspace asset that is a single secure place to place over your backup safely facilitated with cross-device capability. To whatever field of interest you might belong to from a school student, professional, media, or a design team, Kapwing is the right platform ease-to-use.
3. Clideo
Like Kapwing, Clideo is an online video reverser tool that does multiple tasking like video converter, file converter, audio joiner, video maker, and a slideshow maker. We have taken up Clideo in our list as it follows a simple interface and comes up with useful tools of the loop, stops motion, and meme required in the present video creation industry. Supporting all video formats like MPG, MOV, and VOB, Clideo is a fast editor with a high-level of data protection. Developed by Softo Ltd., Clideo has got more than 4.1M users and had made up 25M videos.
Now, let’s take a simple guide to reverse a YouTube video quickly with Clideo.
Step 1: Enter the link, https://clideo.com/reverse-video on your desired web browser like Chrome or Firefox.
Now add the files from your desktop or your smartphone from the “Choose File” option or the drop-down choose your convenient option like Dropbox, Google Drive, or YouTube URL to reverse the video.
Source: clideo.com
Step 2: Paste the YouTube link on the search box, and the video will process.
Step 3: The YouTube video will now start to play from backward where you can reverse the speed by changing the levels from 0.5X to 2X.
You can make a preview by playing or pausing the timeline of the YouTube video.
Once satisfied, hit the “Reverse” button on the right corner of the screen.
Step 4: Before downloading the revered Youtube video, you can play it once, and upon satisfaction, tap the “Download” button else you can go on with the “Back to edit” option.
You can quickly reverse a YouTube video with Clideo in just three steps, along with a watermark removal facility.
Reverse YouTube Videos More Creatively
Want to embed more creativity in your YouTube video before reversing them? Get to know some of the YouTube video downloaders from this session.
Keepvid
Keepvid is an online video downloader that converts a video directly to MP4 & MP3. It allows you to download videos from 100+ sites, including YouTube, Facebook, Twitter, Vevo, Reddit, and BBC, irrespective of their video metadata. With Keepvid, you can listen to YouTube videos offline, save YouTube videos directly to MP3, download YouTube playlists everywhere, and anytime with the web-based lite-weight app.
YTD Video downloader
YTD video downloader has been in the market for years as a popular video downloader & converter. It is free to download software, allowing you to download video, audio, and playlist that could play offline. YTD video downloaded has gathered more than 200M users globally, supporting overall popular sites like Bing, Vimeo, TikTok, Yahoo, and Metacafe. With YTD, you can download the unlimited playlist and HD videos of 1080P at ultra-fast speed.
Want to reverse your YouTube video creatively and stunningly?
Wondershare Filmora is all you need, a complete pack of video/editing toolkit developed for the inspired that helps discover storytelling. It is a platform where you can create without limits, give life to your videos, craft fun in every clip, go beyond boundaries with endless possibilities, and make your epic story or adventure outstanding in the crowd. Filmora has a free version that allows you to access all the beautiful features like video reverse, ripple edit, trim, rotate, flip, zoom, edit, and audio ducking.
3.1How to Reverse Videos in Filmora?
Now that you have come to know about Filmora Wondershare, the best video reverser from the list, let’s directly jump over to a manual on how to reverse a YouTube video at ease.
Note: Before starting up, download and install the free version of Filmora on the device from https://filmora.wondershare.com/ .
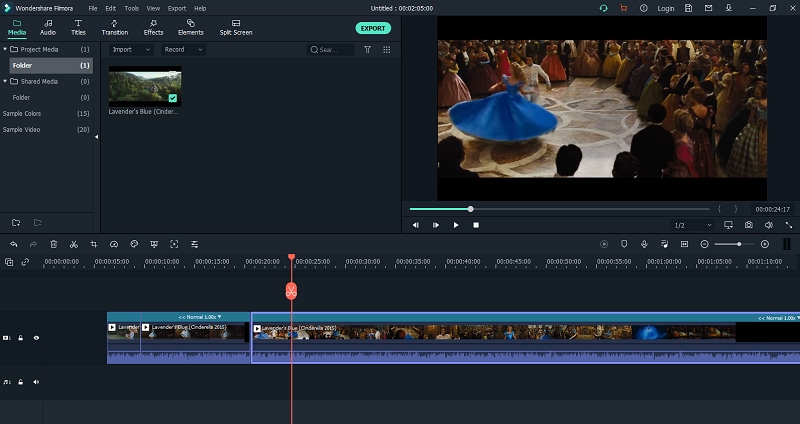
Step 1: Open Filmora and click the “File” menu. Choose “New Project” from the drop-down.
Step 2: To import the YouTube video to the workplace, choose the “Import Media” option from the file menu.
From the drop-down, you can import files or folders at your convenience.
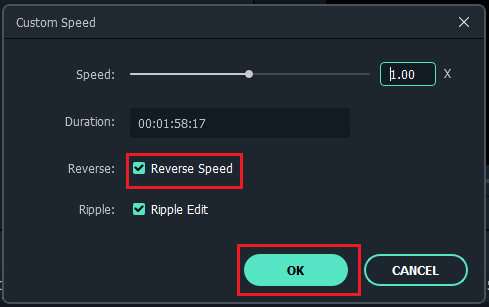
Step 3: Once the video is loaded on the media library, right-click on the track timeline and select the “Speed and Duration” option.
Tick the “Reverse Speed” checkbox and then hit the “OK” button.
Step 4: Doing so will play the YouTube video backward, and you can see the progress on the preview window.
Step 5: You can perfect your creation with filters or effects offered with Filmora.
Once done, click the “Export” option that will allow you to save the file in your destined format and export it.
You can upload the reversed YouTube video directly to your YouTube account or other social media apps with Filmora.
3.2Tips for Customizing the Reversing Videos
1. Add filters & effects: Adding filters and effects like Mosaic and Amaro can uplift your reversed video and make them attractive. Filmora has 200+ filters, utilities, overlays, and LUT.
2. Render/Perfect the audio: Audio is the backbone of the video that provokes and makes the creation sound perfect and outstanding. 76 in-built audio tracks included in Filmora consisting of tender, sentimental, folk, rock, and young categories.
3. Transform your video with transitions: While various ordinary videos crowd the Internet, make yours unique by transforming them with 3D effects and a slideshow. Filmora comes with 233 transitions like 3D, warp, dissolve & ripple slideshow, lifestyle, and still a lot more.
4. Perform video editing tricks: While trim, cut & merge, crop & flip, resize, delete, and watermark are pre-defined and traditional editing tools, why don’t you try something new like creating freeze frames, accessing sample colors, and zoom in/out timeline where Filmora has a toolkit more than what you expect.
Conclusion
Thanks to the technology behind video reversers like Clideo and Kapwing that does a great job of reversing the YouTube video online quickly. The alternatives YTD downloader and Keepvid also facilitates downloading your favorite videos from 100+ video streaming sites. However, if you aspire to become a creative & professional video creator expert in the field, Filmora from Wondershare stands as the best choice for all. Lastly, also note the tips discussed, and use Filmora today for a brighter career tomorrow.
Richard Bennett
Richard Bennett is a writer and a lover of all things video.
Follow @Richard Bennett
Richard Bennett
Mar 27, 2024• Proven solutions
It could be a film or a reversed meme, a boomerang video on Instagram, or a rewind effect in a playback action. The reversing results make the clip compelling and creative. At present, many video creators find YouTube as a suitable platform for such rewind effects as it has millions of diverse genre video clips. Although the mechanism behind such an act can be quite confusing, it is no more if you get to know how to reverse YouTube videos at ease. Yes, video reversers are created and developed for such a purpose, and you can read below to understand how to play YouTube videos backward.
- Part 1: How to Reverse YouTube Video in the Quickest Way?
- Part 2: Reverse YouTube Videos More Creatively
How to Reverse YouTube Video in the Quickest Way?
Let’s take a look at some online tools that can play YouTube videos backward.
2. Kapwing
Kapwing is an online video reverser shared stage where you can create images, videos, and GIFs to share on social media. It suits to be perfect for any content that performs varied tasks with video editor tools like trimmer, resizes, studio, subtitles, and audio addition. Kapwing is an all-in-one workspace asset that is a single secure place to place over your backup safely facilitated with cross-device capability. To whatever field of interest you might belong to from a school student, professional, media, or a design team, Kapwing is the right platform ease-to-use.
3. Clideo
Like Kapwing, Clideo is an online video reverser tool that does multiple tasking like video converter, file converter, audio joiner, video maker, and a slideshow maker. We have taken up Clideo in our list as it follows a simple interface and comes up with useful tools of the loop, stops motion, and meme required in the present video creation industry. Supporting all video formats like MPG, MOV, and VOB, Clideo is a fast editor with a high-level of data protection. Developed by Softo Ltd., Clideo has got more than 4.1M users and had made up 25M videos.
Now, let’s take a simple guide to reverse a YouTube video quickly with Clideo.
Step 1: Enter the link, https://clideo.com/reverse-video on your desired web browser like Chrome or Firefox.
Now add the files from your desktop or your smartphone from the “Choose File” option or the drop-down choose your convenient option like Dropbox, Google Drive, or YouTube URL to reverse the video.
Source: clideo.com
Step 2: Paste the YouTube link on the search box, and the video will process.
Step 3: The YouTube video will now start to play from backward where you can reverse the speed by changing the levels from 0.5X to 2X.
You can make a preview by playing or pausing the timeline of the YouTube video.
Once satisfied, hit the “Reverse” button on the right corner of the screen.
Step 4: Before downloading the revered Youtube video, you can play it once, and upon satisfaction, tap the “Download” button else you can go on with the “Back to edit” option.
You can quickly reverse a YouTube video with Clideo in just three steps, along with a watermark removal facility.
Reverse YouTube Videos More Creatively
Want to embed more creativity in your YouTube video before reversing them? Get to know some of the YouTube video downloaders from this session.
Keepvid
Keepvid is an online video downloader that converts a video directly to MP4 & MP3. It allows you to download videos from 100+ sites, including YouTube, Facebook, Twitter, Vevo, Reddit, and BBC, irrespective of their video metadata. With Keepvid, you can listen to YouTube videos offline, save YouTube videos directly to MP3, download YouTube playlists everywhere, and anytime with the web-based lite-weight app.
YTD Video downloader
YTD video downloader has been in the market for years as a popular video downloader & converter. It is free to download software, allowing you to download video, audio, and playlist that could play offline. YTD video downloaded has gathered more than 200M users globally, supporting overall popular sites like Bing, Vimeo, TikTok, Yahoo, and Metacafe. With YTD, you can download the unlimited playlist and HD videos of 1080P at ultra-fast speed.
Want to reverse your YouTube video creatively and stunningly?
Wondershare Filmora is all you need, a complete pack of video/editing toolkit developed for the inspired that helps discover storytelling. It is a platform where you can create without limits, give life to your videos, craft fun in every clip, go beyond boundaries with endless possibilities, and make your epic story or adventure outstanding in the crowd. Filmora has a free version that allows you to access all the beautiful features like video reverse, ripple edit, trim, rotate, flip, zoom, edit, and audio ducking.
3.1How to Reverse Videos in Filmora?
Now that you have come to know about Filmora Wondershare, the best video reverser from the list, let’s directly jump over to a manual on how to reverse a YouTube video at ease.
Note: Before starting up, download and install the free version of Filmora on the device from https://filmora.wondershare.com/ .
Step 1: Open Filmora and click the “File” menu. Choose “New Project” from the drop-down.
Step 2: To import the YouTube video to the workplace, choose the “Import Media” option from the file menu.
From the drop-down, you can import files or folders at your convenience.
Step 3: Once the video is loaded on the media library, right-click on the track timeline and select the “Speed and Duration” option.
Tick the “Reverse Speed” checkbox and then hit the “OK” button.
Step 4: Doing so will play the YouTube video backward, and you can see the progress on the preview window.
Step 5: You can perfect your creation with filters or effects offered with Filmora.
Once done, click the “Export” option that will allow you to save the file in your destined format and export it.
You can upload the reversed YouTube video directly to your YouTube account or other social media apps with Filmora.
3.2Tips for Customizing the Reversing Videos
1. Add filters & effects: Adding filters and effects like Mosaic and Amaro can uplift your reversed video and make them attractive. Filmora has 200+ filters, utilities, overlays, and LUT.
2. Render/Perfect the audio: Audio is the backbone of the video that provokes and makes the creation sound perfect and outstanding. 76 in-built audio tracks included in Filmora consisting of tender, sentimental, folk, rock, and young categories.
3. Transform your video with transitions: While various ordinary videos crowd the Internet, make yours unique by transforming them with 3D effects and a slideshow. Filmora comes with 233 transitions like 3D, warp, dissolve & ripple slideshow, lifestyle, and still a lot more.
4. Perform video editing tricks: While trim, cut & merge, crop & flip, resize, delete, and watermark are pre-defined and traditional editing tools, why don’t you try something new like creating freeze frames, accessing sample colors, and zoom in/out timeline where Filmora has a toolkit more than what you expect.
Conclusion
Thanks to the technology behind video reversers like Clideo and Kapwing that does a great job of reversing the YouTube video online quickly. The alternatives YTD downloader and Keepvid also facilitates downloading your favorite videos from 100+ video streaming sites. However, if you aspire to become a creative & professional video creator expert in the field, Filmora from Wondershare stands as the best choice for all. Lastly, also note the tips discussed, and use Filmora today for a brighter career tomorrow.
Richard Bennett
Richard Bennett is a writer and a lover of all things video.
Follow @Richard Bennett
Also read:
- Cut Down, Catch More The Best URL Reducers for YouTube
- In 2024, Bridal Bliss Filmed Alike High-Quality 8 Marriage Videos Online
- Troubleshooting Your Video Short's Invisible Thumbnail
- 2024 Approved Elevate Your Video Productions 15 Top-Tier Free Music Websites
- Navigate to 8 Online Vaults for Free Green Screen Backdrop Archives
- 2024 Approved Cut to Perfection Premier Android Editing Software
- Breaking the Norm Eye-Catching Talents Amongst Female YouTube Stars for 2024
- [Updated] Aesthetic Alchemy Transforming YouTube Videos
- 2024 Approved Distinguishing Between YouTube Policies and CC Clauses
- Prime 10 Channel List Best History YT Groups
- Mastery in Motion In-Depth Review of Video Editing Software
- Youtube Foundations Building a Brand & Generating Income for Novices
- [Updated] Engage, Entertain, Enlighten Crafting Compelling Live Thumbnails
- Unveiling Video Visionaries Subscriber Top 5
- 2024 Approved Angled Artistry Elevating YouTube Video Editing Skills
- 2024 Approved Beginner's Guide Top 10 YouTube Editing Tricks
- [New] Elite Women Gaming Leaders Top 10 On YT
- Best Practices in Confirming Your YouTube Access for 2024
- 2024 Approved Dive Into the World of Interactive Video Features on YouTube
- [Updated] Contrasting Copyright Clauses in Youtube & the Freedom of CC
- [Updated] Boosting Your YT Subs A Complete Strategy Guide
- Essential Strategies for Uploading Video Quality 4K on YouTub
- Smart Strategies Uploading Videos From iOS Devices
- In 2024, Elevate Your Banner Game Mastering Visual Branding Techniques
- New Splice Video Editor Review Pros, Cons, and Everything in Between
- [Updated] In 2024, Best in Class Chromebook Recording App
- How to Track Infinix Note 30i Location by Number | Dr.fone
- Curating an In-Depth Look at 2023'S Best PC VR Headsets
- 2024 Approved Boost Engagement Posting Twitter Videos on Snapchat
- In 2024, Best 3 Software to Transfer Files to/from Your Vivo S18e via a USB Cable | Dr.fone
- [New] Achieving Comprehensive Participant Visualization on Meet for 2024
- [New] In 2024, Capturing the Spectrum A Broad Overview of Recorders
- [New] Unlocking Potential Secrets to Successful FB Video Ads
- [New] Top iOS PSP Games & Emulators Revealed
- [New] 2024 Approved Windows 11 Game Snapshots Top 5 Capture Strategies
- [New] In 2024, Step by Step to an Elevated TikTok Identity
- In 2024, Step-by-Step Creating Timelapse Videos with iPad
- [Updated] Spotify's #1 Charting Tunes
- Title: Effective YouTube Card Usage Guide
- Author: Steven
- Created at : 2024-05-25 19:11:24
- Updated at : 2024-05-26 19:11:24
- Link: https://youtube-clips.techidaily.com/effective-youtube-card-usage-guide/
- License: This work is licensed under CC BY-NC-SA 4.0.
