
:max_bytes(150000):strip_icc():format(webp)/the-best-halloween-live-wallpaper-for-2019-4691483-019a40e91504436ca9fc9f1944d89c15.jpg)
"Easy Loop Keeping iPhone Videos Running for 2024"
Easy Loop: Keeping iPhone Videos Running
How to Loop A Video on iPhone?

Shanoon Cox
Mar 27, 2024• Proven solutions
For Win 7 or later (64-bit)
 Secure Download
For macOS 10.14 or later
Secure Download
Click here to get Filmora for PC by email
or Try Filmora App for mobile >>>
download filmora app for ios ](https://app.adjust.com/b0k9hf2%5F4bsu85t ) download filmora app for android ](https://app.adjust.com/b0k9hf2%5F4bsu85t )
Nowadays, we can see a trend of people posting looping videos on their social media. These looping videos are fascinating and fun to watch. A loop is a popular element in photography and especially music videos, the idea being that the camera appears to magically repeat itself as many times as there are photos or frames showing the action. They can also simply recur a sequence a certain number of times, then stop.
Now some people don’t know how to make looping videos, so in this article, we are going to discuss how to loop a video on iPhone videos and also how to loop YouTube videos on iPhone. Let’s get started.
- Part 1: Convert iPhone Live Photos to a Loop Video
- Part 2: Repeat Slideshow Video to Loop on iPhone
- Part 3: Loop YouTube Videos On iPhone
- Part 4: Best Apps to Loop Videos on iPhone and iPad
- Part 5: Better Way to Loop and Create Boomerang Videos in Filmora Video Editor
- Part 6: Frequently Asked Questions About Choosing Best Free Video Editor for Windows
Part 1: How to Convert iPhone Live Photos to a Loop Video
A loop video is a short video that plays in repeat/ indefinitely. Loop videos can be created with features on social media apps and third-party apps.
iPhone has a setting that allows you to edit the photos to loop or bounce videos, and it only works with a photo feature called ‘live photo’. The live photo feature records 1.5 seconds moving picture when you click on the shutter button.
The live photo feature can be edited to create a loop video, and you can do that by following these steps:
- Before creating the video, you need to have the live picture saved on your phone.
To do this, capture a live photo by opening your camera app. Then click on the live photo icon, which is located in the upper right corner. And tap on the shutter button.
- Afterward, you locate the live photo you want to convert to a loop video by going to the Photos apps. Then click on Albums > Media Types> Live photos.

- After locating and clicking on the live picture, you will see the Live tab in the upper left corner. Click on the arrow down to view other options, including Loop, Bounce, and long exposure.

- Select the effect you want to create (loop) and save the file. The loop feature plays the video in a one-way order. So, to make it more interesting, you can select the bounce effect, which makes it play back and forth.
- You can share the created loop video with the share icon at the lower-left corner.

Part 2: Repeat Slideshow to Loop Video on iPhone for Free
Slideshow videos are a very fun way to see your content. People gather around a screen to enjoy these beautiful memories of their life. Here is a step-by-step guide on how to loop a slideshow video on iPhone.
- First, go to your gallery and select a video that you want to make a slideshow of.
- Add that video to an album in your gallery under any name.
- Pause the slideshow video, and you will see Options button at the bottom. Click it and then enable the Repeat option.

Now open that video from the album and start playing the video. That video will start playing in a loop until you make it stop.
Part 3: How to Loop YouTube Videos On iPhone?
Now coming to the part that we discussed in the intro, how to loop YouTube videos on iPhone. So here, we will show you a step-by-step guide on how to loop the videos on your iPhone.
- Launch YouTube on your iPhone and log in to your account if you are not already logged in.
- Now go to the “Search” option and lookup for the desired video that you want to loop, and add it to the playlist. There are two ways you can do that. Click and hold on to the video; a small menu will appear, then click on “Add to” to make a playlist. Start the video and then scroll down a bit and on the extreme right side, click on the “Add to” option, and then name the playlist.
- After that, go back to the main menu and on the lower bottom right side of the screen, click on “Library,” and then select the new playlist.
- Start playing the video, and under the video, click on the drop-down button, and on the left side of the drop-down screen, there is a loop button, click on that, and it will start to play the loop infinitely.
Check this ultimate guide to looping YouTube videos to get more ways.
Part 4: Best Apps to Loop Videos on iPhone and iPad
1. Loopideo - Loop Videos

Loopideo is the app on our list that is an answer to how to loop a video on iPhone. It lets you import any video from your play that you want to play in a loop. This is a great tool when it comes to individual and organizational presentations. This powerful app can be very useful for you in many cases.
2. Loop Video – GIF Maker

The second app on our list is Loop Video GIF Maker. It is very fun and easy to use the tool. It allows you to make the videos loop by turning them into GIFs. Loop Video GIF Maker allows you to import any video from your gallery into your app. You can then convert into a looping GIF. You can also choose the playback speed of the GIF after you can export it to the gallery or upload it to your social media directly from the app.
3. Loopideo Pro

Loopideo Pro is a more feature-filled app on the App Store. Loopideo allows you to make the videos loop an unlimited amount of times. You can also choose the formats that you want to convert the looping video into. This app also gives you the option to choose the playback speed and then can also convert it into GIF speed so that you can save it in your gallery.
4. iMovie
iMovie is a more professional app that is available on the list. This app allows you to loop not only the video but also edit the video. This allows you to play the video in a loop for an unlimited amount of time in the built-in player, but when it comes to saving the looping video, it is not possible because you would need an unlimited amount of space to save that video.
5. Looper

The last app on our list is a looper, and it is a very fun and easy-to-use app available on this list. Choose a video from your gallery, Local Videos, or iCloud Drive. Select the times you want the video to repeat and play. You can also export your video in reverse or in GIF format.
Bonus: Record a Looping Video with Boomerang app on iPhone
To make a looping video on your iPhone, you can either download the boomerang app or use the boomerang video on Instagram.
If you are using the Boomerang app, take these steps to make a looping video:
- Launch the Boomerang from Instagram app on your iPhone, if you haven’t installed it already, click on the search bar and type in Boomerang in the App Store.
- The welcome screen will appear, swipe left and tap on Get started. Allow it to access to your camera, location, and photos. After you are done setting up, you can make the videos.
- To make a boomerang video, click and hold the shutter button. Hold the shutter for a few seconds and move the phone across the image or scene.
- A preview of the looping video will appear; tap on Done to save the video. Or click on the X symbol to make a new video.
- You can change the settings to record a selfie video by clicking on the curved arrows symbol. And you can also tap the lightning sign to put the flash on and off.
To make the video with the Instagram Boomerang feature:
- Open the Instagram app, and then swipe left as if to add a story.
- Click on the boomerang icon (infinity symbol). Press and hold the shutter to make the video.
- Preview the video, and you can add texts, songs, markups, and stickers to the video.
- And then click on the arrow-down symbol to save/ download the video. You can share the video to close friends or your story.
Part 5: What If You’d Like to Loop Videos on Computer?
Filmora is one of the most popular video editors among video creators. It gives you high-quality end product, smooth slowing down & speeding up movements, voiceovers on top of music tracks and transitions between audio & video clips. But another amazing benefit of this computer video editor is that you can produce a loop video.
![]()

The Best Video Looper on Windows and Mac
- Loop and repeat videos multiple times
- Copy and paste clips easily
- Built-in plentiful templates and effects
- Export to MP4, MOV, MKV, GIF and multiple formats
For Win 7 or later (64-bit)
Secure Download
For macOS 10.14 or later
Secure Download
Click here to get Filmora for PC by email
or Try Filmora App for mobile >>>
download filmora app for ios ](https://app.adjust.com/b0k9hf2%5F4bsu85t ) download filmora app for android ](https://app.adjust.com/b0k9hf2%5F4bsu85t )
In this part, I’m going to show you how to create looping video in Filmora video editor with the reverse effect. It’s actually really easy and doesn’t require any complicated steps. You’ll be able to create a cool, looping video in no time! So, let’s get started!
Step 1: Import Videos to Filmora video editor
Launch Filmora video editor on your Windows or Mac computer and then make a new project. Import videos as you can see it has been already imported all the media in the media library from your which you want to loop effect, and then drag the video clip to the timeline.

Step 2: Copy and Paste the Video
After drag and drop the video to the timeline, make a copy of it (Ctrl+C). Go to the last frame and paste this video again.

Step 3: Enable Reverse Speed effect
Right click on the pasted video and go to Speed and Duration option in which custom speed dialog box where you can adjust the speed.
In the Custom Speed dialog box you will find the speed, duration, reverse and ripple options. To make a video with loop effects, click the Reverse option to reverse the video play back from end to start frames automatically. Click OK to save the settings.

Now you have got a video with one looping count, if you want the video to loop several times, you can select these 2 clips and paste it based on your needs to get a continuous looping effect.

We hope you found this post helpful in learning how to create looping video with Filmora video editor. This makes them perfect for use as GIFs because they are never ending! What’s more, you can create a looping video in Filmora video editor by adding a sound that plays continuously. If you’re looking to make an endlessly repeating animated image or video clip using just one still image, look no further than Filmora video editor. It’s easy and fun to use.
For Win 7 or later (64-bit)
Secure Download
For macOS 10.14 or later
Secure Download
Click here to get Filmora for PC by email
or Try Filmora App for mobile >>>
download filmora app for ios ](https://app.adjust.com/b0k9hf2%5F4bsu85t ) download filmora app for android ](https://app.adjust.com/b0k9hf2%5F4bsu85t )
Part 6: Frequently Asked Question About Looping Videos on iPhone
- What is a looping video?
It means a video that repeats for a specific number of times or maybe an unlimited amount of times automatically. For example, a GIF.
- Can I loop videos an unlimited number of times?
Yes, it is possible to loop a video an unlimited amount of times. You can learn how to loop a video on iPhone by using the methods that we discussed above in the whole article. It is not possible to save the infinitely looping because it will take an infinite amount of memory.
- Does the view count if I play a YouTube video in a loop?
No, YouTube will not count repeated views if they all come over and over again from the same sources. This is to maintain the overall quality of YouTube and make it scam-free.
For Win 7 or later (64-bit)
Secure Download
For macOS 10.14 or later
Secure Download
Click here to get Filmora for PC by email
or Try Filmora App for mobile >>>
download filmora app for ios ](https://app.adjust.com/b0k9hf2%5F4bsu85t ) download filmora app for android ](https://app.adjust.com/b0k9hf2%5F4bsu85t )
Shanoon Cox
Shanoon Cox is a writer and a lover of all things video.
Follow @Shanoon Cox
Shanoon Cox
Mar 27, 2024• Proven solutions
For Win 7 or later (64-bit)
Secure Download
For macOS 10.14 or later
Secure Download
Click here to get Filmora for PC by email
or Try Filmora App for mobile >>>
download filmora app for ios ](https://app.adjust.com/b0k9hf2%5F4bsu85t ) download filmora app for android ](https://app.adjust.com/b0k9hf2%5F4bsu85t )
Nowadays, we can see a trend of people posting looping videos on their social media. These looping videos are fascinating and fun to watch. A loop is a popular element in photography and especially music videos, the idea being that the camera appears to magically repeat itself as many times as there are photos or frames showing the action. They can also simply recur a sequence a certain number of times, then stop.
Now some people don’t know how to make looping videos, so in this article, we are going to discuss how to loop a video on iPhone videos and also how to loop YouTube videos on iPhone. Let’s get started.
- Part 1: Convert iPhone Live Photos to a Loop Video
- Part 2: Repeat Slideshow Video to Loop on iPhone
- Part 3: Loop YouTube Videos On iPhone
- Part 4: Best Apps to Loop Videos on iPhone and iPad
- Part 5: Better Way to Loop and Create Boomerang Videos in Filmora Video Editor
- Part 6: Frequently Asked Questions About Choosing Best Free Video Editor for Windows
Part 1: How to Convert iPhone Live Photos to a Loop Video
A loop video is a short video that plays in repeat/ indefinitely. Loop videos can be created with features on social media apps and third-party apps.
iPhone has a setting that allows you to edit the photos to loop or bounce videos, and it only works with a photo feature called ‘live photo’. The live photo feature records 1.5 seconds moving picture when you click on the shutter button.
The live photo feature can be edited to create a loop video, and you can do that by following these steps:
- Before creating the video, you need to have the live picture saved on your phone.
To do this, capture a live photo by opening your camera app. Then click on the live photo icon, which is located in the upper right corner. And tap on the shutter button.
- Afterward, you locate the live photo you want to convert to a loop video by going to the Photos apps. Then click on Albums > Media Types> Live photos.
- After locating and clicking on the live picture, you will see the Live tab in the upper left corner. Click on the arrow down to view other options, including Loop, Bounce, and long exposure.
- Select the effect you want to create (loop) and save the file. The loop feature plays the video in a one-way order. So, to make it more interesting, you can select the bounce effect, which makes it play back and forth.
- You can share the created loop video with the share icon at the lower-left corner.
Part 2: Repeat Slideshow to Loop Video on iPhone for Free
Slideshow videos are a very fun way to see your content. People gather around a screen to enjoy these beautiful memories of their life. Here is a step-by-step guide on how to loop a slideshow video on iPhone.
- First, go to your gallery and select a video that you want to make a slideshow of.
- Add that video to an album in your gallery under any name.
- Pause the slideshow video, and you will see Options button at the bottom. Click it and then enable the Repeat option.
Now open that video from the album and start playing the video. That video will start playing in a loop until you make it stop.
Part 3: How to Loop YouTube Videos On iPhone?
Now coming to the part that we discussed in the intro, how to loop YouTube videos on iPhone. So here, we will show you a step-by-step guide on how to loop the videos on your iPhone.
- Launch YouTube on your iPhone and log in to your account if you are not already logged in.
- Now go to the “Search” option and lookup for the desired video that you want to loop, and add it to the playlist. There are two ways you can do that. Click and hold on to the video; a small menu will appear, then click on “Add to” to make a playlist. Start the video and then scroll down a bit and on the extreme right side, click on the “Add to” option, and then name the playlist.
- After that, go back to the main menu and on the lower bottom right side of the screen, click on “Library,” and then select the new playlist.
- Start playing the video, and under the video, click on the drop-down button, and on the left side of the drop-down screen, there is a loop button, click on that, and it will start to play the loop infinitely.
Check this ultimate guide to looping YouTube videos to get more ways.
Part 4: Best Apps to Loop Videos on iPhone and iPad
1. Loopideo - Loop Videos
Loopideo is the app on our list that is an answer to how to loop a video on iPhone. It lets you import any video from your play that you want to play in a loop. This is a great tool when it comes to individual and organizational presentations. This powerful app can be very useful for you in many cases.
2. Loop Video – GIF Maker
The second app on our list is Loop Video GIF Maker. It is very fun and easy to use the tool. It allows you to make the videos loop by turning them into GIFs. Loop Video GIF Maker allows you to import any video from your gallery into your app. You can then convert into a looping GIF. You can also choose the playback speed of the GIF after you can export it to the gallery or upload it to your social media directly from the app.
3. Loopideo Pro
Loopideo Pro is a more feature-filled app on the App Store. Loopideo allows you to make the videos loop an unlimited amount of times. You can also choose the formats that you want to convert the looping video into. This app also gives you the option to choose the playback speed and then can also convert it into GIF speed so that you can save it in your gallery.
4. iMovie
iMovie is a more professional app that is available on the list. This app allows you to loop not only the video but also edit the video. This allows you to play the video in a loop for an unlimited amount of time in the built-in player, but when it comes to saving the looping video, it is not possible because you would need an unlimited amount of space to save that video.
5. Looper
The last app on our list is a looper, and it is a very fun and easy-to-use app available on this list. Choose a video from your gallery, Local Videos, or iCloud Drive. Select the times you want the video to repeat and play. You can also export your video in reverse or in GIF format.
Bonus: Record a Looping Video with Boomerang app on iPhone
To make a looping video on your iPhone, you can either download the boomerang app or use the boomerang video on Instagram.
If you are using the Boomerang app, take these steps to make a looping video:
- Launch the Boomerang from Instagram app on your iPhone, if you haven’t installed it already, click on the search bar and type in Boomerang in the App Store.
- The welcome screen will appear, swipe left and tap on Get started. Allow it to access to your camera, location, and photos. After you are done setting up, you can make the videos.
- To make a boomerang video, click and hold the shutter button. Hold the shutter for a few seconds and move the phone across the image or scene.
- A preview of the looping video will appear; tap on Done to save the video. Or click on the X symbol to make a new video.
- You can change the settings to record a selfie video by clicking on the curved arrows symbol. And you can also tap the lightning sign to put the flash on and off.
To make the video with the Instagram Boomerang feature:
- Open the Instagram app, and then swipe left as if to add a story.
- Click on the boomerang icon (infinity symbol). Press and hold the shutter to make the video.
- Preview the video, and you can add texts, songs, markups, and stickers to the video.
- And then click on the arrow-down symbol to save/ download the video. You can share the video to close friends or your story.
Part 5: What If You’d Like to Loop Videos on Computer?
Filmora is one of the most popular video editors among video creators. It gives you high-quality end product, smooth slowing down & speeding up movements, voiceovers on top of music tracks and transitions between audio & video clips. But another amazing benefit of this computer video editor is that you can produce a loop video.
![]()
The Best Video Looper on Windows and Mac
- Loop and repeat videos multiple times
- Copy and paste clips easily
- Built-in plentiful templates and effects
- Export to MP4, MOV, MKV, GIF and multiple formats
For Win 7 or later (64-bit)
Secure Download
For macOS 10.14 or later
Secure Download
Click here to get Filmora for PC by email
or Try Filmora App for mobile >>>
download filmora app for ios ](https://app.adjust.com/b0k9hf2%5F4bsu85t ) download filmora app for android ](https://app.adjust.com/b0k9hf2%5F4bsu85t )
In this part, I’m going to show you how to create looping video in Filmora video editor with the reverse effect. It’s actually really easy and doesn’t require any complicated steps. You’ll be able to create a cool, looping video in no time! So, let’s get started!
Step 1: Import Videos to Filmora video editor
Launch Filmora video editor on your Windows or Mac computer and then make a new project. Import videos as you can see it has been already imported all the media in the media library from your which you want to loop effect, and then drag the video clip to the timeline.
Step 2: Copy and Paste the Video
After drag and drop the video to the timeline, make a copy of it (Ctrl+C). Go to the last frame and paste this video again.
Step 3: Enable Reverse Speed effect
Right click on the pasted video and go to Speed and Duration option in which custom speed dialog box where you can adjust the speed.
In the Custom Speed dialog box you will find the speed, duration, reverse and ripple options. To make a video with loop effects, click the Reverse option to reverse the video play back from end to start frames automatically. Click OK to save the settings.
Now you have got a video with one looping count, if you want the video to loop several times, you can select these 2 clips and paste it based on your needs to get a continuous looping effect.

We hope you found this post helpful in learning how to create looping video with Filmora video editor. This makes them perfect for use as GIFs because they are never ending! What’s more, you can create a looping video in Filmora video editor by adding a sound that plays continuously. If you’re looking to make an endlessly repeating animated image or video clip using just one still image, look no further than Filmora video editor. It’s easy and fun to use.
For Win 7 or later (64-bit)
Secure Download
For macOS 10.14 or later
Secure Download
Click here to get Filmora for PC by email
or Try Filmora App for mobile >>>
download filmora app for ios ](https://app.adjust.com/b0k9hf2%5F4bsu85t ) download filmora app for android ](https://app.adjust.com/b0k9hf2%5F4bsu85t )
Part 6: Frequently Asked Question About Looping Videos on iPhone
- What is a looping video?
It means a video that repeats for a specific number of times or maybe an unlimited amount of times automatically. For example, a GIF.
- Can I loop videos an unlimited number of times?
Yes, it is possible to loop a video an unlimited amount of times. You can learn how to loop a video on iPhone by using the methods that we discussed above in the whole article. It is not possible to save the infinitely looping because it will take an infinite amount of memory.
- Does the view count if I play a YouTube video in a loop?
No, YouTube will not count repeated views if they all come over and over again from the same sources. This is to maintain the overall quality of YouTube and make it scam-free.
For Win 7 or later (64-bit)
Secure Download
For macOS 10.14 or later
Secure Download
Click here to get Filmora for PC by email
or Try Filmora App for mobile >>>
download filmora app for ios ](https://app.adjust.com/b0k9hf2%5F4bsu85t ) download filmora app for android ](https://app.adjust.com/b0k9hf2%5F4bsu85t )
Shanoon Cox
Shanoon Cox is a writer and a lover of all things video.
Follow @Shanoon Cox
Seek Out Stimulating Subscriber Spaces
Best Free YouTube Comment Finder You Should Try

Richard Bennett
Mar 27, 2024• Proven solutions
Are you trying to make more people notice your YouTube video? According to surveys, YouTube is the second most popular search engine after Google, with more than 100 hours of video uploaded every minute.
For a YouTube influencer, comments play a crucial role, and so is comment modification.
Now, YouTube has not yet come up with a complete comment modification kit. With the existing tools and free comment finder applications combined, it has become easier to remove improper, unprofessional or offensive comments and engage with genuine followers on YouTube.
This thread is a guide for selecting the best YouTube comment finder and a tutorial to use existing YouTube tools to control comments.
Part 1: Best Free YouTube Comments Finder
YouTube Comment Finder is an SEO feature that allows you to look at the best catchphrases for any mainstream YouTube video. Here are some of the best apps that offer the feature.
YT Comment Finder is one of the most user-friendly and straightforward comment finder tools available on the internet. It is free to use and produces incredible results. Let us see how it works.
- To visit the website, click on the link below https://ytcomment.kmcat.uk/
- A search bar will be visible on the homepage. You can enter the title of the video you wish to search comments for, or the URL of the YouTube channel or a video URL, and then click the Search

- In the next step, you will find a complete list of videos with the same title. Choose your video and click on Search This Video**.**
- A new search bar will appear for any comments you choose to look up.

With YTComment, you can see the basic information about the YouTube video or channel, and to find a comment, all you have to do is type in a word you want to search, and you’ll get a list of all the comments relevant to that term or its synonyms as well.
2. YouTube First Comment Finder
Although YouTube has settings to know about the first comment in a video, that is only accessible to the creator and is a big burden process. With YouTube First Comment Finder, you’re just a click away.
- Open the website through this link https://first-comment.com/
- Paste the URL of your YouTube video in the search box. Click on the FIND There you go! The name of the first commenter of the video will come right in front of you, and you can even see what the comment is and the date of commenting.
- Unique Feature: This website comes with a tutorial and you can find out the first comment of the YouTube quickly with it. However, the feature of this tool is limited.
3. Hadzy
It is one of the most user-friendly and ad-free random comment pickers available for YouTube. Hadzy is quick and can handle more comments than other sites. Hadzy YouTube comment picker is popular among most of the Tubers.
- To open Hadzy, click on the link https://hadzy.com/
- Simply copy and paste the YouTube video’s URL into the homepage’s search bar.
- A pop-up will appear with all the details about the video. You just need to click on Load Data.
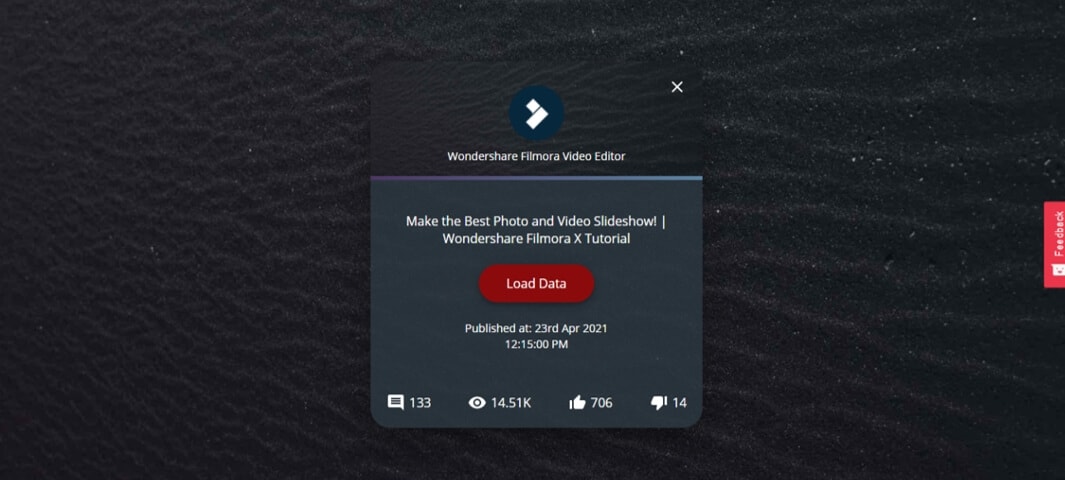
- In the next step, you will be redirected to another pop-up with two buttons- ‘View Comments’ and ‘View Statistics.’ Click on View Comments to check the first, second and all the other comments in ascending order.
- Unique feature 1: By clicking the View Statistics button, you can get a track of the popular words used in the comment section and the top questions asked by your followers.
- Unique feature 2: Along with the comment, details of the user, time of commenting, and many more things can be extracted from Hadzy.
Part 2: How to Find the First Comments You Have Posted on YouTube?
There are times when you regret what you’ve commented on in the past or wish to go back and look up your first message on YouTube. However, it is not always possible to recall the channel or video where you left the comment.
So, is there a way or a tool that can make it just a doodle? Certainly yes. Did you know that you can check for any previous comments you’ve made on YouTube regardless of how old it is?
Everything you have to do now follows the steps below. For the following methods, it is preferable to use a browser rather than the YouTube App.
- Go to the homepage of YouTube. At the top left corner, Click on the three-lined icon. Click on History next. You will be redirected to your account’s history section.
- At the right corner, choose History type as ‘community.’ Below that, click on the ‘Comments’ option. Finally, a new tab would open with all your YouTube comment history.

By these basic steps, enjoy editing or deleting your comments and replies directly on YouTube!
However, you will have to scroll down a long way before you hit the end to see your first comment posted on YouTube.
Part 3: How to Find the Latest Comments you have received on YouTube?
You do not get notifications about comments left on your YouTube videos at times. Mostly, it’s due to your notification preferences. When you enable comment notifications, you’ll be informed of all the latest comments on your videos. And this, in turn, allows you to keep track of your followers and engage with them more easily.
YouTube is a vast platform, and there are quite a few modifications hidden everywhere. To know everything is not always possible. Now that you are here let’s see how to locate the most recent comment you’ve got on YouTube.
Step 1: Enable Comment Notifications
- Open the homepage of YouTube, scroll down to ‘Settings’ and click on it. You will be redirected to the Setting page.
- From the bar in the left corner, select Notifications and scroll down and enable ‘Activity on my Channel.’
These steps are convenient both for pc as well as a mobile app. Just follow three steps, Setting-Notifications-Activity on your Channel.
Step 2: Check the Notification Bar
- Click on the bell icon at the top right corner and there you would receive notifications regarding all the comment activities. Click on the particular notification to go to that comment.
Bonus: How to Change the Comments View Order?
Did you know you can also customize your comment section as per your need? On the watch page for your video, you can rearrange the order of the comments. You may sort the comments by top comments or by date added. It’s just simple steps ahead.
- First of all, you need to sign in to YouTube Studio: http://studio.youtube.com ,
- From the left bar, select Content, click a video’s thumbnail, and click on Show More in video details page.
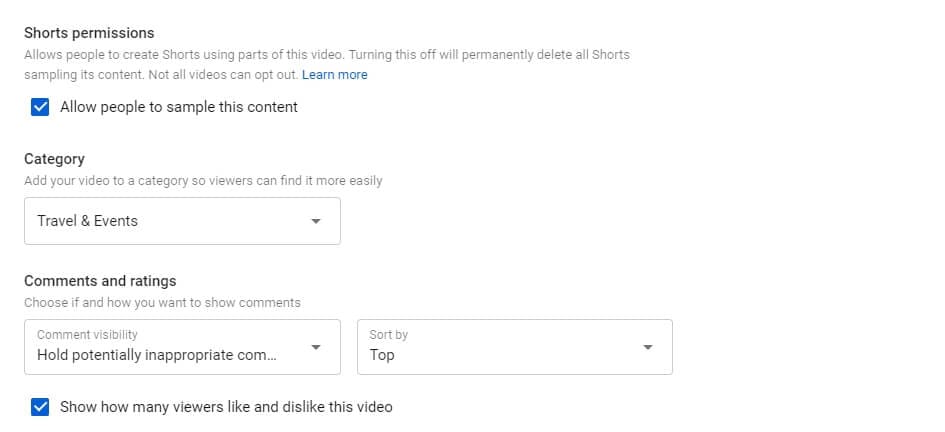
- Under ‘Comments and ratings,’ select Sort by, and then choose between “Top” and “Newest.”
- Save the changes, and you are done!
Conclusion
YouTube comments play a predominant role in handling your business as a YouTuber. It’s reasonable to believe that the search algorithm considers comments on your videos to be a significant indicator of their efficiency, and therefore gives them higher rankings for specific searches.
The higher your video content’s exposure on the internet, the more you’ll be included in YouTube or Google searches.
YouTube Comments Finder helps you keep track of the good and bad comments in your videos and definitely helps improve the SEO of your Channel. Thanks to YouTube’s advanced tools and websites like Hadzy, YouTube comment Finder, YT Comment Finder and YouTube First Comment Finder, managing third-party interaction is a lot simpler today.
Richard Bennett
Richard Bennett is a writer and a lover of all things video.
Follow @Richard Bennett
Richard Bennett
Mar 27, 2024• Proven solutions
Are you trying to make more people notice your YouTube video? According to surveys, YouTube is the second most popular search engine after Google, with more than 100 hours of video uploaded every minute.
For a YouTube influencer, comments play a crucial role, and so is comment modification.
Now, YouTube has not yet come up with a complete comment modification kit. With the existing tools and free comment finder applications combined, it has become easier to remove improper, unprofessional or offensive comments and engage with genuine followers on YouTube.
This thread is a guide for selecting the best YouTube comment finder and a tutorial to use existing YouTube tools to control comments.
Part 1: Best Free YouTube Comments Finder
YouTube Comment Finder is an SEO feature that allows you to look at the best catchphrases for any mainstream YouTube video. Here are some of the best apps that offer the feature.
YT Comment Finder is one of the most user-friendly and straightforward comment finder tools available on the internet. It is free to use and produces incredible results. Let us see how it works.
- To visit the website, click on the link below https://ytcomment.kmcat.uk/
- A search bar will be visible on the homepage. You can enter the title of the video you wish to search comments for, or the URL of the YouTube channel or a video URL, and then click the Search
- In the next step, you will find a complete list of videos with the same title. Choose your video and click on Search This Video**.**
- A new search bar will appear for any comments you choose to look up.
With YTComment, you can see the basic information about the YouTube video or channel, and to find a comment, all you have to do is type in a word you want to search, and you’ll get a list of all the comments relevant to that term or its synonyms as well.
2. YouTube First Comment Finder
Although YouTube has settings to know about the first comment in a video, that is only accessible to the creator and is a big burden process. With YouTube First Comment Finder, you’re just a click away.
- Open the website through this link https://first-comment.com/
- Paste the URL of your YouTube video in the search box. Click on the FIND There you go! The name of the first commenter of the video will come right in front of you, and you can even see what the comment is and the date of commenting.
- Unique Feature: This website comes with a tutorial and you can find out the first comment of the YouTube quickly with it. However, the feature of this tool is limited.
3. Hadzy
It is one of the most user-friendly and ad-free random comment pickers available for YouTube. Hadzy is quick and can handle more comments than other sites. Hadzy YouTube comment picker is popular among most of the Tubers.
- To open Hadzy, click on the link https://hadzy.com/
- Simply copy and paste the YouTube video’s URL into the homepage’s search bar.
- A pop-up will appear with all the details about the video. You just need to click on Load Data.
- In the next step, you will be redirected to another pop-up with two buttons- ‘View Comments’ and ‘View Statistics.’ Click on View Comments to check the first, second and all the other comments in ascending order.
- Unique feature 1: By clicking the View Statistics button, you can get a track of the popular words used in the comment section and the top questions asked by your followers.
- Unique feature 2: Along with the comment, details of the user, time of commenting, and many more things can be extracted from Hadzy.
Part 2: How to Find the First Comments You Have Posted on YouTube?
There are times when you regret what you’ve commented on in the past or wish to go back and look up your first message on YouTube. However, it is not always possible to recall the channel or video where you left the comment.
So, is there a way or a tool that can make it just a doodle? Certainly yes. Did you know that you can check for any previous comments you’ve made on YouTube regardless of how old it is?
Everything you have to do now follows the steps below. For the following methods, it is preferable to use a browser rather than the YouTube App.
- Go to the homepage of YouTube. At the top left corner, Click on the three-lined icon. Click on History next. You will be redirected to your account’s history section.
- At the right corner, choose History type as ‘community.’ Below that, click on the ‘Comments’ option. Finally, a new tab would open with all your YouTube comment history.
By these basic steps, enjoy editing or deleting your comments and replies directly on YouTube!
However, you will have to scroll down a long way before you hit the end to see your first comment posted on YouTube.
Part 3: How to Find the Latest Comments you have received on YouTube?
You do not get notifications about comments left on your YouTube videos at times. Mostly, it’s due to your notification preferences. When you enable comment notifications, you’ll be informed of all the latest comments on your videos. And this, in turn, allows you to keep track of your followers and engage with them more easily.
YouTube is a vast platform, and there are quite a few modifications hidden everywhere. To know everything is not always possible. Now that you are here let’s see how to locate the most recent comment you’ve got on YouTube.
Step 1: Enable Comment Notifications
- Open the homepage of YouTube, scroll down to ‘Settings’ and click on it. You will be redirected to the Setting page.
- From the bar in the left corner, select Notifications and scroll down and enable ‘Activity on my Channel.’
These steps are convenient both for pc as well as a mobile app. Just follow three steps, Setting-Notifications-Activity on your Channel.
Step 2: Check the Notification Bar
- Click on the bell icon at the top right corner and there you would receive notifications regarding all the comment activities. Click on the particular notification to go to that comment.
Bonus: How to Change the Comments View Order?
Did you know you can also customize your comment section as per your need? On the watch page for your video, you can rearrange the order of the comments. You may sort the comments by top comments or by date added. It’s just simple steps ahead.
- First of all, you need to sign in to YouTube Studio: http://studio.youtube.com ,
- From the left bar, select Content, click a video’s thumbnail, and click on Show More in video details page.
- Under ‘Comments and ratings,’ select Sort by, and then choose between “Top” and “Newest.”
- Save the changes, and you are done!
Conclusion
YouTube comments play a predominant role in handling your business as a YouTuber. It’s reasonable to believe that the search algorithm considers comments on your videos to be a significant indicator of their efficiency, and therefore gives them higher rankings for specific searches.
The higher your video content’s exposure on the internet, the more you’ll be included in YouTube or Google searches.
YouTube Comments Finder helps you keep track of the good and bad comments in your videos and definitely helps improve the SEO of your Channel. Thanks to YouTube’s advanced tools and websites like Hadzy, YouTube comment Finder, YT Comment Finder and YouTube First Comment Finder, managing third-party interaction is a lot simpler today.
Richard Bennett
Richard Bennett is a writer and a lover of all things video.
Follow @Richard Bennett
Also read:
- Step-by-Step Guide YouTube Downloads for iOS Devices
- Forging Strong Connections Building YouTube Backlinks Right
- Securely Transforming YouTube Videos Top 3 Reliable Methods
- Boost YouTube Videos' Appeal - 3 Ways to Incorporate Neon Borders for 2024
- Enchantments of the Video Edging Wizardry
- Cutting-Edge Unboxing Strategies to Boost Viewership and Engagement
- YouTube Legends Rapidly Climbing to 100 Million Views in Early 2024
- [Updated] Discovering the Timeline for YouTube Earnings
- Does Recording Your Viewed YouTube Content Violate Laws?
- A Comprehensive Rundown Longer Videos on YouTube
- In 2024, Capitalizing on Hairstyle Demonstrations
- In 2024, Enhance Engagement Mastering Template-Based Video Description Writing
- In 2024, Enhance YouTube Video Speed - Fast Render and Upload Techniques
- The Problem Is Over Your Shorts Show Up Now
- 2024 Approved Chuckling Challenge Brainstroming 7 Humorous YouTube Videos
- [Updated] Dance of Words Crafting Bouncing Text Effects
- Essential Tips on Calculating Your YouTube Traffic & Earnings for 2024
- 4 Effective Methods for Slide Embedding From YouTube
- Maximizing YouTube Engagement with Strategic Hashes
- From Idea to Execution Creating YouTube Trailers in Filmora
- In 2024, Effortless YouTube Content Crafting 10 Basic Video Ideas for All
- [Updated] Boosting Viewership Responsibly Strategies That Work
- 2024 Approved Essential Updates Top 10 YouTube Sources for Journalism
- Unleashing Creativity How to Convert Your Favorite Youtube Videos To Gifs
- In 2024, Boosting Your Content Quality Essential Tips for YouTube Users
- In 2024, Decoding YouTube's Algorithm Behind Prominent Comments
- Anime for Your Life’s Highlights Today's Most Captivating Streaming Channels [2023 New] for 2024
- In 2024, Discover 10 Amazing World Wanderlust Channels
- Pace Upplayers Swift Sharing of YouTube Plays
- 2024 Approved Adopt the Best Practices of Live Streaming with Google Meet Youtube
- In 2024, Avoiding Pitfalls Understanding YouTube Standards
- Step-by-Step Guide to Elevating Video Presence Through Thumbnails
- Quick-Fix Valorant Thumbnails Professionally Done Now!
- [Updated] Breaking Even on YouTube Key View Figures Explored
- [New] Diverse Vlogging Content Suggestions
- In 2024, Design Strategies for Top-Tier Valorant Thumbnails on Social Media
- Beginning the Video Odyssey How to Create an Engaging YouTube Channel for 2024
- Essential Game Streamers for Your Watchlist for 2024
- Maximize Audience Impact - Peak Viewing Hours
- [Updated] Clear, Distraction-Free Viewing of Old YouTube Content
- 2024 Approved Economic Expressiveness in Video Theming Tools
- Scrutinizing the Legalities of Youtube Versus Creative Commons
- How To Open Your iPhone 15 Without a Home Button | Dr.fone
- Updated Best MKV Cutting Tools 2023 Edition (No Cost!) For 2024
- Beats & Cuts Evaluating Professional-Level Audio Editors for Music Production
- [Updated] 2024 Approved Expert Strategies for Home-Based Podcast Recordings
- [New] 2024 Approved Best Free Webcam Recording Apps Unveiled
- In 2024, Ultimate Guide from Vivo V29 FRP Bypass
- Solved Warning Camera Failed on Xiaomi 14 Pro | Dr.fone
- In 2024, iPogo will be the new iSpoofer On Vivo T2x 5G? | Dr.fone
- New Mastering the Art of Audio Replacement A Comprehensive Guide to Video Dubbing with Wondershare Filmora for 2024
- [Updated] In 2024, Make a Buzz on TikTok Thematic Templates for Viral Video Creation
- In 2024, Top 4 Ways to Trace Vivo S17t Location | Dr.fone
- New Top-Tier Audio Purge Software for Videos on All Platforms (New Era of Removal, 2024)
- 2024 Approved Voice Modification & Removal Techniques The Best Software Solutions for Karaoke & Music Production
- How to Reset a Oppo Find X6 Pro Phone that is Locked?
- Top 4 Android System Repair Software for Infinix Note 30 Bricked Devices | Dr.fone
- Enhance TikTok Velocity with These Hacks for 2024
- Assessing FFmpeg’s Prowess in Original Audio Extraction for 2024
- Repair damaged, unplayable video files of Infinix Hot 40i on Windows
- What are Location Permissions Life360 On Vivo G2? | Dr.fone
- 10 Free CCTV Software Options for Your Home or Business for 2024
- Speed Up PC Games The Ultimate Speed Controller Selection
- In 2024, Complete Tutorial to Use VPNa to Fake GPS Location On Apple iPhone 6 | Dr.fone
- Easy Guide to Poco X6 Pro FRP Bypass With Best Methods
- In 2024, Top 11 Free Apps to Check IMEI on OnePlus Nord N30 5G Phones
- 6 Essential Tips to Create Insta's Most Attractive Unboxings for 2024
- Metaverse vs Multiverse What's the Difference?
- In 2024, The Ultimate Guide to Get the Rare Candy on Pokemon Go Fire Red On Vivo Y100 5G | Dr.fone
- 5 Easy Ways to Copy Contacts from Tecno Camon 20 Pro 5G to iPhone 14 and 15 | Dr.fone
- How to Mirror PC Screen to Vivo S18 Pro Phones? | Dr.fone
- In 2024, Navigating Through Top PS2 Games on Android Devices - A Compre Written in English
- Title: "Easy Loop Keeping iPhone Videos Running for 2024"
- Author: Steven
- Created at : 2024-05-25 19:10:25
- Updated at : 2024-05-26 19:10:25
- Link: https://youtube-clips.techidaily.com/easy-loop-keeping-iphone-videos-running-for-2024/
- License: This work is licensed under CC BY-NC-SA 4.0.
