
:max_bytes(150000):strip_icc()/GettyImages-112228848-5825fd543df78c6f6ac39b7b.jpg)
DIY Tips to Cut Unwanted Sounds From Your Videos
DIY Tips to Cut Unwanted Sounds From Your Videos
How To Remove Background Noise from Your Youtube Video

Richard Bennett
Mar 27, 2024• Proven solutions
There are few things more annoying to viewers on YouTube than background noise. It is distracting and makes it difficult to engage with the content of a video. If there is noticeable background noise in a video, even a small noise like the faint hum of a computer fan, then it will increase the chances of viewers clicking away. The good news is that these kinds of noises are fairly easy to get rid of.
In order to remove background noise from your video clip, you will first need to create an MP3 of your audio. Then you will be able to take out the unwanted noise in a free program called Audacity and reintroduce your corrected audio into your Filmora project. This article will walk you through the audio editing process.

How To Remove Background Noise from Your Youtube Video
Background Noise Removal


Open up Filmora, import your clip, and drag it into the timeline. Then, play your clip and listen for background noise. If you hear a noise that you wish to remove move on to the first step of background noise removal .
1. Creating An MP3
If you do not already have it you will need to download VLC Media Player from videoLAN.org. VLC is a completely free media player that can play almost any type of file, is great for converting files, and can even be used as a screen recorder. If you consume a lot of media online then chances are you already have VLC. You could also use is Free Video to MP3 Converter by DVDVideoSoft.
If you choose to use VLC, open it up and select Convert/Save under Media. Select your video in the Open Media window that pops up. After you click Convert/Save you will be able to choose your format, in this case, MP3, under Save as type.
2. Removing Background Noise in Audacity
You can download Audacity for free at Audacityteam.org.
Once you have Audacity use it to open your MP3. Then, find a section of your audio that is silent aside from your background noise and highlight it by clicking and dragging. The idea is to point out to the program exactly what sound is a problem for you so it knows what to remove. If you have trouble finding a significant stretch of background noise that does not also include dialogue remember to record a pause before or after the content of your video next time you film.
With your section of background noise highlighted, go to Effect and then Noise Reduction. Then, click on Get Noise Profile. After that, you will select your entire audio timeline before going back to Noise Reduction under Effect. This time click on OK (the default settings are the best in most situations so you do not need to worry about changing them).
Audacity will remove everything that sounds like the sound profile, eliminating your background noise. Sometimes this method will also dull your dialogue, which can be fixed by selecting your entire track and then going to Effect and Amplify. Increasing amplification will fix any muffling of your audio.
3. Syncing in Filmora
Export your corrected MP3 from Audacity and import it into Filmora. Then, drag it into your music track. Syncing your audio should not be difficult, but you can always use your original audio to help you line it up properly if you need to. Just look for a significant spike in your audio waves in both your MP3 and the original audio and make sure they are right on top of each other.
Then, since you no longer need your original audio, you can delete it. Right-click on your clip and select Audio Detach. Once your audio is on its own track just select it and click delete.
Covering Background Noise
Sometimes background noise is so minor that you do not want to bother going through the process of removing it. In these situations, it may be easier to cover up your background noise than to remove it. This is as simple as dragging a song into the music track of your timeline and adjusting its volume so it is not loud enough to draw attention away from your dialogue. Chances are you want to add background music anyways and this is not even an extra step.
Richard Bennett
Richard Bennett is a writer and a lover of all things video.
Follow @Richard Bennett
Richard Bennett
Mar 27, 2024• Proven solutions
There are few things more annoying to viewers on YouTube than background noise. It is distracting and makes it difficult to engage with the content of a video. If there is noticeable background noise in a video, even a small noise like the faint hum of a computer fan, then it will increase the chances of viewers clicking away. The good news is that these kinds of noises are fairly easy to get rid of.
In order to remove background noise from your video clip, you will first need to create an MP3 of your audio. Then you will be able to take out the unwanted noise in a free program called Audacity and reintroduce your corrected audio into your Filmora project. This article will walk you through the audio editing process.
How To Remove Background Noise from Your Youtube Video
Background Noise Removal
Open up Filmora, import your clip, and drag it into the timeline. Then, play your clip and listen for background noise. If you hear a noise that you wish to remove move on to the first step of background noise removal .
1. Creating An MP3
If you do not already have it you will need to download VLC Media Player from videoLAN.org. VLC is a completely free media player that can play almost any type of file, is great for converting files, and can even be used as a screen recorder. If you consume a lot of media online then chances are you already have VLC. You could also use is Free Video to MP3 Converter by DVDVideoSoft.
If you choose to use VLC, open it up and select Convert/Save under Media. Select your video in the Open Media window that pops up. After you click Convert/Save you will be able to choose your format, in this case, MP3, under Save as type.
2. Removing Background Noise in Audacity
You can download Audacity for free at Audacityteam.org.
Once you have Audacity use it to open your MP3. Then, find a section of your audio that is silent aside from your background noise and highlight it by clicking and dragging. The idea is to point out to the program exactly what sound is a problem for you so it knows what to remove. If you have trouble finding a significant stretch of background noise that does not also include dialogue remember to record a pause before or after the content of your video next time you film.
With your section of background noise highlighted, go to Effect and then Noise Reduction. Then, click on Get Noise Profile. After that, you will select your entire audio timeline before going back to Noise Reduction under Effect. This time click on OK (the default settings are the best in most situations so you do not need to worry about changing them).
Audacity will remove everything that sounds like the sound profile, eliminating your background noise. Sometimes this method will also dull your dialogue, which can be fixed by selecting your entire track and then going to Effect and Amplify. Increasing amplification will fix any muffling of your audio.
3. Syncing in Filmora
Export your corrected MP3 from Audacity and import it into Filmora. Then, drag it into your music track. Syncing your audio should not be difficult, but you can always use your original audio to help you line it up properly if you need to. Just look for a significant spike in your audio waves in both your MP3 and the original audio and make sure they are right on top of each other.
Then, since you no longer need your original audio, you can delete it. Right-click on your clip and select Audio Detach. Once your audio is on its own track just select it and click delete.
Covering Background Noise
Sometimes background noise is so minor that you do not want to bother going through the process of removing it. In these situations, it may be easier to cover up your background noise than to remove it. This is as simple as dragging a song into the music track of your timeline and adjusting its volume so it is not loud enough to draw attention away from your dialogue. Chances are you want to add background music anyways and this is not even an extra step.
Richard Bennett
Richard Bennett is a writer and a lover of all things video.
Follow @Richard Bennett
Ideal Screen Capture Device for Effective Video Sharing
Best Screen Recorder for YouTube
Richard Bennett
Mar 27, 2024• Proven solutions
Taking viewers ‘in app’ is an effective way to show them how you work or play. A screen recording is a footage recorded not from your camera, but directly from the interface of your computer or mobile device. A screen recording might be footage from a game, a software tutorial, or a demonstration of your creative process in a program.
We have picked up the best 10 paid screen recorders for YouTube on Windows and Mac, but if you are looking for a complete solution to record videos on Windows, Mac, Android or iOS phone to make tutorial videos, how-to videos, or demonstration videos, or products/software review videos, or gameplay videos on YouTube, here is the all the information you need. This article will introduce you to the best screen recorders on computers, Android devices, and iPhones for YouTube.
- Part 1: Best Screen Recording Software for Recording Windows/Mac Screen for YouTube
- Part 2: Best Screen Capturing Apps for Recording Your Android Screen (No Root)
- Part 3: Best Screen Recording Apps for Recording on iOS Devices for YouTube Videos
Part 1: Best Software for Recording Your Computer Screen for YouTube Videos
1.Filmora Video Editor [Windows & Mac, Freemium]
In addition to being a powerful editing tool, Filmora can also be used to record your computer screen. In Filmora, just select Media and then Record. In the Record menu, click Record PC Screen. The recording window will pop up and you will be able to decide whether you want to record your full screen, a customized selection of it, or a specific target window. After you have finished recording your clip will automatically appear in the Media menu in your Filmora project so you can edit it right away. You can download Filmora from Filmora.wondershare.com if you do not have it yet.
If you just want to make a how-to video with some captured screens, Filmora will be a good choice. Check the video below about how to record Screen with Filmora.
2.Wondershare DemoCreator
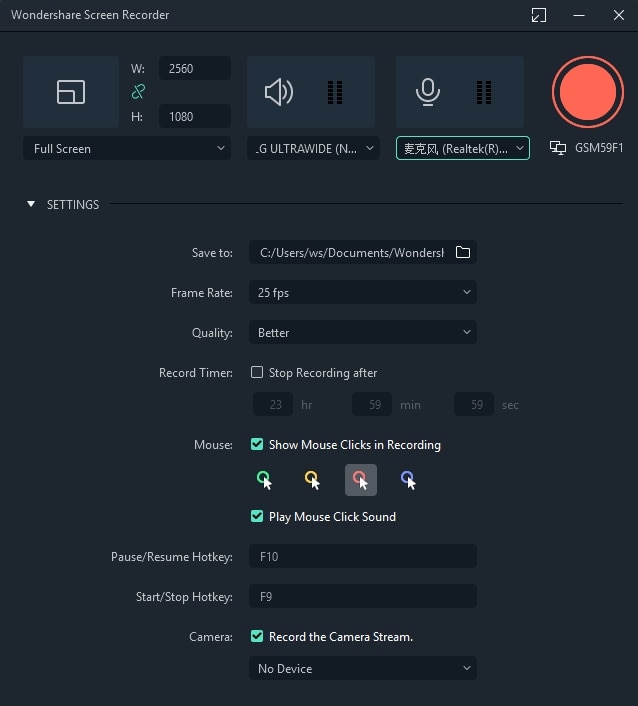
DemoCreator is a specially designed screen recording software from Wondershare for both gameplay recording, tutorial making, screen capturing, and webcam recording as well. You can use it to record the full screen of your Windows or Mac computer or a particular part on the screen. The best part is that you can both record and edit the video in DemoCreator and upload it to YouTube directly. This screen recorder for YouTube is a perfect solution for those who want to capture 120 frames per second and 4K videos.
3.VLC Media Player [Windows & Mac & Linux, Free]
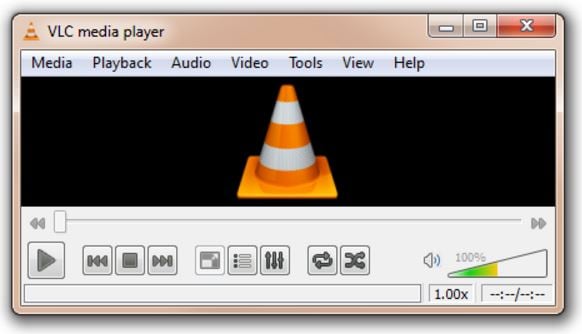
VLC Media Player is a free media player that has a great screen recording feature. You can download it from Video LAN.org. In order to take a screen recording using VLC you first need to click on View and Advanced Controls. A lot of the more advanced features, like screen recording, are initially hidden so as not to confuse users, but selecting Advanced Controls will make them visible. Then you can go to Media and Open Capture Device. In the window that opens choose Desktop next to Capture Mode and click Play. VLC will start displaying your desktop in the player window. Now you just have to click Record.
Learn more details about how to record YouTube videos with VLC
4.QuickTime [Mac, Free]

QuickTime is the default media player for Mac users. To access QuickTime’s screen recording feature select File and New Screen Recording. In the window that pops up click on the arrow next to the Record button and choose a microphone. Then you can press Record. Your recording will not start right away. First, a window will pop up explaining that you can stop your recording by pressing ‘command-control-escape’. Although QuickTime is available for PCs the PC version does not have a screen recording feature.
Learn more details about how to record YouTube video and audio with QuickTime Player on Mac
Part 2: Recording Your Android Screen for YouTube Videos (No Root)
We have already described 4 ways of recording screen videos on Android , while in this part, we will introduce some useful screen recording apps for recording YouTube videos on Android phones.
1. AZ Screen Recorder
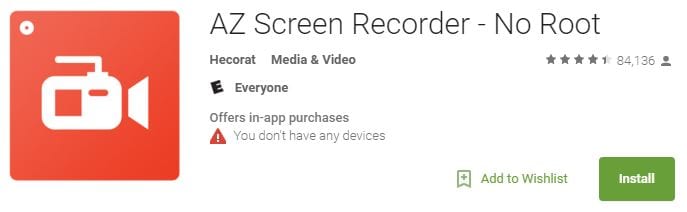
AZ Screen Recorder is free screen recording app for Android 5.0 Lollipop. Using AZ Screen Recorder you can simultaneously record from your phone’s camera and screen. This is useful if you want to shoot a video of yourself explaining an app to add into your final video. Although the basic version of AZ Screen Recorder is free there are in-app purchases.
2.Unlimited Screen Recorder
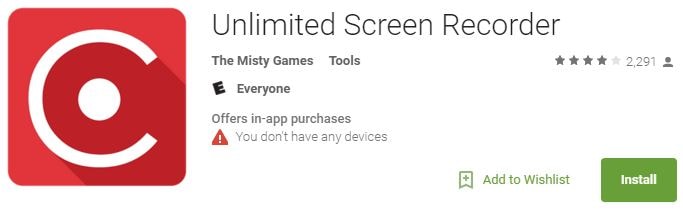
Unlimited Screen Recorder is also for 5.0 Lollipop and is free with in-app purchases. Like the name ‘Unlimited’ suggests you can use this app to record for as long as you want. There is no time limit. You can also record audio through Unlimited Screen Recorder so it is convenient to make a voiceover for your video.
There are very few options available for recording Android devices older than Lollipop without rooting your device.
Click here to check more screen recording apps to capture videos on Android
Part 3: Recording Your iOS Device Screen for YouTube Videos
With the release of iOS 11, recording on iPhone and iPad is much easier with the built-in screen recording tool . If your iOS is above 11 (including 11) version, you can record the screen with its in-app application, check this video to know the details:
Apart from recording with the built-in recording tool, you can also use some best iOS screen recording apps to record YouTube videos, or use some mirror software to record iPhone/iPad on Windows and Mac and create a YouTube video.
1.QuickTime
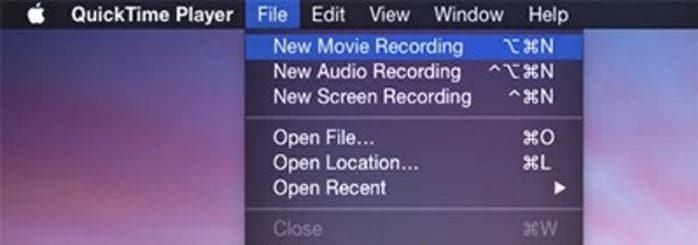
QuickTime can be used to record the screen of your iPhone or iPad in addition to the screen of your Mac. First you need to connect your device to your computer with a USB port. Instead of selecting ‘New Screen Recording’ in QuickTime, the way you would when recording your computer screen, select ‘New Movie Recording’. In the recording window click on the arrow next to the ‘Record’ button and choose your iOS device where it asks you to choose a camera. This method only works with the Mac version of QuickTime.
2.Reflector
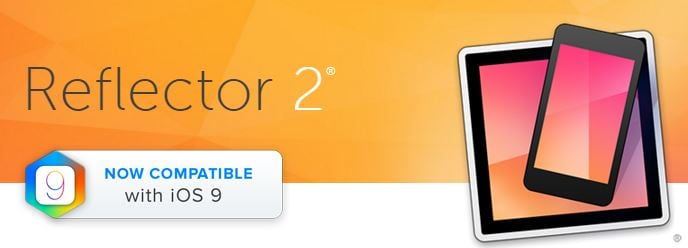
Reflector is mirroring software available for Mac or PC. Mirroring software creates a clone of your device’s interface on your computer screen. Once your device is being displayed on the screen of your computer you can capture it by recording your computer screen. You can download Reflector from Airsquirrels.com.
In order to use Reflector to mirror your device, you will also need to use AirPlay on your iPhone or iPad, and your device and your computer will need to be connected to the same wifi network. In AirPlay, make sure mirroring is on and select your computer as a receiver. Your computer will not show up as an option if you do not have Reflector running.
Conclusion
Above are the screen and video recording software programs that we picked up for you to make a YouTube tutorial, how-to or software review video on most popular platforms including Windows and Mac computer and Android and iOS smartphones. Besides recording, you may also need thebest video editing software for editing YouTube videos . Watch the video tutorial to check how to edit your YouTube videos and get to know some terms in video editing. Remember to download Filmora and have a try today.
Richard Bennett
Richard Bennett is a writer and a lover of all things video.
Follow @Richard Bennett
Richard Bennett
Mar 27, 2024• Proven solutions
Taking viewers ‘in app’ is an effective way to show them how you work or play. A screen recording is a footage recorded not from your camera, but directly from the interface of your computer or mobile device. A screen recording might be footage from a game, a software tutorial, or a demonstration of your creative process in a program.
We have picked up the best 10 paid screen recorders for YouTube on Windows and Mac, but if you are looking for a complete solution to record videos on Windows, Mac, Android or iOS phone to make tutorial videos, how-to videos, or demonstration videos, or products/software review videos, or gameplay videos on YouTube, here is the all the information you need. This article will introduce you to the best screen recorders on computers, Android devices, and iPhones for YouTube.
- Part 1: Best Screen Recording Software for Recording Windows/Mac Screen for YouTube
- Part 2: Best Screen Capturing Apps for Recording Your Android Screen (No Root)
- Part 3: Best Screen Recording Apps for Recording on iOS Devices for YouTube Videos
Part 1: Best Software for Recording Your Computer Screen for YouTube Videos
1.Filmora Video Editor [Windows & Mac, Freemium]
In addition to being a powerful editing tool, Filmora can also be used to record your computer screen. In Filmora, just select Media and then Record. In the Record menu, click Record PC Screen. The recording window will pop up and you will be able to decide whether you want to record your full screen, a customized selection of it, or a specific target window. After you have finished recording your clip will automatically appear in the Media menu in your Filmora project so you can edit it right away. You can download Filmora from Filmora.wondershare.com if you do not have it yet.
If you just want to make a how-to video with some captured screens, Filmora will be a good choice. Check the video below about how to record Screen with Filmora.
2.Wondershare DemoCreator
DemoCreator is a specially designed screen recording software from Wondershare for both gameplay recording, tutorial making, screen capturing, and webcam recording as well. You can use it to record the full screen of your Windows or Mac computer or a particular part on the screen. The best part is that you can both record and edit the video in DemoCreator and upload it to YouTube directly. This screen recorder for YouTube is a perfect solution for those who want to capture 120 frames per second and 4K videos.
3.VLC Media Player [Windows & Mac & Linux, Free]
VLC Media Player is a free media player that has a great screen recording feature. You can download it from Video LAN.org. In order to take a screen recording using VLC you first need to click on View and Advanced Controls. A lot of the more advanced features, like screen recording, are initially hidden so as not to confuse users, but selecting Advanced Controls will make them visible. Then you can go to Media and Open Capture Device. In the window that opens choose Desktop next to Capture Mode and click Play. VLC will start displaying your desktop in the player window. Now you just have to click Record.
Learn more details about how to record YouTube videos with VLC
4.QuickTime [Mac, Free]
QuickTime is the default media player for Mac users. To access QuickTime’s screen recording feature select File and New Screen Recording. In the window that pops up click on the arrow next to the Record button and choose a microphone. Then you can press Record. Your recording will not start right away. First, a window will pop up explaining that you can stop your recording by pressing ‘command-control-escape’. Although QuickTime is available for PCs the PC version does not have a screen recording feature.
Learn more details about how to record YouTube video and audio with QuickTime Player on Mac
Part 2: Recording Your Android Screen for YouTube Videos (No Root)
We have already described 4 ways of recording screen videos on Android , while in this part, we will introduce some useful screen recording apps for recording YouTube videos on Android phones.
1. AZ Screen Recorder
AZ Screen Recorder is free screen recording app for Android 5.0 Lollipop. Using AZ Screen Recorder you can simultaneously record from your phone’s camera and screen. This is useful if you want to shoot a video of yourself explaining an app to add into your final video. Although the basic version of AZ Screen Recorder is free there are in-app purchases.
2.Unlimited Screen Recorder
Unlimited Screen Recorder is also for 5.0 Lollipop and is free with in-app purchases. Like the name ‘Unlimited’ suggests you can use this app to record for as long as you want. There is no time limit. You can also record audio through Unlimited Screen Recorder so it is convenient to make a voiceover for your video.
There are very few options available for recording Android devices older than Lollipop without rooting your device.
Click here to check more screen recording apps to capture videos on Android
Part 3: Recording Your iOS Device Screen for YouTube Videos
With the release of iOS 11, recording on iPhone and iPad is much easier with the built-in screen recording tool . If your iOS is above 11 (including 11) version, you can record the screen with its in-app application, check this video to know the details:
Apart from recording with the built-in recording tool, you can also use some best iOS screen recording apps to record YouTube videos, or use some mirror software to record iPhone/iPad on Windows and Mac and create a YouTube video.
1.QuickTime
QuickTime can be used to record the screen of your iPhone or iPad in addition to the screen of your Mac. First you need to connect your device to your computer with a USB port. Instead of selecting ‘New Screen Recording’ in QuickTime, the way you would when recording your computer screen, select ‘New Movie Recording’. In the recording window click on the arrow next to the ‘Record’ button and choose your iOS device where it asks you to choose a camera. This method only works with the Mac version of QuickTime.
2.Reflector
Reflector is mirroring software available for Mac or PC. Mirroring software creates a clone of your device’s interface on your computer screen. Once your device is being displayed on the screen of your computer you can capture it by recording your computer screen. You can download Reflector from Airsquirrels.com.
In order to use Reflector to mirror your device, you will also need to use AirPlay on your iPhone or iPad, and your device and your computer will need to be connected to the same wifi network. In AirPlay, make sure mirroring is on and select your computer as a receiver. Your computer will not show up as an option if you do not have Reflector running.
Conclusion
Above are the screen and video recording software programs that we picked up for you to make a YouTube tutorial, how-to or software review video on most popular platforms including Windows and Mac computer and Android and iOS smartphones. Besides recording, you may also need thebest video editing software for editing YouTube videos . Watch the video tutorial to check how to edit your YouTube videos and get to know some terms in video editing. Remember to download Filmora and have a try today.
Richard Bennett
Richard Bennett is a writer and a lover of all things video.
Follow @Richard Bennett
Also read:
- Erase Unwanted Black Fringes on YouTube Tracks for 2024
- In 2024, Crafting a Winning Strategy YouTube Keyword Mastery Explained
- Social Sites Showdown YouTubers' Choice
- 2024 Approved Beyond the Leading Films Hidden Cinema Treasures
- Elevate Video Rankings Proven YouTube SEO Solutions for 2024
- In 2024, Crafting Content Dimensions for App Aggregates
- YouTube Studio Review Profits and Payments
- 2024 Approved Balancing Consistency & Quality A Key to Increasing YouTube Viewership
- [Updated] Craftsmanship in Marvellous Marvel Creation
- From Passive Viewers to Earnings YouTube's Monetization Mastery
- Elevate Your Video Presentation with These 7 Free Makers for 2024
- 2024 Approved Capturing the Best Visuals in Vlogs
- Building Your Thriving YouTube Space for Gamers
- Step-by-Step Guide to Producing Quality Mobile Videos
- Daily Digital Domination Top 10 YouTube Viewership Ranking for 2024
- [Updated] Best Free Subtitles & Downloader Guide
- Streamlined Conversion at Your Fingertips Top 6 Free Apps for YouTube & MP3
- Best YouTube Shorts Video Editor Tools for iOS & Android Devices for 2024
- [New] Building a Brand, Building Income YouTube Edition
- Beginner's Tutorial Setting Up Your YouTube Presence for 2024
- Essential 20 YouTube Playlists Bringing You the Beat for 2024
- Automated Subscription Link Creation for Youtube
- In 2024, Elite 10 Sound Enhancers Across OS Platforms
- Video-Enhanced Slideshow Mastery with YouTube
- [Updated] Breaking Down T-Series Income Mechanism on YouTube
- [New] Diving Into VTUBERdom Career Beginnings Explained
- In 2024, Android Users The Top 6 Video Downloaders for Easy Access
- Expertise in Action Leading Youtube Text-to-Video Devices
- In 2024, Complete Code of Conduct for YouTube Creators
- In 2024, Brighter Days with Five Winter-Themed Backgrounds
- [Updated] Direct From Google Meet Securely Live Stream on YouTube
- [Updated] 12 Unparalleled YouTube Gamers' Intros Revealed Free or Fee?
- Editor's Compendium Top Devices Transforming Media Projects
- Low-Cost Cameras That Don't Compromise Quality
- 2024 Approved 10 Best Yoga YouTube Channels to Follow - Keep Fit
- Discover 9 Free, Whole-Film Festive Movie Gems on Youtube
- 2024 Approved Brand Visualization Inserting Watermarks and Logos Into YouTube Media
- [New] Essential 5 Video Editing Software Excluding Youtube
- [New] Amplify Audience on Both Platforms Youtube + Twitch Strategy
- Why Does My Infinix GT 10 Pro Keep Turning Off By Itself? 6 Fixes Are Here | Dr.fone
- 2024 Approved Optimal Music File Converter Transforming MPA Files Into High-Quality MP3s Without Cost
- [New] Embracing Diversity, EaseUS Tech Assessment for 2024
- [New] 2024 Approved Reclaim Lost Chatter in Shared Tweeted Films
- In 2024, 10 Fake GPS Location Apps on Android Of your Honor 100 Pro | Dr.fone
- In 2024, Mirth Meanderings Latest Crackers and Their Stunts
- [New] In 2024, Social Media Fusion Tweet-Facebook Connectivity
- How Do You Get Sun Stone Evolutions in Pokémon For Honor X50? | Dr.fone
- 2024 Approved Protecting Your Digital Memories How to Save TikTok Videos
- [Updated] Obs Full-Screen No More Problem!
- [Updated] 2024 Approved Unlock the Secrets of Stellar Snaps and Snapchat Boomers
- In 2024, Bypass Activation Lock On iPhone 13 mini - 4 Easy Ways
- In 2024, How Can We Unlock Our Oppo A2 Phone Screen?
- Updated In 2024, Here You Will Get to Know About some of the Best Video-Making Apps that You Can Use to Create Reactions Not only for TikTok but for Many Other Such Platforms that Are Available These Days
- In 2024, Twitchstars Engaging on Snapchat
- Fix Xiaomi Redmi Note 12 5G Android System Webview Crash 2024 Issue | Dr.fone
- In 2024, All You Need To Know About Mega Greninja For Motorola Moto G04 | Dr.fone
- [New] In 2024, Highest-Rated Nintendo Switch Battle Titles (Max 156)
- Palette Perfection A Guide to Grading Filmmaking
- In 2024, Bypassing Google Account With vnROM Bypass For Xiaomi Civi 3
- How to Cast Huawei P60 Screen to PC Using WiFi | Dr.fone
- [Updated] 2024 Approved Nine Key Approaches for Storing .mov in Windows Environments
- [New] Tech Unity Expert EaseUS Reviews
- How to Change Your Xiaomi Redmi 12 5G Location on life360 Without Anyone Knowing? | Dr.fone
- [New] Utilizing FB Features for Broadcasting Historical Video Footage for 2024
- Transform Your Visuals Instagram Video Borders
- [Updated] In 2024, Navigating TikTok's Creative Frontier Choosing Perfect Backdrops
- 5 Easy Ways to Copy Contacts from Tecno Spark 10 Pro to iPhone 14 and 15 | Dr.fone
- New Evolve Your Tone on the Fly Examining the Most Prominent Real-Time Voice Altering Apps & Programs for 2024
- 2024 Approved Essential Gaming Gear Keyboards for Less Than $100
- In 2024, How Can I Use a Fake GPS Without Mock Location On Vivo Y78 5G? | Dr.fone
- [New] Maximizing Call Recording 20+ Techniques for Windows/Mac Users
- Child's Drone Pick Top Five Suggestions
- Capture Every Skype Interaction Windows & OS X Style
- In 2024, The Top 5 Android Apps That Use Fingerprint Sensor to Lock Your Apps On Nokia G22
- 2024 Approved Astral Tunes Navigating Through the Top-Rated Software for Capturing Fretwork
- Spark Conversation with Personalized Instagram Story Queries
- Title: DIY Tips to Cut Unwanted Sounds From Your Videos
- Author: Steven
- Created at : 2024-05-25 19:08:32
- Updated at : 2024-05-26 19:08:32
- Link: https://youtube-clips.techidaily.com/diy-tips-to-cut-unwanted-sounds-from-your-videos/
- License: This work is licensed under CC BY-NC-SA 4.0.
