
:max_bytes(150000):strip_icc():format(webp)/GettyImages-626970032-497800518dac4d6cafa0dc19b953f1ff.jpg)
"Dividing Opinions Is Mirrorless Better than DSLR for Vids for 2024"
Dividing Opinions: Is Mirrorless Better than DSLR for Vids?
Mirrorless vs. DSLR Cameras: Which is Better for Videos?

Richard Bennett
Oct 26, 2023• Proven solutions
If you’re looking to shoot your videos with interchangeable lenses, your camera set up will either have to have a mirrorless camera body or a DSLR camera body. In this post, I’ll be comparing the two camera body types for recording video.
- Part 1: What is a DSLR Camera?
- Part 2: What is a Mirrorless Camera?
- Part 3: Mirrorless vs. DSLR - a Complete Comparison
- Part 4: Mirrorless vs. DSLR - Which One is Better for Video?
What is a DSLR Camera?
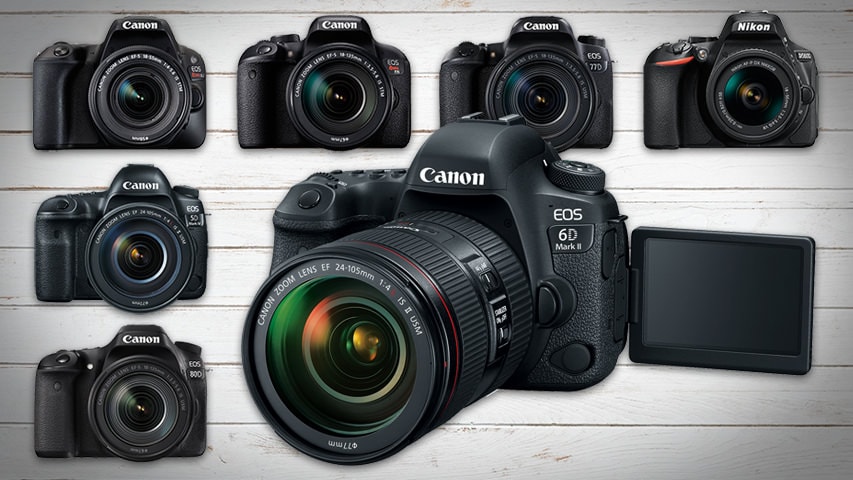
DSLR cameras are digital single-lens reflex cameras. Like 35mm film cameras of the past, DSLR cameras are built with an angled mirror inside its camera body. This mirror allows you to look into your camera’s optical viewfinder and see exactly what your camera sees.
The mirror inside a DSLR camera flips up out of the way when you open the shutter to allow light to reach the camera’s image sensor.
Check out our list of the 7 Best DSLR Cameras For Vlogging .
What is a Mirrorless Camera?
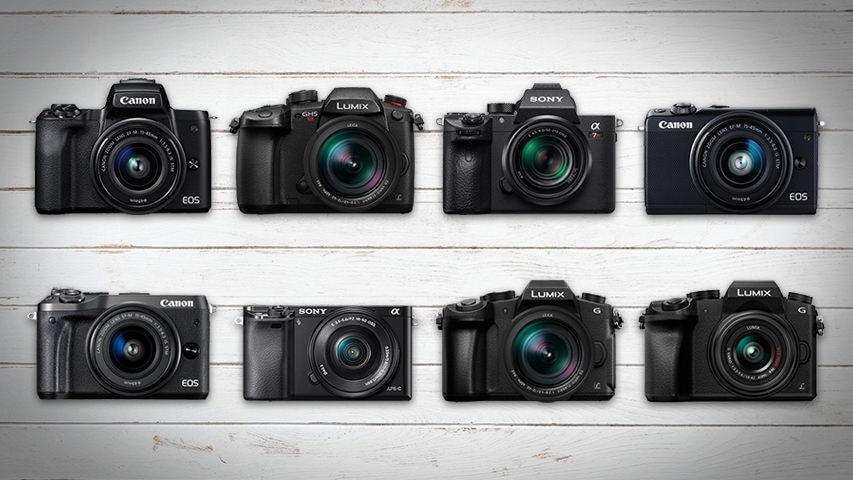
Mirrorless cameras are interchangeable lens cameras without a mirror inside the camera body. With nothing to reflect your image, you won’t find any optical viewfinder to look through to see exactly what your camera sees.
Light passes through the lens of a mirrorless camera and lands directly onto the camera’s sensor.
Check out our list of the 8 Best Mirrorless Cameras For Vlogging .
Mirrorless vs. DSLR - a Complete Comparison
Size and Weight
DSLR cameras are larger and heavier than mirrorless cameras because there are more parts that go into their camera bodies. DSLR cameras require enough space inside for an angled mirror to flip up out of the way.
If your video shooting style is more on-the-go, like that of a daily vlogger or travel vlogger, the smaller size and lighter weight of a mirrorless camera may be more suitable for you.
Previewing Images
When you’re using a DSLR camera, your optical viewfinder will show you exactly what your camera sees as opposed to a digital preview of what your image sensor picks up. No matter how bright or dark your scene actually is, through the optical viewfinder, you’ll be able to clearly see what your camera sees with the power of your eye.
Mirrorless cameras, on the other hand, display on your camera’s screen or electronic viewfinder a digital preview of what your camera is looking at. You will notice a lag, especially in low light, between actions that are taking place in front of the camera and the same actions being displayed in your live preview.
Lenses and Accessories
Having been around much longer, there are plenty more options for lenses and accessories when it comes to shooting with DSLR cameras. You can choose from all kinds of different quality levels and price ranges.
Video Resolution
4K video recording is more readily available in mirrorless cameras than DSLR cameras. At a much more affordable budget, you can get your hands on a 4K mirrorless camera. If you want to shoot 4K video on a DSLR camera, though, you will have to pay for some of the most expensive DSLR cameras on the market.
Image Stabilization
Up until quite recently, you needed to get the right lens with built-in optical image stabilization if you wanted to shoot stabilized photos and videos with an interchangeable lens camera. Image stabilization had not been readily available in the bodies of these cameras.
In recent years, however, mirrorless cameras have been much more active in their development of camera bodies equipped with shifting image sensors. Your shots can be even more stabilized when the optical image stabilization of your lens is combined with your camera’s in-body sensor-shift image stabilization.
Battery Life
When it comes to shooting video, DSLR cameras and mirrorless cameras consume about the same amount of power. It’s still safe to say, though, that DSLR cameras, for the most part, have better battery life than mirrorless cameras because their bigger batteries are packed with more power.
Mirrorless vs. DSLR - Which One is Better for Video?
In my opinion, when it comes to filming a video, mirrorless cameras are the way to go. In such a short time, mirrorless cameras have made huge leaps in their capabilities. It won’t be long before the ultimate vlogging camera comes out on the mirrorless market.
In the end, if you need to edit videos futhermore, try Filmora video editor . It’s a video editor which has significantly improved overall performance, making the product faster, and more powerful, and taking the user editing experience to a new level.
It is perfect for helping beginners, and intermediate users create stylish videos by providing an intuitive user interface and built-in effects.
![]()
Richard Bennett
Richard Bennett is a writer and a lover of all things video.
Follow @Richard Bennett
Richard Bennett
Oct 26, 2023• Proven solutions
If you’re looking to shoot your videos with interchangeable lenses, your camera set up will either have to have a mirrorless camera body or a DSLR camera body. In this post, I’ll be comparing the two camera body types for recording video.
- Part 1: What is a DSLR Camera?
- Part 2: What is a Mirrorless Camera?
- Part 3: Mirrorless vs. DSLR - a Complete Comparison
- Part 4: Mirrorless vs. DSLR - Which One is Better for Video?
What is a DSLR Camera?
DSLR cameras are digital single-lens reflex cameras. Like 35mm film cameras of the past, DSLR cameras are built with an angled mirror inside its camera body. This mirror allows you to look into your camera’s optical viewfinder and see exactly what your camera sees.
The mirror inside a DSLR camera flips up out of the way when you open the shutter to allow light to reach the camera’s image sensor.
Check out our list of the 7 Best DSLR Cameras For Vlogging .
What is a Mirrorless Camera?
Mirrorless cameras are interchangeable lens cameras without a mirror inside the camera body. With nothing to reflect your image, you won’t find any optical viewfinder to look through to see exactly what your camera sees.
Light passes through the lens of a mirrorless camera and lands directly onto the camera’s sensor.
Check out our list of the 8 Best Mirrorless Cameras For Vlogging .
Mirrorless vs. DSLR - a Complete Comparison
Size and Weight
DSLR cameras are larger and heavier than mirrorless cameras because there are more parts that go into their camera bodies. DSLR cameras require enough space inside for an angled mirror to flip up out of the way.
If your video shooting style is more on-the-go, like that of a daily vlogger or travel vlogger, the smaller size and lighter weight of a mirrorless camera may be more suitable for you.
Previewing Images
When you’re using a DSLR camera, your optical viewfinder will show you exactly what your camera sees as opposed to a digital preview of what your image sensor picks up. No matter how bright or dark your scene actually is, through the optical viewfinder, you’ll be able to clearly see what your camera sees with the power of your eye.
Mirrorless cameras, on the other hand, display on your camera’s screen or electronic viewfinder a digital preview of what your camera is looking at. You will notice a lag, especially in low light, between actions that are taking place in front of the camera and the same actions being displayed in your live preview.
Lenses and Accessories
Having been around much longer, there are plenty more options for lenses and accessories when it comes to shooting with DSLR cameras. You can choose from all kinds of different quality levels and price ranges.
Video Resolution
4K video recording is more readily available in mirrorless cameras than DSLR cameras. At a much more affordable budget, you can get your hands on a 4K mirrorless camera. If you want to shoot 4K video on a DSLR camera, though, you will have to pay for some of the most expensive DSLR cameras on the market.
Image Stabilization
Up until quite recently, you needed to get the right lens with built-in optical image stabilization if you wanted to shoot stabilized photos and videos with an interchangeable lens camera. Image stabilization had not been readily available in the bodies of these cameras.
In recent years, however, mirrorless cameras have been much more active in their development of camera bodies equipped with shifting image sensors. Your shots can be even more stabilized when the optical image stabilization of your lens is combined with your camera’s in-body sensor-shift image stabilization.
Battery Life
When it comes to shooting video, DSLR cameras and mirrorless cameras consume about the same amount of power. It’s still safe to say, though, that DSLR cameras, for the most part, have better battery life than mirrorless cameras because their bigger batteries are packed with more power.
Mirrorless vs. DSLR - Which One is Better for Video?
In my opinion, when it comes to filming a video, mirrorless cameras are the way to go. In such a short time, mirrorless cameras have made huge leaps in their capabilities. It won’t be long before the ultimate vlogging camera comes out on the mirrorless market.
In the end, if you need to edit videos futhermore, try Filmora video editor . It’s a video editor which has significantly improved overall performance, making the product faster, and more powerful, and taking the user editing experience to a new level.
It is perfect for helping beginners, and intermediate users create stylish videos by providing an intuitive user interface and built-in effects.
![]()
Richard Bennett
Richard Bennett is a writer and a lover of all things video.
Follow @Richard Bennett
The Ultimate Pathway: Merging YouTube with TikTok
Best Video Editor for Beginners on Windows and Mac
Wondershare Filmora is one of the most popular video editing software among TikTokers , download and have a try.
There is no better time for singers, actors, and content creators to join TikTok. With over a billion downloads, TikTok is now more influential than ever. Here, you can consider all TikTok users to be prospective audiences or followers. Videos go viral every day, and a substantial portion of them come from a single source: TikTok.
The massively popular short-video app is the latest craze, with individuals from all over the world using it to watch and produce content. Instagram stars, YouTube stars, and even real-life movie stars have switched to this platform, so what’s stopping you? It has so much to offer. Both seem to work in a connected way as Tiktok stars are seen converting videos from YouTube to TikTok.
In this article
01 How to Link a YouTube Video to TikTok Post?
02 How to Convert YouTube Video and Post to TikTok? [3 ways]
Part 1: How to Link a YouTube Video to TikTok Post?
There is no social network available online that gives more relevancy, popularity, and engagement than TikTok. Even though Tiktok’s operations were only launched outside of China a few years ago, Tiktok has entirely taken over the social sphere when it comes to producing amusing and enjoyable short videos, which has been seen after a very long time after the app ‘VINE’ was shut down back in 2016.
You can reap multiple benefits if you’re a content creator by connecting all your social media platforms. You can extend your reach and exposure to an immense number of people by linking your YouTube video to the TikTok post. Let’s look at your options of connecting videos from YouTube to TikTok and highlight how to connect TikTok to YouTube.
Step 1: Open the TikTok app on your phone and tap on your profile option.
Step 2: Tap on the edit profile option and further select Add YouTube to Your Profile option.
Note: If you haven’t previously linked your YouTube account to your TikTok channel, tapping on this will very certainly take you to another page with the Google login screen.
Step 3: Click on “Allow” option. By tapping on this, your YouTube channel will display as a link in your bio area.
Note: However, as we continue with this knowledge, it is worth noting that when you put your channel description and links under the videos you publish, the link is not always clickable. It is recommended that you keep with the bio section and conclude your short films by urging your viewers to visit your YouTube channel, which is included in the bio of your Tiktok profile.
Part 2: How to Convert YouTube Video and Post to TikTok? [3 ways]
Further, we feel that differences in posting (such as formats, aspect ratios , and durations) should be accounted for when YouTube videos are converted into TikTok videos. Tiktok offers a 9:16 aspect ratio compared to most videos on YouTube, where the aspect ratio is primarily 16:9.
As for the format, the resolution can only be set to 1080p since TikTok only supports it to utilize the entire canvas. Tiktok is a platform that promotes videos ranging from 15 seconds to 3 minutes, compared to its initial support for content up to 15 seconds only. You will most likely have to resize your video if you plan to share it on Tiktok with all the above elements. Here are some of the video dimension details for TikTok.
- Dimensions: 1080 x 1920
- Resolution: 9:16 Aspect Ratio
- File Format:.mp4 or .mov
- Code: encoded
We might have left you perplexed with all the information about how to connect TikTok to YouTube, but don’t worry, here are a variety of apps and a step-by-step guide for posting your videos on Tiktok without any issues.
1. Kapwing Studio
Within the various applications available, Kapwing Studio provides users with support and resources to help them edit and convert their YouTube videos to TikTok. It allows creators to upload the video from anywhere, anytime, via media library support since it is a web-base video editor. Moreover, Kapwing supports .mp4, .mov, .png, .gif, .jpg, .avi and plenty of other formats as well. All in all, Kapwing can be a complete transcoding and conversion package to optimize and convert your YouTube videos to post on TikTok.
Step 1: Copy the YouTube Video’s link
To get started, go to YouTube and search for the video you wish to convert. You can copy the link by right-clicking on YouTube’s video and paste it on Kapwing directly.
Note: Alternatively, if you’re already logged in, choose Create New Project. This will lead you to the Kapwing Studio, on which you can access all of Kapwing’s video editing capabilities in a single location.
Step 2: Resize YouTube video to 9:16
Double click the video in the timeline, and then click the Crop menu on the right top corner. To convert a YouTube video to TikTok, click the 9:16 option to start. Or, you can move the handles in the timeline until it reaches the precise length you need.
Note: When you process your video, make sure it has a 9:16 aspect ratio so it will fit on TikTok.

Step 3: Download & share on TikTok!
After you’ve uploaded your video to the Studio, just select the Export Video option in the upper right corner to save your video and share it on TikTok.
2. Kamua
On TikTok, content always takes precedence. One strategy to grow your TikTok audience is to convert your existing YouTube videos to post, and Kamua is the perfect tool for this! Kamua, a cloud-based video tool, allows creators to resize, crop, edit and save videos. Everything, including cutting, retouching, and repurposing of the video, is available in a single place.
Perhaps you have some daring, humorous, or legendary videos in a neglected collection that would be perfect for a TikTok trend or challenge- it’s time to edit them with Kamua! Transforming Landscape films vertically into the 9:16 aspect ratio is now easier and faster than ever before with Kamua.
Step 1: Copy the YouTube Video link and paste it into the Kamua.
Note: You can right-click on any video on YouTube to copy the link or click on the Share option.

Step 2: To turn on AutoCrop, select the Portrait (9:16) setting under the Settings menu on the left. You can also choose Remove Black Bars to resize the video.

Note: To preview how your videos would look on a TikTok mobile app, click the Phone symbol underneath the video
Step 3: Once done, click on the render project option in the below right corner to save the optimized video file. To watch the final video or to download it, click on the Outputs option. From here, you can watch as well as download your video.
3. Use Auto Reframe Feature in Filmora Video Editor
Auto Reframe , as clear from the name, can automatically visualize and detect the video’s focal point to resize or crop it in an optimal way. The Auto Reframe tool can identify a moving item in any video and rapidly trim it to multiple aspect ratios. What initially took hours, if not days, of editing may now be completed in moments with Filmora. You can also manually set the focal point in any video to adjust the aspect ratio and preferences as per your choice.
If you frequently have to upload videos to your social networking networks such as YouTube, Instagram, Facebook, and TikTok, Filmora will ease your life! We’ll teach you how to utilize Filmora’s Auto-Reframe option to reframe sequences for your YouTube to TikTok videos in the below-listed steps.
Step 1: Start by Launching Filmora on your device. Choose the Auto Reframe option from the starting window.

Step 2:Click on Import Media and select the video file you wish to convert. A separate dialogue box will open. From here, choose the aspect ratio and click on Analyze. The reframing process will start automatically.

You can choose from five different aspect ratios: square (1:1), vertical (9:16), standard (4:3), widescreen (16:9), and cinema (21:9). You can also adjust the frame’s dimensions by moving the crop box.

Step 3: When you’re through with the adjustments and reframing, click the Export option to preserve your work.

Note: Click Save after you enter a file name and select a destination folder. Add music, titles, effects, or transitions to improve the clip. You can move the clip to the timeline for more editing. You can share and save your video on TikTok once you have completed editing by clicking the Export option.
This vido tutorial introduces several ways to convert a 16:9 YouTube video to TikTok in Filmora. Download this smart auto reframe tool now and have a try.
For Win 7 or later (64-bit)
For macOS 10.12 or later
Conclusion
Good luck with your endeavors as a content creator, musician, comedian, or whatever else you choose. This article heavily emphasized on how you can convert YouTube to TikTok and be famous. Still, you can also reverse this process by posting your TikTok username on YouTube and in your YouTube videos. We hope this article has proved out to be helpful, if you have any further questions, don’t hesitate to contact us.
There is no better time for singers, actors, and content creators to join TikTok. With over a billion downloads, TikTok is now more influential than ever. Here, you can consider all TikTok users to be prospective audiences or followers. Videos go viral every day, and a substantial portion of them come from a single source: TikTok.
The massively popular short-video app is the latest craze, with individuals from all over the world using it to watch and produce content. Instagram stars, YouTube stars, and even real-life movie stars have switched to this platform, so what’s stopping you? It has so much to offer. Both seem to work in a connected way as Tiktok stars are seen converting videos from YouTube to TikTok.
In this article
01 How to Link a YouTube Video to TikTok Post?
02 How to Convert YouTube Video and Post to TikTok? [3 ways]
Part 1: How to Link a YouTube Video to TikTok Post?
There is no social network available online that gives more relevancy, popularity, and engagement than TikTok. Even though Tiktok’s operations were only launched outside of China a few years ago, Tiktok has entirely taken over the social sphere when it comes to producing amusing and enjoyable short videos, which has been seen after a very long time after the app ‘VINE’ was shut down back in 2016.
You can reap multiple benefits if you’re a content creator by connecting all your social media platforms. You can extend your reach and exposure to an immense number of people by linking your YouTube video to the TikTok post. Let’s look at your options of connecting videos from YouTube to TikTok and highlight how to connect TikTok to YouTube.
Step 1: Open the TikTok app on your phone and tap on your profile option.
Step 2: Tap on the edit profile option and further select Add YouTube to Your Profile option.
Note: If you haven’t previously linked your YouTube account to your TikTok channel, tapping on this will very certainly take you to another page with the Google login screen.
Step 3: Click on “Allow” option. By tapping on this, your YouTube channel will display as a link in your bio area.
Note: However, as we continue with this knowledge, it is worth noting that when you put your channel description and links under the videos you publish, the link is not always clickable. It is recommended that you keep with the bio section and conclude your short films by urging your viewers to visit your YouTube channel, which is included in the bio of your Tiktok profile.
Part 2: How to Convert YouTube Video and Post to TikTok? [3 ways]
Further, we feel that differences in posting (such as formats, aspect ratios , and durations) should be accounted for when YouTube videos are converted into TikTok videos. Tiktok offers a 9:16 aspect ratio compared to most videos on YouTube, where the aspect ratio is primarily 16:9.
As for the format, the resolution can only be set to 1080p since TikTok only supports it to utilize the entire canvas. Tiktok is a platform that promotes videos ranging from 15 seconds to 3 minutes, compared to its initial support for content up to 15 seconds only. You will most likely have to resize your video if you plan to share it on Tiktok with all the above elements. Here are some of the video dimension details for TikTok.
- Dimensions: 1080 x 1920
- Resolution: 9:16 Aspect Ratio
- File Format:.mp4 or .mov
- Code: encoded
We might have left you perplexed with all the information about how to connect TikTok to YouTube, but don’t worry, here are a variety of apps and a step-by-step guide for posting your videos on Tiktok without any issues.
1. Kapwing Studio
Within the various applications available, Kapwing Studio provides users with support and resources to help them edit and convert their YouTube videos to TikTok. It allows creators to upload the video from anywhere, anytime, via media library support since it is a web-base video editor. Moreover, Kapwing supports .mp4, .mov, .png, .gif, .jpg, .avi and plenty of other formats as well. All in all, Kapwing can be a complete transcoding and conversion package to optimize and convert your YouTube videos to post on TikTok.
Step 1: Copy the YouTube Video’s link
To get started, go to YouTube and search for the video you wish to convert. You can copy the link by right-clicking on YouTube’s video and paste it on Kapwing directly.
Note: Alternatively, if you’re already logged in, choose Create New Project. This will lead you to the Kapwing Studio, on which you can access all of Kapwing’s video editing capabilities in a single location.
Step 2: Resize YouTube video to 9:16
Double click the video in the timeline, and then click the Crop menu on the right top corner. To convert a YouTube video to TikTok, click the 9:16 option to start. Or, you can move the handles in the timeline until it reaches the precise length you need.
Note: When you process your video, make sure it has a 9:16 aspect ratio so it will fit on TikTok.
Step 3: Download & share on TikTok!
After you’ve uploaded your video to the Studio, just select the Export Video option in the upper right corner to save your video and share it on TikTok.
2. Kamua
On TikTok, content always takes precedence. One strategy to grow your TikTok audience is to convert your existing YouTube videos to post, and Kamua is the perfect tool for this! Kamua, a cloud-based video tool, allows creators to resize, crop, edit and save videos. Everything, including cutting, retouching, and repurposing of the video, is available in a single place.
Perhaps you have some daring, humorous, or legendary videos in a neglected collection that would be perfect for a TikTok trend or challenge- it’s time to edit them with Kamua! Transforming Landscape films vertically into the 9:16 aspect ratio is now easier and faster than ever before with Kamua.
Step 1: Copy the YouTube Video link and paste it into the Kamua.
Note: You can right-click on any video on YouTube to copy the link or click on the Share option.
Step 2: To turn on AutoCrop, select the Portrait (9:16) setting under the Settings menu on the left. You can also choose Remove Black Bars to resize the video.
Note: To preview how your videos would look on a TikTok mobile app, click the Phone symbol underneath the video
Step 3: Once done, click on the render project option in the below right corner to save the optimized video file. To watch the final video or to download it, click on the Outputs option. From here, you can watch as well as download your video.
3. Use Auto Reframe Feature in Filmora Video Editor
Auto Reframe , as clear from the name, can automatically visualize and detect the video’s focal point to resize or crop it in an optimal way. The Auto Reframe tool can identify a moving item in any video and rapidly trim it to multiple aspect ratios. What initially took hours, if not days, of editing may now be completed in moments with Filmora. You can also manually set the focal point in any video to adjust the aspect ratio and preferences as per your choice.
If you frequently have to upload videos to your social networking networks such as YouTube, Instagram, Facebook, and TikTok, Filmora will ease your life! We’ll teach you how to utilize Filmora’s Auto-Reframe option to reframe sequences for your YouTube to TikTok videos in the below-listed steps.
Step 1: Start by Launching Filmora on your device. Choose the Auto Reframe option from the starting window.
Step 2:Click on Import Media and select the video file you wish to convert. A separate dialogue box will open. From here, choose the aspect ratio and click on Analyze. The reframing process will start automatically.
You can choose from five different aspect ratios: square (1:1), vertical (9:16), standard (4:3), widescreen (16:9), and cinema (21:9). You can also adjust the frame’s dimensions by moving the crop box.
Step 3: When you’re through with the adjustments and reframing, click the Export option to preserve your work.
Note: Click Save after you enter a file name and select a destination folder. Add music, titles, effects, or transitions to improve the clip. You can move the clip to the timeline for more editing. You can share and save your video on TikTok once you have completed editing by clicking the Export option.
This vido tutorial introduces several ways to convert a 16:9 YouTube video to TikTok in Filmora. Download this smart auto reframe tool now and have a try.
For Win 7 or later (64-bit)
For macOS 10.12 or later
Conclusion
Good luck with your endeavors as a content creator, musician, comedian, or whatever else you choose. This article heavily emphasized on how you can convert YouTube to TikTok and be famous. Still, you can also reverse this process by posting your TikTok username on YouTube and in your YouTube videos. We hope this article has proved out to be helpful, if you have any further questions, don’t hesitate to contact us.
Also read:
- 2024 Approved Can You Receive a Monthly Check From YouTube?
- [New] A Stepwise Approach to Unlinking and Removing YouTube Content
- In 2024, An Owner's Guide to Playlist Permutations in YT
- [New] Crafting Standout YouTube Thumbnails with Ease
- 10 Must-Try Microphones for Exceptional ASMR Sounds for 2024
- 2024 Approved Essential Vids Summary Uncovered
- Creating Compelling Content with Personalized Video Setups
- [Updated] Enriching Vlog Topics to Share
- Discover the Top 10 Historically Rich YouTube Tutorials
- Synchronized Screenscapes YouTube Clips in TV Loops
- From Beginner to Expert Choose Studio or Beta
- Digital Recorder Snap Your Screen, Upload to YouTube Online/PC/Mac
- Monetizing Makeup Tutorial Content
- 2024 Approved Create Memorable Videos with the Right Thumbnail Font
- The Mobility of Art Filming and Thumbnail Design for YouTubes
- [Updated] Cutting-Edge Techniques for Incorporating Soundtracks in YouTube Creations
- Limelight Rhythms The Crème De La Crop of YT Short Scores
- Get Hooked Easy Ways to Loop Any YouTube Video
- In 2024, Dismantling the Economics of YouTube's Ambitious Shorts Fund
- Behind Closed Doors of YouTube A Discovery Manual for 2024
- Mastering YT Analytics Counting Eyeballs & Cash
- [Updated] Deep Dive The Economy and Impact of Online Stars
- Audience Attraction in a Minute Comparing YouTubes Shorts and TikToks
- Maximize Engagement The Ultimate List of YouTube Growth Tactics
- In 2024, Dial Back Your Playlist Quick Steps to Reverse Order
- [Updated] Average Revenue What Every View Contributes to Creators
- In 2024, Essential Free Video Editing Apps for iPhones/iPads
- Dive Into Youtube's Best Practices for Playlist Design
- Enhance Videos Naturally - Free 9 YouTube Thumbnail Crafting Tips
- [New] Crafting Comedy The Art of Parody Videos
- Quick Fix Mac-Compatible YouTube Video Resize
- Explore Popular YouTube Comment Sections
- Build Stellar YouTube Beginnings on a Shoestring Budget
- How to Get Just the Essentials From YouTube Videos
- Expert Tips for YouTube Channel Aesthetics Finding Optimal Sizes
- [Updated] Elevate Viewing Experience Activating AV1 Codec on YouTube
- 2024 Approved Boosting YouTube Traffic Outsmarting Automated Viewers
- Gender Diversity in Streaming Celebrating Top 10 Females
- [Updated] Enhancing Video Appeal Mac Thumbnails Tutorial
- In 2024, Bridal Bliss Filmed Alike High-Quality 8 Marriage Videos Online
- [New] Discover the Top 7 Free YouTube Tag Extractor Vendors
- [Updated] Bypass Youtube and Shine with These 5 Next-Gen Editing Software
- In 2024, Essential Collection Top 9 Premium Wedding Movies Online
- Tripod Alignment Secrets for Clearer Videos
- 2024 Approved Dive Into the World of Cosmetics Launching a Beauty Channel
- Best 3 Tecno Pop 8 Emulator for Mac to Run Your Wanted Android Apps | Dr.fone
- In 2024, Hacks to do pokemon go trainer battles For Realme V30T | Dr.fone
- Fake the Location to Get Around the MLB Blackouts on Xiaomi Redmi K70E | Dr.fone
- [Updated] 2024 Approved Top Pick Prodigious Insta HLV Pages Creators
- Fix App Not Available in Your Country Play Store Problem on Realme 11 Pro+ | Dr.fone
- Unlocking Video Potential with Fraps Recorder
- In 2024, Complete Guide For iPhone 14 Pro Max Lock Screen | Dr.fone
- [Updated] 2024 Approved Screen Grabs Revealed Gaming Edition Reviewed
- Complete Tutorial for Motorola Moto G Stylus (2023) Hard Reset | Dr.fone
- 9 Quick Fixes to Unfortunately TouchWiz has stopped Of Vivo Y27s | Dr.fone
- [Updated] Fix Hidden Suggested YouTube & Facebook Videos Explained for 2024
- [New] SocialNet Movie Replayer
- Innovative Audio Techniques for Your Podcasts
- [Updated] 2024 Approved Premium 9 Clandestine Content Getters
- [New] Simple Scan-Capture Solution - W10 OS
- Updated 2024 Approved The Ultimate Checklist for Virtual Vigilance Safeguarding During Online Interactions
- In 2024, How PGSharp Save You from Ban While Spoofing Pokemon Go On Samsung Galaxy A15 4G? | Dr.fone
- [New] Streamlined Processes for Capturing Vimeo Video Files
- [New] In 2024, Social Networking 101 Registering with Facebook
- How PGSharp Save You from Ban While Spoofing Pokemon Go On Vivo Y78 5G? | Dr.fone
- Empowering Videos with Your Cellphone's Camera Function for 2024
- Crafting Superior Recordings A Guide to Audacity for 2024
- [Updated] The Secrets of Top TikTok Response Vids
- Apple ID Locked for Security Reasons From Apple iPhone SE? Find the Best Solution Here
- [Updated] Unlock the Speed Dial Tips and Tricks to Fast Forward on TikTok for 2024
- In 2024, Steps to Engage in a Virtual Meeting via Devices (Google)
- Visionary Logo Designs that Define Your Podcast Brand
- [New] 2024 Approved Cutting-Edge Video Meeting Techniques on Slack + Filmora
- [Updated] 2024 Approved Top 5 Techniques for Captivating Your Twitch Audience
- ImageCaptor 3000 Windows/Mac's Ultimate Choice for 2024
- In 2024, Forgot iPhone Passcode Again? Unlock iPhone 13 Pro Max Without Passcode Now
- New In 2024, Effortless 4K Video Editing The Top 8 Proxy Video Editors
- [New] 2024 Approved From Ideas to Influence An Insider Look at Strategic Instagram Videos
- 2024 Approved Posting a YouTube Video via Insta Stories A Step-by-Step Guide
- Unleash Your Creativity Top Mobile Video Editors for iPhone and Android for 2024
- 2024 Approved Capture in Action Detailed Analysis of Apowersoft on PCs
- [Updated] 2024 Approved Gamers' Masterclass Advanced Recording Tips Unveiled
- How to Factory Reset Realme C53 If I Forgot Security Code or Password? | Dr.fone
- Title: "Dividing Opinions Is Mirrorless Better than DSLR for Vids for 2024"
- Author: Steven
- Created at : 2024-05-25 19:08:20
- Updated at : 2024-05-26 19:08:20
- Link: https://youtube-clips.techidaily.com/dividing-opinions-is-mirrorless-better-than-dslr-for-vids-for-2024/
- License: This work is licensed under CC BY-NC-SA 4.0.
