
:max_bytes(150000):strip_icc():format(webp)/best-time-of-day-to-instagram-3485858-1-5bb3cc9046e0fb002612537d.jpg)
Directly Posting Your Videos From iDevice to YouTube for 2024
Directly Posting Your Videos From iDevice to YouTube
Create High-Quality Video - Wondershare Filmora
An easy and powerful YouTube video editor
Numerous video and audio effects to choose from
Detailed tutorials provided by the official channel
Initially, iOS users had the option to load videos directly to YouTube via the tap-to-upload feature. However, this option is missing in the recent iOS devices versions. Therefore, many users search for possible ways to post a video on YouTube from iPhone. For this, you have to put some considerations into place before moving on. The video title length should not exceed 100 characters, while the description is maintained at 5,000 characters. Also, ensure the video length doesn’t exceed 15 minutes. Let’s roll out the best ways to upload your videos and make that big catch on subscribers.

In this article
01 [ How to upload a video to YouTube from iPhone or iPad](#Part 1)
02 [Why your phone doesn’t post videos to YouTube](#Part 2)
03 [Make your YouTube video better with Filmora](#Part 3)
How to upload a video to YouTube from iPhone or iPad
Are you ready to start on that big adventure and share your videos on YouTube? Follow these steps to learn how to upload a video to YouTube from your iPhone.
Method 1: Upload using the YouTube iOS app
Using the YouTube app is the simplest way to upload your YouTube videos. The YouTube app should be installed on your iOS device.
Step 1. Launch the YouTube app on your device, then sign in to your account. If you don’t have an account yet, you will need to “Sign up” for a new one before continuing the upload process.
Step 2. Click on the “+” icon found at the bottom of the screen.
Step 3. Then choose the “Upload a video” option from the populated list of options.
Step 4. Check out the pop-up that appears and “Allow access” to it.
Step 5. Edit your video to your preference by trimming or cropping as you desire. Then click on the “Next” option.

Step 6. Add “title and description” to your video. Remember, the title should contain less than 100 characters and the description no more than 500 characters.
Step 7. Then set the visibility mode as “Public” to enable you to share your video over the internet.
Step 8. Click on the “Upload” button to finally upload your video to YouTube.

Method 2: Upload using Photo App
The Photo App has a “Share” option that you can use to upload your videos to YouTube. Here is the guide.
Step 1. Go to your iOS device and tap on the “Photos” app.
Step 2. Then tap on the “Videos Folder” to locate the video you wish to upload to YouTube.

Step 3. Next, tap on the video that you want to upload.
Step 4. Then tap on the “Share” icon located at the bottom left of your iOS device screen.
Step 5. You’ll then access a “Share” menu from where you have various share options for your video.
Step 6. Choose the “YouTube” option to continue to share your video there. At this juncture, ensure you have logged in to your Google Account.

Step 7. You need to provide a “Title” and “Description” of your video. Then go to the “Privacy” Options and make your video “Public.”
Step 8. Finally, tap on the “Publish” tab found at the top-right corner of your screen to make your video viewable by the public.

Method 3: Upload video to YouTube using Safari
Safari is another alternative method to upload a video to YouTube.
Step 1. First, go to “youtube.com” on Safari and sign in.

Step 2. Then tap on the “account” icon at the top right side of the screen.
Step 3. Hit on the “Upload” icon and wait to be redirected to the YouTube Studio desktop site.
Step 4. Click on the “Select Files” option.
Step 5. Choose the video you wish to add to YouTube from the “Photo” library and tap on the “Add” button.

Step 6. Add your video’s “title and description” and hit the “Next” button.
Step 7. Tap on the “Next” button once more to go to the “Visibility” page.
Step 8. Select the “Public” option to upload your video to the public.
Why your phone doesn’t post videos to YouTube
Despite learning how to upload to YouTube from iPhone, you may be perplexed to realize that your phone refuses to post videos to YouTube. What could be the reason?
1) YouTube issues
In most cases, the problem doesn’t arise from your phone but from YouTube. This streaming app may also experience some hitches along the way. Remember that even if your phone sync with your YouTube account to upload videos from the “Camera Roll,” YouTube isn’t managed from the Camera Roll but the YouTube app directly. You can solve the issue by signing out of your YouTube account and signing back in.
2) Connection Strength
Some videos may appear quite large and cause a time-out during the upload process. Check your Wi-Fi or internet connection strength to determine if it needs a boost or wait until the streaming strength is strong for a quick upload. Test your internet speed by searching “internet test speed” on Google. Then click the “Run Speed Test” in the search box. A window will open and give you an estimate of the Mbps that your connection is operating at. If too low, switch to other alternatives.
3) Verify your YouTube account
Verifying your account will help you to enjoy YouTube’s full features. It’s then that you’ll manage to upload videos without any drawbacks. Also, that’s when you’ll manage to upload longer videos that go beyond the 15-minute duration.
4) Pay attention to the video size
There is a limit for videos to post to YouTube. If it is too large or long, the upload will cancel before completion.
5) Be patient
YouTube can save your partial upload for 24 hours. So, you can continue to upload from where you left. Learn to be patient as there could be a surge of user traffic, especially during evenings.
Make your YouTube video better with Filmora
Good video quality will make you go miles ahead of your marketing gig. You can use Filmora mobile application to make your videos look better before uploading them to YouTube. This intuitive video editing app has advanced features and several ways to compose creative videos.
- Stunning video effects that let you add animated text to video
- Easily record your voice-overs with its perfect sound effects
- Split functionality that allows you to slice your video footage into two or more separate video clips
- Playback your clips in reverse and adjust the speed for fast or slow motion
- Select the best aspect ratio for your video
- Advanced camera to create emoji selfies and other video beautification
- Directly share your videos to social media sites like YouTube and Facebook.
Check out the steps to edit your video with Filmora on your iOS device
Step 1. Download and install Filmora
For iOS devices, go to the “Apple Store” to download and install the app. Also, allow it to access your videos, camera, and pictures in the process.
Step 2. Import video
You may already have a video in your library that you wish to upload to YouTube. Nonetheless, you can shoot a video afresh to add. To shoot one, you need to settle on a topic before recording and downloading other images you may need. Ensure you watch what you are filming and use adequate lighting during the shooting process.
Next, begin to import your video file. Just open the application and select the “Create new video” option. Then choose the “Video” icon and select a folder that contains the video to be added. Hit the “Add” button from the bottom right corner.
Step 3. Edit video
Filmora has several editing features to make your video better. Use the “Edit tools” feature to turn your video into an impeccable piece. Easily add filters, adjust the speed, or create subtitles, among other functions. You can also split, trim, or delete the unwanted clip parts.
It is important to add a title and description to your video. Just use the “Titles” button to add the title. Other precepts that you can add include transitions, sound like voice-over,
Step 4. Export and share
You’ve just finished creating and editing your video. Click on the “Save” tab and let the application export your video. Then select the “Save to Camera Roll” option to save the video to your iPhone. Finally, you can upload and share the video directly to your YouTube account.
Conclusion
● However, it appears to be a difficult task; you must have found relief after going through these procedures. You don’t need prior knowledge on how to upload a video to YouTube from your iPhone. Several options are at your disposal. You can use the Safari, YouTube app, or the Photo app to upload your videos. The better part is that you can create top-notch videos with Filmora. This mobile video editing app has a lot to offer, ensuring quality content.
Initially, iOS users had the option to load videos directly to YouTube via the tap-to-upload feature. However, this option is missing in the recent iOS devices versions. Therefore, many users search for possible ways to post a video on YouTube from iPhone. For this, you have to put some considerations into place before moving on. The video title length should not exceed 100 characters, while the description is maintained at 5,000 characters. Also, ensure the video length doesn’t exceed 15 minutes. Let’s roll out the best ways to upload your videos and make that big catch on subscribers.
In this article
01 [ How to upload a video to YouTube from iPhone or iPad](#Part 1)
02 [Why your phone doesn’t post videos to YouTube](#Part 2)
03 [Make your YouTube video better with Filmora](#Part 3)
How to upload a video to YouTube from iPhone or iPad
Are you ready to start on that big adventure and share your videos on YouTube? Follow these steps to learn how to upload a video to YouTube from your iPhone.
Method 1: Upload using the YouTube iOS app
Using the YouTube app is the simplest way to upload your YouTube videos. The YouTube app should be installed on your iOS device.
Step 1. Launch the YouTube app on your device, then sign in to your account. If you don’t have an account yet, you will need to “Sign up” for a new one before continuing the upload process.
Step 2. Click on the “+” icon found at the bottom of the screen.
Step 3. Then choose the “Upload a video” option from the populated list of options.
Step 4. Check out the pop-up that appears and “Allow access” to it.
Step 5. Edit your video to your preference by trimming or cropping as you desire. Then click on the “Next” option.
Step 6. Add “title and description” to your video. Remember, the title should contain less than 100 characters and the description no more than 500 characters.
Step 7. Then set the visibility mode as “Public” to enable you to share your video over the internet.
Step 8. Click on the “Upload” button to finally upload your video to YouTube.
Method 2: Upload using Photo App
The Photo App has a “Share” option that you can use to upload your videos to YouTube. Here is the guide.
Step 1. Go to your iOS device and tap on the “Photos” app.
Step 2. Then tap on the “Videos Folder” to locate the video you wish to upload to YouTube.
Step 3. Next, tap on the video that you want to upload.
Step 4. Then tap on the “Share” icon located at the bottom left of your iOS device screen.
Step 5. You’ll then access a “Share” menu from where you have various share options for your video.
Step 6. Choose the “YouTube” option to continue to share your video there. At this juncture, ensure you have logged in to your Google Account.
Step 7. You need to provide a “Title” and “Description” of your video. Then go to the “Privacy” Options and make your video “Public.”
Step 8. Finally, tap on the “Publish” tab found at the top-right corner of your screen to make your video viewable by the public.
Method 3: Upload video to YouTube using Safari
Safari is another alternative method to upload a video to YouTube.
Step 1. First, go to “youtube.com” on Safari and sign in.
Step 2. Then tap on the “account” icon at the top right side of the screen.
Step 3. Hit on the “Upload” icon and wait to be redirected to the YouTube Studio desktop site.
Step 4. Click on the “Select Files” option.
Step 5. Choose the video you wish to add to YouTube from the “Photo” library and tap on the “Add” button.
Step 6. Add your video’s “title and description” and hit the “Next” button.
Step 7. Tap on the “Next” button once more to go to the “Visibility” page.
Step 8. Select the “Public” option to upload your video to the public.
Why your phone doesn’t post videos to YouTube
Despite learning how to upload to YouTube from iPhone, you may be perplexed to realize that your phone refuses to post videos to YouTube. What could be the reason?
1) YouTube issues
In most cases, the problem doesn’t arise from your phone but from YouTube. This streaming app may also experience some hitches along the way. Remember that even if your phone sync with your YouTube account to upload videos from the “Camera Roll,” YouTube isn’t managed from the Camera Roll but the YouTube app directly. You can solve the issue by signing out of your YouTube account and signing back in.
2) Connection Strength
Some videos may appear quite large and cause a time-out during the upload process. Check your Wi-Fi or internet connection strength to determine if it needs a boost or wait until the streaming strength is strong for a quick upload. Test your internet speed by searching “internet test speed” on Google. Then click the “Run Speed Test” in the search box. A window will open and give you an estimate of the Mbps that your connection is operating at. If too low, switch to other alternatives.
3) Verify your YouTube account
Verifying your account will help you to enjoy YouTube’s full features. It’s then that you’ll manage to upload videos without any drawbacks. Also, that’s when you’ll manage to upload longer videos that go beyond the 15-minute duration.
4) Pay attention to the video size
There is a limit for videos to post to YouTube. If it is too large or long, the upload will cancel before completion.
5) Be patient
YouTube can save your partial upload for 24 hours. So, you can continue to upload from where you left. Learn to be patient as there could be a surge of user traffic, especially during evenings.
Make your YouTube video better with Filmora
Good video quality will make you go miles ahead of your marketing gig. You can use Filmora mobile application to make your videos look better before uploading them to YouTube. This intuitive video editing app has advanced features and several ways to compose creative videos.
- Stunning video effects that let you add animated text to video
- Easily record your voice-overs with its perfect sound effects
- Split functionality that allows you to slice your video footage into two or more separate video clips
- Playback your clips in reverse and adjust the speed for fast or slow motion
- Select the best aspect ratio for your video
- Advanced camera to create emoji selfies and other video beautification
- Directly share your videos to social media sites like YouTube and Facebook.
Check out the steps to edit your video with Filmora on your iOS device
Step 1. Download and install Filmora
For iOS devices, go to the “Apple Store” to download and install the app. Also, allow it to access your videos, camera, and pictures in the process.
Step 2. Import video
You may already have a video in your library that you wish to upload to YouTube. Nonetheless, you can shoot a video afresh to add. To shoot one, you need to settle on a topic before recording and downloading other images you may need. Ensure you watch what you are filming and use adequate lighting during the shooting process.
Next, begin to import your video file. Just open the application and select the “Create new video” option. Then choose the “Video” icon and select a folder that contains the video to be added. Hit the “Add” button from the bottom right corner.
Step 3. Edit video
Filmora has several editing features to make your video better. Use the “Edit tools” feature to turn your video into an impeccable piece. Easily add filters, adjust the speed, or create subtitles, among other functions. You can also split, trim, or delete the unwanted clip parts.
It is important to add a title and description to your video. Just use the “Titles” button to add the title. Other precepts that you can add include transitions, sound like voice-over,
Step 4. Export and share
You’ve just finished creating and editing your video. Click on the “Save” tab and let the application export your video. Then select the “Save to Camera Roll” option to save the video to your iPhone. Finally, you can upload and share the video directly to your YouTube account.
Conclusion
● However, it appears to be a difficult task; you must have found relief after going through these procedures. You don’t need prior knowledge on how to upload a video to YouTube from your iPhone. Several options are at your disposal. You can use the Safari, YouTube app, or the Photo app to upload your videos. The better part is that you can create top-notch videos with Filmora. This mobile video editing app has a lot to offer, ensuring quality content.
Organizing Information Mastery: Seamless Integration of Chapters in YouTube Videos
How to Add Chapters to YouTube Videos

Richard Bennett
Mar 27, 2024• Proven solutions
If you have seen chapter markers on YouTube of our official channel, you might be wondering how someone can create chapters on YouTube? What is the way to mark different parts of the videos, and how can you add markers to all the existing videos on YouTube? Don’t worry; this article will discuss everything about YouTube chapters that you need to know. Keep reading to find all the details and learn the step-by-step instructions to add chapters to your YouTube videos for better engagement.
- Part 1: What Are YouTube Chapters?
- Part 2: How to Add Chapter to YouTube Video Progress Bar?
- Part 3: Why Add Chapters to Videos?
- Part 4: When Add Chapters on YouTube?
- Part 5: Will Chapter Decrease Watching Time?
- Part 6: Video Chapter Adding Tips
- Part 7: Why YouTube Chapter is Not Working?
Part 1: What Are YouTube Chapters?
YouTube video chapters are an excellent way to optimize your YouTube content. When you have chapters for your YouTube video, each chapter will have an individual preview. Chapters will break your YouTube video into multiple parts allowing your audience to have better context and information.
As per YouTube, chapters let the audience navigate better through videos. Chapters will let your audience watch different video parts, which will eventually lead to better engagement. If you want to organize your YouTube content, chapters are one of the best ways to go about it. By using labeled timestamps, your video will be divided into multiple sections. Your audience will be able to see the preview of the content and easily skip to the part they want to see within the video’s progress bar.
Part 2: How to Add Chapter to YouTube Video Progress Bar?
If you are a YouTube creator and want to know how you can add chapters to your YouTube content, here’s what you need to do. Follow these instructions carefully:
Step 1: First things first, please sign in to your YouTube account.
Step 2: Select the video that you want to edit and add chapters.
Step 3: Click on the edit video option. This option will be there under the video.
Step 4: On the add details page, you will see the description box. Here, you need to add the list of titles and timestamps.

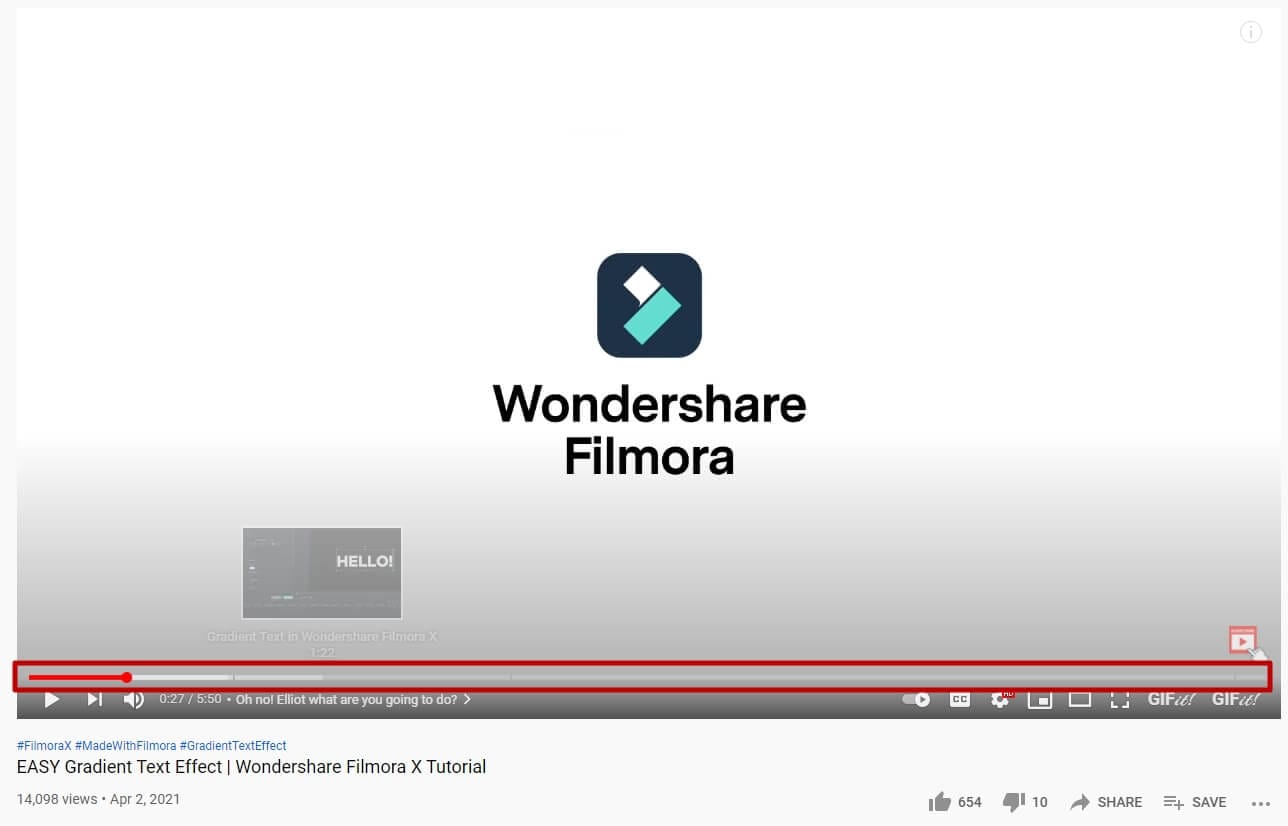
Please keep in mind that you must add the first timestamp with “00:00”. You will have to add a minimum of three timestamps with a minimum of 10 seconds for each chapter. Here is how it looks like in the description after published.

Part 3: Why YouTubers Should Add Chapters to videos?
There are two primary advantages of adding chapters to your YouTube videos. Apart from making your YouTube video look organized and neat, chapters will let you provide a better user experience to everyone watching your video because they will find all the information about your video faster and easier within a video. And the second benefit is that your YouTube video will show up in search results. This is a way to optimize your content for more users to find your content.
YouTube chapters are beneficial for both creators and viewers. On the progress bar, these clickable chapters can be added. This will allow a viewer to skip and scrub through a video quickly and skip to parts they actually want to watch.
This feature is quite helpful for videos that are pretty long. Chapters will let you segment the videos into important chapters so that the viewer can rewatch already watched chapters or skip to other chapters in the video. YouTube chapters have been recently added to this platform for better navigation and engagement.
Better User Experience for Users
Just like Google wants browsers to find what they are looking for when they add a keyword, YouTube also wants to help viewers find what they are looking for. Chapters can be immensely beneficial for extended content. For example, if you are uploading a video of your convert video, let the users jump straight to their favorite songs.
Even in tutorial video content, viewers will now have a chance to get straight to the main part of the video. With chapters being added, viewers will have an opportunity to decide whether they want to watch the whole video or not. They won’t have to keep skipping one part to another blindly. Chapters will allow them to find what they are looking for in an instant.
For Creators: Increased Visibility
If you know about the Google algorithm, you must be aware that it regularly changes its algorithm to let people find the information they are looking for easily. Adding chapters to your video will encourage Google to display them more often when someone searches for them, and this will include adding your videos to its featured snippets.
While adding chapters, you need to make sure that it is labeled with correct keywords, and it is clear and descriptive. YouTube videos are often showed as Google snippet when someone tries to find something on the search engine. Adding a chapter will let Google understand the content better, thereby letting your videos gain more search traffic.
Part 4: When should I add or not chapters on YouTube?
If you are wondering whether all videos on YouTube should have chapters, the answer to this is no. A two minutes long video won’t require chapters because it won’t make sense. Think about whether you would want your audience to have reduced watch time. Another thing to pay attention to is audience retention.
We mentioned earlier that adding chapters to long videos will be a good idea, but before you jump in and start adding chapters, you need to understand whether it will help you and should be done in your particular case?
If you are uploading a video on education, science and technology, how-to, news and politics, Q and A, and other similar videos, adding chapters will definitely help. In these kinds of videos, you will let your audience rewatch a section they liked the most over and over again.
However, if you are uploading music, entertainment, comedy, and film and animation videos, we will recommend not to add chapters because this will reduce the watch time.
Part 5: Do YouTube Video Chapters Decrease Channel Watch Time?
One of the most commonly asked questions regarding adding chapters to YouTube videos is whether it will reduce the watch time of a video. Video chapters are a pretty good feature and can enable your videos to engage with the viewers.
Since chapters allow your audience to skip through video content, they are not really watching the whole video, which can’t be suitable for audience retention! Here’s what we have to say to this: don’t put your 100% focus on watch time right now. Your focus should be creating informative and engaging content, which will keep your audience hooked to their screens. Even if you add chapters, if your audience doesn’t find it engaging, they will choose not to go on with the content.
Video chapters are a tiny part of the overall content. Chapters provide value to your audience, and you should try them. If you are uploading a concise video, animation video, funny video, and more, don’t add chapters.
Even some of the most watched videos on YouTube have chapters. Learn from them. These video makers could have thought about numbers rather than giving value to their audience, but they did just the opposite, and here they are with over a million views!
Part 6: Tips for adding chapters to YouTube video
Each video on YouTube is different, and that’s why there is no one-size-fits-all answer. There are some cases where you should not think about adding chapters at all. Whereas in other cases, you will have to experiment a bit before adding chapters.
Here are some tips that will help you.
Do Some Testing
Before adding chapters to a new video that you are thinking to upload, try adding chapters to an old video. See what happens to that video. Have the views increased? How about average view duration? Track these metrics first, and then try adding chapters to your upcoming videos to benefit from videos. Along with these metrics, you will also have to evaluate if adding chapters decreases or increases the watch time and number of views.
Label Your Chapters Using Keywords
Another thing to do that will help you have better traction is using a good keyword strategy. Look at what people are using while searching for content, which is similar to yours? Using names based on keywords that have better search volume will help your videos to rank higher.
Part 7: Why Video Chapter is Not working? [Problem solved]
There are a few mandatory things that you need to do before adding chapters to your YouTube video. Here are some of the common reasons why the video chapter is not working. See if any one of them is true in your case, and rectify it right away.
- Your video doesn’t have the 00:00 timestamp.
- Your video has less than three chapters.
- You have added a chapter that is less than 10 seconds long.
- You have not added the timestamps in chronological order.
- Rather than using “:” you have entered “.” for timecodes.
- If your channel has active copyright strikes, video chapters won’t work.
- Your channel doesn’t have more than 1k subscribers.
- Your video chapters are not suitable for some viewers.
Richard Bennett
Richard Bennett is a writer and a lover of all things video.
Follow @Richard Bennett
Richard Bennett
Mar 27, 2024• Proven solutions
If you have seen chapter markers on YouTube of our official channel, you might be wondering how someone can create chapters on YouTube? What is the way to mark different parts of the videos, and how can you add markers to all the existing videos on YouTube? Don’t worry; this article will discuss everything about YouTube chapters that you need to know. Keep reading to find all the details and learn the step-by-step instructions to add chapters to your YouTube videos for better engagement.
- Part 1: What Are YouTube Chapters?
- Part 2: How to Add Chapter to YouTube Video Progress Bar?
- Part 3: Why Add Chapters to Videos?
- Part 4: When Add Chapters on YouTube?
- Part 5: Will Chapter Decrease Watching Time?
- Part 6: Video Chapter Adding Tips
- Part 7: Why YouTube Chapter is Not Working?
Part 1: What Are YouTube Chapters?
YouTube video chapters are an excellent way to optimize your YouTube content. When you have chapters for your YouTube video, each chapter will have an individual preview. Chapters will break your YouTube video into multiple parts allowing your audience to have better context and information.
As per YouTube, chapters let the audience navigate better through videos. Chapters will let your audience watch different video parts, which will eventually lead to better engagement. If you want to organize your YouTube content, chapters are one of the best ways to go about it. By using labeled timestamps, your video will be divided into multiple sections. Your audience will be able to see the preview of the content and easily skip to the part they want to see within the video’s progress bar.
Part 2: How to Add Chapter to YouTube Video Progress Bar?
If you are a YouTube creator and want to know how you can add chapters to your YouTube content, here’s what you need to do. Follow these instructions carefully:
Step 1: First things first, please sign in to your YouTube account.
Step 2: Select the video that you want to edit and add chapters.
Step 3: Click on the edit video option. This option will be there under the video.
Step 4: On the add details page, you will see the description box. Here, you need to add the list of titles and timestamps.
Please keep in mind that you must add the first timestamp with “00:00”. You will have to add a minimum of three timestamps with a minimum of 10 seconds for each chapter. Here is how it looks like in the description after published.
Part 3: Why YouTubers Should Add Chapters to videos?
There are two primary advantages of adding chapters to your YouTube videos. Apart from making your YouTube video look organized and neat, chapters will let you provide a better user experience to everyone watching your video because they will find all the information about your video faster and easier within a video. And the second benefit is that your YouTube video will show up in search results. This is a way to optimize your content for more users to find your content.
YouTube chapters are beneficial for both creators and viewers. On the progress bar, these clickable chapters can be added. This will allow a viewer to skip and scrub through a video quickly and skip to parts they actually want to watch.
This feature is quite helpful for videos that are pretty long. Chapters will let you segment the videos into important chapters so that the viewer can rewatch already watched chapters or skip to other chapters in the video. YouTube chapters have been recently added to this platform for better navigation and engagement.
Better User Experience for Users
Just like Google wants browsers to find what they are looking for when they add a keyword, YouTube also wants to help viewers find what they are looking for. Chapters can be immensely beneficial for extended content. For example, if you are uploading a video of your convert video, let the users jump straight to their favorite songs.
Even in tutorial video content, viewers will now have a chance to get straight to the main part of the video. With chapters being added, viewers will have an opportunity to decide whether they want to watch the whole video or not. They won’t have to keep skipping one part to another blindly. Chapters will allow them to find what they are looking for in an instant.
For Creators: Increased Visibility
If you know about the Google algorithm, you must be aware that it regularly changes its algorithm to let people find the information they are looking for easily. Adding chapters to your video will encourage Google to display them more often when someone searches for them, and this will include adding your videos to its featured snippets.
While adding chapters, you need to make sure that it is labeled with correct keywords, and it is clear and descriptive. YouTube videos are often showed as Google snippet when someone tries to find something on the search engine. Adding a chapter will let Google understand the content better, thereby letting your videos gain more search traffic.
Part 4: When should I add or not chapters on YouTube?
If you are wondering whether all videos on YouTube should have chapters, the answer to this is no. A two minutes long video won’t require chapters because it won’t make sense. Think about whether you would want your audience to have reduced watch time. Another thing to pay attention to is audience retention.
We mentioned earlier that adding chapters to long videos will be a good idea, but before you jump in and start adding chapters, you need to understand whether it will help you and should be done in your particular case?
If you are uploading a video on education, science and technology, how-to, news and politics, Q and A, and other similar videos, adding chapters will definitely help. In these kinds of videos, you will let your audience rewatch a section they liked the most over and over again.
However, if you are uploading music, entertainment, comedy, and film and animation videos, we will recommend not to add chapters because this will reduce the watch time.
Part 5: Do YouTube Video Chapters Decrease Channel Watch Time?
One of the most commonly asked questions regarding adding chapters to YouTube videos is whether it will reduce the watch time of a video. Video chapters are a pretty good feature and can enable your videos to engage with the viewers.
Since chapters allow your audience to skip through video content, they are not really watching the whole video, which can’t be suitable for audience retention! Here’s what we have to say to this: don’t put your 100% focus on watch time right now. Your focus should be creating informative and engaging content, which will keep your audience hooked to their screens. Even if you add chapters, if your audience doesn’t find it engaging, they will choose not to go on with the content.
Video chapters are a tiny part of the overall content. Chapters provide value to your audience, and you should try them. If you are uploading a concise video, animation video, funny video, and more, don’t add chapters.
Even some of the most watched videos on YouTube have chapters. Learn from them. These video makers could have thought about numbers rather than giving value to their audience, but they did just the opposite, and here they are with over a million views!
Part 6: Tips for adding chapters to YouTube video
Each video on YouTube is different, and that’s why there is no one-size-fits-all answer. There are some cases where you should not think about adding chapters at all. Whereas in other cases, you will have to experiment a bit before adding chapters.
Here are some tips that will help you.
Do Some Testing
Before adding chapters to a new video that you are thinking to upload, try adding chapters to an old video. See what happens to that video. Have the views increased? How about average view duration? Track these metrics first, and then try adding chapters to your upcoming videos to benefit from videos. Along with these metrics, you will also have to evaluate if adding chapters decreases or increases the watch time and number of views.
Label Your Chapters Using Keywords
Another thing to do that will help you have better traction is using a good keyword strategy. Look at what people are using while searching for content, which is similar to yours? Using names based on keywords that have better search volume will help your videos to rank higher.
Part 7: Why Video Chapter is Not working? [Problem solved]
There are a few mandatory things that you need to do before adding chapters to your YouTube video. Here are some of the common reasons why the video chapter is not working. See if any one of them is true in your case, and rectify it right away.
- Your video doesn’t have the 00:00 timestamp.
- Your video has less than three chapters.
- You have added a chapter that is less than 10 seconds long.
- You have not added the timestamps in chronological order.
- Rather than using “:” you have entered “.” for timecodes.
- If your channel has active copyright strikes, video chapters won’t work.
- Your channel doesn’t have more than 1k subscribers.
- Your video chapters are not suitable for some viewers.
Richard Bennett
Richard Bennett is a writer and a lover of all things video.
Follow @Richard Bennett
Also read:
- In 2024, A Blueprint for Exceptional Product Showcasing
- Wow-Tastic Editing YouTube Edition of Greatest Magic Tricks!
- [Updated] Crafting Engaging Channels Using TubeBuddy's Framework
- 2024 Approved Become a YouTube Visionary with These Production Insights
- 2024 Approved Bypassing Barriers A Guide to Flawless YouTube Shorts
- [Updated] Creating Heartfelt YouTube Journeys
- Direct Route Uploading From YouTube to Dailymotion
- [New] Affordable Mic Picks for Aspiring YT Bands
- In 2024, Elevate Your Social Media Game Discover the Best 5 YouTube Promotion Strategies
- Ideal History Streams The 10 Premier Channels for Students' Study
- 10 Best YouTube Keyword Tools to Get More Views for 2024
- 2024 Approved Elevating Your YouTube Projects with Enhancements
- [New] Budding Creators Set Up a Profitable YouTube Chanel
- [New] Chuckles Galore Navigate the Best 15 Comedic YouTube Crews
- How To Make a YouTube Trailer
- [Updated] Enhancing Video Content Through Effective Use of Cards/Annotations
- Elevate Your Vlogs Optimizing Title, Description & Tags
- 2024 Approved Elevate Your Content Strategies to Climb YouTube Ranks
- In 2024, Amplify Videographic Excellence - Choose From These 7 Audios
- The Next Generation of Video Communities Post-YouTube
- In 2024, Drive Traffic and Growth with YouTube Analytic Insights
- Cutting-Edge Free Audio for YouTube Visionaries
- The Streamer's Crossroad Navigating Between Vimeo, YouTube, Dailymotion
- [Updated] Sharing Tweets via Vids on WhatsApp Now
- Disable screen lock on Infinix Smart 8
- Samsung Galaxy Z Flip 5 can't play MP4 video files
- [New] 2024 Approved Dynamic Duo Enhancing Fb Live with Monitor Sharing Capabilities
- In 2024, 5 Ways Change Your Home Address in Google/Apple Map on Apple iPhone 6s/iPad | Dr.fone
- New Guide How To Check iCloud Activation Lock Status From Your Apple iPhone XR
- New 2024 Approved Merge Videos Without Watermarks Top 5 Tools
- [Updated] Dissecting Apowersoft An In-Depth Screen Recorder Study
- Diminuendo Design Guiding Sounds In Adobe Premiere
- New 2024 Approved Unleash the 80S Easy VHS Effects for Final Cut Pro Users
- [Updated] In 2024, Accelerated Learning for Effective NVIDIA Screener Use
- What To Do When Vivo Y100i Has Black Screen of Death? | Dr.fone
- Updated 2024 Approved AVS Video Editor A Review of Its Performance and Capabilities
- In 2024, 10 Free Location Spoofers to Fake GPS Location on your Honor 90 | Dr.fone
- In 2024, 15 Best Strongest Pokémon To Use in Pokémon GO PvP Leagues For Nokia C32 | Dr.fone
- In 2024, 10 Free Online Subtitle Converters for Video Accessibility
- [New] 2024 Approved The Ultimate Guide to Rapidly Discover Friends
- Master the Basics Essential Photo Edits for Starters
- For People Wanting to Mock GPS on Oppo Reno 10 Pro 5G Devices | Dr.fone
- [Updated] 2024 Approved Excellent Live Broadcast Achieving Ultra-HD FB Video
- In 2024, Top-Notch Solutions for Disabled Apple ID On iPhone 6 Making It Possible
- Title: Directly Posting Your Videos From iDevice to YouTube for 2024
- Author: Steven
- Created at : 2024-05-25 19:06:33
- Updated at : 2024-05-26 19:06:33
- Link: https://youtube-clips.techidaily.com/directly-posting-your-videos-from-idevice-to-youtube-for-2024/
- License: This work is licensed under CC BY-NC-SA 4.0.
