
:max_bytes(150000):strip_icc():format(webp)/GettyImages-527803604-ad6f389c89ff4be1b953a3c2cdc64c09.jpg)
"Directing Content Flow Uploading IMovie Films to YouTube"
Directing Content Flow: Uploading IMovie Films to YouTube
How to Upload a Video from iMovie to YouTube?

Liza Brown
Aug 18, 2022• Proven solutions
“Is iMovie good for YouTube?”
The iMovie is not only good for YouTube but various other social media platforms. The thing is, you have to compromise with the quality offered by Apple’s video editor iMovie. Well, iMovie is perfect for getting started for beginners. But, the professionals and ones who want a bit high features than basic ones should look elsewhere. Thus, we always recommend alternatives to a particular software for our audience. In this article, there is a mention of Wondershare Filmora to overcome the drawbacks of iMovie.
Without further ado, let’s begin with how to upload a video from iMovie to YouTube. We want to lead with the best iMovie export settings, specific troubleshooting issues, and our alternative intro section to overcome iMovie’s limitations.
Part 1: How to Upload a Video from iMovie to YouTube?
iMovie is ideal for making YouTube videos if you are too basic and are not looking for advanced features. Remember that professionalism pays in these platforms and helps you stand better among others. If you’re still interested in making introductory videos, here is a step-by-step guide on uploading a video to YouTube from iMovie on Mac first and leading with iPhone.
Step-by-Step Tutorial on how to upload a video from iMovie to YouTube on Mac
Step 1: Create a Project
On the first step, go to iMovie on Mac and click the Create New tab below.
Step 2: Import Media
Click the Import Media button and browse the files on your computer, as shown below.
Step 3: Edit Clips
It’s time to edit video footage. Drag your video to the timeline, as shown below.
Then, you can trim and drag the edges of video clips to allow editing.
Step 4: Add Titles
You can add titles by clicking the Title tab and further drag the Title’s template into the timeline.
Step 5: Export the Video
Click the Export button as follows after editing is over.
Select YouTube to upload your video over the platform directly.
Step 6: Save
After selecting the desired platform, click the Next tab to proceed with saving the file.
At last, save your video as shown below.
Step-by-Step Tutorial on how to upload iMovie to YouTube from iPhone
Step 1: Share the iMovie Project
Go to iMovie on your iPhone. Open the iMovie project on your iPhone and tap the Share button to select YouTube. Enter the information of Title, Description, Size, Tags, Privacy, and Location (optional).
Step 2: Upload iMovie Files
For ease of use, you can upload saved videos in Photo Library on your iPhone. Then, you can upload iMovie videos via the YouTube iOS app. Sign In to YouTube and click the Camera icon at the top of the Home page. Select your iPhone Photo Library file and set the video Title, Description, Size, Tags, and Privacy. Then, hit the Upload button to confirm.
Part 2: The Best iMovie Export Settings for YouTube Videos
As we all know that iMovie consists of a bit long procedure to export projects. Here are some tips on the best iMovie export settings to avoid an unnecessary headache.
- Set small resolution: Small resolution plays a more significant role, especially while uploading. Thus, you can set the smallest resolution in the Email tab of the Export button.
2. Change Export settings in the File tab: There is a File tab under the Export button. Click it and find various settings that you need to change to get the best export settings for YouTube 2021. Make the Title of the video as small as possible. Set the resolution at 1080P than 4K.
However, it isn’t going to upgrade the resolution if your video is already in the 1080P definition. Now, the last setting that will crazily offer you the best quality and lots of space-saving. You have to select Best (ProRes) in quality settings for this purpose. These settings also take less time to upload to YouTube.
3. Compress is not for speed: Various options you see in the Compresstab are not for speed. They are for how you save the video on a desktop. Thus, always choose the Better Quality tab than Faster.
- Do not export directly to YouTube: iMovie is pretty basic and doesn’t offer great settings to upload your video instantly. You may have to make changes to the uploaded video even if you do this as per our step-by-step guide mentioned above.
Part 3: How to fix the “Failed to Upload to YouTube” Error on iMovie?
The “iMovie to YouTube failed” problem occurs when you directly upload a YouTube video from iMovie. The issue will result if you upload from any third-party uploader. That is why the direct upload doesn’t work, especially in iMovie. You can opt to share your video to the desktop first and then drag it to upload to the YouTube platform.
Part 4: Upload Videos to YouTube with the Best Alternative to iMovie - Wondershare Filmora
“What can I use instead of iMovie to overcome its limitations?”
When you see that iMovie is not uploading to YouTube or iMovie upload to YouTube got stuck, go for a better alternative. In this section, we’d like to recommend Wondershare Filmora that offers the best export settings compared to iMovie. It is the go-to solution if you can’t upload video from iMovie to YouTube directly. Filmora further provides intuitive editing tools that professionally make your YouTube video projects.
Export Key Aspects of Wondershare Filmora in comparison to iMovie:
- It offers a long list of export resolutions to choose from.
- You get separate video and audio settings such as Encoder, Channel, Frame Rate, Bit Rate, Resolution, etc.
- It is further compatible with export to various devices including the iPhone, Samsung, iPod, Apple TV, iPad, Google Pixel, PSP, Smart TV, etc.
Step-by-Step Guide on how to upload a video from iMovie to YouTube via Wondershare Filmora
Step 1: Click the Export button and select resolution
After your project in Wondershare Filmora is over, click the Export tab and select video resolution from the Local tab, as shown below.
It has a list of formats. You can also edit the Name and saving location here.
Step 2: Select Quality
Select the Settings button and choose from three quality levels of Best, Better, and Good. You can also adjust video and audio parameters, including the Encoder, Frame Rate, Resolution, Bit Rate, etc.
Step 3: Select platform
Select the YouTube tab, Sign In to your YouTube account, and hit the Export button after modifying the Title and Quality if needed. Also, make sure to check the Enable GPU accelerated video encoding tab.
Select Wondershare Filmora as the ultimate solution even if iMovie upload to YouTube not showing up.
Conclusion
Hopefully, we’ve informed you of the relevant facts on how to upload a video from iMovie to YouTube. We have also examined the number of troubleshooting issues involved in the iMovie video editor. Well, you will get to face similar kinds of export difficulties in the iMovie editor. Also, the entire procedure to end the exporting task is a bit long in iMovie compared to any other video editing software. Thus, it’s crucial to check out what other alternatives the technological world has today. We can’t state to you a better beginner-friendly yet advanced editing option than Wondershare Filmora that rightly outtakes the iMovie video editor in all aspects.
Liza Brown
Liza Brown is a writer and a lover of all things video.
Follow @Liza Brown
Liza Brown
Aug 18, 2022• Proven solutions
“Is iMovie good for YouTube?”
The iMovie is not only good for YouTube but various other social media platforms. The thing is, you have to compromise with the quality offered by Apple’s video editor iMovie. Well, iMovie is perfect for getting started for beginners. But, the professionals and ones who want a bit high features than basic ones should look elsewhere. Thus, we always recommend alternatives to a particular software for our audience. In this article, there is a mention of Wondershare Filmora to overcome the drawbacks of iMovie.
Without further ado, let’s begin with how to upload a video from iMovie to YouTube. We want to lead with the best iMovie export settings, specific troubleshooting issues, and our alternative intro section to overcome iMovie’s limitations.
Part 1: How to Upload a Video from iMovie to YouTube?
iMovie is ideal for making YouTube videos if you are too basic and are not looking for advanced features. Remember that professionalism pays in these platforms and helps you stand better among others. If you’re still interested in making introductory videos, here is a step-by-step guide on uploading a video to YouTube from iMovie on Mac first and leading with iPhone.
Step-by-Step Tutorial on how to upload a video from iMovie to YouTube on Mac
Step 1: Create a Project
On the first step, go to iMovie on Mac and click the Create New tab below.
Step 2: Import Media
Click the Import Media button and browse the files on your computer, as shown below.
Step 3: Edit Clips
It’s time to edit video footage. Drag your video to the timeline, as shown below.
Then, you can trim and drag the edges of video clips to allow editing.
Step 4: Add Titles
You can add titles by clicking the Title tab and further drag the Title’s template into the timeline.
Step 5: Export the Video
Click the Export button as follows after editing is over.
Select YouTube to upload your video over the platform directly.
Step 6: Save
After selecting the desired platform, click the Next tab to proceed with saving the file.
At last, save your video as shown below.
Step-by-Step Tutorial on how to upload iMovie to YouTube from iPhone
Step 1: Share the iMovie Project
Go to iMovie on your iPhone. Open the iMovie project on your iPhone and tap the Share button to select YouTube. Enter the information of Title, Description, Size, Tags, Privacy, and Location (optional).
Step 2: Upload iMovie Files
For ease of use, you can upload saved videos in Photo Library on your iPhone. Then, you can upload iMovie videos via the YouTube iOS app. Sign In to YouTube and click the Camera icon at the top of the Home page. Select your iPhone Photo Library file and set the video Title, Description, Size, Tags, and Privacy. Then, hit the Upload button to confirm.
Part 2: The Best iMovie Export Settings for YouTube Videos
As we all know that iMovie consists of a bit long procedure to export projects. Here are some tips on the best iMovie export settings to avoid an unnecessary headache.
- Set small resolution: Small resolution plays a more significant role, especially while uploading. Thus, you can set the smallest resolution in the Email tab of the Export button.
2. Change Export settings in the File tab: There is a File tab under the Export button. Click it and find various settings that you need to change to get the best export settings for YouTube 2021. Make the Title of the video as small as possible. Set the resolution at 1080P than 4K.
However, it isn’t going to upgrade the resolution if your video is already in the 1080P definition. Now, the last setting that will crazily offer you the best quality and lots of space-saving. You have to select Best (ProRes) in quality settings for this purpose. These settings also take less time to upload to YouTube.
3. Compress is not for speed: Various options you see in the Compresstab are not for speed. They are for how you save the video on a desktop. Thus, always choose the Better Quality tab than Faster.
- Do not export directly to YouTube: iMovie is pretty basic and doesn’t offer great settings to upload your video instantly. You may have to make changes to the uploaded video even if you do this as per our step-by-step guide mentioned above.
Part 3: How to fix the “Failed to Upload to YouTube” Error on iMovie?
The “iMovie to YouTube failed” problem occurs when you directly upload a YouTube video from iMovie. The issue will result if you upload from any third-party uploader. That is why the direct upload doesn’t work, especially in iMovie. You can opt to share your video to the desktop first and then drag it to upload to the YouTube platform.
Part 4: Upload Videos to YouTube with the Best Alternative to iMovie - Wondershare Filmora
“What can I use instead of iMovie to overcome its limitations?”
When you see that iMovie is not uploading to YouTube or iMovie upload to YouTube got stuck, go for a better alternative. In this section, we’d like to recommend Wondershare Filmora that offers the best export settings compared to iMovie. It is the go-to solution if you can’t upload video from iMovie to YouTube directly. Filmora further provides intuitive editing tools that professionally make your YouTube video projects.
Export Key Aspects of Wondershare Filmora in comparison to iMovie:
- It offers a long list of export resolutions to choose from.
- You get separate video and audio settings such as Encoder, Channel, Frame Rate, Bit Rate, Resolution, etc.
- It is further compatible with export to various devices including the iPhone, Samsung, iPod, Apple TV, iPad, Google Pixel, PSP, Smart TV, etc.
Step-by-Step Guide on how to upload a video from iMovie to YouTube via Wondershare Filmora
Step 1: Click the Export button and select resolution
After your project in Wondershare Filmora is over, click the Export tab and select video resolution from the Local tab, as shown below.
It has a list of formats. You can also edit the Name and saving location here.
Step 2: Select Quality
Select the Settings button and choose from three quality levels of Best, Better, and Good. You can also adjust video and audio parameters, including the Encoder, Frame Rate, Resolution, Bit Rate, etc.
Step 3: Select platform
Select the YouTube tab, Sign In to your YouTube account, and hit the Export button after modifying the Title and Quality if needed. Also, make sure to check the Enable GPU accelerated video encoding tab.
Select Wondershare Filmora as the ultimate solution even if iMovie upload to YouTube not showing up.
Conclusion
Hopefully, we’ve informed you of the relevant facts on how to upload a video from iMovie to YouTube. We have also examined the number of troubleshooting issues involved in the iMovie video editor. Well, you will get to face similar kinds of export difficulties in the iMovie editor. Also, the entire procedure to end the exporting task is a bit long in iMovie compared to any other video editing software. Thus, it’s crucial to check out what other alternatives the technological world has today. We can’t state to you a better beginner-friendly yet advanced editing option than Wondershare Filmora that rightly outtakes the iMovie video editor in all aspects.
Liza Brown
Liza Brown is a writer and a lover of all things video.
Follow @Liza Brown
Elevate Videography Quality: Top 7 Sound Effects Pick
7 Places to Find Royalty Free Sound Effects for YouTube Videos

Richard Bennett
Mar 27, 2024• Proven solutions
Sound effects can add a lot of excitement to your videos. Sometimes they are even used for comedic effect. For example, you might use a fake slap sound in a slapstick comedy sketch. Other times sound effects can be more subtle. You might want to add city noises to the background of your video to help set your scene, or a droning sound to build suspense. A lot of the most popular free sound effects are related to the genres of science fiction or action.
- Part 1: Three Types of Sound Effects
- Part 2: Royalty-Free Sound Effects for Your YouTube Videos
- Part 3: Free Sound Effects and Music in Filmora
Part 1: Three Types of Sound Effects
1. Without License
When you want to download sound effects for YouTube, the licensed ones cannot be used, but there are a few that do not hold a license and can be easily downloaded from the website. The quality might be poor to some extent, but you may use the sound effects without a license in any product or video.
2. Creative Commons License
The sound effects under the CC license need to be checked for their type. There are some vlog sound effects that can be used for personal projects free but not for commercial ones. There are a few sound effects that might just require attribution or credit to the creator and cannot be modified in any way.
3. Royalty-free license
You may download sound effects for YouTube by purchasing the licensed sound effects that a professional offers. When you purchase it, you will get high-quality sound, and you may use it on one or more projects, irrespective of personal or commercial types.
Where can you get free sound effects and edit audios at the same time? Just try Filmora for free!


Part 2: Royalty-Free Sound Effects for Your YouTube Videos
This article will introduce you to the six best sites to find royalty-free sound effects and explain their terms of use.
1.YouTube Audio Library – Free!
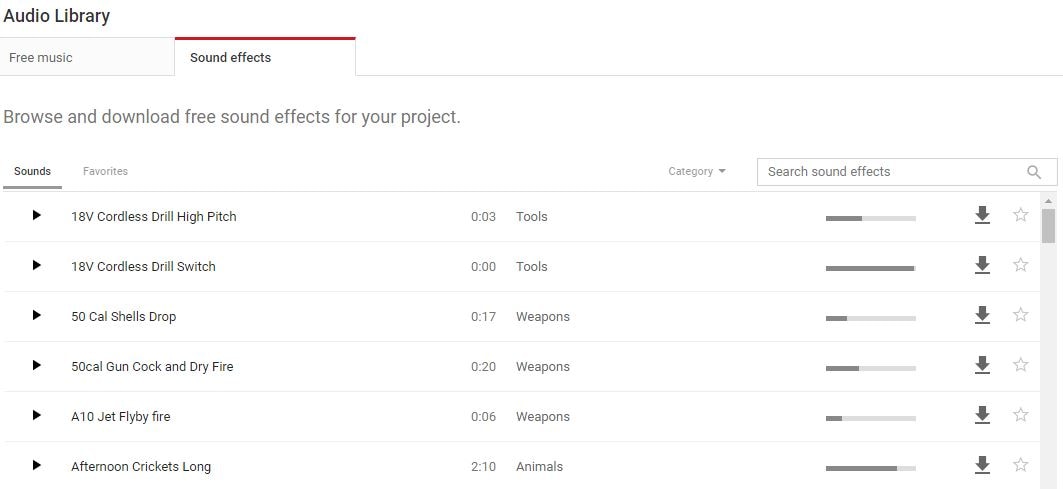
Besides royalty-free music, the YouTube Audio Library also has sound effects that you can download for free. The sound effects in YouTube’s library are organized into categories. You can select a category, i.e ‘sci-fi’, from the drop-down menu next to the search bar and browse through just the types of sounds you are interested in. You can also favorite sounds you like so you can find them again easily.
The sound effects you download from YouTube’s library can be used as many times as you like and in as many different projects. Monetizing your videos will not impact your ability to use these sound effects either. Some other sources of sound effects have different rules about monetizing or using sound effects in multiple projects.
2.Freesound – Free!
![]()
Freesound.org is a huge database of royalty-free sound effects and other audio files. All downloads are free, but there are conditions for using some of the sounds on Freesound. There are three different Creative Commons licenses uses on Freesound and which one applies to the sound effect you want depends on the user who posted it.
The three licenses used on Freesound are Zero, Attribution, and Attribution-Noncommercial.
Zero (cc0): you can do anything you want with these sound effects except claim that you created them. You can make money off of them and you do not have to credit the original creator.
Attribution (by): you should credit the creator of the sound. Usually, this means adding a ‘Sound effect by Username on Freesound’ line in the description of your video. So long as you credit the artists you can do anything with these sounds, even monetize the videos you use them in.
Attribution-Noncommercial (by –nc): you must credit the creators of these sound effects and you cannot make money off of them. This means that you cannot monetize a video in which you used these sound effects.
Freesound is a social site where you can talk to the creators of the sounds you want to download. If you are planning to monetize a video that uses an Attribution-Noncommercial sound effect you can always ask the artist for permission.
I’ve also found a YouTube video that explains the Creative Commons in detail. You can watch it below.
3.AudioJungle - $1 and Up

AudioJungle.net has a wide selection of royalty-free sound effects available for prices as low as $1. Sound effects costing more than $10 tend to either be longer or include whole sets of sounds. You can filter the sounds on AudioJungle by category, tags, and price while you browse.
There are two different licenses you can purchase on AudioJungle, SFX Single Use, and SFX Multi-Use. The prices displayed are all for the Single Use license. The Multi-Use license costs more.
The main difference between the two licenses on AudioJungle is how many projects you can use your sound effect in. If you purchase a sound under a Single-Use license you can only use it in one project. You can use it as many times as you want within that project, and you can even make money off of that project, but you cannot use it again in a second project unless you repurchase it. While it is more expensive, the Multi-Use license gives you unlimited use of your download.
If you decide to use sound effects from any of these sites then please make sure to read their more detailed legal information.
4.Free Sound Effects
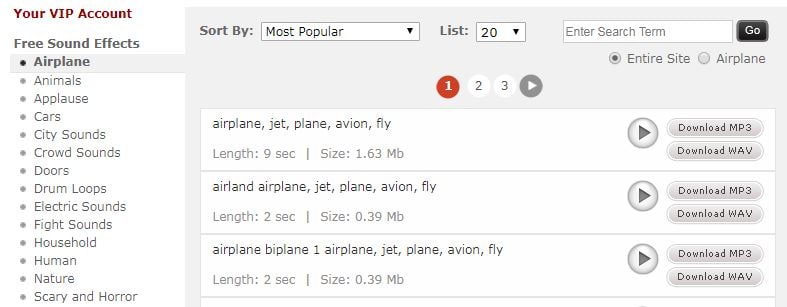
The Free Sound Effects lets you access free as well as licensed sound effects. If you want to download sound effects for YouTube videos, the legally licensed soundtracks with high-quality effects can be selected from the Pro Sound Effects sections. These are royalty-free sound effects.
It requires a one-time fee and you get access to use the sound effects as many times you want for your projects. But, if you are not really serious and just creating videos out of fun, you may also try the free sound effects like animals, applause, cars, etc. to ensure good vlog sound effects that can give life to your vlog.
5.Soundsnap

Whether you wish to spice up your games videos or make the notification alerts hilarious, the Soundsnap app lets you download some of the most amazing sound effects. It is the best platform to search and also share the free vlog sound effects or loops legally. Soundsnap offers original sound effects created by the users and not the edited or mixed sounds that you find in usual commercial libraries. It features above 200,000 loops and sound effects created by expert and knowledgeable music producers and sound engineers.
6.PacDV Free Sound Effects
Now, you may create vlog sound effects from this royalty-free library of sounds produced by film students, multimedia developers, sound designers, music producers, etc. On the PacDV Free Sound Effects site, you can find free sound clips that have been used in a number of films, television programs, and videos.
You may definitely enjoy downloading sound effects for YouTube from this site completely free but cannot sell it or re-license it to anyone for your benefit. It must be used by you for your video only. The sound clips must not be put on site for download or link to other sound files.
Part 3: Get Free Sound Effects for YouTube Video in Filmora
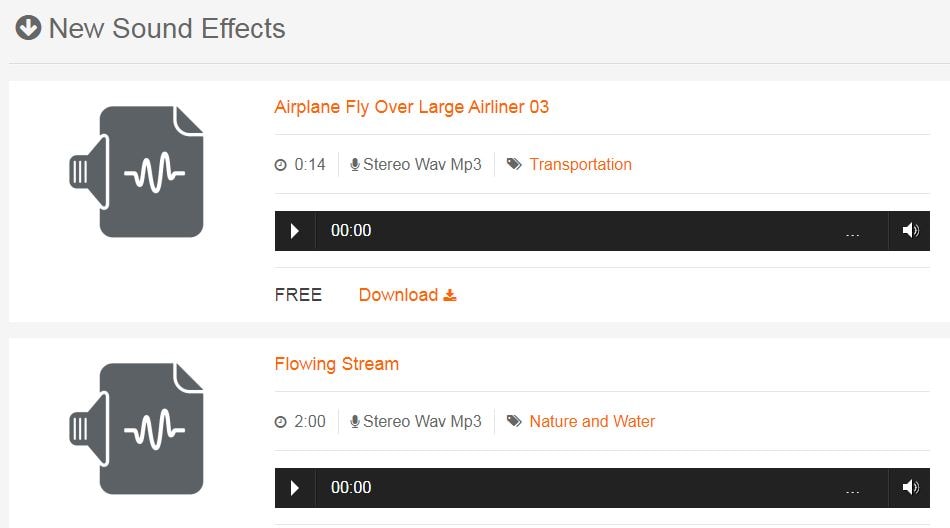
If you’re using the Filmora video editor to produce YouTube videos, then you have a free sound effect library already. You can find them in the Audio library (shown below).

There are currently 25 different sound effects available, varying from animal, machine, people, sci-fi, and ambiance. After adding the sound effect to the timeline, you can change the speed to make the sound sounds fun.
Richard Bennett
Richard Bennett is a writer and a lover of all things video.
Follow @Richard Bennett
Richard Bennett
Mar 27, 2024• Proven solutions
Sound effects can add a lot of excitement to your videos. Sometimes they are even used for comedic effect. For example, you might use a fake slap sound in a slapstick comedy sketch. Other times sound effects can be more subtle. You might want to add city noises to the background of your video to help set your scene, or a droning sound to build suspense. A lot of the most popular free sound effects are related to the genres of science fiction or action.
- Part 1: Three Types of Sound Effects
- Part 2: Royalty-Free Sound Effects for Your YouTube Videos
- Part 3: Free Sound Effects and Music in Filmora
Part 1: Three Types of Sound Effects
1. Without License
When you want to download sound effects for YouTube, the licensed ones cannot be used, but there are a few that do not hold a license and can be easily downloaded from the website. The quality might be poor to some extent, but you may use the sound effects without a license in any product or video.
2. Creative Commons License
The sound effects under the CC license need to be checked for their type. There are some vlog sound effects that can be used for personal projects free but not for commercial ones. There are a few sound effects that might just require attribution or credit to the creator and cannot be modified in any way.
3. Royalty-free license
You may download sound effects for YouTube by purchasing the licensed sound effects that a professional offers. When you purchase it, you will get high-quality sound, and you may use it on one or more projects, irrespective of personal or commercial types.
Where can you get free sound effects and edit audios at the same time? Just try Filmora for free!
Part 2: Royalty-Free Sound Effects for Your YouTube Videos
This article will introduce you to the six best sites to find royalty-free sound effects and explain their terms of use.
1.YouTube Audio Library – Free!
Besides royalty-free music, the YouTube Audio Library also has sound effects that you can download for free. The sound effects in YouTube’s library are organized into categories. You can select a category, i.e ‘sci-fi’, from the drop-down menu next to the search bar and browse through just the types of sounds you are interested in. You can also favorite sounds you like so you can find them again easily.
The sound effects you download from YouTube’s library can be used as many times as you like and in as many different projects. Monetizing your videos will not impact your ability to use these sound effects either. Some other sources of sound effects have different rules about monetizing or using sound effects in multiple projects.
2.Freesound – Free!
![]()
Freesound.org is a huge database of royalty-free sound effects and other audio files. All downloads are free, but there are conditions for using some of the sounds on Freesound. There are three different Creative Commons licenses uses on Freesound and which one applies to the sound effect you want depends on the user who posted it.
The three licenses used on Freesound are Zero, Attribution, and Attribution-Noncommercial.
Zero (cc0): you can do anything you want with these sound effects except claim that you created them. You can make money off of them and you do not have to credit the original creator.
Attribution (by): you should credit the creator of the sound. Usually, this means adding a ‘Sound effect by Username on Freesound’ line in the description of your video. So long as you credit the artists you can do anything with these sounds, even monetize the videos you use them in.
Attribution-Noncommercial (by –nc): you must credit the creators of these sound effects and you cannot make money off of them. This means that you cannot monetize a video in which you used these sound effects.
Freesound is a social site where you can talk to the creators of the sounds you want to download. If you are planning to monetize a video that uses an Attribution-Noncommercial sound effect you can always ask the artist for permission.
I’ve also found a YouTube video that explains the Creative Commons in detail. You can watch it below.
3.AudioJungle - $1 and Up
AudioJungle.net has a wide selection of royalty-free sound effects available for prices as low as $1. Sound effects costing more than $10 tend to either be longer or include whole sets of sounds. You can filter the sounds on AudioJungle by category, tags, and price while you browse.
There are two different licenses you can purchase on AudioJungle, SFX Single Use, and SFX Multi-Use. The prices displayed are all for the Single Use license. The Multi-Use license costs more.
The main difference between the two licenses on AudioJungle is how many projects you can use your sound effect in. If you purchase a sound under a Single-Use license you can only use it in one project. You can use it as many times as you want within that project, and you can even make money off of that project, but you cannot use it again in a second project unless you repurchase it. While it is more expensive, the Multi-Use license gives you unlimited use of your download.
If you decide to use sound effects from any of these sites then please make sure to read their more detailed legal information.
4.Free Sound Effects
The Free Sound Effects lets you access free as well as licensed sound effects. If you want to download sound effects for YouTube videos, the legally licensed soundtracks with high-quality effects can be selected from the Pro Sound Effects sections. These are royalty-free sound effects.
It requires a one-time fee and you get access to use the sound effects as many times you want for your projects. But, if you are not really serious and just creating videos out of fun, you may also try the free sound effects like animals, applause, cars, etc. to ensure good vlog sound effects that can give life to your vlog.
5.Soundsnap
Whether you wish to spice up your games videos or make the notification alerts hilarious, the Soundsnap app lets you download some of the most amazing sound effects. It is the best platform to search and also share the free vlog sound effects or loops legally. Soundsnap offers original sound effects created by the users and not the edited or mixed sounds that you find in usual commercial libraries. It features above 200,000 loops and sound effects created by expert and knowledgeable music producers and sound engineers.
6.PacDV Free Sound Effects
Now, you may create vlog sound effects from this royalty-free library of sounds produced by film students, multimedia developers, sound designers, music producers, etc. On the PacDV Free Sound Effects site, you can find free sound clips that have been used in a number of films, television programs, and videos.
You may definitely enjoy downloading sound effects for YouTube from this site completely free but cannot sell it or re-license it to anyone for your benefit. It must be used by you for your video only. The sound clips must not be put on site for download or link to other sound files.
Part 3: Get Free Sound Effects for YouTube Video in Filmora
If you’re using the Filmora video editor to produce YouTube videos, then you have a free sound effect library already. You can find them in the Audio library (shown below).
There are currently 25 different sound effects available, varying from animal, machine, people, sci-fi, and ambiance. After adding the sound effect to the timeline, you can change the speed to make the sound sounds fun.
Richard Bennett
Richard Bennett is a writer and a lover of all things video.
Follow @Richard Bennett
Also read:
- In 2024, Avoiding Illegal Content YouTube to MP4 Transfer Safely
- 2024 Approved Ensuring Profitability in YouTube with Correct Monetization
- 10 Steps to Perfect YouTube Reactions – A Trio Guide for 2024
- [New] Crafting a Revenue-Generating Online Presence
- [New] Conveniently Connect with Others via Your Playlist
- Instant Guide Photos to Powerful YouTube Channel Thumbnails in a Flash
- 2024 Approved AdSense Profits on YouTube Earnings per Thousand Video Watchers
- [New] Culinary Craftsmanship Innovative Naming for Food Shows
- In 2024, Delving Into Past Our Top 10 Picks of History Channels Online
- [Updated] Drafting Dynamic Denouements
- In 2024, Dominate the Digital Space YouTube Leadership
- Effortless Rearrangement of Your Personalized Lists for 2024
- Cut to Perfection Top Video Editors for YouTubers for 2024
- In 2024, Evaluating Mr. Beast's Financial Heft
- Ultimate Sound Editing Solutions for Online Bloggers
- Maximizing Impact with YouTube Micro Videos
- In 2024, Discovering the Top 8 Truly Efficient Advancement Services
- [New] Behind the Scenes Choosing Ideal Winter Backdrops
- [Updated] DIY GIF Creation Extracting Motion From YouTube Videos
- Ryan’s Revenue Revolution From Childhood to YouTube Riches
- Save Money & Time Creating Engaging YouTube Intros Without Paying
- [Updated] Efficient Guide Image Conversion to Professional YouTube Thumbnails
- The Art of Choosing Between Independent or MNC Status
- [Updated] Enhance YouTube Views Leveraging Outro Content Partnerships
- Beautifying Videos for YouTube Viewers
- [Updated] Elevate Your Video Entrance with These Tools
- Effortless YouTube Content Crafting 10 Basic Video Ideas for All for 2024
- Weighing Your Options Choosing Between TikTok and YouTube Shorts
- [Updated] Brand Battlegrounds Mastery of Marketing Metrics on YouTube
- Short Film Synopsis Must-Know Points
- [Updated] Enhance Your Channel's Image Adding Watermarks & Logos to Video Posts
- [Updated] Captivate Viewers Social Media Strategies for YouTube
- [Updated] Digital Elites 8 The Speedy Video Channels
- In 2024, Channel Growth Hacks – The Ultimate List of 5 YouTube Strategies
- Insight Into Highlighted Video Discussion Threads
- Transforming Your Videos for IGTV Excellence (3 Methods)
- [New] Discovering the Timeline for YouTube Earnings
- 2024 Approved Comedy Channel Guide Your Best 15 YouTube Sources
- How to Edit YouTube Videos in Windows Movie Maker
- Conduct Cost-Effective Seminars Using YouTube for 2024
- Access Creative Banners for Video Makers at Zero Price
- Adapting Your Favorite Songs From Spotify to YouTube Music Service
- The Game Plan for Thriving as a Livestreamer on YouTube
- The Conversion Wizard Turning Shorts Into Mp4 Delights
- Maximizing Engagement How to Pick Perfect YouTube Collaborators
- In 2024, 15 Top-Rated YouTube Downloaders - Your Offline Viewing Solution
- [New] Elite 10 Sound Enhancers Across OS Platforms
- What Are the Best Site to Promote YouTube Videos
- [New] Rapid Reel Sound-Mixed Screenshotting for 2024
- A Filmmaker's Handbook Mastering Close-Up Videography for 2024
- [Updated] Key Commodities for Your Company 8 Indispensable Tools That Can’t Be Ignored
- [New] Unveiling Secrets to Broadcast Recordings on Facebook Live for 2024
- Ultimate Video Playback MKV Edition
- In 2024, Unlocking the Secrets to Instagram Post Replicas
- Updated Decoding The Criteria for Optimal Audio Post-Production Professionals
- [Updated] 2024 Approved Navigating Legalities of Instagram Harmonies
- How to Create a Digital Signature Online for .wps file document
- Time-Reversal Tactics for iPhone Movies
- [Updated] IPhone Slow-Motion Camera Video for 2024
- Updated Windows Video Editing How to Create Stunning 3D Effects in Minutes
- [Updated] 2024 Approved Mastering LOL Recording Three Easy Techniques
- TikTok's Favorite Products The Best On Amazon
- In 2024, 8 Best Apps for Screen Mirroring Xiaomi Redmi Note 12 4G PC | Dr.fone
- Best 3 Honor 70 Lite 5G Emulator for Mac to Run Your Wanted Android Apps | Dr.fone
- 2024 Approved Top 8 Live Selling Platforms & Beginners Tool Suggestion
- The Best Methods to Unlock the iPhone Locked to Owner for Apple iPhone 6s Plus | Dr.fone
- How to recover deleted photos from Android Gallery after format on G310
- Methods to Change GPS Location On Tecno Camon 30 Pro 5G | Dr.fone
- In 2024, Crafting Compelling Compositions with Magix Fruity Loops
- Updated No Downloads Needed 10 Free Online Video Compression Solutions for 2024
- In 2024, How To Use Allshare Cast To Turn On Screen Mirroring On OnePlus Open | Dr.fone
- Dissecting Apple’s Revolutionary M1 Chip
- 10 Free Resources for Perfect Presentation Slides
- 2024 Approved Nailing the Art of PowerPoint to Video Conversion
- 2024 Approved The Top 5 Audio Production Contenders Analyzing if MAGIX Samplitude Reigns Supreme
- Unlock Your Vivo S17s Potential The Top 20 Lock Screen Apps You Need to Try
- Crafting Success on Facebook A Beginner's & Pro Guide Compilation for 2024
- In 2024, Master the Art of Sowing and Cultivation in Valheim
- Things You Should Know When Unlocking Total Wireless Of iPhone 11 | Dr.fone
- Bricked Your Infinix Hot 30 5G? Heres A Full Solution | Dr.fone
- The Ultimate List 10 Best Video Maker Apps for Android for 2024
- New Zero Watermark, Total Freedom Best Free Online Video Editors
- Title: "Directing Content Flow Uploading IMovie Films to YouTube"
- Author: Steven
- Created at : 2024-05-25 19:06:30
- Updated at : 2024-05-26 19:06:30
- Link: https://youtube-clips.techidaily.com/directing-content-flow-uploading-imovie-films-to-youtube/
- License: This work is licensed under CC BY-NC-SA 4.0.
