"Creating Costless Webinars on YouTube A Handbook for 2024"
Creating Costless Webinars on YouTube: A Handbook
How to Host a Webinar on YouTube for Free

Max Wales
Mar 27, 2024• Proven solutions
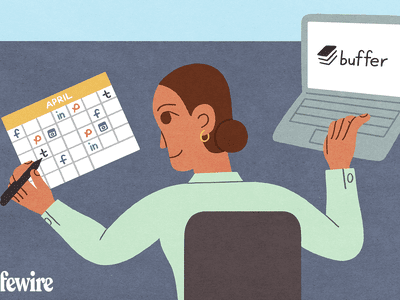
Promoting products, offering educational content or in-depth tutorials on virtually any subject through webinars will enable you to reach new audiences and offer your services on a worldwide market. There are thousands of webinar software products and online platforms, but most of them are quite expensive and they require you to have a considerable amount of experience with the process of setting up and recording webinars.
An alternative solution is available if your budget is tight, but you’d still like to produce a great webinar. We are going to take you through all the steps you’ll need to take if you’d like to host a webinar for free and help you spread the word about the products and services you’re offering.
![]()

The All-in-One Screen Recorder & Video Editor
- Record desktop screen, voiceover, and webcam simultaneously
- Edit recorded clips quickly with a wide range of professional tools
- Built-in plentiful templates and effects
- Export to MP4, MOV, MKV, GIF and multiple formats
For Win 7 or later (64-bit)
For macOS 10.12 or later
 Secure Download
Hosting a Webinar for Free
The world’s largest video sharing platform also features broadcasting options that enable its users to schedule events and thus host webinars free of charge. Previously known as the Google Hangouts on Air, the YouTube Live feature is fairly simple to set up, but before you start your first webinar you will need to choose a landing page and a chatbox. If you already have a website you can simply copy and paste the embed link and create a landing page for your webinar, or you can use landing pages software products such as LeadPages or Unbounce if you don’t have your own online domain. For setting up chatboxes for your webinars we recommend using Chatroll or RumbleTalk platforms, although you’ll have to pay a fee if you choose to chat with your audience using these computer programs. So here’s how you can host your first webinar on YouTube for free.
Step 1. Create a YouTube Event
If you don’t already have an account on YouTube, you’ll have to create one before you can schedule your first live event. After making sure that you are logged in to your YouTube account head over to the Creator Studio, and click on the Live Streaming tab. Select the New Live Event option and proceed to insert the basic information about the event such as the title, date when the event should take place, tags or a short description of the webinar you’re planning.
The Advanced Settings tab will enable you the access to options that will allow you to assign the license and the owner of the webinar. You can also choose the language, set the location or select the category of the event.
Step 2. Copy the Embed Code and Paste it To Your Webinar’s Landing Page
When you adjust all the settings for your upcoming event, you should click on the Share button. This action will grant you access to the video’s embed link, so you can just copy it to your website, or to the landing page you’ve created with the appropriate software.
Step 3. Add the Chatbox to The Webinar’s Landing Page
Communicating with the audience during the webinar is important, and for that reason, embedding the chatbox link on the webinar’s landing page is a crucial step that will allow you to interact with the participants of your webinar. Chatbox platforms for live events such as Chatroll or RumbleTalk offer amazing features, but they cannot be used for free, which means that you’ll have to invest a certain amount of money in order to include a chatbox in your webinar.
Step 4. Publish the Webinar’s Landing Page and Get the URL
Making the event public a week or a few days before it takes place will provide you with enough time to promote it. Include the webinar’s landing page URL in the promotional social media posts and make sure to send out invites for your webinar to your friends and colleagues. Email marketing methods can help you get a larger number of attendees, which is the reason why investing time in the promotion of your webinar can prove to be extremely beneficial.
Step 5. Start your Webinar
Hit the Go Live Now button, when you are ready to start your first webinar and enjoy sharing your skills and knowledge with your audience. Even though YouTube offers a simple way to host webinars for free, it lacks the advanced options that enable you to use the prerecorded footage, keep track of the webinar’s analytics or create virtual whiteboards and polls.
Read More to Get : 10 Best Free Video Hosting Sites for Private/Business Online
Max Wales
Max Wales is a writer and a lover of all things video.
Follow @Max Wales
Max Wales
Mar 27, 2024• Proven solutions
Promoting products, offering educational content or in-depth tutorials on virtually any subject through webinars will enable you to reach new audiences and offer your services on a worldwide market. There are thousands of webinar software products and online platforms, but most of them are quite expensive and they require you to have a considerable amount of experience with the process of setting up and recording webinars.
An alternative solution is available if your budget is tight, but you’d still like to produce a great webinar. We are going to take you through all the steps you’ll need to take if you’d like to host a webinar for free and help you spread the word about the products and services you’re offering.
![]()
The All-in-One Screen Recorder & Video Editor
- Record desktop screen, voiceover, and webcam simultaneously
- Edit recorded clips quickly with a wide range of professional tools
- Built-in plentiful templates and effects
- Export to MP4, MOV, MKV, GIF and multiple formats
For Win 7 or later (64-bit)
For macOS 10.12 or later
Secure Download
Hosting a Webinar for Free
The world’s largest video sharing platform also features broadcasting options that enable its users to schedule events and thus host webinars free of charge. Previously known as the Google Hangouts on Air, the YouTube Live feature is fairly simple to set up, but before you start your first webinar you will need to choose a landing page and a chatbox. If you already have a website you can simply copy and paste the embed link and create a landing page for your webinar, or you can use landing pages software products such as LeadPages or Unbounce if you don’t have your own online domain. For setting up chatboxes for your webinars we recommend using Chatroll or RumbleTalk platforms, although you’ll have to pay a fee if you choose to chat with your audience using these computer programs. So here’s how you can host your first webinar on YouTube for free.
Step 1. Create a YouTube Event
If you don’t already have an account on YouTube, you’ll have to create one before you can schedule your first live event. After making sure that you are logged in to your YouTube account head over to the Creator Studio, and click on the Live Streaming tab. Select the New Live Event option and proceed to insert the basic information about the event such as the title, date when the event should take place, tags or a short description of the webinar you’re planning.
The Advanced Settings tab will enable you the access to options that will allow you to assign the license and the owner of the webinar. You can also choose the language, set the location or select the category of the event.
Step 2. Copy the Embed Code and Paste it To Your Webinar’s Landing Page
When you adjust all the settings for your upcoming event, you should click on the Share button. This action will grant you access to the video’s embed link, so you can just copy it to your website, or to the landing page you’ve created with the appropriate software.
Step 3. Add the Chatbox to The Webinar’s Landing Page
Communicating with the audience during the webinar is important, and for that reason, embedding the chatbox link on the webinar’s landing page is a crucial step that will allow you to interact with the participants of your webinar. Chatbox platforms for live events such as Chatroll or RumbleTalk offer amazing features, but they cannot be used for free, which means that you’ll have to invest a certain amount of money in order to include a chatbox in your webinar.
Step 4. Publish the Webinar’s Landing Page and Get the URL
Making the event public a week or a few days before it takes place will provide you with enough time to promote it. Include the webinar’s landing page URL in the promotional social media posts and make sure to send out invites for your webinar to your friends and colleagues. Email marketing methods can help you get a larger number of attendees, which is the reason why investing time in the promotion of your webinar can prove to be extremely beneficial.
Step 5. Start your Webinar
Hit the Go Live Now button, when you are ready to start your first webinar and enjoy sharing your skills and knowledge with your audience. Even though YouTube offers a simple way to host webinars for free, it lacks the advanced options that enable you to use the prerecorded footage, keep track of the webinar’s analytics or create virtual whiteboards and polls.
Read More to Get : 10 Best Free Video Hosting Sites for Private/Business Online
Max Wales
Max Wales is a writer and a lover of all things video.
Follow @Max Wales
Brush Up Your Youtube Videos with Color Correction
Video Color Correction for YouTube Beauty

Richard Bennett
Mar 27, 2024• Proven solutions
As a YouTube video creator, especially a YouTube beauty, you must know how important video color correction is. In case you want to make your YouTube video look more vibrant or pop out the colors of your video, knowing the basics of video color correction will certainly help you. In this article, we are going to show you how to correct your YouTube videos with 3 different video editing software.
You may also like: Color Correction vs Color Grading >>
Video Color Correction for YouTube Beauty
1. By using Wondershare Filmora
There are multiple professional color correction/grading software options for you to choose like Red Giant Colorista, but, to be honest, they are very difficult to get along with. Wondershare Filmora is an easy to use video editing software available both on Win and Mac which can help you make your video cinematic within a few clicks.
 Download Mac Version ](https://tools.techidaily.com/wondershare/filmora/download/ )
Color correction with Wondershare Filmora
Wondershare Filmora can be used to adjust the color of your video. To do this, select your target video and drag it to the timeline. You will see a video editing window and four parameters i.e. Saturation, brightness, contrast, and hue.

Brightness settings can be used to adjust the overall look of your video. In case your video seems to be too dark or bright, you can take the cursor to the slider and adjust the color manually.
Saturation helps you control how much you want the color of your video pop out. The color can be faded or enhanced through this setting.
Contrast settings help to adjust the difference in color and brightness in different parts of the video.
Color grading with Wondershare Filmora
Hit the button Advanced at the lower corner, then a powerful color grading window will pop up, and you can explore your options.

In this tool, you can adjust the white balance, temperature, tint, and more.
2. By Using Adobe Premiere Pro CC
Adobe Speed Grade is a software intelligently designed to fix all the color issues of your video and helps you make your videos look more stylish. Using it, you can make your video cooler or warmer by adjusting the RGB. It has a temperature slider as well which helps you adjust the overall color of video. The adjustments of highlights, shadows and midtones can also be done for accurate representation of colors in your video. Various trackball and slider controls are available in this software which gives you a large variety of options to experiment with colors of your digital video. Using this software, you can even add different film stock effects which give a traditional film appearance to your video. What else do you need? This software has a lot in store to fit your demands. Go for it!
3. By Using Final Cut Pro
Final Cut Pro lets you adjust your video color with the help of a tool called the Color Board. There are a lot of tools available in The Color section for adjusting the color of your video clip. The first option is of “Balance” which lets you alter the brightness of video. You can also try the option of “Match Color” which lets you match one video clip’s color settings with another. You can be as creative as you want to be by adjusting the brightness, saturation and RGB values of your video with this software. It will not disappoint with the outstanding output.
You may also like: Color grading and correction in Final Cut Pro >>
Richard Bennett
Richard Bennett is a writer and a lover of all things video.
Follow @Richard Bennett
Richard Bennett
Mar 27, 2024• Proven solutions
As a YouTube video creator, especially a YouTube beauty, you must know how important video color correction is. In case you want to make your YouTube video look more vibrant or pop out the colors of your video, knowing the basics of video color correction will certainly help you. In this article, we are going to show you how to correct your YouTube videos with 3 different video editing software.
You may also like: Color Correction vs Color Grading >>
Video Color Correction for YouTube Beauty
1. By using Wondershare Filmora
There are multiple professional color correction/grading software options for you to choose like Red Giant Colorista, but, to be honest, they are very difficult to get along with. Wondershare Filmora is an easy to use video editing software available both on Win and Mac which can help you make your video cinematic within a few clicks.
Download Mac Version ](https://tools.techidaily.com/wondershare/filmora/download/ )
Color correction with Wondershare Filmora
Wondershare Filmora can be used to adjust the color of your video. To do this, select your target video and drag it to the timeline. You will see a video editing window and four parameters i.e. Saturation, brightness, contrast, and hue.
Brightness settings can be used to adjust the overall look of your video. In case your video seems to be too dark or bright, you can take the cursor to the slider and adjust the color manually.
Saturation helps you control how much you want the color of your video pop out. The color can be faded or enhanced through this setting.
Contrast settings help to adjust the difference in color and brightness in different parts of the video.
Color grading with Wondershare Filmora
Hit the button Advanced at the lower corner, then a powerful color grading window will pop up, and you can explore your options.
In this tool, you can adjust the white balance, temperature, tint, and more.
2. By Using Adobe Premiere Pro CC
Adobe Speed Grade is a software intelligently designed to fix all the color issues of your video and helps you make your videos look more stylish. Using it, you can make your video cooler or warmer by adjusting the RGB. It has a temperature slider as well which helps you adjust the overall color of video. The adjustments of highlights, shadows and midtones can also be done for accurate representation of colors in your video. Various trackball and slider controls are available in this software which gives you a large variety of options to experiment with colors of your digital video. Using this software, you can even add different film stock effects which give a traditional film appearance to your video. What else do you need? This software has a lot in store to fit your demands. Go for it!
3. By Using Final Cut Pro
Final Cut Pro lets you adjust your video color with the help of a tool called the Color Board. There are a lot of tools available in The Color section for adjusting the color of your video clip. The first option is of “Balance” which lets you alter the brightness of video. You can also try the option of “Match Color” which lets you match one video clip’s color settings with another. You can be as creative as you want to be by adjusting the brightness, saturation and RGB values of your video with this software. It will not disappoint with the outstanding output.
You may also like: Color grading and correction in Final Cut Pro >>
Richard Bennett
Richard Bennett is a writer and a lover of all things video.
Follow @Richard Bennett
Also read:
- [New] 2024 Approved Elevate Your AR Graphics - Tips for Using LUTs
- [New] Crafting Success on YouTube Standard Studio or Beta
- [Updated] 5 Innovative YouTube Thumbnail Designers for Aspiring Filmmakers
- [Updated] Digital Dreams Unite Conference
- 8 Perfekt Løsninger For Klik På Google - MXF Til MP4-Konverter I Mac Og Windows
- From Dead Screen to Battlefield: Fortnite Launches
- How PGSharp Save You from Ban While Spoofing Pokemon Go On Vivo V29? | Dr.fone
- How to Handle the Impending End-of-Life Date?
- In 2024, Step-by-Step Tutorial How To Bypass Lava Agni 2 5G FRP
- Orchestrating a Journey Through Hidden YouTube Archives
- Rooting in Cities Cultivating Urban Biodiversity
- Streamline Your Vids with These 15 Royalty-Free Tracks Sites
- Unveiling the Secrets of Enhancing Video Sessions in Google Meet for 2024
- Title: Creating Costless Webinars on YouTube A Handbook for 2024
- Author: Steven
- Created at : 2025-02-07 02:32:26
- Updated at : 2025-02-10 18:40:30
- Link: https://youtube-clips.techidaily.com/creating-costless-webinars-on-youtube-a-handbook-for-2024/
- License: This work is licensed under CC BY-NC-SA 4.0.