
:max_bytes(150000):strip_icc():format(webp)/how-to-fix-it-when-reddit-apps-arent-working-f4c8fe50a9ff4c90a28e6a056b427208.jpg)
"Crafting Captivating YouTube Closures - Expert Guides Included for 2024"
Crafting Captivating YouTube Closures - Expert Guides Included
YouTube Outro Complete Guide [+Best Makers & Templates]

Richard Bennett
Mar 27, 2024• Proven solutions
The key reason your YouTube videos have a hundred views a year after publication is because they lack good YouTube intro and outro.
How interactive is your YouTube channel? Or, what’s the bounce rate of your YouTube videos? As you answer this, you’ll realize how important YouTube outro is. Very few people know to add outro to YouTube videos is the best YouTube SEO technique.
In this guide, I’ll demystify what YouTube outro is and how to make outro and add it to a YouTube video. If you are not a tech expert, use intro and outro makers highlighted herein to make your videos as interactive pas possible.
To get a sneak preview of what is entailed here; this guide has been subdivided into five parts:
- Part 1: YouTube Outro Prerequisites
- Part 2: Best 8 Intro And Outro Makers For YouTube
- Part 3: How To Make And Add Outro To YouTube Video
- Part 4: How To Add An Outro To A Youtube Video
- Part 5: Frequently Asked Questions about YouTube Outro
Part 1: YouTube Outro Prerequisites
In this part, we will learn what outros for YouTube are, the importance of land that distinguishes them from the intro. Also included are expert tips on how to make YouTube outro that attracts a hundred thousand subscribers in seven days included.
To understand what YouTube outro is and why you should add it to your videos, here is a detailed explanation.
Section 1: What is a Youtube Outro?
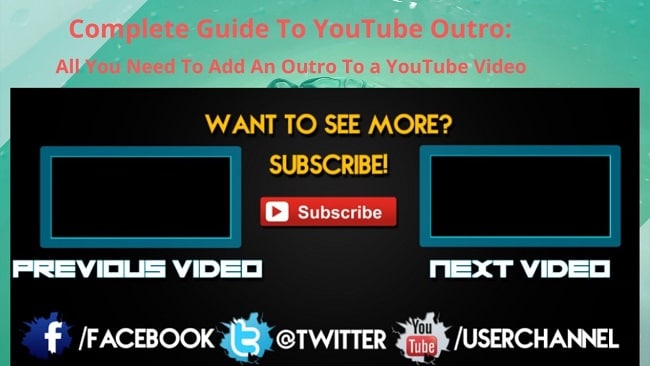
YouTube outro aka end screen is the last part of a video with a call to action statement, button or video suggestion to view other YouTube videos. In other words, it’s the last part of a video with calls to action links.
One of the most effective technical methods of optimizing YouTube videos is by adding an outro. This helps attract huge traffic, increase conversion and engage viewers.
Why spend your time adding outro? You can add Outro to YouTube videos to direct viewers to your website, other selected videos, engage viewers for longer and to persuade them to subscribe to the channel. In short, most end screens have four elements incorporated into an outro: Channel, subscribe, Video playlist and a website link.
Section 2: Difference Between Outro and Intro
Most YouTube videos have an intro and an outro. In this case, an intro is a short clip at the beginning of a YouTube video that introduces you to the viewers and your brand.
Even though video creators attach more emphasis on intros, both are both very critical. For your videos to achieve meaningful results, it’s important to view each as distinct from the other. Equally important to know, both intros and outros have different purposes.
| Differences Between YouTube Intro And Outro | |
|---|---|
| Intro | Outro |
| Inserted at the begging of a video | Inserted at the end of a video |
| Used to capture audience attention | Directs the audience to the next step |
| Introduces the topic | Suggests new topics to viewers |
| Attract viewers to the video | Contains a call-action button |
| Showcases a brand, logo, business slogan or a statement mission |
Section 3: YouTube Outro Requirements
Just as their requirements for any video uploaded on YouTube, outros are no exception. For your outro to be interactive, observe the following requirements:
1. Outro Resolution
Outros for YouTube should have an aspect ratio of 16:9 and a resolution of 1920px X 1080px.
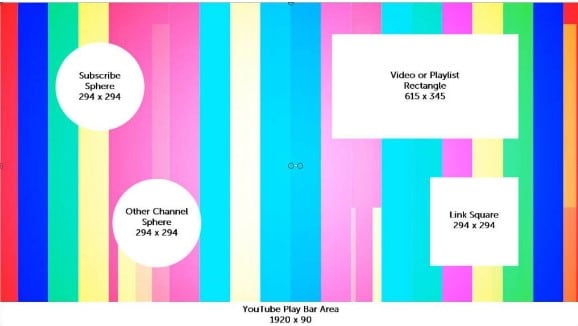
2. Outro Element Sizes and Dimensions
End screen templates comprise elements that are in different shapes and sizes. When using a YouTube outro size of 1920px X 1080px, here are the element dimensions to use:
- Subscribe – 294px X 294px
- Channel – 294px X 294px
- Website link - 294px X 294px
- Video playlist – 615px X 345px
3. Outro Length
If you want to make your outro boring, make it long. So, how long should YouTube outro be? For your outros to have a high conversation rate, they should be approximately 10-20 seconds long. However, the length of your video should be the determining factor. A one-hour YouTube video can have a longer outro.
Don’t be challenged by setting the above sizes because nearly all intro and outro makers have already set dimensions for the elements. The major requirements are done for you
Section 4: Best Practices When Making A YouTube Outro
Imagine given 10 seconds to showcase your YouTube channel and direct viewers on the next move without breaking the engagement! Different YouTube outros come in different styles; certainly a show of one’s degree of creativity.
At this point, you should be already be having the best outro maker in mind - Filmora. The below YouTube outro tips should coincide with the features of your selected outro maker.
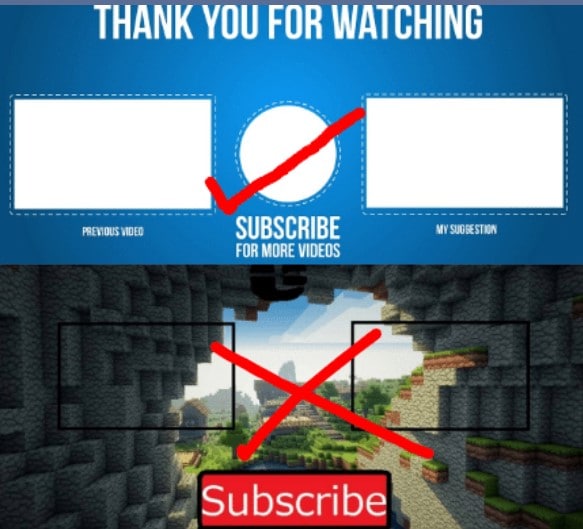
- Be relevant
The featured elements should be related to the video. Adding irrelevant elements your outro will most likely make the viewer click away.
- Keep to your goals
The big question is; what do you want to achieve from the YouTube end screen? Draw your attention to the subject matter of that particular video, your channel or the product highlighted in the video. Try to align your thoughts with those of the viewer.
Every video creator wishes for the following goals, increasing your channel subscribers, sending traffic to another site, viewing more videos and sharing to social media. Each YouTube outro element should have its own goal.
- Simple, clear and easy to interpret
Your outro will be meaningless if the audience cannot take action due to the complexity of either the language used or the ambiguity of words used. Use colors that pop out the elements making them the center of focus. Make them clear and avoid anything distractive.
- Use similar outro templates
Apart from being a good method of branding your channel, using similar outro on your videos adds credibility. It is, therefore, a good practice to have the consistency of colors, elements, images, and logos.
It’s absolutely important to understand all the prerequisites related to YouTube outros. Make use of the tips and requirements explained above when making and adding YouTube end screens to achieve the best results.
Part 2: Best 8 Intro And Outro Makers For YouTube
If you are wondering how to make the best magnetic intro and converting outro for your YouTube videos, this is your best article for you. Whether it’s the free online intro maker or the YouTube outro maker free no watermark, just select one that suits you most from the below list.
1. Wondershare Filmora
Quick fact – Using Filmora as an outro maker, allows you to select your admired background and outro template.
Do you want to make HD YouTube intros and outros that will grow your channel? I recommend Wondershare Filmora.


This software has the simplest friendly interface that any new and expert video editor would understand easily. This is very important for you; to use the best intro or outro for your YouTube videos, download Filmora video editor to get access to Filmstock. There are plenty of free and editable YouTube intro and outro templates ready for download.
Filmora is an all in one YouTube outro maker: you can download intro and outro templates, edit, add to your YouTube video and publish to your channel. There are innumerable backgrounds, transitions and effects to make an outro that matches the video colors, speed, and theme.
2. Outromaker
Quick fact – Outromaker is highly preferred for adding YouTube end screens with animated backgrounds that are mobile-friendly.
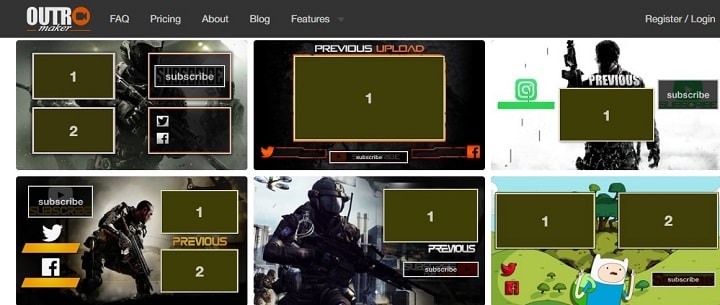
In spite of its pricey plans, Outro Maker continues to be more and more users due to its high genre of outro templates. Among the features included in this app are outro templates, YouTube mobile cards, and YouTube graphics.
To insert a Pokémon Go or animated cartoon background that rhymes with your videos, you have to register an account. Secondly, you must have a registered YouTube channel with videos. Lastly, subscribe to a paid plan.
3. MotionDen
Quick fact – MotionDen is an online into and outro maker. To create YouTube intro and outro without watermark, you have to first pay.
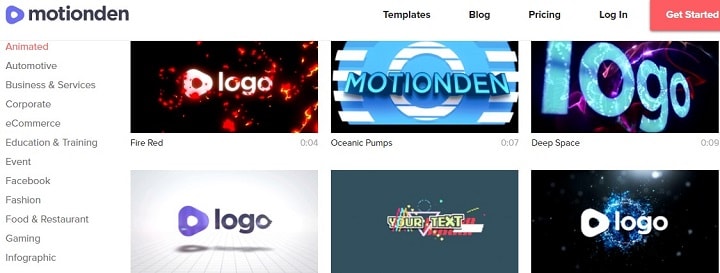
There are plenty of YouTube intro and outro templates for your marketing videos, showdown movies or hard sports videos. Only two pricing plans are available, namely $9.0/Video and $39/ month. Both plans produce HD intros and outros for YouTube and give access to directly publish to YouTube.
To start creating end screens, creating an account is a requirement. MotionDen has rich text editing features and direct typography to edit your logo.
4. Snappa
Quick fact- With Snappa as your YouTube outro maker, only 60 seconds are enough to create a professional high-quality outro.

This is the perfect YouTube outro maker online free with over a 5000+ outro template and million-plus royalty-free HD photos and graphics. Among the features it’s renowned for include, thousands of templates in different sizes, resizable graphics, a huge library of HD intros and outros and seamless integration with uploaded logos and custom fonts.
Most of the YouTube outro requirements like dimensions have been done for you. To access more features, subscribe to either the Pro plan for $10/month or the Team plan for $20/month.
5. Biteable
Quick fact- Biteable is a free online YouTube outro creator. It’s compatible with mobile phones and computers and is highly used by content marketing experts.

The clarity of the interface is enough to prove its simplicity and user-friendliness. The only requirement to use this app is registration. However, the free plan is limited to 10 projects per month, the basic content and 24/7 customer support. Its main limitation is any project under the free plan bears the Biteable watermark.
Biteable Youtube outro template download feature contains 85,000 Shutterstock clips. There are four optional pricing plans. The free plan with limited features, Starter Plan for $29/mo, Pro Plan for $29/mo and Unlimited Plan for $49/mo. You can also subscribe annually.
6. Tube Arsenal
Quick fact – Tube Arsenal is among the best HD intro and outro maker for YouTube. No monthly/annual subscription plans. Each outro template can be customized online.
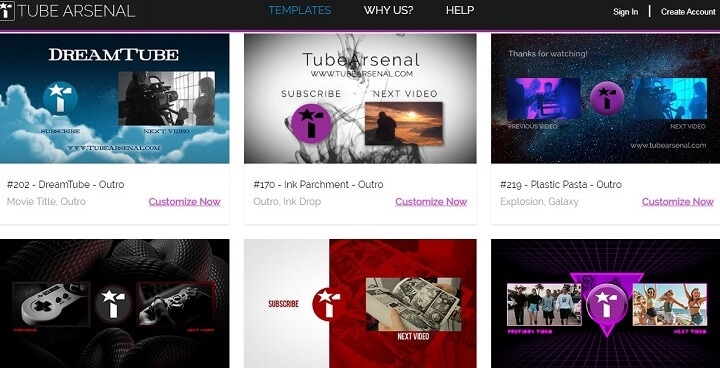
Despite its high quality and professional templates, Tube Arsenal is suitable for both beginners and experts. Would you like to add the best YouTube outro songs to your videos? Select any intro or outro and on the customizing chart to the left, scroll to the bottom and click “Music”.
Some of the features include unlimited downloads, free downloads, online template customization and curated collection of intros and outros. Each outros’ price is determined by its resolution (720px for $9 and 180px for $11).
7. Animaker
Quick fact – Animaker takes cognizance of human creative ability. You can, therefore, create your own intro from scratch or edit the provided templates.

Animaker is among the world’s most used YouTube intro maker. It’s trusted by over 1000 big brands like Adidas, Google, UNICEF, and Uber. You can start with the free plan if it’s your first time then upgrade to the complex paid plans. The paid plans are Personal for $19/mo, Startup for $35/mo and Business for $59/mo.
There are many features to look out for in Animaker. Some include 50+ backgrounds YouTube intro music, over 175 sound effects, custom font support and pre-designed templates.
8. Video Jaguar
Quick fact – Video Jaguar is a cloud-based software used creating YouTube intros and outros. You can, therefore, use it from any location without downloading it.

This app’s outro maker interface comes equipped with easy to use features like full HD intro and outro templates, licensed music and text editor. There are also plenty of royalty-free photos.
Video Jaguar is majorly designed for marketers who specialize in video ads to grow their brand awareness.
You may also like: How to Convert YouTube to MP4 Safely? [Step by Step Guide] >>
Part 3: How To Make And Add Outro To YouTube Video
How to make a YouTube outro was comprehensively answered by the launch Filmora video editor. Why say Filmora? We all know how the best professional YouTube outros should look like, right? Go to the Filmora products page then click download. Among the features, you’ll find include transitions, backgrounds, effects, rich text editor and free audio and voiceover recorder among others.
Step 1: Start by downloading and installing Filmora on your Windows or Mac by clicking any of the below icons.
Step 2: Once it’s fully installed, double-click on the Filmora icon on your desktop to open a welcome screen for you to start a new project. Adjust the project aspect ratio to 16:9.
Step 3: Click the new project and wait for the software full interface to open. On the Filmora Filmstock page, search and select a YouTube outro template of your choice, download and save to your media.
Before importing the template, click “Sample Colours” to choose a color that rhymes with your video and set it as the background.
Click “Media” on the top menu and import your outro template to the timeline.
Step 4: Use the screen blind mode to edit the YouTube outro elements at the preview window. Also, you can select audio and add it as outro music for YouTube. Click “Title” to select your preferred font editor. Once you are done, export the outro to the media file.
Check this video tutorial. It’s very easy and simple to make a YouTube outro. Free to download the video maker and have a try now!
Part 4: How To Add An Outro To A Youtube Video
To understand the whole end screen process we will continue with the Filmora video editing procedure.
Step 1: Upload your video to the timeline and create a space for the video outro.
Step 2: Import the YouTube outro created earlier and drag it down to the timeline. Now that you have two imports on your timeline, drag the outro to the videos end section.

Step 3: Click “Export” to save or upload the video on YouTube. You now have your video with an end screen.
Part 5: Frequently Asked Questions about YouTube Outro

Best Websites for YouTube Outro Template Download
YouTube Outro templates are helping websites grow their revenue by setting pricing plans. Nevertheless, there are some websites with even better free outro templates for download. Here is a combination of both paid and free websites to download YouTube outros:
Best Websites to Find YouTube Outro Songs
Finding outro songs for YouTube is a bit challenging partly because not many YouTube outro makers have also songs on the website. Video creators also tend to use video audio in their end screens thereby reducing the demand for outro songs.
Despite their low demand, few websites continue to create YouTube outro songs like:
You may also like: 10 Best Sources to Download Free Outro Music [No Copyright] >>
Conclusion
We all wish to create YouTube videos that attract many viewers and eventually subscribers! To grow your YouTube channel, start adding outros to your videos before uploading them to YouTube. YouTube outro engages viewers for longer by clicking the suggested videos or helps grow the channel.
It’s not a surprise to find some of your videos with no outros despite the high number of free intro and outro YouTube makers. Use the above list to make a stunning outro for YouTube.
Was this guide helpful to you? Kindly share your comments or thoughts on the social media platforms on this site.
Richard Bennett
Richard Bennett is a writer and a lover of all things video.
Follow @Richard Bennett
Richard Bennett
Mar 27, 2024• Proven solutions
The key reason your YouTube videos have a hundred views a year after publication is because they lack good YouTube intro and outro.
How interactive is your YouTube channel? Or, what’s the bounce rate of your YouTube videos? As you answer this, you’ll realize how important YouTube outro is. Very few people know to add outro to YouTube videos is the best YouTube SEO technique.
In this guide, I’ll demystify what YouTube outro is and how to make outro and add it to a YouTube video. If you are not a tech expert, use intro and outro makers highlighted herein to make your videos as interactive pas possible.
To get a sneak preview of what is entailed here; this guide has been subdivided into five parts:
- Part 1: YouTube Outro Prerequisites
- Part 2: Best 8 Intro And Outro Makers For YouTube
- Part 3: How To Make And Add Outro To YouTube Video
- Part 4: How To Add An Outro To A Youtube Video
- Part 5: Frequently Asked Questions about YouTube Outro
Part 1: YouTube Outro Prerequisites
In this part, we will learn what outros for YouTube are, the importance of land that distinguishes them from the intro. Also included are expert tips on how to make YouTube outro that attracts a hundred thousand subscribers in seven days included.
To understand what YouTube outro is and why you should add it to your videos, here is a detailed explanation.
Section 1: What is a Youtube Outro?
YouTube outro aka end screen is the last part of a video with a call to action statement, button or video suggestion to view other YouTube videos. In other words, it’s the last part of a video with calls to action links.
One of the most effective technical methods of optimizing YouTube videos is by adding an outro. This helps attract huge traffic, increase conversion and engage viewers.
Why spend your time adding outro? You can add Outro to YouTube videos to direct viewers to your website, other selected videos, engage viewers for longer and to persuade them to subscribe to the channel. In short, most end screens have four elements incorporated into an outro: Channel, subscribe, Video playlist and a website link.
Section 2: Difference Between Outro and Intro
Most YouTube videos have an intro and an outro. In this case, an intro is a short clip at the beginning of a YouTube video that introduces you to the viewers and your brand.
Even though video creators attach more emphasis on intros, both are both very critical. For your videos to achieve meaningful results, it’s important to view each as distinct from the other. Equally important to know, both intros and outros have different purposes.
| Differences Between YouTube Intro And Outro | |
|---|---|
| Intro | Outro |
| Inserted at the begging of a video | Inserted at the end of a video |
| Used to capture audience attention | Directs the audience to the next step |
| Introduces the topic | Suggests new topics to viewers |
| Attract viewers to the video | Contains a call-action button |
| Showcases a brand, logo, business slogan or a statement mission |
Section 3: YouTube Outro Requirements
Just as their requirements for any video uploaded on YouTube, outros are no exception. For your outro to be interactive, observe the following requirements:
1. Outro Resolution
Outros for YouTube should have an aspect ratio of 16:9 and a resolution of 1920px X 1080px.
2. Outro Element Sizes and Dimensions
End screen templates comprise elements that are in different shapes and sizes. When using a YouTube outro size of 1920px X 1080px, here are the element dimensions to use:
- Subscribe – 294px X 294px
- Channel – 294px X 294px
- Website link - 294px X 294px
- Video playlist – 615px X 345px
3. Outro Length
If you want to make your outro boring, make it long. So, how long should YouTube outro be? For your outros to have a high conversation rate, they should be approximately 10-20 seconds long. However, the length of your video should be the determining factor. A one-hour YouTube video can have a longer outro.
Don’t be challenged by setting the above sizes because nearly all intro and outro makers have already set dimensions for the elements. The major requirements are done for you
Section 4: Best Practices When Making A YouTube Outro
Imagine given 10 seconds to showcase your YouTube channel and direct viewers on the next move without breaking the engagement! Different YouTube outros come in different styles; certainly a show of one’s degree of creativity.
At this point, you should be already be having the best outro maker in mind - Filmora. The below YouTube outro tips should coincide with the features of your selected outro maker.
- Be relevant
The featured elements should be related to the video. Adding irrelevant elements your outro will most likely make the viewer click away.
- Keep to your goals
The big question is; what do you want to achieve from the YouTube end screen? Draw your attention to the subject matter of that particular video, your channel or the product highlighted in the video. Try to align your thoughts with those of the viewer.
Every video creator wishes for the following goals, increasing your channel subscribers, sending traffic to another site, viewing more videos and sharing to social media. Each YouTube outro element should have its own goal.
- Simple, clear and easy to interpret
Your outro will be meaningless if the audience cannot take action due to the complexity of either the language used or the ambiguity of words used. Use colors that pop out the elements making them the center of focus. Make them clear and avoid anything distractive.
- Use similar outro templates
Apart from being a good method of branding your channel, using similar outro on your videos adds credibility. It is, therefore, a good practice to have the consistency of colors, elements, images, and logos.
It’s absolutely important to understand all the prerequisites related to YouTube outros. Make use of the tips and requirements explained above when making and adding YouTube end screens to achieve the best results.
Part 2: Best 8 Intro And Outro Makers For YouTube
If you are wondering how to make the best magnetic intro and converting outro for your YouTube videos, this is your best article for you. Whether it’s the free online intro maker or the YouTube outro maker free no watermark, just select one that suits you most from the below list.
1. Wondershare Filmora
Quick fact – Using Filmora as an outro maker, allows you to select your admired background and outro template.
Do you want to make HD YouTube intros and outros that will grow your channel? I recommend Wondershare Filmora.
This software has the simplest friendly interface that any new and expert video editor would understand easily. This is very important for you; to use the best intro or outro for your YouTube videos, download Filmora video editor to get access to Filmstock. There are plenty of free and editable YouTube intro and outro templates ready for download.
Filmora is an all in one YouTube outro maker: you can download intro and outro templates, edit, add to your YouTube video and publish to your channel. There are innumerable backgrounds, transitions and effects to make an outro that matches the video colors, speed, and theme.
2. Outromaker
Quick fact – Outromaker is highly preferred for adding YouTube end screens with animated backgrounds that are mobile-friendly.
In spite of its pricey plans, Outro Maker continues to be more and more users due to its high genre of outro templates. Among the features included in this app are outro templates, YouTube mobile cards, and YouTube graphics.
To insert a Pokémon Go or animated cartoon background that rhymes with your videos, you have to register an account. Secondly, you must have a registered YouTube channel with videos. Lastly, subscribe to a paid plan.
3. MotionDen
Quick fact – MotionDen is an online into and outro maker. To create YouTube intro and outro without watermark, you have to first pay.
There are plenty of YouTube intro and outro templates for your marketing videos, showdown movies or hard sports videos. Only two pricing plans are available, namely $9.0/Video and $39/ month. Both plans produce HD intros and outros for YouTube and give access to directly publish to YouTube.
To start creating end screens, creating an account is a requirement. MotionDen has rich text editing features and direct typography to edit your logo.
4. Snappa
Quick fact- With Snappa as your YouTube outro maker, only 60 seconds are enough to create a professional high-quality outro.
This is the perfect YouTube outro maker online free with over a 5000+ outro template and million-plus royalty-free HD photos and graphics. Among the features it’s renowned for include, thousands of templates in different sizes, resizable graphics, a huge library of HD intros and outros and seamless integration with uploaded logos and custom fonts.
Most of the YouTube outro requirements like dimensions have been done for you. To access more features, subscribe to either the Pro plan for $10/month or the Team plan for $20/month.
5. Biteable
Quick fact- Biteable is a free online YouTube outro creator. It’s compatible with mobile phones and computers and is highly used by content marketing experts.
The clarity of the interface is enough to prove its simplicity and user-friendliness. The only requirement to use this app is registration. However, the free plan is limited to 10 projects per month, the basic content and 24/7 customer support. Its main limitation is any project under the free plan bears the Biteable watermark.
Biteable Youtube outro template download feature contains 85,000 Shutterstock clips. There are four optional pricing plans. The free plan with limited features, Starter Plan for $29/mo, Pro Plan for $29/mo and Unlimited Plan for $49/mo. You can also subscribe annually.
6. Tube Arsenal
Quick fact – Tube Arsenal is among the best HD intro and outro maker for YouTube. No monthly/annual subscription plans. Each outro template can be customized online.
Despite its high quality and professional templates, Tube Arsenal is suitable for both beginners and experts. Would you like to add the best YouTube outro songs to your videos? Select any intro or outro and on the customizing chart to the left, scroll to the bottom and click “Music”.
Some of the features include unlimited downloads, free downloads, online template customization and curated collection of intros and outros. Each outros’ price is determined by its resolution (720px for $9 and 180px for $11).
7. Animaker
Quick fact – Animaker takes cognizance of human creative ability. You can, therefore, create your own intro from scratch or edit the provided templates.
Animaker is among the world’s most used YouTube intro maker. It’s trusted by over 1000 big brands like Adidas, Google, UNICEF, and Uber. You can start with the free plan if it’s your first time then upgrade to the complex paid plans. The paid plans are Personal for $19/mo, Startup for $35/mo and Business for $59/mo.
There are many features to look out for in Animaker. Some include 50+ backgrounds YouTube intro music, over 175 sound effects, custom font support and pre-designed templates.
8. Video Jaguar
Quick fact – Video Jaguar is a cloud-based software used creating YouTube intros and outros. You can, therefore, use it from any location without downloading it.
This app’s outro maker interface comes equipped with easy to use features like full HD intro and outro templates, licensed music and text editor. There are also plenty of royalty-free photos.
Video Jaguar is majorly designed for marketers who specialize in video ads to grow their brand awareness.
You may also like: How to Convert YouTube to MP4 Safely? [Step by Step Guide] >>
Part 3: How To Make And Add Outro To YouTube Video
How to make a YouTube outro was comprehensively answered by the launch Filmora video editor. Why say Filmora? We all know how the best professional YouTube outros should look like, right? Go to the Filmora products page then click download. Among the features, you’ll find include transitions, backgrounds, effects, rich text editor and free audio and voiceover recorder among others.
Step 1: Start by downloading and installing Filmora on your Windows or Mac by clicking any of the below icons.
Step 2: Once it’s fully installed, double-click on the Filmora icon on your desktop to open a welcome screen for you to start a new project. Adjust the project aspect ratio to 16:9.
Step 3: Click the new project and wait for the software full interface to open. On the Filmora Filmstock page, search and select a YouTube outro template of your choice, download and save to your media.
Before importing the template, click “Sample Colours” to choose a color that rhymes with your video and set it as the background.
Click “Media” on the top menu and import your outro template to the timeline.
Step 4: Use the screen blind mode to edit the YouTube outro elements at the preview window. Also, you can select audio and add it as outro music for YouTube. Click “Title” to select your preferred font editor. Once you are done, export the outro to the media file.
Check this video tutorial. It’s very easy and simple to make a YouTube outro. Free to download the video maker and have a try now!
Part 4: How To Add An Outro To A Youtube Video
To understand the whole end screen process we will continue with the Filmora video editing procedure.
Step 1: Upload your video to the timeline and create a space for the video outro.
Step 2: Import the YouTube outro created earlier and drag it down to the timeline. Now that you have two imports on your timeline, drag the outro to the videos end section.
Step 3: Click “Export” to save or upload the video on YouTube. You now have your video with an end screen.
Part 5: Frequently Asked Questions about YouTube Outro
Best Websites for YouTube Outro Template Download
YouTube Outro templates are helping websites grow their revenue by setting pricing plans. Nevertheless, there are some websites with even better free outro templates for download. Here is a combination of both paid and free websites to download YouTube outros:
Best Websites to Find YouTube Outro Songs
Finding outro songs for YouTube is a bit challenging partly because not many YouTube outro makers have also songs on the website. Video creators also tend to use video audio in their end screens thereby reducing the demand for outro songs.
Despite their low demand, few websites continue to create YouTube outro songs like:
You may also like: 10 Best Sources to Download Free Outro Music [No Copyright] >>
Conclusion
We all wish to create YouTube videos that attract many viewers and eventually subscribers! To grow your YouTube channel, start adding outros to your videos before uploading them to YouTube. YouTube outro engages viewers for longer by clicking the suggested videos or helps grow the channel.
It’s not a surprise to find some of your videos with no outros despite the high number of free intro and outro YouTube makers. Use the above list to make a stunning outro for YouTube.
Was this guide helpful to you? Kindly share your comments or thoughts on the social media platforms on this site.
Richard Bennett
Richard Bennett is a writer and a lover of all things video.
Follow @Richard Bennett
Integrating Text in Multimedia: Techniques for YouTube Video Enhancement
How to Add Text to YouTube Video Before or After Uploading
Richard Bennett
Mar 27, 2024• Proven solutions
A great way to emphasize something you say in your vlog is to have your words appear next to you as you say them . Adding text to YouTube videos can look really professional. You might put a title at the beginning of your video, use bullet points to help people keep track of your monologue, or to highlight an important point by writing it on your screen. When you use text in your videos there are a few things you need to keep in mind. In this article, I will share with you 2 ways to add text/subtitles/captions to YouTube videos, whether you need to add text to the video during editing and upload it to YouTube later, or you have uploaded the video to YouTube already and want to add some captions and subtitles to complement it.
- Part 1: Add text to video before uploading YouTube
- Part 2: Add Text to YouTube video after uploading
- Part 3: Top 3 YouTube Video Text Tips
How to Add Text to YouTube Video Before Uploading
Before uploading the video to YouTube, it is recommended to add text to the video first. You can add simple texts and captions to videos with the free video editing software. To add more text effects to the video, you can use Filmora, Sony Vegas Movie Studio and Adobe Premiere CC based on your video editing skills and needs. These software programs are great video editors, which can help you input text easily.
1. Use Filmora to Add text to Videos
There are plenty of Text effects built in Filmora, you can apply motions and animation to texts, titles, subtitles, end credits and openers as well. Each title preset will present different effects. You can add multiple text boxes and place the text to any position in need. Besides writing texts to video, you can select the target font, size and color and customize the text effect in detail as well. To add text to a video in Filmora is easy, just follow the steps below:

- Open up Filmora and drag a clip into your timeline. Then, go to Text/Credit.
- Find a style that you like and drag it into your timeline where you want your text to appear. Make sure your text is selected in your timeline and click the Advanced Text Editing icon, which looks like a pen and paper.
- Insert your own words and drag your text to where you want it on the screen. Adjust the size by dragging the blue squares which surround your text.
- To change the color of your text, go into the Customize menu. You will find it near the top left of your screen. While you are in Customize there will be a section called Fill. This is where you select the color of your text. You can even change the fill type to ‘gradient fill’ and have your text transition between two colors.
- All of Filmora’s text options are animated – they fade, move around the screen, or perform some other type of action as they appear and disappear. To change the animation of your text select Animation next to Customize. A selection of different animations will appear. Double click on the one you want to apply to your text.
Download Mac Version ](https://tools.techidaily.com/wondershare/filmora/download/ )
Check the detailed steps of how to add text to video in Filmora.
2. Use Windows Movie Maker
As a simple video editing software, Windows Movie Maker also allows you to add text to videos. It provides 3 different options for you to add Title, Caption and Credits to the YouTube videos. You can follow the steps below to add text to the video in WMM.

- To start, launch the Windows Movie Maker.
- After, select import video to insert the video that you want to add text with.
- Select edit movie then click make credits or titles.
- Then add the text that you want to include.
For the step by step tutorial of adding text to YouTube video, check How to Add Text to Video with Windows Movie Maker . Besides adding text to video, you can use Windows Movie Maker to edit YouTube video further. Learn How to trim, cut, combine, split video and add transitions and upload video to YouTube in Windows Movie Maker?
3. Use Sony Vegas Movie Studio
Adding text to YouTube videos in Sony Vegas is not so complicated if you are new to this software. You can adjust the color, size, font and duration of the text effect and add fade in and fade out effects. Follow the steps below to add texts to video in Vegas:

- Launch Sony Vegas Movie Studio.
- Click the View Menu then select Media Generators.
- Choose the generator that you want to use.
- After, drag the generator you have chosen on the timeline.
- Then, the video event FX dialogue box will appear.
- Enter the text that you want and modify it by changing the font, size and style.
4. Use Adobe Premiere CC
For professionals who are looking for a professional way to adding text to video and also have a sufficient budget, Adobe Premiere CC is always recommended. You can check the video and the steps below to add text to video in Premiere:
- Click open or create a project.
- Click the file menu then choose new and title.
- After, the text window will appear then utilize the text tool to add text.
- You can also edit your text using the commands that are provided in the Title Menu.
- Save the text that you have made by clicking the file menu then choose Save As.
How to Add Text to video in YouTube after uploading
Sometimes, we have uploaded a video to YouTube and then want to add subtitles/cc to the video later. The good news is that YouTube is not only a site for videos but is also the place where you can edit your videos in an instant. As you have read, adding text and captions to the uploaded YouTube videos is just a breeze.
Of course, you can only add and edit texts and captions to the video under your YouTube account. Here are the steps on how you can add text to your videos with YouTube Video Editor after the video is uploaded.
- Go to youtube.com then sign in to your account. After sign in your YouTube account, click your avatar and select Creator Studio to enter the creator studio interface.
- Click the Video Manager tab and in Videos section you will see all your videos uploaded to YouTube. Select the video that you want to add captions to and then select Subtitles/CC after clicking Edit button.
- Add Captions/Subtitles

While YouTube may have already created the subtitles automatically for your video with its speech recognition technology. If it does, you will see something like Published: English (Automatic) to the right of your video. If the automatically generated subtitles is not correct, you can edit it to improve the accuracy. Select the line that needs modification to make the edits.
If there is no auto-subtitles, you can choose from 3 ways to add subtitles and closed captions to the video: Upload a file, Transcribe and auto-sync and create new subtitles or CC.

Upload a file: upload a text transcript or timed subtitles file.
Transcribe and auto-sync: Type or paste in a full transcript of the video and subtitle timings will be set automatically.
Create new subtitles or CC: Create subtitles and closed captions by typing them in as you watch the video.
If you already have a caption file which contains both text and time codes, just click Upload a file and upload the text to the video.
- Once everything is okay, you can change the name of the video and you can do it in the box beside Project.
Cons of Using YouTube Video Editor
When you make use of this editor, you cannot shorten the clips for music. Moreover, since it is an online editor, you need to refresh the page in order to do the changes. Aside from YouTube Video Editor, you can use Adobe Premier Pro, MAGIX Vegas Pro, OpenShot and Avidemux.
From 20th September 2017 users will no longer be able to use the complementary editing suite. Check the best YouTube video editor alternatives from this complete guide to find out more YouTube video editor alternatives if you want to add text to video with more features and customization.
Top 3 Tips for Adding Text to YouTube Videos
1. Leave Room
If you know you are going to add text to your video then make sure you leave room for it in your frame. Consider standing off to one side instead of directly in front of your camera. You do not want to have to choose between not using text, making your text really small, or placing it over your face.
While planning out your frame and leaving room for your text, consider what color you are going to make the words and whether it will stand out and look good against your background.
2. Bigger is Better
People should be able to read your text without putting in any extra effort, such as straining their eyes to make out small words. If it takes effort to read your text then a lot of people will just ignore it. Your text should be big enough that somebody watching your video on their smartphone screen – where everything is shrunk down – can read it easily.
It is easier to make your text larger when you stick to titles, keywords, and short sentences.
3. Do Not Overuse
Text is a great tool for making something stand out. However, if you try to use text to emphasize too much of what you say it will lose its effect. Text does not stand out anymore once viewers get too used to seeing it. Too much text can even get annoying and cause people to click away from your videos.
Try to use text to emphasize only the most important things you say.
Richard Bennett
Richard Bennett is a writer and a lover of all things video.
Follow @Richard Bennett
Richard Bennett
Mar 27, 2024• Proven solutions
A great way to emphasize something you say in your vlog is to have your words appear next to you as you say them . Adding text to YouTube videos can look really professional. You might put a title at the beginning of your video, use bullet points to help people keep track of your monologue, or to highlight an important point by writing it on your screen. When you use text in your videos there are a few things you need to keep in mind. In this article, I will share with you 2 ways to add text/subtitles/captions to YouTube videos, whether you need to add text to the video during editing and upload it to YouTube later, or you have uploaded the video to YouTube already and want to add some captions and subtitles to complement it.
- Part 1: Add text to video before uploading YouTube
- Part 2: Add Text to YouTube video after uploading
- Part 3: Top 3 YouTube Video Text Tips
How to Add Text to YouTube Video Before Uploading
Before uploading the video to YouTube, it is recommended to add text to the video first. You can add simple texts and captions to videos with the free video editing software. To add more text effects to the video, you can use Filmora, Sony Vegas Movie Studio and Adobe Premiere CC based on your video editing skills and needs. These software programs are great video editors, which can help you input text easily.
1. Use Filmora to Add text to Videos
There are plenty of Text effects built in Filmora, you can apply motions and animation to texts, titles, subtitles, end credits and openers as well. Each title preset will present different effects. You can add multiple text boxes and place the text to any position in need. Besides writing texts to video, you can select the target font, size and color and customize the text effect in detail as well. To add text to a video in Filmora is easy, just follow the steps below:
- Open up Filmora and drag a clip into your timeline. Then, go to Text/Credit.
- Find a style that you like and drag it into your timeline where you want your text to appear. Make sure your text is selected in your timeline and click the Advanced Text Editing icon, which looks like a pen and paper.
- Insert your own words and drag your text to where you want it on the screen. Adjust the size by dragging the blue squares which surround your text.
- To change the color of your text, go into the Customize menu. You will find it near the top left of your screen. While you are in Customize there will be a section called Fill. This is where you select the color of your text. You can even change the fill type to ‘gradient fill’ and have your text transition between two colors.
- All of Filmora’s text options are animated – they fade, move around the screen, or perform some other type of action as they appear and disappear. To change the animation of your text select Animation next to Customize. A selection of different animations will appear. Double click on the one you want to apply to your text.
Download Mac Version ](https://tools.techidaily.com/wondershare/filmora/download/ )
Check the detailed steps of how to add text to video in Filmora.
2. Use Windows Movie Maker
As a simple video editing software, Windows Movie Maker also allows you to add text to videos. It provides 3 different options for you to add Title, Caption and Credits to the YouTube videos. You can follow the steps below to add text to the video in WMM.
- To start, launch the Windows Movie Maker.
- After, select import video to insert the video that you want to add text with.
- Select edit movie then click make credits or titles.
- Then add the text that you want to include.
For the step by step tutorial of adding text to YouTube video, check How to Add Text to Video with Windows Movie Maker . Besides adding text to video, you can use Windows Movie Maker to edit YouTube video further. Learn How to trim, cut, combine, split video and add transitions and upload video to YouTube in Windows Movie Maker?
3. Use Sony Vegas Movie Studio
Adding text to YouTube videos in Sony Vegas is not so complicated if you are new to this software. You can adjust the color, size, font and duration of the text effect and add fade in and fade out effects. Follow the steps below to add texts to video in Vegas:
- Launch Sony Vegas Movie Studio.
- Click the View Menu then select Media Generators.
- Choose the generator that you want to use.
- After, drag the generator you have chosen on the timeline.
- Then, the video event FX dialogue box will appear.
- Enter the text that you want and modify it by changing the font, size and style.
4. Use Adobe Premiere CC
For professionals who are looking for a professional way to adding text to video and also have a sufficient budget, Adobe Premiere CC is always recommended. You can check the video and the steps below to add text to video in Premiere:
- Click open or create a project.
- Click the file menu then choose new and title.
- After, the text window will appear then utilize the text tool to add text.
- You can also edit your text using the commands that are provided in the Title Menu.
- Save the text that you have made by clicking the file menu then choose Save As.
How to Add Text to video in YouTube after uploading
Sometimes, we have uploaded a video to YouTube and then want to add subtitles/cc to the video later. The good news is that YouTube is not only a site for videos but is also the place where you can edit your videos in an instant. As you have read, adding text and captions to the uploaded YouTube videos is just a breeze.
Of course, you can only add and edit texts and captions to the video under your YouTube account. Here are the steps on how you can add text to your videos with YouTube Video Editor after the video is uploaded.
- Go to youtube.com then sign in to your account. After sign in your YouTube account, click your avatar and select Creator Studio to enter the creator studio interface.
- Click the Video Manager tab and in Videos section you will see all your videos uploaded to YouTube. Select the video that you want to add captions to and then select Subtitles/CC after clicking Edit button.
- Add Captions/Subtitles
While YouTube may have already created the subtitles automatically for your video with its speech recognition technology. If it does, you will see something like Published: English (Automatic) to the right of your video. If the automatically generated subtitles is not correct, you can edit it to improve the accuracy. Select the line that needs modification to make the edits.
If there is no auto-subtitles, you can choose from 3 ways to add subtitles and closed captions to the video: Upload a file, Transcribe and auto-sync and create new subtitles or CC.
Upload a file: upload a text transcript or timed subtitles file.
Transcribe and auto-sync: Type or paste in a full transcript of the video and subtitle timings will be set automatically.
Create new subtitles or CC: Create subtitles and closed captions by typing them in as you watch the video.
If you already have a caption file which contains both text and time codes, just click Upload a file and upload the text to the video.
- Once everything is okay, you can change the name of the video and you can do it in the box beside Project.
Cons of Using YouTube Video Editor
When you make use of this editor, you cannot shorten the clips for music. Moreover, since it is an online editor, you need to refresh the page in order to do the changes. Aside from YouTube Video Editor, you can use Adobe Premier Pro, MAGIX Vegas Pro, OpenShot and Avidemux.
From 20th September 2017 users will no longer be able to use the complementary editing suite. Check the best YouTube video editor alternatives from this complete guide to find out more YouTube video editor alternatives if you want to add text to video with more features and customization.
Top 3 Tips for Adding Text to YouTube Videos
1. Leave Room
If you know you are going to add text to your video then make sure you leave room for it in your frame. Consider standing off to one side instead of directly in front of your camera. You do not want to have to choose between not using text, making your text really small, or placing it over your face.
While planning out your frame and leaving room for your text, consider what color you are going to make the words and whether it will stand out and look good against your background.
2. Bigger is Better
People should be able to read your text without putting in any extra effort, such as straining their eyes to make out small words. If it takes effort to read your text then a lot of people will just ignore it. Your text should be big enough that somebody watching your video on their smartphone screen – where everything is shrunk down – can read it easily.
It is easier to make your text larger when you stick to titles, keywords, and short sentences.
3. Do Not Overuse
Text is a great tool for making something stand out. However, if you try to use text to emphasize too much of what you say it will lose its effect. Text does not stand out anymore once viewers get too used to seeing it. Too much text can even get annoying and cause people to click away from your videos.
Try to use text to emphasize only the most important things you say.
Richard Bennett
Richard Bennett is a writer and a lover of all things video.
Follow @Richard Bennett
Also read:
- Dialing in the Perfect Aspect Ratio for YouTube Images for 2024
- In 2024, Ensuring Long-Term YouTube Success with Creative Commons Mainteninas
- Best ASMR Apps for Android and iOS
- [Updated] Amplify Audience on Both Platforms Youtube + Twitch Strategy
- Integrate YouTube Content Into Google Slides Effectively
- 2024 Approved Earning Hacks for YouTube Short Creators
- Exposing the Accelerating Path of 8 YouTube Content Creators
- Free-to-Mp3 Journey Top 10 Online Converters
- Dive Into the World of Expertise with YouTube's Top 10 Makeup Vloggers for 2024
- Step 1 to 50 Building a Foundation for Mukbang Creation
- Blueprints for Breaking Ground in Edu-Video Production on YouTube Channels
- The Pinnacle of YouTube Ad Design Industry's Top Talents
- 2024 Approved Cultivate Creativity 20+ Inspiring YouTube Concepts
- [New] Boost Your Video's Impact with GS and YT Conversion
- In 2024, Brain Mechanisms Guiding High-Stakes Business Conclusions
- Crafting Effective, Affordable YouTube Intros with Templates for 2024
- Mix Magic How to Download Top DJ Content
- 2024 Approved Cultivating a Community The Key to Surpassing 1000 Views
- [Updated] Designing Youtube Ads That Grab Attention A Compreeher Guide
- Independent Artists' Guide to Personalized Visual Tricks
- Streamlining Content Across Platforms YouTube & IGTV
- Ultimate List of 16 Key YouTube Videos for Higher Engagement
- Crafting Standout YouTube Thumbnails with Ease
- Audiovisual Quality Its Significance in Video Ranking for 2024
- The Art of Turning YouTube Media on Its Head
- In 2024, Creating Customized URLs for Channel Subscribers
- [Updated] Crafting Captivating Thumbnails A Comprehensive Guide for YouTube Creators
- [Updated] Enhancing Watchability Adding Time Stamps to YouTube Videos
- [Updated] Essential Techniques for Enhanced YouTube Long-Form Videos
- [New] Effortless Way to Personalize Your YouTube Channel Url
- [New] Elevate Engagement Crafting Anime Subscribe Bars for YouTube Content
- Capturing Youtube Icons Browser Extension, Command Line & Software Trio for 2024
- In 2024, Crafting Attention A Look at the Best 15 Video Intro Plans
- Elevate Your Brand Discovering the Essential 5 YouTube Strategies for 2024
- [Updated] Elevate Your Online Presence Secrets of Youtube Live with WireCast
- [New] Enter Immersive Realms Top 10 YouTube's Most Captivating VR Videos
- Creating Professional Edits Using YouTube Studio Editor
- 2024 Approved Elite 10 Sound Enhancers Across OS Platforms
- 2024 Approved A Closer Look at the VegasPro '19 Makeover
- In 2024, From Memory to Moments Securely Uploading Photos to Snapchat
- [Updated] In 2024, Pull in Viewers With The Best TikTok Caption Ideas for Engagement
- [Updated] In 2024, Prime 10 TikTok Creators Tools for W Insiders
- New In 2024, Introduction to The Best Cinematic LUTs in The Market
- Fixing Persistent Pandora Crashes on Motorola Moto G04 | Dr.fone
- In 2024, Top 10 Best Spy Watches For your Oppo F25 Pro 5G | Dr.fone
- Starting Off with Vlogging Necessary Equipment/Software
- 2024 Approved Unlocking the Secrets of Instagram's Trending Reels
- [Updated] Privacy Prowess How to Disconnect on Insta for 2024
- Discover the Top 12 Audio Converters A Comprehensive Guide for 2024
- The Ultimate Guide to Video Editing - InShot's Place
- Updated 2024 Approved 10 Top-Rated Vegas Pro Alternatives for Mac A Comprehensive Review
- [New] 2024 Approved Mastering Negative Space Reverse Video Tricks for Instagram
- New The Puzzle of Production Piecing Together Roles for an Immersive Filming Experience
- In 2024, How To Pause Life360 Location Sharing For Realme 12 5G | Dr.fone
- 3uTools Virtual Location Not Working On Itel P55 5G? Fix Now | Dr.fone
- New In 2024, Best Cartoon Animation Software for Android and iOS
- Virtual Vice Games Resembling GTA V Experience for 2024
- Replay Xiaomi 11'S Best Moments with Crystal Clarity
- Updated In 2024, Cutting Large Videos on Mac? Heres How to Do It Quickly and Effortlessly
- In 2024, How to Fake Snapchat Location without Jailbreak On Lava Agni 2 5G | Dr.fone
- Top 10 Telegram Spy Tools On Vivo Y27s for Parents | Dr.fone
- 2024 Approved The Ultimate Showdown Bandicam's Prowess Against Camtasia
- Clearing Imagery The Canva Method for Clean Bounds for 2024
- In 2024, Transform Your Footage How to Add Stunning Effects in FCP X (3 Steps)
- [New] 2024 Approved Spectacular Sportscasting Techniques on Demand
- In 2024, Is GSM Flasher ADB Legit? Full Review To Bypass Your Vivo Y02TFRP Lock
- Stuck at Android System Recovery Of Samsung Galaxy F54 5G ? Fix It Easily | Dr.fone
- In 2024, How Do You Get Sun Stone Evolutions in Pokémon For Vivo Y78t? | Dr.fone
- 2024 Approved The Overlooked Elements What You're Missing as a Story Viewer
- How to Fix My Xiaomi Redmi 13C 5G Location Is Wrong | Dr.fone
- [Updated] Maximizing Impact Adjusting Facebook Video Sizes Correctly
- 5 Ways to Reset Vivo V30 Lite 5G Without Volume Buttons | Dr.fone
- [New] Mastering TikTok Desktop Video Creation Guide
- How to Mirror PC Screen to Realme 12 5G Phones? | Dr.fone
- Title: "Crafting Captivating YouTube Closures - Expert Guides Included for 2024"
- Author: Steven
- Created at : 2024-05-25 18:59:55
- Updated at : 2024-05-26 18:59:55
- Link: https://youtube-clips.techidaily.com/crafting-captivating-youtube-closures-expert-guides-included-for-2024/
- License: This work is licensed under CC BY-NC-SA 4.0.
