
:max_bytes(150000):strip_icc()/raytracingstarwars-b548b699b36b4bb8b4334d66a964ede9.jpg)
"Converting YT to IGTV 3 Effective Methods"
Converting YT to IGTV: 3 Effective Methods
How to Convert YouTube to IGTV Videos? [3 Ways]

Shanoon Cox
Mar 27, 2024• Proven solutions
Publishing video content on social media platforms like Instagram or IGTV can help influencers and brands reach new customers. The only trouble is that both Instagram and IGTV have very precise video upload requirements, so each video you want to share on your IGTV channel must be saved in MP4 file format and in a 9:16 aspect ratio.
YouTube videos, on the other hand, are mostly horizontally oriented. If you attempt to upload a YouTube video to IGTV and wondering how to achieve it, just keep reading. Because in this article, we are going to show you how you can convert a horizontal YouTube video into IGTV vertical one in 3 different ways.
- Part 1: Re-post YouTube Video to IGTV with Filmora
- Part 2: Use YouTube to IGTV Online Converter
- Part 3: Convert YouTube Video to IGTV with FXP
Part 1: Convert YouTube Videos to IGTV Vertical Videos with Filmora


If you don’t already have the original file of the video you’d like to upload to your IGTV channel, you can download a video from YouTube , but keep in mind that you can’t use any content without permission from its owner.
Once you have the file, you can create a new project in Filmora and then after the project loads you should click on the File menu and select the Project Settings option. Pick one of the 9:16 video resolution options provided by the editor and click OK to confirm the changes.

Click on the Import button to add a YouTube video to your project and then place it on the timeline. Your video will be displayed in the Preview Panel, and you’ll be able to see that the video is positioned at the center of the panel and that its top and bottom are black.
Go to the Effects tab and click on the Background Blur submenu if you want to blur the empty areas of the frame. Add the Basic Blur effect to the timeline and drag one of its sides to position it over the entire video.

In case you are working with a video that already has a 16:9 aspect ratio, you can create a project that has the same aspect ratio, and then just use the Rotate slider in the Transform menu, to change turn a landscape video into a portrait video. The scaling tool is helpful to enlarge the frames in a vertical aspect ratio.

Filmora lets you create vertical videos in just a few quick steps, which makes it a perfect choice for influencers and marketers who want to share video content on YouTube and IGTV.
Latest News: In Filmora V10.5 and later versions, there is a new feature called Auto-Reframe. This feature allows users to convert one video for different social media platforms based on the aspect ratio changing, and its features of detecting the moving object. Click the Analyze button, and Filmora will convert this 16:9 YouTube video to vertical 9:16 IGTV video automatically. And I can adjust frames to follow Yasmine’s movement to fine-tune the result.

You can watch the video below to find out more information about the Auto-Reframe tool.
Part 2: Use Kapwing to Convert YouTube to IGTV Online
YouTubers who already have lots of videos on their channel can use online video editing platforms, like Kapwing to edit the content they want to post on IGTV. This online video editor offers a number of video editing tools that let you polish your videos before posting them on social media.
Click on the Resize tool and simply copy and paste the URL of a YouTube into the appropriate bar and the platform will automatically import a video and display it on the screen once the content is finally fetched.

Pick the Story (Snap/Insta) or IGTV 9:16 option and then proceed to choose the background color for your IGTV video, increase or decrease the zoom level or change the position of the video. Click on the Create button when ready and wait for Kapwing to process your video. All videos you create with the free version of this online video editor are going to be watermarked and you have to pay a six-dollar fee for each watermark-free video you edit with Kapwing or you can opt for a $20 monthly subscription fee that enables you to export an unlimited amount of videos without watermarks each month.

A growing number of IGTV users choose to rotate their videos, instead of resizing them, so if you already have a YouTube video with a 16:9 aspect ratio you can just rotate it and get a video with a 9:16 aspect ratio. Click on the Rotate option and then rotate it 90 degrees clockwise or counterclockwise and click on the Create button. If you opt for this method of creating a vertical video for IGTV, your video will remain the same size, but the viewers will have to hold their phones horizontally in order to view it properly.
You may also like: How to Convert MKV to MP4 without Losing Quality [Free Converters Provided] >>
Part 3: Changing the Aspect Ratio of a YouTube Video with Final Cut Pro
Editing videos with professional video editing software products like Final Cut Pro or Premiere Pro requires a certain amount of skill. There is more than just one way to change the aspect ratio of a video in Final Cut Pro, but probably the best one is to set the project resolution to 2160X3840 or any other lower resolution that matches the 9:16 aspect ratio. During the video editing process, you will have to resize all of the footage you want to include in the final version of the video. Planning your shots and composing them differently than you would compose horizontally oriented shots can potentially save you a little time on resizing and repositioning the video clips you’re working with.
If you’ve already exported a video and uploaded it to your YouTube channel, you can open that video in Final Cut Pro and just rotate it using the Transform tools. However, the viewers will have to hold their phones in a horizontal position while watching the video if you choose this method of creating a 9:16 aspect ratio in Final Cut Pro.
Conclusion
Posting YouTube videos on your IGTV channel is still a somewhat complicated process because you can’t share posts directly from one platform to the other. Moreover, you can’t upload videos that last more than ten minutes to IGTV, unless you have a verified account. Even so, the IGTV platform can help you extend the reach of your videos and increase the revenue you’re generating from the content you’re sharing on social media. Do you know another way of changing a YouTube video’s aspect ratio before re-posting it on IGTV? Leave a comment and let us know.
You may also like: YouTube to WAV File: 4 Best Free Convert Solutions >>
Shanoon Cox
Shanoon Cox is a writer and a lover of all things video.
Follow @Shanoon Cox
Shanoon Cox
Mar 27, 2024• Proven solutions
Publishing video content on social media platforms like Instagram or IGTV can help influencers and brands reach new customers. The only trouble is that both Instagram and IGTV have very precise video upload requirements, so each video you want to share on your IGTV channel must be saved in MP4 file format and in a 9:16 aspect ratio.
YouTube videos, on the other hand, are mostly horizontally oriented. If you attempt to upload a YouTube video to IGTV and wondering how to achieve it, just keep reading. Because in this article, we are going to show you how you can convert a horizontal YouTube video into IGTV vertical one in 3 different ways.
- Part 1: Re-post YouTube Video to IGTV with Filmora
- Part 2: Use YouTube to IGTV Online Converter
- Part 3: Convert YouTube Video to IGTV with FXP
Part 1: Convert YouTube Videos to IGTV Vertical Videos with Filmora
If you don’t already have the original file of the video you’d like to upload to your IGTV channel, you can download a video from YouTube , but keep in mind that you can’t use any content without permission from its owner.
Once you have the file, you can create a new project in Filmora and then after the project loads you should click on the File menu and select the Project Settings option. Pick one of the 9:16 video resolution options provided by the editor and click OK to confirm the changes.
Click on the Import button to add a YouTube video to your project and then place it on the timeline. Your video will be displayed in the Preview Panel, and you’ll be able to see that the video is positioned at the center of the panel and that its top and bottom are black.
Go to the Effects tab and click on the Background Blur submenu if you want to blur the empty areas of the frame. Add the Basic Blur effect to the timeline and drag one of its sides to position it over the entire video.
In case you are working with a video that already has a 16:9 aspect ratio, you can create a project that has the same aspect ratio, and then just use the Rotate slider in the Transform menu, to change turn a landscape video into a portrait video. The scaling tool is helpful to enlarge the frames in a vertical aspect ratio.
Filmora lets you create vertical videos in just a few quick steps, which makes it a perfect choice for influencers and marketers who want to share video content on YouTube and IGTV.
Latest News: In Filmora V10.5 and later versions, there is a new feature called Auto-Reframe. This feature allows users to convert one video for different social media platforms based on the aspect ratio changing, and its features of detecting the moving object. Click the Analyze button, and Filmora will convert this 16:9 YouTube video to vertical 9:16 IGTV video automatically. And I can adjust frames to follow Yasmine’s movement to fine-tune the result.
You can watch the video below to find out more information about the Auto-Reframe tool.
Part 2: Use Kapwing to Convert YouTube to IGTV Online
YouTubers who already have lots of videos on their channel can use online video editing platforms, like Kapwing to edit the content they want to post on IGTV. This online video editor offers a number of video editing tools that let you polish your videos before posting them on social media.
Click on the Resize tool and simply copy and paste the URL of a YouTube into the appropriate bar and the platform will automatically import a video and display it on the screen once the content is finally fetched.
Pick the Story (Snap/Insta) or IGTV 9:16 option and then proceed to choose the background color for your IGTV video, increase or decrease the zoom level or change the position of the video. Click on the Create button when ready and wait for Kapwing to process your video. All videos you create with the free version of this online video editor are going to be watermarked and you have to pay a six-dollar fee for each watermark-free video you edit with Kapwing or you can opt for a $20 monthly subscription fee that enables you to export an unlimited amount of videos without watermarks each month.
A growing number of IGTV users choose to rotate their videos, instead of resizing them, so if you already have a YouTube video with a 16:9 aspect ratio you can just rotate it and get a video with a 9:16 aspect ratio. Click on the Rotate option and then rotate it 90 degrees clockwise or counterclockwise and click on the Create button. If you opt for this method of creating a vertical video for IGTV, your video will remain the same size, but the viewers will have to hold their phones horizontally in order to view it properly.
You may also like: How to Convert MKV to MP4 without Losing Quality [Free Converters Provided] >>
Part 3: Changing the Aspect Ratio of a YouTube Video with Final Cut Pro
Editing videos with professional video editing software products like Final Cut Pro or Premiere Pro requires a certain amount of skill. There is more than just one way to change the aspect ratio of a video in Final Cut Pro, but probably the best one is to set the project resolution to 2160X3840 or any other lower resolution that matches the 9:16 aspect ratio. During the video editing process, you will have to resize all of the footage you want to include in the final version of the video. Planning your shots and composing them differently than you would compose horizontally oriented shots can potentially save you a little time on resizing and repositioning the video clips you’re working with.
If you’ve already exported a video and uploaded it to your YouTube channel, you can open that video in Final Cut Pro and just rotate it using the Transform tools. However, the viewers will have to hold their phones in a horizontal position while watching the video if you choose this method of creating a 9:16 aspect ratio in Final Cut Pro.
Conclusion
Posting YouTube videos on your IGTV channel is still a somewhat complicated process because you can’t share posts directly from one platform to the other. Moreover, you can’t upload videos that last more than ten minutes to IGTV, unless you have a verified account. Even so, the IGTV platform can help you extend the reach of your videos and increase the revenue you’re generating from the content you’re sharing on social media. Do you know another way of changing a YouTube video’s aspect ratio before re-posting it on IGTV? Leave a comment and let us know.
You may also like: YouTube to WAV File: 4 Best Free Convert Solutions >>
Shanoon Cox
Shanoon Cox is a writer and a lover of all things video.
Follow @Shanoon Cox
Your Guide to Making Millions on YouTube: From Novice to Big Earnings
Hello, I’m looking to start my journey as a YouTuber, but I do not know how the process works. Please, can you share with me how I can create a YouTube channel and make money from it? Kindly, help.
Starting a successful YouTube channel is very tricky. So, if you’re wondering how to create a YouTube channel and make money, worry less, we understand your struggle, and that is why we’ve created this YouTube beginners guide.
Regardless of whether you’re looking to start a tech YouTube channel, a money-making online YouTube channel, a lifestyle YouTube channel, or other topics, this guide will walk you through the simple process of how to create a YouTube channel and make money from it.
Part 1: Why choose YouTube to make money?
Boasting over 2 billion active users globally, YouTube remains the most used video-playing platform on the internet with all kinds of videos.
Today, many folks use YouTube as a means of generating income because it offers users more opportunities to reach a wide range of audiences, and the means of generating income via YouTube easily. As of when this article is written, research shows that an average YouTuber could earn up to $10,000 yearly.
Also, YouTube is a free marketing platform. So, if you have a website, you can add links to your website in the video description, thus enabling you to boost your website traffic via the platform. And it’ll allow you to advertise your product or services 100% free.
Part 2: 5-Step Formula to Start a YouTube Channel
Now you understand why you should choose YouTube to make money, the following steps will teach you how to create a YouTube channel within a few clicks. So, read on.
Step1 Create a google account
To get started, you need to create a google account. But if you already have a Google account you can skip this step.
Head to Google Account and click Create Account at the top right corner.

On the new screen, enter the necessary details and click Next.

Provide your phone number and other required details. Then, click Next.

On the new page, click I Agree to accept Google’s terms and conditions. Then finish the Google Account setup.

Step2 Create a YouTube account
Once you’ve successfully created a Google account, the next thing is to create your YouTube account. You just have to do the following to carry out the operation;
Open YouTube’s official website in your browser and click Sign in from the top right corner.

On the new page, sign in to the Google account that you want to use in creating your YouTube channel.
After you sign in to your Google account, you’ll be prompted back to the YouTube home interface. Click on your profile icon from the top right corner and select Create A Channel from the drop-down list.

Choose the Name you want to appear on your YouTube channel profile and upload a preferred Picture. Then, click Create Channel to proceed.

Step3 Customize your YouTube channel
After you’ve successfully created the channel, the next thing is to customize the channel as per requirement. Click Customise Channel from the left-hand side.

You’ll be prompted to the YouTube creator studio. There, you’ll find Layout, Branding, and Basic Info options displayed at the top of the page.
In the Layout section, you’ll be allowed to apply customization of how you want your YouTube channel homepage to look.

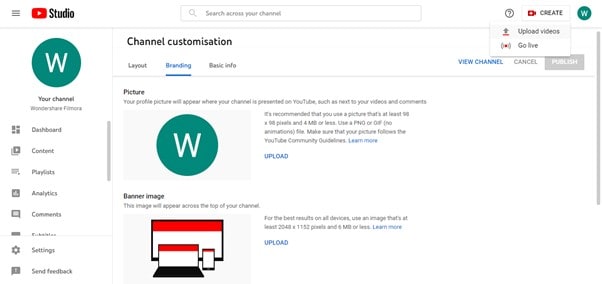
Under Branding, you can upload your brand logo as a profile photo, upload a banner image, and add the video watermark that you want to appear on all videos you upload on YouTube.

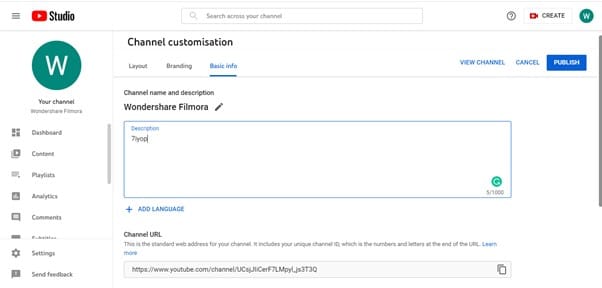
Under Basic Info, you’ll be able to enter a description for your YouTube channel, edit your channel URL, and do lots more. However, remember to always use the PUBLISH button to save customization.
Step4 Upload your first YouTube video
Now, it’s to upload your first YouTube video. To do so, navigate to the top-right corner of the page and click Create New. Select Upload Video.
If you have a video ready, click Select Files and upload the video you want to post.

Complete the required editing/settings after the video is uploaded.

Speaking of videos, you upload on YouTube, there are certain types of videos that can make you popular within a short time. Such YouTube video category includes;
- Singing
- Teaching
- Fashion Advice
- Cooking Tutorial
- Make-Up Tutorial
Step5 Make your YouTube channel discoverable
It’s time to start making your YouTube channel discoverable online. You need the subscribers, views, and all that a creator like you is worth having. However, to make this possible, you need to do the following;
Optimize Video Titles
Using Google-friendly titles for your videos is vital to allow them to rank well on Google search ranking. It should be catchy and compelling that users will be prompted to want to know what the video is about. Make sure it contains keywords too.

Optimize Video Description
Adding descriptions to your video is as important as the title. This will help search engines understand what your video is all about. So, make sure you add rich keywords to your video description and keep it concise.

Promote Your Channel on Other Social Media Platforms
You shouldn’t limit yourself to just creating videos and uploading them on YouTube. Make sure you always make it a priority to promote your YouTube videos on other platforms like Facebook, Twitter, or Instagram. This will help you give your existing fans a heads-up that you’re starting a YouTube channel.

Add Tags to your videos
When we say add tags to your videos, it does not mean you should add any tag to any video you upload on YouTube. Only add tags that’s relating to the theme of your video.
Tags will help YouTube understand the kind of video you’re uploading, and it’ll help you maintain the quality of not just your videos but your YouTube channel.

Use Keywords in Your Videos
Using rich keywords in your YouTube videos is a great way to increase the chances of your videos being seen online. Make sure you use the right keyword in the video title, as it’ll help guide viewers to your video when they search for similar words or phrases online.

Part 3: YouTube Must-Have Tools: What Are They?
Congratulations on creating your YouTube channel. But, before you get over-excited, there are essential tools you need as a YouTuber to help you stand out in the industry. These tools include the following;
1. Video Editor – Wondershare Filmora
As a YouTuber, regardless of your niche of expertise, you need an efficient video editing tool like Wondershare Filmora to create quality videos. Filmora is different from the regular video editor you find online, and it offers a plethora of video editing features that you can rely on to edit your videos and spice them up without requiring any kind of video editing knowledge.
See how you can use Filmora video editor on your YouTube videos;
Free Download For Win 7 or later(64-bit)
Free Download For macOS 10.14 or later
Step1 Go to the official website and install the Filmora video editing software on your computer. Then, launch the tool and import the video you want to edit using the Import button.

Drag-n-drop the video to the timeline.

Step2 Click Effects from the top of the screen. Select AI Portrait from the left-hand side and find a preferred AI Portrait effect. Then, click on it and drag-n-drop the effect to the Timeline.

Adjust the effect starting and ending point of where you want the AI Portrait effect to be displayed.
Step3 Again, adjust the AI Portrait effect settings by double-clicking on it, then, from the pop-up, apply the preferred settings.

Step4 You can also add a “Subscribe” watermark to your YouTube video. To do so, just click the >> icon next to Export at the top of the screen, then select Element.

Select the ‘Social Media Show Element 07’ Effects. Then, drag-n-drop it to the Timeline.

Step5 Lastly, preview the edited video, and if you’re okay with it, click Export from the top bar and select Burn DVD from the drop-down list.
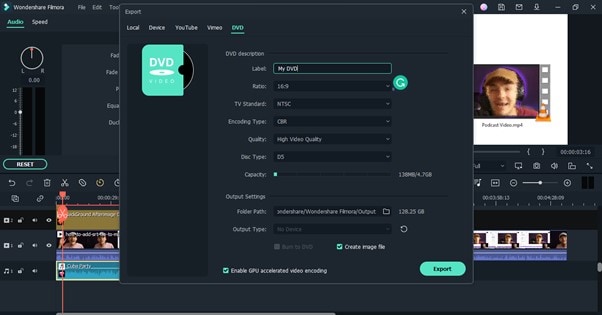
From the pop-up window that appears on your PC screen, select the Folder Path and give the video file a preferred name. Then, click Export to complete the operation.

2. Google Keyword Planner
The Google keyword planner is vital to help you do keyword research and see the trends of how a particular keyword is searched in a particular month, within a given year, or more. It’ll help you understand how people are searching for a particular keyword and what time of the year it usually has more searches from folks.
By using Google Keyword planner, you’ll put yourself ahead of your competitors by using the right keyword that you need for your SEO and PPC strategies at the right time. From search volume to trends, CPC, competition scores, and more, it’s crucial you have this tool at your fingertips. Besides, it’s 100% free to use.
3. YouTube Studio
YouTube Studio is a crucial analytic tool that can come in handy to help you improve your video as you grow your YouTube channel. It is like Google Analytics in a way. It’ll allow you to track the analytics of how people view your videos, comment on your video, and more. YouTube Studio is available for free. You can use it through the Android App, on your PC or online from YouTube itself.

4. VidIQ
Are you looking for a tool to grow your YouTube channel efficiently? Then VidIQ is the ideal tool for you. Yes, with VidIQ, you’ll get access to essential tools to grow your YouTube audience faster than you can think. It’s just a scorecard that offers you in-depth analytics of how your YouTube videos are performing compared to your competitors, thus allowing you to get helpful info on how you can get ahead of them and stand out in the industry.
With VidIQ, you’ll get access to a checklist that will highlight titles, descriptions, cards, end screens, closed captions, and lots more in your videos. And of all, it’ll suggest tags that you can use in your videos to get more traffic and improve SEO.

Part 4: Tips & Tricks to Make your YouTube Grow Faster
Stay Consistent
There’s no doubt that the key to succeeding in whatever you do is to stay consistent. It can be quite hard for anyone, especially newbies to keep up with different difficulties encountered in the pursuit to create a successful YouTube channel.
So, for you to achieve your dreams of being a popular YouTuber, you must keep up with the consistency of creating quality videos, promoting your videos, and doing the right thing that’s needed for your YouTube channel to stand out online.
Collaborate With Other YouTubers
Don’t be shy to reach out to your fellow YouTubers for collaboration. Yes, by collaborating with popular YouTubers, you get to enhance your online presence, thereby increasing your subscriber base and increasing your video views.
YouTube SEO Is Crucial
You might have heard of SEO (Search Engine Optimization) being crucial for websites to rank well, but the truth is it also applies to YouTube channels. YouTube SEO is a great way to optimize your YouTube channel and video to make it rank well on online search results.
It’s important you understand how YouTube SEO works and implement it in your YouTube channel, as it’ll increase your chances of more viewers visiting your channel and watching your videos.
Final Words
That’s all you need to know about creating a successful YouTube channel. If you fancy creating videos, the above tips will teach you how to create a YouTube channel and make money. Also, if you read the article to this point, we believe you’ve understood different ways you can make your YouTube channel stand out and enhance your chances of making more money on YouTube. Don’t hesitate to start your journey now!
Free Download For Win 7 or later(64-bit)
Free Download For macOS 10.14 or later
Part 1: Why choose YouTube to make money?
Boasting over 2 billion active users globally, YouTube remains the most used video-playing platform on the internet with all kinds of videos.
Today, many folks use YouTube as a means of generating income because it offers users more opportunities to reach a wide range of audiences, and the means of generating income via YouTube easily. As of when this article is written, research shows that an average YouTuber could earn up to $10,000 yearly.
Also, YouTube is a free marketing platform. So, if you have a website, you can add links to your website in the video description, thus enabling you to boost your website traffic via the platform. And it’ll allow you to advertise your product or services 100% free.
Part 2: 5-Step Formula to Start a YouTube Channel
Now you understand why you should choose YouTube to make money, the following steps will teach you how to create a YouTube channel within a few clicks. So, read on.
Step1 Create a google account
To get started, you need to create a google account. But if you already have a Google account you can skip this step.
Head to Google Account and click Create Account at the top right corner.
On the new screen, enter the necessary details and click Next.
Provide your phone number and other required details. Then, click Next.
On the new page, click I Agree to accept Google’s terms and conditions. Then finish the Google Account setup.
Step2 Create a YouTube account
Once you’ve successfully created a Google account, the next thing is to create your YouTube account. You just have to do the following to carry out the operation;
Open YouTube’s official website in your browser and click Sign in from the top right corner.
On the new page, sign in to the Google account that you want to use in creating your YouTube channel.
After you sign in to your Google account, you’ll be prompted back to the YouTube home interface. Click on your profile icon from the top right corner and select Create A Channel from the drop-down list.
Choose the Name you want to appear on your YouTube channel profile and upload a preferred Picture. Then, click Create Channel to proceed.
Step3 Customize your YouTube channel
After you’ve successfully created the channel, the next thing is to customize the channel as per requirement. Click Customise Channel from the left-hand side.
You’ll be prompted to the YouTube creator studio. There, you’ll find Layout, Branding, and Basic Info options displayed at the top of the page.
In the Layout section, you’ll be allowed to apply customization of how you want your YouTube channel homepage to look.
Under Branding, you can upload your brand logo as a profile photo, upload a banner image, and add the video watermark that you want to appear on all videos you upload on YouTube.
Under Basic Info, you’ll be able to enter a description for your YouTube channel, edit your channel URL, and do lots more. However, remember to always use the PUBLISH button to save customization.
Step4 Upload your first YouTube video
Now, it’s to upload your first YouTube video. To do so, navigate to the top-right corner of the page and click Create New. Select Upload Video.
If you have a video ready, click Select Files and upload the video you want to post.
Complete the required editing/settings after the video is uploaded.
Speaking of videos, you upload on YouTube, there are certain types of videos that can make you popular within a short time. Such YouTube video category includes;
- Singing
- Teaching
- Fashion Advice
- Cooking Tutorial
- Make-Up Tutorial
Step5 Make your YouTube channel discoverable
It’s time to start making your YouTube channel discoverable online. You need the subscribers, views, and all that a creator like you is worth having. However, to make this possible, you need to do the following;
Optimize Video Titles
Using Google-friendly titles for your videos is vital to allow them to rank well on Google search ranking. It should be catchy and compelling that users will be prompted to want to know what the video is about. Make sure it contains keywords too.
Optimize Video Description
Adding descriptions to your video is as important as the title. This will help search engines understand what your video is all about. So, make sure you add rich keywords to your video description and keep it concise.
Promote Your Channel on Other Social Media Platforms
You shouldn’t limit yourself to just creating videos and uploading them on YouTube. Make sure you always make it a priority to promote your YouTube videos on other platforms like Facebook, Twitter, or Instagram. This will help you give your existing fans a heads-up that you’re starting a YouTube channel.
Add Tags to your videos
When we say add tags to your videos, it does not mean you should add any tag to any video you upload on YouTube. Only add tags that’s relating to the theme of your video.
Tags will help YouTube understand the kind of video you’re uploading, and it’ll help you maintain the quality of not just your videos but your YouTube channel.
Use Keywords in Your Videos
Using rich keywords in your YouTube videos is a great way to increase the chances of your videos being seen online. Make sure you use the right keyword in the video title, as it’ll help guide viewers to your video when they search for similar words or phrases online.
Part 3: YouTube Must-Have Tools: What Are They?
Congratulations on creating your YouTube channel. But, before you get over-excited, there are essential tools you need as a YouTuber to help you stand out in the industry. These tools include the following;
1. Video Editor – Wondershare Filmora
As a YouTuber, regardless of your niche of expertise, you need an efficient video editing tool like Wondershare Filmora to create quality videos. Filmora is different from the regular video editor you find online, and it offers a plethora of video editing features that you can rely on to edit your videos and spice them up without requiring any kind of video editing knowledge.
See how you can use Filmora video editor on your YouTube videos;
Free Download For Win 7 or later(64-bit)
Free Download For macOS 10.14 or later
Step1 Go to the official website and install the Filmora video editing software on your computer. Then, launch the tool and import the video you want to edit using the Import button.
Drag-n-drop the video to the timeline.
Step2 Click Effects from the top of the screen. Select AI Portrait from the left-hand side and find a preferred AI Portrait effect. Then, click on it and drag-n-drop the effect to the Timeline.
Adjust the effect starting and ending point of where you want the AI Portrait effect to be displayed.
Step3 Again, adjust the AI Portrait effect settings by double-clicking on it, then, from the pop-up, apply the preferred settings.
Step4 You can also add a “Subscribe” watermark to your YouTube video. To do so, just click the >> icon next to Export at the top of the screen, then select Element.
Select the ‘Social Media Show Element 07’ Effects. Then, drag-n-drop it to the Timeline.
Step5 Lastly, preview the edited video, and if you’re okay with it, click Export from the top bar and select Burn DVD from the drop-down list.
From the pop-up window that appears on your PC screen, select the Folder Path and give the video file a preferred name. Then, click Export to complete the operation.
2. Google Keyword Planner
The Google keyword planner is vital to help you do keyword research and see the trends of how a particular keyword is searched in a particular month, within a given year, or more. It’ll help you understand how people are searching for a particular keyword and what time of the year it usually has more searches from folks.
By using Google Keyword planner, you’ll put yourself ahead of your competitors by using the right keyword that you need for your SEO and PPC strategies at the right time. From search volume to trends, CPC, competition scores, and more, it’s crucial you have this tool at your fingertips. Besides, it’s 100% free to use.
3. YouTube Studio
YouTube Studio is a crucial analytic tool that can come in handy to help you improve your video as you grow your YouTube channel. It is like Google Analytics in a way. It’ll allow you to track the analytics of how people view your videos, comment on your video, and more. YouTube Studio is available for free. You can use it through the Android App, on your PC or online from YouTube itself.
4. VidIQ
Are you looking for a tool to grow your YouTube channel efficiently? Then VidIQ is the ideal tool for you. Yes, with VidIQ, you’ll get access to essential tools to grow your YouTube audience faster than you can think. It’s just a scorecard that offers you in-depth analytics of how your YouTube videos are performing compared to your competitors, thus allowing you to get helpful info on how you can get ahead of them and stand out in the industry.
With VidIQ, you’ll get access to a checklist that will highlight titles, descriptions, cards, end screens, closed captions, and lots more in your videos. And of all, it’ll suggest tags that you can use in your videos to get more traffic and improve SEO.
Part 4: Tips & Tricks to Make your YouTube Grow Faster
Stay Consistent
There’s no doubt that the key to succeeding in whatever you do is to stay consistent. It can be quite hard for anyone, especially newbies to keep up with different difficulties encountered in the pursuit to create a successful YouTube channel.
So, for you to achieve your dreams of being a popular YouTuber, you must keep up with the consistency of creating quality videos, promoting your videos, and doing the right thing that’s needed for your YouTube channel to stand out online.
Collaborate With Other YouTubers
Don’t be shy to reach out to your fellow YouTubers for collaboration. Yes, by collaborating with popular YouTubers, you get to enhance your online presence, thereby increasing your subscriber base and increasing your video views.
YouTube SEO Is Crucial
You might have heard of SEO (Search Engine Optimization) being crucial for websites to rank well, but the truth is it also applies to YouTube channels. YouTube SEO is a great way to optimize your YouTube channel and video to make it rank well on online search results.
It’s important you understand how YouTube SEO works and implement it in your YouTube channel, as it’ll increase your chances of more viewers visiting your channel and watching your videos.
Final Words
That’s all you need to know about creating a successful YouTube channel. If you fancy creating videos, the above tips will teach you how to create a YouTube channel and make money. Also, if you read the article to this point, we believe you’ve understood different ways you can make your YouTube channel stand out and enhance your chances of making more money on YouTube. Don’t hesitate to start your journey now!
Free Download For Win 7 or later(64-bit)
Free Download For macOS 10.14 or later
Also read:
- [New] Elevate Your Content A Guide to Engaging Live Thumbnails
- [Updated] Breaking Through YouTube's Walls Using Advanced Creator Studio Skills
- [New] Building Blocks of a Well-Structured YouTube Video
- In 2024, Discovering the Top 10 News-Driven YouTube Pages
- In 2024, Efficient Fortnite Imagery Design Quickly
- [New] 6 YouTuber Quizzes to Know What Type of YouTuber You Are
- 2024 Approved Building a Custom Link for YouTube's Auto-Subscribe
- [Updated] Dynamic Shots Infusing Energy Into Your YouTube Videos
- 2024 Approved Accolades Across Platforms for Video Creators
- In 2024, Amplify Engagement Utilizing YouTube Analytics Wisely
- Demystifying the Math of YouTube Ratio Perfection
- Adding Emojis in YouTube Discussions for 2024
- Audience Retention The Key to a Great YouTube Conclusion for 2024
- Key Dimensions YouTube Titles & Images That Work
- Incorporating Custom Visuals in YouTube Videos Easily
- [New] Audience Allure Video Marketing Strategies for YouTube Trailers via Filmora
- [New] Download Free Sound Effects for YouTubers
- [Updated] Elevate Your Media Content via YouTube Studio Editing Skills
- Unearthing Popular User-Generated Speeches
- Distinctive Digital Monikers for Video Creators for 2024
- Expert Advice on YouTube Short Pitfalls
- 2024 Approved Breakdown of Earnings How Much Does a Clicky Make?
- 2024 Approved Boosting Buzz & Views Masterful Strategies for YouTube Success
- Inside the World of Haul and Try-On Videos
- Charting Your Course Building Plays on YouTube for 2024
- In 2024, How To Use Allshare Cast To Turn On Screen Mirroring On ZTE Blade A73 5G | Dr.fone
- [Updated] Firefox Recording Tools & Extensions
- Best Web Microphones at a Glance
- [Updated] From Click to Chatter Turning Titles Into Talk on FB for 2024
- [New] 2024 Approved Step-by-Step Guide to Crafting IGTV Cover Photos
- Quick, Easy, Fun 4 Steps to Showcasing Your Favorite GIFs on Instagram for 2024
- Unova Stone Pokémon Go Evolution List and How Catch Them For Nubia Red Magic 8S Pro | Dr.fone
- 2024 Approved MP3 Editor for Mac Free & Cheap
- [Updated] No Marking TikTok MP4 Downloader for High-Quality Clips
- [New] Beginner’s Guide to All Things Vector Images- Overview, Types, and Software Choices
- [New] Humor Hierarchy The 20 Most Popular Memes for 2024
- In 2024, Top 10 AirPlay Apps in Vivo X90S for Streaming | Dr.fone
- Title: "Converting YT to IGTV 3 Effective Methods"
- Author: Steven
- Created at : 2024-05-25 18:59:05
- Updated at : 2024-05-26 18:59:05
- Link: https://youtube-clips.techidaily.com/converting-yt-to-igtv-3-effective-methods/
- License: This work is licensed under CC BY-NC-SA 4.0.
