
:max_bytes(150000):strip_icc()/free-documentaries-online-56a324a85f9b58b7d0d0940c-5baba43ac9e77c0025106f12.jpg)
"Converting Your Clips Upload to YouTube Via Premiere for 2024"
Converting Your Clips: Upload to YouTube Via Premiere
How Do I Use Adobe Premiere To Upload YouTube Videos?

Benjamin Arango
Mar 27, 2024• Proven solutions
Whilst getting the editing and post work just right on any project is what we all aim for, the ultimate aim is for other people to see our creations, and the most popular way to achieve that is YouTube . Chances are, if you are producing video, you will be putting some of it on YouTube at some point, so let’s have a look at the most efficient way to get your work from Premiere to YouTube.
Check if your computer meet the Premiere System Requirements >>
This is a basic tutorial about Adobe Premiere, professional video editing software. However, if video editing is new to you, consider Wondershare Filmora , which is a powerful but easy-to-use tool for users just starting out. Download the free trial version below.
 Download Mac Version ](https://tools.techidaily.com/wondershare/filmora/download/ )
How Do I Use Adobe Premiere To Upload YouTube Videos
1. Master Copy
Before exporting your work, it is important to first create a master copy of your project that is ‘as is’, in that it reflects the settings and codecs used in the original footage.
To do this you simply select the sequence within the Timeline or in the Project Panel, and go through the menu tree via File > Export > Media to bring up the export dialogue.

To create your Master Copy, simply select the first option of ‘Match Sequence Settings’, this exports a file that is of the same quality as your original footage, essentially producing a digital copy of the work for archiving before anything else is done.
With you work safe and secure it is now time to look at ensuring the project is suitable for YouTube. With our sequence selected in the Timeline or Project Panel again, we go through the same File > Export > Media path to bring up the media export dialogue as before.
2. Container
The first option we have to consider is the file format that our finished video needs to be in. Here you should refer to YouTube for its guidelines, whilst they do accept a number of file formats, digging through the YouTube help system to find the settings for highest quality we find that they recommend MPEG4 as the container, using the codec.

We can also see further recommended settings in this screenshot that will be covered later.
The good news is that Premiere automatically selects the appropriate container for us when we select our codec, however it is worth knowing the file type YouTube is expecting just to check yourself.
3. Video Codec
So having established that YouTube recommends the MPEG4 container using the codec, the first option we need to look for in the media export dialogue is to select the appropriate Format.
This is the first drop down in the dialogue box, and in this case we simply select from the list.

Once you select you can check the ‘output name’ field and see that premiere is automatically set the output file to .mp4 which is exactly what we need.
4. Preset
The next field we come to is the ‘Preset’ dropdown menu. This is a major help to most people, as Adobe have very kindly included large numbers of presets to quickly adapt video settings to suit specific uses. They vary depending on the exact version of Premiere you are using, and each format type does have its own list of presets, as we can see has a large number for YouTube, but also has many presets for specific devices (presets for iPad, Kindle, Nook, various other tablets and phones, Vimeo and a host of others) to make getting the right settings that bit easier for us.

It is important here to select the correct preset from the various YouTube options. You want to select the resolution and frame rate that match your source file, for the best results. So, if your source file is 1080p with a frame rate of 29.97 fps then that is the YouTube setting you would select.
Once a preset is selected a summary of the settings is displayed below, normally these will be well suited to your project, however you can fine tune anything you wish by selecting the video or audio tabs at the bottom which give you the chance to adjust each parameter individually. If you do this, you can save these changes as a custom preset by clicking the button at the side of the Preset dropdown menu and simply use it on later projects by selecting it from the list the same as any other, a great time saving tool.

5. Rendering
Once you are satisfied with the settings, either from the Preset alone or if you have adjusted anything yourself, you are nearly ready to render the file and export it.
For YouTube it is recommended you select the ‘Use Maximum Render Quality’ option to maintain the best output you can, it does add time to the render process but if you value the quality of your work it is worthwhile.
Finally you can choose a suitable filename and the destination of the file by clicking on the ‘Output Name’ field.
I normally use a filename that includes the destination medium so I can differentiate between different versions of a project and know which one to upload where, in this case I include ‘youtube’, but if I were planning on uploading clips of the project to vimeo as well for instance there may be a cut of the project with ‘vimeo’ in the name too. The destination is personal preference, because I do use filenames to differentiate versions I can put the various iterations into a single project file, others have folder structures for each type of file , so all YouTube output goes into a single folder and so on, how you organize is entirely dependent on how you work.

Once those are selected clicking ‘Export’ starts the rendering process, and eventually (how long depends on the speed of your computer and the size and type of file involved), you will end up with your YouTube optimized video in the location you chose.
Here I created 4 key frames that let the ‘Animation’ object move around the ‘Demo Text’ Object and finally come to rest below it. Whilst this type of effect does look very effective on screen, such is the ease of use of After Effects it really is just a few minutes work to achieve.
Learn more details about How to add text in Premiere >>
6. Uploading
Now you have your file, the next step is to go to your YouTube account and log in if you need to.
On the top of your homepage on the right is the upload button, selecting that brings up the select file menu as below.

You can either drag your file into the window or click on it to open a standard file browser to locate the desired file, click and the upload will begin. The dropdown underneath allows you to set the video as Public, Unlisted or Private. You can change this at any time once the video is uploaded as well.
This opens the upload progress window, where you can add in a name, description and tags as well as add the video to a playlist or adjust the privacy settings as the video is uploading.

Once the upload as finished, you can do final adjustments to settings and choose a thumbnail for the video. The final step is to click the ‘Publish’ button and your video will be processed and go live.

Benjamin Arango
Benjamin Arango is a writer and a lover of all things video.
Follow @Benjamin Arango
Benjamin Arango
Mar 27, 2024• Proven solutions
Whilst getting the editing and post work just right on any project is what we all aim for, the ultimate aim is for other people to see our creations, and the most popular way to achieve that is YouTube . Chances are, if you are producing video, you will be putting some of it on YouTube at some point, so let’s have a look at the most efficient way to get your work from Premiere to YouTube.
Check if your computer meet the Premiere System Requirements >>
This is a basic tutorial about Adobe Premiere, professional video editing software. However, if video editing is new to you, consider Wondershare Filmora , which is a powerful but easy-to-use tool for users just starting out. Download the free trial version below.
Download Mac Version ](https://tools.techidaily.com/wondershare/filmora/download/ )
How Do I Use Adobe Premiere To Upload YouTube Videos
1. Master Copy
Before exporting your work, it is important to first create a master copy of your project that is ‘as is’, in that it reflects the settings and codecs used in the original footage.
To do this you simply select the sequence within the Timeline or in the Project Panel, and go through the menu tree via File > Export > Media to bring up the export dialogue.
To create your Master Copy, simply select the first option of ‘Match Sequence Settings’, this exports a file that is of the same quality as your original footage, essentially producing a digital copy of the work for archiving before anything else is done.
With you work safe and secure it is now time to look at ensuring the project is suitable for YouTube. With our sequence selected in the Timeline or Project Panel again, we go through the same File > Export > Media path to bring up the media export dialogue as before.
2. Container
The first option we have to consider is the file format that our finished video needs to be in. Here you should refer to YouTube for its guidelines, whilst they do accept a number of file formats, digging through the YouTube help system to find the settings for highest quality we find that they recommend MPEG4 as the container, using the codec.
We can also see further recommended settings in this screenshot that will be covered later.
The good news is that Premiere automatically selects the appropriate container for us when we select our codec, however it is worth knowing the file type YouTube is expecting just to check yourself.
3. Video Codec
So having established that YouTube recommends the MPEG4 container using the codec, the first option we need to look for in the media export dialogue is to select the appropriate Format.
This is the first drop down in the dialogue box, and in this case we simply select from the list.
Once you select you can check the ‘output name’ field and see that premiere is automatically set the output file to .mp4 which is exactly what we need.
4. Preset
The next field we come to is the ‘Preset’ dropdown menu. This is a major help to most people, as Adobe have very kindly included large numbers of presets to quickly adapt video settings to suit specific uses. They vary depending on the exact version of Premiere you are using, and each format type does have its own list of presets, as we can see has a large number for YouTube, but also has many presets for specific devices (presets for iPad, Kindle, Nook, various other tablets and phones, Vimeo and a host of others) to make getting the right settings that bit easier for us.
It is important here to select the correct preset from the various YouTube options. You want to select the resolution and frame rate that match your source file, for the best results. So, if your source file is 1080p with a frame rate of 29.97 fps then that is the YouTube setting you would select.
Once a preset is selected a summary of the settings is displayed below, normally these will be well suited to your project, however you can fine tune anything you wish by selecting the video or audio tabs at the bottom which give you the chance to adjust each parameter individually. If you do this, you can save these changes as a custom preset by clicking the button at the side of the Preset dropdown menu and simply use it on later projects by selecting it from the list the same as any other, a great time saving tool.
5. Rendering
Once you are satisfied with the settings, either from the Preset alone or if you have adjusted anything yourself, you are nearly ready to render the file and export it.
For YouTube it is recommended you select the ‘Use Maximum Render Quality’ option to maintain the best output you can, it does add time to the render process but if you value the quality of your work it is worthwhile.
Finally you can choose a suitable filename and the destination of the file by clicking on the ‘Output Name’ field.
I normally use a filename that includes the destination medium so I can differentiate between different versions of a project and know which one to upload where, in this case I include ‘youtube’, but if I were planning on uploading clips of the project to vimeo as well for instance there may be a cut of the project with ‘vimeo’ in the name too. The destination is personal preference, because I do use filenames to differentiate versions I can put the various iterations into a single project file, others have folder structures for each type of file , so all YouTube output goes into a single folder and so on, how you organize is entirely dependent on how you work.
Once those are selected clicking ‘Export’ starts the rendering process, and eventually (how long depends on the speed of your computer and the size and type of file involved), you will end up with your YouTube optimized video in the location you chose.
Here I created 4 key frames that let the ‘Animation’ object move around the ‘Demo Text’ Object and finally come to rest below it. Whilst this type of effect does look very effective on screen, such is the ease of use of After Effects it really is just a few minutes work to achieve.
Learn more details about How to add text in Premiere >>
6. Uploading
Now you have your file, the next step is to go to your YouTube account and log in if you need to.
On the top of your homepage on the right is the upload button, selecting that brings up the select file menu as below.
You can either drag your file into the window or click on it to open a standard file browser to locate the desired file, click and the upload will begin. The dropdown underneath allows you to set the video as Public, Unlisted or Private. You can change this at any time once the video is uploaded as well.
This opens the upload progress window, where you can add in a name, description and tags as well as add the video to a playlist or adjust the privacy settings as the video is uploading.
Once the upload as finished, you can do final adjustments to settings and choose a thumbnail for the video. The final step is to click the ‘Publish’ button and your video will be processed and go live.
Benjamin Arango
Benjamin Arango is a writer and a lover of all things video.
Follow @Benjamin Arango
Jumpstart Your Filming Setups - 8 Sites Offering Free Eco-Screens
Top 8 Sites to Get Free Green Screen Backgrounds and Footage

Richard Bennett
Mar 27, 2024• Proven solutions
Green screen or also known as chroma key is used when you swap the background of a video with another background. It provides you the opportunity to create fancy YouTube videos without forming an expensive set or going to a distant location and will reduce your cost! You can shoot your video at any place, at any time you want and then you can just swap the background with a fancy animation!
In this article, we are going to show you 8 sites to download green screen footage and how to make green screen videos for free.
- Part1: Top 8 site for free green screen background videos
- Part2: How to make and apply a green screen background video
- Part3: How to use the green screen in video
The best video editor for YouTubers - Wondershare Filmora , not only allows you to cut, crop, rotate, reverse videos, but also offers advanced features like PIP, Green Screen , or audio mixing. What’s more, you can find lots of effects on Fashion, gaming, education, tutorial, sports, etc. Check this article to know more.
In the video tutorial below, we will walk you through the steps to transforming your video into a cinematic marvel. With a few simple clicks and adjustments, you can take your audience to another world.
Download Mac Version ](https://tools.techidaily.com/wondershare/filmora/download/ )
Part 1: Top 8 sites to get free green screen videos
With the latest release, you can now download video effects, video footage, stock image, and royalty-free sound effect and music from the effects store Wondershare Filmstock .
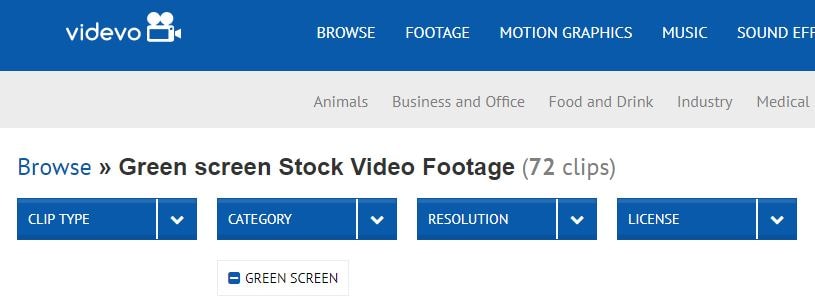
1. Videvo
Get amazing and high-quality videos that are free of the copyright at Videvo. It is a free stock website for videos that also offers free stock motion graphics that can be used in any projects you want. There are 4 segments that are clip-type, category, resolution, and license with further sub-categories for you to choose from. Only the videos with the Creative Commons license 3.0 must be given credit to the original creator.
The features of Videvo include-
- Use video clips free of charge.
- Offers free stock videos and motion graphics.
- Use the video for any types of production, personal or commercial.
- You may browse free green screen background videos.
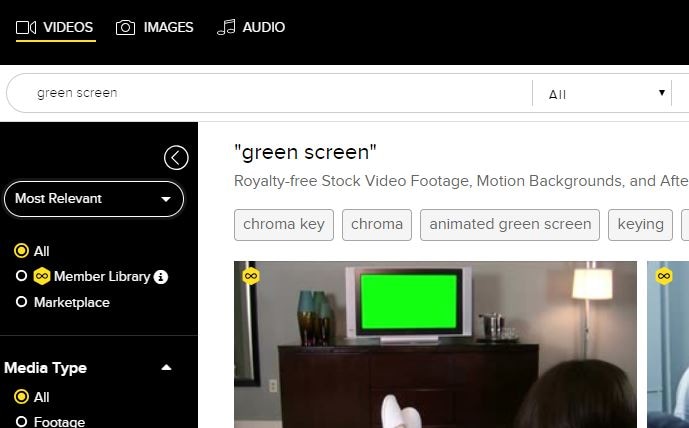
2. VideoBlocks
Download high-quality free stock video at VideoBlocks. Started in the year 2009, VideoBlocks offers animated free green screen background to 4k videos and after-effect templates.
The features are-
- Offers royalty-free stock video footages.
- Choose from the background, after-effects, and collections.
- From Chroma key to blue screen and touchscreen gestures.
- Come in 3 types of pricing plans basic, unlimited, and enterprise.
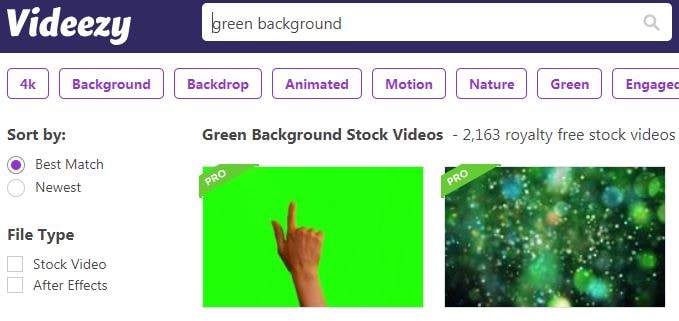
3. Videezy
From sharing HD quality videos to free green screen backgrounds and amazingly cool video footages, Videezy is a platform with numerous free stock video clips, backgrounds and more.
The features of Videezy include-
- All videos on this platform are licensed CC0.
- Share free green screen backgrounds.
- Offer ultra HD resolution.
- A range of themes.
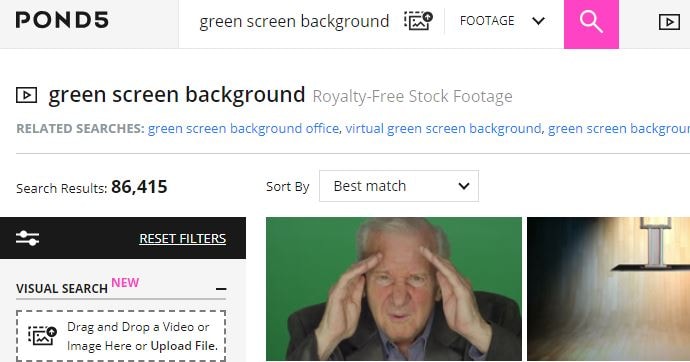
4. Pond5
You can now license your videos with Pond5 which is an international community of brands and media creators. It is a website with more than 60000 contributors of content from about 150 countries. Over 10000 videos are uploaded on Pond5 each day.
The features of Pond5 include-
- Browse more than 700k royalty-free video production tracks.
- Discover HD and 4K clips from filmmakers renowned globally.
- Easy visual search with drag and drop video feature.
- Free green screen background with animated HD videos.
- Several filters to present your green background video amazingly.
5. iStock
If you wish to search for millions of premium quality images, try iStock that handpicks and maintains the leading stock content globally.
The features of iStock include-
- From the green background to blue and orange backgrounds, iStock offers all.
- Find HD Video and 4K footage with green screen background at a nominal price just for the video and not the size.
- Pricing is flexible.

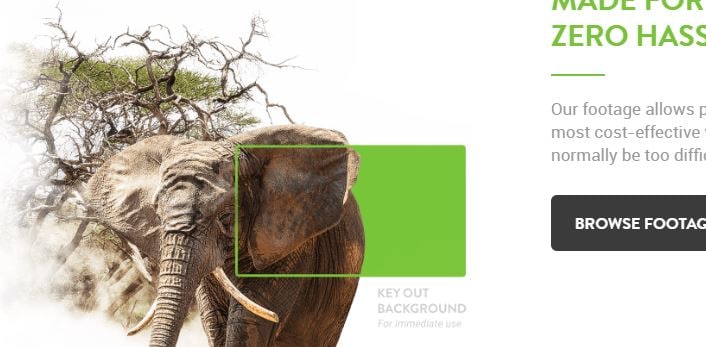
6. Green Screen Animals
The animals are truly difficult to capture. With the Green Screen Animals, you get the easiest and cost-effective access to high-quality video clips of domestic and exotic animals on a free green screen background.
The features are-
- Offers ultra HD 6k resolution video footage.
- You get access to any format as per your requirement.
- Use 3D chimpanzee models in your project with the green screen background.
- Getting performance from the animals can be a tough call, Green Screen Animals makes it easy.
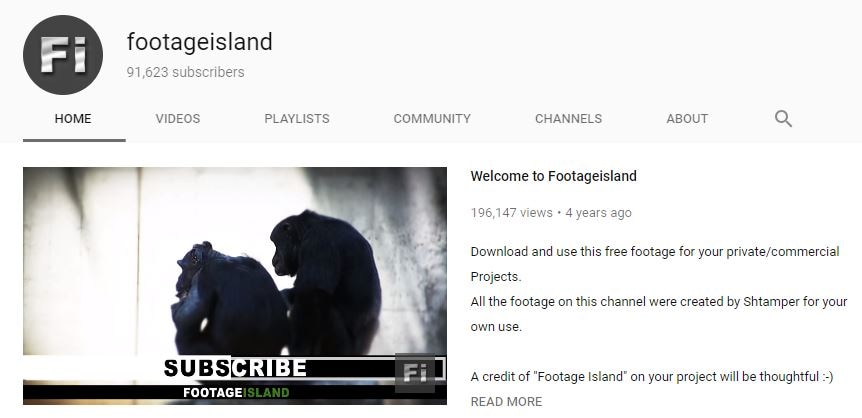
7. Footage Island
Get video footage for both private and commercial use completely free. You just need to give credit to Footage Island and use the content free.
- Free green screen background footages available.
- Free download for both personal and commercial use with just credits to the channel.
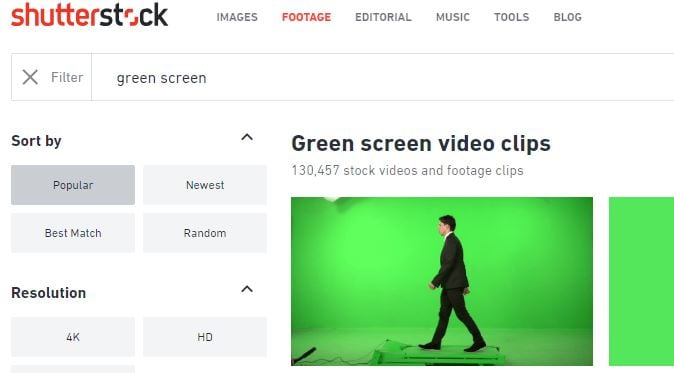
8. Shutterstock
You can sort green screen videos from shutterstock using various search options like popular, latest, best match, and random. You may also select SD, 4k or HD resolution, choose a character from people, animals or abstract, categories and more.
The features include-
- Over 1 lakh stock videos and video clips.
- Curated video collection.
- Categories like entertainment, news, sports, royalty.
- Add music to your free green screen background video.
- Easy editing tools for a great video.
Part 2: How to make and apply a green screen background
In our last article, we have shared with you how to make and use green screen footage .
While, in this article, we won’t repeat it but just share with you some tips for making and applying green screen footage in video editings.
The core objective is to have a smooth one colored background which is easy to replace in post-production. Since the green screen is employed in the film industry on a mega scale, professional green screen kits are quite expensive. Hence it is much more feasible that a DIY solution is employed for the required results.
For a good quality result from a DIY green screen, you need to take care of the following items:
1. Screen Quality
Green screens can be wall painted with a chroma key, a large sheet of cloth hung without any creases, or a portable setup canvas that can cover the given area.
2. Lightning
The most important thing to be kept in mind is that your background should be lit evenly. Any shadows on the background should be avoided. The distance of the subject should be at least ten feet from the background, to minimize any kind of shadow.
You may also like: >> Blue Screen VS Green Screen: All You Need to Know
Part 3: How to composite green screen video footage
The next step is to utilize the downloaded free green screen footage with your video.
The best green screen software for personal and semi-professional use is Filmora. It allows you to import and work on videos shot in any format (AVI, MPEG, MKV, MP4, etc.) and seamlessly integrate your video with the background.
We have already demonstrated the steps of compositing and editing green screen videos at the beginning of the article. While in the video tutorial below, you can check the samples of using Filmora to compositing downloaded free green screen footage.
You can edit a video with green screen using Filmora easily. Check the below video to learn how to manage it.
Download Mac Version ](https://tools.techidaily.com/wondershare/filmora/download/ )
Richard Bennett
Richard Bennett is a writer and a lover of all things video.
Follow @Richard Bennett
Richard Bennett
Mar 27, 2024• Proven solutions
Green screen or also known as chroma key is used when you swap the background of a video with another background. It provides you the opportunity to create fancy YouTube videos without forming an expensive set or going to a distant location and will reduce your cost! You can shoot your video at any place, at any time you want and then you can just swap the background with a fancy animation!
In this article, we are going to show you 8 sites to download green screen footage and how to make green screen videos for free.
- Part1: Top 8 site for free green screen background videos
- Part2: How to make and apply a green screen background video
- Part3: How to use the green screen in video
The best video editor for YouTubers - Wondershare Filmora , not only allows you to cut, crop, rotate, reverse videos, but also offers advanced features like PIP, Green Screen , or audio mixing. What’s more, you can find lots of effects on Fashion, gaming, education, tutorial, sports, etc. Check this article to know more.
In the video tutorial below, we will walk you through the steps to transforming your video into a cinematic marvel. With a few simple clicks and adjustments, you can take your audience to another world.
Download Mac Version ](https://tools.techidaily.com/wondershare/filmora/download/ )
Part 1: Top 8 sites to get free green screen videos
With the latest release, you can now download video effects, video footage, stock image, and royalty-free sound effect and music from the effects store Wondershare Filmstock .
1. Videvo
Get amazing and high-quality videos that are free of the copyright at Videvo. It is a free stock website for videos that also offers free stock motion graphics that can be used in any projects you want. There are 4 segments that are clip-type, category, resolution, and license with further sub-categories for you to choose from. Only the videos with the Creative Commons license 3.0 must be given credit to the original creator.
The features of Videvo include-
- Use video clips free of charge.
- Offers free stock videos and motion graphics.
- Use the video for any types of production, personal or commercial.
- You may browse free green screen background videos.
2. VideoBlocks
Download high-quality free stock video at VideoBlocks. Started in the year 2009, VideoBlocks offers animated free green screen background to 4k videos and after-effect templates.
The features are-
- Offers royalty-free stock video footages.
- Choose from the background, after-effects, and collections.
- From Chroma key to blue screen and touchscreen gestures.
- Come in 3 types of pricing plans basic, unlimited, and enterprise.
3. Videezy
From sharing HD quality videos to free green screen backgrounds and amazingly cool video footages, Videezy is a platform with numerous free stock video clips, backgrounds and more.
The features of Videezy include-
- All videos on this platform are licensed CC0.
- Share free green screen backgrounds.
- Offer ultra HD resolution.
- A range of themes.
4. Pond5
You can now license your videos with Pond5 which is an international community of brands and media creators. It is a website with more than 60000 contributors of content from about 150 countries. Over 10000 videos are uploaded on Pond5 each day.
The features of Pond5 include-
- Browse more than 700k royalty-free video production tracks.
- Discover HD and 4K clips from filmmakers renowned globally.
- Easy visual search with drag and drop video feature.
- Free green screen background with animated HD videos.
- Several filters to present your green background video amazingly.
5. iStock
If you wish to search for millions of premium quality images, try iStock that handpicks and maintains the leading stock content globally.
The features of iStock include-
- From the green background to blue and orange backgrounds, iStock offers all.
- Find HD Video and 4K footage with green screen background at a nominal price just for the video and not the size.
- Pricing is flexible.
6. Green Screen Animals
The animals are truly difficult to capture. With the Green Screen Animals, you get the easiest and cost-effective access to high-quality video clips of domestic and exotic animals on a free green screen background.
The features are-
- Offers ultra HD 6k resolution video footage.
- You get access to any format as per your requirement.
- Use 3D chimpanzee models in your project with the green screen background.
- Getting performance from the animals can be a tough call, Green Screen Animals makes it easy.
7. Footage Island
Get video footage for both private and commercial use completely free. You just need to give credit to Footage Island and use the content free.
- Free green screen background footages available.
- Free download for both personal and commercial use with just credits to the channel.
8. Shutterstock
You can sort green screen videos from shutterstock using various search options like popular, latest, best match, and random. You may also select SD, 4k or HD resolution, choose a character from people, animals or abstract, categories and more.
The features include-
- Over 1 lakh stock videos and video clips.
- Curated video collection.
- Categories like entertainment, news, sports, royalty.
- Add music to your free green screen background video.
- Easy editing tools for a great video.
Part 2: How to make and apply a green screen background
In our last article, we have shared with you how to make and use green screen footage .
While, in this article, we won’t repeat it but just share with you some tips for making and applying green screen footage in video editings.
The core objective is to have a smooth one colored background which is easy to replace in post-production. Since the green screen is employed in the film industry on a mega scale, professional green screen kits are quite expensive. Hence it is much more feasible that a DIY solution is employed for the required results.
For a good quality result from a DIY green screen, you need to take care of the following items:
1. Screen Quality
Green screens can be wall painted with a chroma key, a large sheet of cloth hung without any creases, or a portable setup canvas that can cover the given area.
2. Lightning
The most important thing to be kept in mind is that your background should be lit evenly. Any shadows on the background should be avoided. The distance of the subject should be at least ten feet from the background, to minimize any kind of shadow.
You may also like: >> Blue Screen VS Green Screen: All You Need to Know
Part 3: How to composite green screen video footage
The next step is to utilize the downloaded free green screen footage with your video.
The best green screen software for personal and semi-professional use is Filmora. It allows you to import and work on videos shot in any format (AVI, MPEG, MKV, MP4, etc.) and seamlessly integrate your video with the background.
We have already demonstrated the steps of compositing and editing green screen videos at the beginning of the article. While in the video tutorial below, you can check the samples of using Filmora to compositing downloaded free green screen footage.
You can edit a video with green screen using Filmora easily. Check the below video to learn how to manage it.
Download Mac Version ](https://tools.techidaily.com/wondershare/filmora/download/ )
Richard Bennett
Richard Bennett is a writer and a lover of all things video.
Follow @Richard Bennett
Also read:
- [New] Captivating Call-to-Action Designing a Dynamic Subscribe Buttons with Filmora
- [New] Entry-Level Expenditure Cost-Effective Platforms for YouTube Purchases
- The Ultimate Selection Identifying Best 12 Vloggers' Camera Choices
- [Updated] Best Free YouTube to MP3 Converters You Should Know [Online/Win/Mac]
- In-Depth Video Metrics at Your Fingertips Social Blade for YouTube
- Embracing Resilience Against Online Detractors
- [Updated] Elevating Your Content Choosing Right YouTube Duos/Groups
- Behind-the-Camera Glory Spotlight on Top 10 Female YouTubers
- Discover the Leading Free Naming Resources - 11 Must-Have Makers for 2024
- Unveiling Truth Understanding YouTube's SEO Keywords
- The Ultimate Guide to Self-Supported YouTube Earnings Strategies
- Skyrocket Your YouTube Traffic with Effective Outros
- Enhancing Clarity & Comprehensibility Adding On-Screen Captions in Video Projects for 2024
- In 2024, Engage with These Top 10 Student-Oriented History Channels
- [Updated] Channel Progression Reach and Maintain 10K Viewer Threshold
- Unveiling the Hidden Pathways to Earning on YouTube
- In 2024, Elite Transcribers for YouTube Clips
- In 2024, Digitally Delving Into Deleted YouTubes Easy Watch Options
- Eliminated Non-Display of Shorts Videos for 2024
- 2024 Approved Decoding the Visual Language of YouTube Thumbnails
- Elevating Video Reach The Role of Smart Backlinking Techniques for 2024
- Easily Enable Offline Access to YouTube on iPhone/iPad
- [Updated] A Symphony of Streams Harmonizing Your Multiple YouTube Views
- [Updated] Balancing Act Proper Techniques for Stable Photos
- Mastering Playlist Sharing on YouTube
- A Practical Approach to Incorporate YouTube Playlists Online for 2024
- [Updated] Channel Titling 101 The Quest for an Original Label
- Spotlight on 8 Mirrorless Cameras Dominating the Vlogging Scene
- 15 DIY Music Production Tutorial Videos for Home Studios for 2024
- [Updated] Channel Hunt Best Historical YouTubes That Every Student Should Watch
- Ultimate Visual Storyteller Harmony in Imagery & Melodies
- High-Quality, Freely Accessible Music Websites Listed Here
- The Ultimate Video Booster Guide - Uncovering the Top 20 Tips
- [New] Cultivating a Unique Vibe in Your Own Mukbang Content
- New Free Video Editing Made Easy A Wax Tutorial for Beginners for 2024
- Tips and Tricks for Apple ID Locked Issue On iPhone XS
- [Updated] Essential 20 Hysterical Detention Cell Gifs to Amplify Your Online Joy for 2024
- How to Unlock iPhone 6s with IMEI Code?
- [Updated] 2024 Approved Virtual Broadcast Archivers
- Top 10 Edge-Enhancing TikTok Filters for Striking Visuals for 2024
- 2024 Approved Top-Rated Online Image Resizing Tools for Any Ratio
- Updated Do You Want to Crop a TikTok Video? In This Article, We Will Provide You with Detailed Steps Through Which You Can Discover How to Crop TikTok Videos Easily for 2024
- HTC U23 won’t play HEVC H.265 media, how to fix?
- Decoding PowerDirector 2 Written Users
- [New] Tips & Tricks for Professional Logitech Webcam Recordings for 2024
- 2024 Approved Getting Started with Computers The Basics of Going Live on TikTok
- 2024 Approved Joining the Social TV Revolution FB Live & Roku Interactions
- [New] In 2024, Comprehensible Content Retention Through Apple-Assisted Recording Methods
- In 2024, Top 10 Must-Try Challenges Don't Miss Them
- In 2024, Full Guide to Catch 100 IV Pokémon Using a Map On Apple iPhone X | Dr.fone
- How to Change Netflix Location to Get More Country Version On Realme GT 5 | Dr.fone
- In 2024, Overview of the Best Tecno Spark 10 5G Screen Mirroring App | Dr.fone
- [Updated] Ultimate Group Communication Applications for 2024
- Title: "Converting Your Clips Upload to YouTube Via Premiere for 2024"
- Author: Steven
- Created at : 2024-05-25 18:59:02
- Updated at : 2024-05-26 18:59:02
- Link: https://youtube-clips.techidaily.com/converting-your-clips-upload-to-youtube-via-premiere-for-2024/
- License: This work is licensed under CC BY-NC-SA 4.0.
