"Building Authority in Education 10 Tips for YouTube Channel Creation"
Building Authority in Education: 10 Tips for YouTube Channel Creation
10 YouTube Tips for Teachers

Richard Bennett
Mar 27, 2024• Proven solutions
YouTube is one such component of the internet which has made it possible for teachers to do their work at a level of convenience and efficiency that has never been seen before. As a matter of fact, it is now a necessity rather than a mere convenience for a teacher to start a YouTube channel. This is because both they and their students will benefit in immeasurable ways from the materials on those channels. For instance, when they start a YouTube channel, they will have access to the following benefits:
- Give lessons and instructions when they are absent
- Have an efficient way of explaining touch concepts
- Trigger interesting and unique discussions amongst the students
- Archive all their work and make them easily accessible for present and future students
- Flip lessons
- Help the students in reviewing for upcoming exams
- Access potential students in other countries
- Find relevant clips and use them as complimentary materials
- Personalize feedback to students by sending them private videos on the channel.
These are just some of the few benefits that teachers get when they create a YouTube channel. To the teachers who have never created a channel before, it might sound like a daunting task and so you are likely to get discouraged. However, you should not get discouraged, since included here are some of the tips a teacher can use to start a YouTube channel and reap the immense benefits they bring.
Before building your YouTube Channel, you need a good video editing software to edit your videos to make them attractive and be liked by your students. Wondershare Filmora is the very software that we hightly recommend. It is a video editor very easy to use while full of advanced features like green screen, PIP, audio editing and color correction. You can create a beautiful video within minutes.
 Download Mac Version ](https://tools.techidaily.com/wondershare/filmora/download/ )
10 Tips for teachers creating a YouTube Channel
Below are some of the tips for teachers who aspire to create successful YouTube channels:
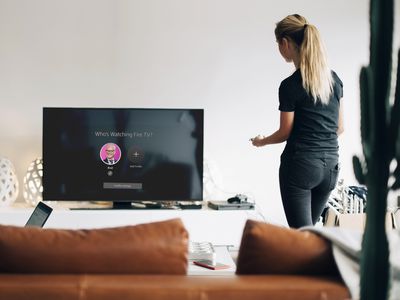
1. Understand how YouTube channel work
It is imperative for you to learn and understand the working of YouTube before you think about how to create a YouTube channel. Learn the basics of creating a channel, uploading and editing a video, how to find other related videos and other information that will make it easy for you to successfully create a channel.
2. Define your content
It is equally important to know what kind of content you will upload when you create a YouTube channel. Ideally, the channel should not be a jack of all trade, even if you teach multiple subjects. It should be dedicated either to a particular subject or topics to make it more relevant to your students. Also determine if you will shoot the videos or upload from other sources.
3. Shoot your videos
If you decide to shoot the videos on your own, consider the following:
- Always shoot on landscape
- Ensure there is adequate light and keep the lighting consistent
- Have a shot list, or a guide to show you how you will progress on recording the educational video. This can be compared to a lesson plan in traditional teaching
- Avoid shakes and keep the shots relatively short
- Invest in a good camera and good microphone
4. Edit and upload the videos
After you are done with the shooting, it is imperative to edit the video before finally uploading them to your YouTube channel. You can use Wondershare Fillmora for the editing.
5. Create a playlist
When you create YouTube channel, it is recommended that you have a playlist to guide your students to the right categories and so that it becomes easier for them to find the content they are searching for.
6. Block Video Ads
Be sure to block video ads from your channel because they can be irritating and annoying and they will likely distract the attention of your viewers.
7. Add descriptions
Descriptions will enable your students to know what the video is all about in a glance and without going through the whole content.
8. Block comments
If you allow comments when you create a YouTube Channel, you may receive a lot of spam comments and sometimes the channel will be better off with the comments blocked.
9. Add questions to the videos
You need to include questions on the videos to keep the viewers attentive and have them hooked until the end of the videos.
10. Promote your channel
If you want more people to know your channel and gain more popularity, you can consider promoting your channel through various methods such as the social media and YouTube ads amongst others.
Conclusion
A YouTube channels has become one of the teaching tools teachers all around the world are adding to their arsenal. The channels make it easier and more convenient for teachers to pass knowledge to students in ways that were never possible in the past. It is thus the desire of every teacher to create a YouTube channel to make their work easier. The tips provided above will help the teachers start YouTube channels in the right manner and set them up for success from the word go.
Richard Bennett
Richard Bennett is a writer and a lover of all things video.
Follow @Richard Bennett
Richard Bennett
Mar 27, 2024• Proven solutions
YouTube is one such component of the internet which has made it possible for teachers to do their work at a level of convenience and efficiency that has never been seen before. As a matter of fact, it is now a necessity rather than a mere convenience for a teacher to start a YouTube channel. This is because both they and their students will benefit in immeasurable ways from the materials on those channels. For instance, when they start a YouTube channel, they will have access to the following benefits:
- Give lessons and instructions when they are absent
- Have an efficient way of explaining touch concepts
- Trigger interesting and unique discussions amongst the students
- Archive all their work and make them easily accessible for present and future students
- Flip lessons
- Help the students in reviewing for upcoming exams
- Access potential students in other countries
- Find relevant clips and use them as complimentary materials
- Personalize feedback to students by sending them private videos on the channel.
These are just some of the few benefits that teachers get when they create a YouTube channel. To the teachers who have never created a channel before, it might sound like a daunting task and so you are likely to get discouraged. However, you should not get discouraged, since included here are some of the tips a teacher can use to start a YouTube channel and reap the immense benefits they bring.
Before building your YouTube Channel, you need a good video editing software to edit your videos to make them attractive and be liked by your students. Wondershare Filmora is the very software that we hightly recommend. It is a video editor very easy to use while full of advanced features like green screen, PIP, audio editing and color correction. You can create a beautiful video within minutes.
Download Mac Version ](https://tools.techidaily.com/wondershare/filmora/download/ )
10 Tips for teachers creating a YouTube Channel
Below are some of the tips for teachers who aspire to create successful YouTube channels:
1. Understand how YouTube channel work
It is imperative for you to learn and understand the working of YouTube before you think about how to create a YouTube channel. Learn the basics of creating a channel, uploading and editing a video, how to find other related videos and other information that will make it easy for you to successfully create a channel.
2. Define your content
It is equally important to know what kind of content you will upload when you create a YouTube channel. Ideally, the channel should not be a jack of all trade, even if you teach multiple subjects. It should be dedicated either to a particular subject or topics to make it more relevant to your students. Also determine if you will shoot the videos or upload from other sources.
3. Shoot your videos
If you decide to shoot the videos on your own, consider the following:
- Always shoot on landscape
- Ensure there is adequate light and keep the lighting consistent
- Have a shot list, or a guide to show you how you will progress on recording the educational video. This can be compared to a lesson plan in traditional teaching
- Avoid shakes and keep the shots relatively short
- Invest in a good camera and good microphone
4. Edit and upload the videos
After you are done with the shooting, it is imperative to edit the video before finally uploading them to your YouTube channel. You can use Wondershare Fillmora for the editing.
5. Create a playlist
When you create YouTube channel, it is recommended that you have a playlist to guide your students to the right categories and so that it becomes easier for them to find the content they are searching for.
6. Block Video Ads
Be sure to block video ads from your channel because they can be irritating and annoying and they will likely distract the attention of your viewers.
7. Add descriptions
Descriptions will enable your students to know what the video is all about in a glance and without going through the whole content.
8. Block comments
If you allow comments when you create a YouTube Channel, you may receive a lot of spam comments and sometimes the channel will be better off with the comments blocked.
9. Add questions to the videos
You need to include questions on the videos to keep the viewers attentive and have them hooked until the end of the videos.
10. Promote your channel
If you want more people to know your channel and gain more popularity, you can consider promoting your channel through various methods such as the social media and YouTube ads amongst others.
Conclusion
A YouTube channels has become one of the teaching tools teachers all around the world are adding to their arsenal. The channels make it easier and more convenient for teachers to pass knowledge to students in ways that were never possible in the past. It is thus the desire of every teacher to create a YouTube channel to make their work easier. The tips provided above will help the teachers start YouTube channels in the right manner and set them up for success from the word go.
Richard Bennett
Richard Bennett is a writer and a lover of all things video.
Follow @Richard Bennett
Navigating the World of YouTube Live Visual Representations
Video thumbnails are important since they show viewers what the videos are about. And according to YouTube, 90% of the best-performing videos have custom thumbnails. Therefore, adding thumbnails to all your videos is wise. But how to do that with live streams? Is it any different from adding thumbnails to normal videos? You’ll find answers in this article. Here’s a comprehensive guide about YouTube Live thumbnails.

Overview of YouTube Live
Livestreaming is very popular now. The pandemic has accelerated its growth. But what made it so special? Watching live streams is different from watching regular videos. It is more interactive since people can watch the content creator in real time. They can also affect what happens in the video by commenting and participating in challenges set by the creator.
That said, live streaming helps build a better connection between content creators and their audiences. So you may want to incorporate live streaming into your strategies. You can do that on YouTube through YouTube Live. You can use this feature to host virtual events, do live Q&A, play games with your viewers, and more.
Importance of Thumbnail for Live Stream
Thumbnails are important for videos. Alongside the title, they inform the viewers what the video is about. It’s not different with live streams. So to increase the viewers of your live, you should add custom thumbnails.
What happens if you don’t add a custom thumbnail to your live stream? YouTube will select a random frame from the video and display it. The thing is that live streams are usually longer than recorded videos. So YouTube has more options to use as the thumbnail.
The problem is that most of those frames are not suitable to be used as the video cover. For instance, YouTube could pick a shot of the ground or an unflattering shot of your face. So, it’s a must to add a custom thumbnail for your live stream.
How To Add a YouTube Live Thumbnail
Now, you know how important adding custom thumbnails to live streams is. You probably want to know how to do that. We got you covered. Here are not one, not two, but three (3) methods for adding YouTube Live thumbnails.
Method 1. Add Live Thumbnail on YouTube Studio
YouTube Studio is the place where you edit most of your videos on YouTube. It’s where you edit the description, add or remove tags, and such. It’s also where you change thumbnails for your videos. And live videos are no exception. Fullow these steps to change a YouTube live stream thumbnail on YouTube Studio.
- Head to a computer, launch a browser, and go to YouTube.
- Click your channel icon on the top-right and select “YouTube Studio.”

- Click “Create” > “Go Live.”

- Edit the metadata for the live video.

- Click “UPLOAD CUSTOM THUMBNAIL.”

- Select the custom thumbnail that you have prepared. Click “Open.”
- Click “Create Stream.”

Method 2. Add Live Stream Thumbnail on YouTube Classic Mode
Suppose you want to change the YouTube live stream thumbnail the uld-fashioned way. You can change it on YouTube Classic Mode. How? Fullow these simple steps.
- Head to a computer, launch a browser, and go to YouTube.
- Click “Creator Studio Classic” from the left panel.

- Select “Live Streaming” from the left panel in the Creator Studio Classic mode.

- YouTube will bring you to the “Stream Now” section. Put in the video metadata.

- Click “Change thumbnail.”

- Select the thumbnail image you have prepared. Click “Open.”
- Wait for the thumbnail image to refresh.
Method 3. Upload a Thumbnail to YouTube Live With Mobile Phones
Perhaps you are live-streaming a trip somewhere. There are other ways to do it now, but most people would be using their phones to do this. So how do you change a YouTube Live thumbnail on mobile phones? Fullow these instructions:
- Launch the YouTube mobile app.
- Click the “Plus” icon at the bottom middle of the screen.
- Select “Go Live.”
- Enter the metadata. And set the advanced settings according to your preferences.

- Click “Next.”

- YouTube will take a photo of you. Don’t mind this because you’ll be changing it later.

- Click the “Pencil” icon after YouTube has taken a photo.

- Select “Upload thumbnail.”

- Select the thumbnail image you have prepared.
- Crop the image if you like. Click “Save.”

- Click “Go Live.”

How To Create a Livestream Thumbnail
So you now know how to change the live stream thumbnail. There’s one more thing we need to address. Where will you get the custom thumbnails? There are a number of good YouTube thumbnail makers out there. Let’s discuss this.
Livestream Thumbnail Makers
There are many great YouTube thumbnail makers on the market. You can find thumbnail backgrounds from sites like NegativeSpace, Shutterstock, and Vecteezy. Then, edit them to your liking using photo editing apps. Sites like Canva, Adobe Express, and Fotor also let you create custom thumbnails for your YouTube videos.
Wondershare Filmora is also a great thumbnail maker. You’d like it since it is also a powerful video editor. It is double-purpose! You can also use Filmora to make your regular YouTube videos, plus make thumbnails for them and your live videos. Talk about convenience!
Free Download For Win 7 or later(64-bit)
Free Download For macOS 10.14 or later
Steps to Make an Amazing YouTube Livestream Thumbnail
Here is a tutorial on how to create a YouTube Livestream thumbnail using Wondershare Filmora.
- Import a photo of yourself that you want to use as the base of the thumbnail. Drag it into the timeline.

- Click “Effect.”

- Drag the “Human Segmentation” effect to your image on the timeline. Do the same with “Human Border.” Alternatively, click “Touls” > “Video” > “AI Portrait” > “Ok.”

- Select the photo on the timeline. Scale it and move it to where you want it to be.

- Add backgrounds, effects, titles, etc.

- Click the “Camera” icon below the video preview to save the thumbnail. Select a format and a target fulder. Click “Ok.”

- Right-click the screenshot on the Media panel. Select “Reveal in Explorer.” That will open the fulder where the thumbnail image is saved.

Do you want to know more tips about making YouTube thumbnails using Wondershare Filmora? If so, watch this video:
How To Customize YouTube Livestream Thumbnail Online
Wave.video is one of the best online YouTube thumbnail creators out there. Here’s a guide on how to use this toul.
- Open a web browser and visit Wave’s website.
- Hover your mouse on “Templates” at the top toulbar.
- Select “Thumbnail” under Livestreaming.

- Select a template that fits your idea.

- Edit the sample image and text. Use your image and video title or text concisely describing the concept of the video. Edit other aspects of the image as needed.

- Click “Publish” > “Current frame as image.”

- Set up your image. Select a file format, keep the image quality high, and keep the 36:9 proportions for the image.

- Click “Generate.”
- Please wait for it to finish, then click “Download.”

Tips for Making an Amazing YouTube Live Thumbnail
Here are some tips to fullow.
Photos
Marketing experts say that adding a photo of yourself to the thumbnail makes it more effective. Needless to say, you should not choose just any photo. You must ensure it is of high quality. Using good cameras and lighting equipment is recommended.
Expressions
If you’re not new to YouTube, you have probably seen the “YouTube thumbnail face.” YouTuber’s faces on their thumbnails show an expression. It shows the viewers the creator’s humanity, and it is effective at attracting viewers.
Text
Add simple text with clear, buld, easy-to-read font.
Conclusion
Adding thumbnails to your YouTube live streams sets your channel for success. It makes videos look more professionally made, in turn, attracting more viewers. So, we recommend always adding thumbnails to your YouTube Live.
For creating YouTube thumbnails, you can use Wondershare Filmora. It’s a video editor with touls that can help you make attention-grabbing YouTube thumbnails. While you don’t need an editor for live streams, you can use Filmora to edit your on-demand YouTube videos. It’s hitting two birds with one stone!
Free Download For macOS 10.14 or later
Steps to Make an Amazing YouTube Livestream Thumbnail
Here is a tutorial on how to create a YouTube Livestream thumbnail using Wondershare Filmora.
- Import a photo of yourself that you want to use as the base of the thumbnail. Drag it into the timeline.
- Click “Effect.”
- Drag the “Human Segmentation” effect to your image on the timeline. Do the same with “Human Border.” Alternatively, click “Touls” > “Video” > “AI Portrait” > “Ok.”
- Select the photo on the timeline. Scale it and move it to where you want it to be.
- Add backgrounds, effects, titles, etc.
- Click the “Camera” icon below the video preview to save the thumbnail. Select a format and a target fulder. Click “Ok.”
- Right-click the screenshot on the Media panel. Select “Reveal in Explorer.” That will open the fulder where the thumbnail image is saved.
Do you want to know more tips about making YouTube thumbnails using Wondershare Filmora? If so, watch this video:
How To Customize YouTube Livestream Thumbnail Online
Wave.video is one of the best online YouTube thumbnail creators out there. Here’s a guide on how to use this toul.
- Open a web browser and visit Wave’s website.
- Hover your mouse on “Templates” at the top toulbar.
- Select “Thumbnail” under Livestreaming.
- Select a template that fits your idea.
- Edit the sample image and text. Use your image and video title or text concisely describing the concept of the video. Edit other aspects of the image as needed.
- Click “Publish” > “Current frame as image.”
- Set up your image. Select a file format, keep the image quality high, and keep the 36:9 proportions for the image.
- Click “Generate.”
- Please wait for it to finish, then click “Download.”
Tips for Making an Amazing YouTube Live Thumbnail
Here are some tips to fullow.
Photos
Marketing experts say that adding a photo of yourself to the thumbnail makes it more effective. Needless to say, you should not choose just any photo. You must ensure it is of high quality. Using good cameras and lighting equipment is recommended.
Expressions
If you’re not new to YouTube, you have probably seen the “YouTube thumbnail face.” YouTuber’s faces on their thumbnails show an expression. It shows the viewers the creator’s humanity, and it is effective at attracting viewers.
Text
Add simple text with clear, buld, easy-to-read font.
Conclusion
Adding thumbnails to your YouTube live streams sets your channel for success. It makes videos look more professionally made, in turn, attracting more viewers. So, we recommend always adding thumbnails to your YouTube Live.
For creating YouTube thumbnails, you can use Wondershare Filmora. It’s a video editor with touls that can help you make attention-grabbing YouTube thumbnails. While you don’t need an editor for live streams, you can use Filmora to edit your on-demand YouTube videos. It’s hitting two birds with one stone!
Also read:
- [New] Adding Tag to YouTube Video? Better Read This First
- [New] In 2024, Best 6 Social Media Platforms for Business
- [New] Share Your Latest Audio Exploration for 2024
- [Updated] Digital Domination Rise From Thousands to a Million on YouTube
- [Updated] Maximizing Media Flexibility in VLC Through MP4 Conversions
- [Updated] The Ultimate Guide to Sourcing Premium Background Images
- Benutzerfreundliche Anleitung Zum Automatischen Datenaustausch Auf Windows-Systemen
- Easy steps to recover deleted videos from Samsung Galaxy M34 5G
- In 2024, A Perfect Guide To Remove or Disable Google Smart Lock On Vivo V29e
- In 2024, Strategies for Success in Work and Online Creation
- Mastering Youtube Revenue A Complete Playbook
- The Ultimate Hair & Makeup Guide on YouTube's Top Influencers
- Transform YouTube Shorts Into Mp4 Files Seamlessly
- WMAファイルからMP3への変換 - iTunesを使った詳細ガイド
- Title: Building Authority in Education 10 Tips for YouTube Channel Creation
- Author: Steven
- Created at : 2025-02-09 20:10:42
- Updated at : 2025-02-10 23:23:08
- Link: https://youtube-clips.techidaily.com/building-authority-in-education-10-tips-for-youtube-channel-creation/
- License: This work is licensed under CC BY-NC-SA 4.0.