
:max_bytes(150000):strip_icc()/GettyImages-951122364-5bb18ecb46e0fb0026e9b92b.jpg)
"Binge Your Way Into Animated Gifs Turning YouTube Content Without Downloads"
Binge Your Way Into Animated Gifs: Turning YouTube Content Without Downloads
How to Convert YouTube Videos to GIFs

Shanoon Cox
Mar 27, 2024• Proven solutions
A GIF adds an extra element to any conversation and makes the reader feel connected to the post. Using GIF can turn useful if done rightly. It narrates a story in a single animated image for social media conversation. In this article, we will brief you about how to convert YouTube to gif, various GIF converters, their uses, and the pros and cons of each converter.
Let’s get started!
How to Convert a YouTube Video into GIFs?
1. YouTube to GIF Directly
Here is a quick way to convert the YouTube video to GIFs without typing a YouTube to GIF website.
Gif.com is a free and easy-to-use video editor available with multiple effects. This converter was created keeping in mind how people spend hours and money on paid platforms.
Follow the below steps to convert a YouTube video into gifs.
- In the YouTube video page, add gif before youtube.com. For example, I want to convert the YouTube video https://www.youtube.com/watch?v=40fuGLmwHwk to GIFs, here is how it looks like after adding gif at the beginning: https://www.gifyoutube.com/watch?v=40fuGLmwHwk . Press the enter button on your keyboard and you will enter the gifs.com directly.

- In gifs.com, you can play and pause the YouTube video and drag the bar to select a desired moment for gif. Press the “Create Gif” button on the top right side to convert the specific part of the YouTube video to gif.
- You will then be directed to the result page to see your GIF created using the YouTube video, and you can change the GIF title and the tag.
- Lastly, you need to copy the link and share it!
Pros of converting YouTube to GIFs with Gifs.com:
- The interface is easy to use and it provides lots of tools to adjust.
- Simple functionality.
Cons:
- The watermark on your created GIF can be removed only after purchasing the premium version.
- GIFs can be downloaded only by registered users.
2. FreeGifMaker.me
FreeGifMaker is one simple online tool that allows the creation of animated Gifs for free. A minimum of two pictures has to be uploaded out of ten. It takes few seconds and is super easy to make a GIF from a YouTube video. You can use FreeGifMaker.me in some easy steps.
- Open the website http://freegifmaker.me/youtube-to-gif/ on your desktop.
- Go to YouTube and copy the video URL you want to create a GIF of and paste it on the website mentioned above.
- Then click “Load YouTube Video” below the URL and wait for a few seconds while the tool checks the video source.
- Once the YouTube video is loaded, enter the gif duration, start time, and click on the “Make a GIF button.” It will redirect you to the result page.
- Pros:
- Conversion size is unlimited**.**
- There is no usage of ads.
- Easy to make Gifs.
- Cons:
- The upload speed is slow.
- The converter gives limited options for editing.
3. Wondershare Online UniConverter
Online UniConverter converts video into a high-quality animated GIF and allows editing. It is a simple converter with unique features.
If you want to convert your YouTube video into a GIF, follow the steps.
- You need to upload your video through the “Choose Files” option. You can also copy the link from YouTube.
- Wait for some time once you upload the file; you can then set your start time, end time, frame rate according to your needs.
- Lastly, click on “Create GIF” and download your GIF. You can also save it through the dropdown option available besides “Download.”
- Pros:
- Easy to handle.
- A wide range of customization tools is available.
- Zero ads.
- Cons:
- Upload speed is slow.
- Conversion size is limited.
4. GifRun
It is a video maker that started in 2013, and GifRun converts videos from YouTube, Facebook, and other sources to high-quality GIFs. You can create Gifs free of cost from GifRun.
Here is how you can use Gifrun.
- Open the website and paste the URL you want to convert into Gif. Later, press “Get Video” option below the URL box.
- In this step, you can adjust the duration, start time, add text, and also pause and preview the video. Once you’re done altering the video, click “Create GIF.”
- Lastly, click on the “Download” button beside the add text button, or share the link directly.
- Pros:
- Fast conversion and download.
- There is no upload limit.
- The video preview feature is available.
- Cons:
- UI is ad-infested.
- Supports YouTube videos only.
5. Makeagif
This GIF converter creates high-quality GIFs in no time. You need to paste the URL in Makeagif and nothing much. It can make GIFs from Instagram, Facebook, Twitter, and other platforms easily.
The only issue is that it supports one type of conversion with a maximum limit of 25MB.
Here is how you can make your favorite GIF in few steps.
- Open makeagif.com and paste the YouTube URL in the box available.
- Once you paste the URL, the website will automatically take you to the edit page to edit GIF length, start time, speed, and add caption and stickers. The next step is to select the category to which the video belongs available on the left side of the screen.
- After editing, click on “Continue to publishing” then “Create GIF” at the lower right corner of the screen. Voila! Your GIF is ready to use.
- Pros:
- The UI is user-friendly.
- Ads are minimal
- Various GIF conversions are supported.
- Cons:
- The conversion size is small.
- Batch conversions are not available.
6. ImgFlip
It is a creative GIF website supporting various videos from other websites such as Vimeo and YouTube. ImgFlip has innovative customization tools for cropping, reshaping, adding text and, a lot more, but you just need to be aware of the ads.
Want to know how to create GIF? Go through these simple steps.
- You can make GIFs both from Video and Images. To make GIF from a video, paste the YouTube URL in the box at the top, upload the tape from your device’s file.
- After pasting the URL, you will be given lots of customization options. Choose the effect of your choice for your GIF.
- Lastly, click on “Generate GIF” available on the right side of the screen. You can now share the GIF via your device or download it.
- Pros:
- Plenty of customization options.
- Fast conversion.
- Easy to upload and use.
- Cons:
- Ads pop up frequently.
- Offline conversion is unavailable.
7. GIPHY
It is a free GIF converter that helps you download free YouTube GIFs. You can also make GIFs from your photos, videos available on your device along with video URLs and images. The only problem is, to use Giphy you first have to log in to the app.
Follow the below steps to create a GIF from YouTube videos with Giphy:
- Open Giphy on your device and click on “Create” on the top right-side of your screen.
- Paste the URL in the space given below. A pop-up will tell you to log in. Log in to the website to continue.
- The video you choose should be less than 15 seconds and under 100MB. You will be given editing options from which you can select the start time and duration of your GIF along with Captions and Tags.
- In the end, press the “Create GIF” button to make the GIF. When it’s done, you will be redirected to the GIF page. You can then share your GIF on any social media site.
- Pros:
- Ads are absent
- Uploading is fast
- Wide range of free GIFs available
- Cons:
- Not perfect for green hands
8. Imgur
It is one of the best apps that offers tons of images, memes, and GIFs. You can make GIFs of less than 60 seconds with high quality, which you can share anywhere.
Here are three easy steps to make GIFs
- Visit the page “imgur.com/vidgif” and paste your YouTube URL there.
- Set a start time by clicking or dragging on the timeline. The total runtime is also adjustable, with 60 seconds as the maximum time for GIFs.
- Lastly, press on “Create GIF” to see the magic. The GIF is converted from the YouTube video.
- Pros:
- The users can share the post of their choice
- Users can save posts.
- Great collection of short GIFs and videos.
- Cons:
- During loading, the screen flashes.
9 VEED.IO
Veed is a simple YouTube video converter that makes your work super easy. It converts YouTube videos into GIFs with various editing options like crop, trim, text ads, and many more.
Check out how to use VEED in 3 steps.
- Start by pasting the URL of your YouTube video into VEED, Your video will be ready to convert into GIF.
- Now you are all set to edit your video. You have the option to crop and trim the video. You can also include different font styles, colors, and sizes of your choice.
- Lastly, download the GIF you made in VEED.
- Pros:
- Downloading the software is not mandatory.
- UI is simple and easy to navigate.
- The subtitle option is present.
- Cons:
- It takes a lot of time to upload video.
- Many basic tools.
10. Kapwing
Kapwing is a helpful video converter that can easily turn any video into GIFs with a click. It can also convert different files such as 3GP, GIF, WEBM.
To create beautiful GIFs with this video editor, follow these easy steps.
- Open Kapwing video editor and upload your video from YouTube.
- Choose the “Export dropdown” option and choose the format you wish to convert.
You can also preview the GIF and customize it as per your choice.
- In the final step, export the video by clicking the “Export Video” button. Save and download the newly created GIF and share it anywhere with your friends.
- Pros:
- Great editing tools.
- Easy to use.
- Cons:
- Available only on the website.
- Too many tools for the same purpose.
Final Thoughts
With the increased use of GIFs on social media, you can now easily convert your favorite YouTube videos into GIFs on your own. All you have to do is simply choose the tools mentioned above and share it with your friends.
Shanoon Cox
Shanoon Cox is a writer and a lover of all things video.
Follow @Shanoon Cox
Shanoon Cox
Mar 27, 2024• Proven solutions
A GIF adds an extra element to any conversation and makes the reader feel connected to the post. Using GIF can turn useful if done rightly. It narrates a story in a single animated image for social media conversation. In this article, we will brief you about how to convert YouTube to gif, various GIF converters, their uses, and the pros and cons of each converter.
Let’s get started!
How to Convert a YouTube Video into GIFs?
1. YouTube to GIF Directly
Here is a quick way to convert the YouTube video to GIFs without typing a YouTube to GIF website.
Gif.com is a free and easy-to-use video editor available with multiple effects. This converter was created keeping in mind how people spend hours and money on paid platforms.
Follow the below steps to convert a YouTube video into gifs.
- In the YouTube video page, add gif before youtube.com. For example, I want to convert the YouTube video https://www.youtube.com/watch?v=40fuGLmwHwk to GIFs, here is how it looks like after adding gif at the beginning: https://www.gifyoutube.com/watch?v=40fuGLmwHwk . Press the enter button on your keyboard and you will enter the gifs.com directly.
- In gifs.com, you can play and pause the YouTube video and drag the bar to select a desired moment for gif. Press the “Create Gif” button on the top right side to convert the specific part of the YouTube video to gif.
- You will then be directed to the result page to see your GIF created using the YouTube video, and you can change the GIF title and the tag.
- Lastly, you need to copy the link and share it!
Pros of converting YouTube to GIFs with Gifs.com:
- The interface is easy to use and it provides lots of tools to adjust.
- Simple functionality.
Cons:
- The watermark on your created GIF can be removed only after purchasing the premium version.
- GIFs can be downloaded only by registered users.
2. FreeGifMaker.me
FreeGifMaker is one simple online tool that allows the creation of animated Gifs for free. A minimum of two pictures has to be uploaded out of ten. It takes few seconds and is super easy to make a GIF from a YouTube video. You can use FreeGifMaker.me in some easy steps.
- Open the website http://freegifmaker.me/youtube-to-gif/ on your desktop.
- Go to YouTube and copy the video URL you want to create a GIF of and paste it on the website mentioned above.
- Then click “Load YouTube Video” below the URL and wait for a few seconds while the tool checks the video source.
- Once the YouTube video is loaded, enter the gif duration, start time, and click on the “Make a GIF button.” It will redirect you to the result page.
- Pros:
- Conversion size is unlimited**.**
- There is no usage of ads.
- Easy to make Gifs.
- Cons:
- The upload speed is slow.
- The converter gives limited options for editing.
3. Wondershare Online UniConverter
Online UniConverter converts video into a high-quality animated GIF and allows editing. It is a simple converter with unique features.
If you want to convert your YouTube video into a GIF, follow the steps.
- You need to upload your video through the “Choose Files” option. You can also copy the link from YouTube.
- Wait for some time once you upload the file; you can then set your start time, end time, frame rate according to your needs.
- Lastly, click on “Create GIF” and download your GIF. You can also save it through the dropdown option available besides “Download.”
- Pros:
- Easy to handle.
- A wide range of customization tools is available.
- Zero ads.
- Cons:
- Upload speed is slow.
- Conversion size is limited.
4. GifRun
It is a video maker that started in 2013, and GifRun converts videos from YouTube, Facebook, and other sources to high-quality GIFs. You can create Gifs free of cost from GifRun.
Here is how you can use Gifrun.
- Open the website and paste the URL you want to convert into Gif. Later, press “Get Video” option below the URL box.
- In this step, you can adjust the duration, start time, add text, and also pause and preview the video. Once you’re done altering the video, click “Create GIF.”
- Lastly, click on the “Download” button beside the add text button, or share the link directly.
- Pros:
- Fast conversion and download.
- There is no upload limit.
- The video preview feature is available.
- Cons:
- UI is ad-infested.
- Supports YouTube videos only.
5. Makeagif
This GIF converter creates high-quality GIFs in no time. You need to paste the URL in Makeagif and nothing much. It can make GIFs from Instagram, Facebook, Twitter, and other platforms easily.
The only issue is that it supports one type of conversion with a maximum limit of 25MB.
Here is how you can make your favorite GIF in few steps.
- Open makeagif.com and paste the YouTube URL in the box available.
- Once you paste the URL, the website will automatically take you to the edit page to edit GIF length, start time, speed, and add caption and stickers. The next step is to select the category to which the video belongs available on the left side of the screen.
- After editing, click on “Continue to publishing” then “Create GIF” at the lower right corner of the screen. Voila! Your GIF is ready to use.
- Pros:
- The UI is user-friendly.
- Ads are minimal
- Various GIF conversions are supported.
- Cons:
- The conversion size is small.
- Batch conversions are not available.
6. ImgFlip
It is a creative GIF website supporting various videos from other websites such as Vimeo and YouTube. ImgFlip has innovative customization tools for cropping, reshaping, adding text and, a lot more, but you just need to be aware of the ads.
Want to know how to create GIF? Go through these simple steps.
- You can make GIFs both from Video and Images. To make GIF from a video, paste the YouTube URL in the box at the top, upload the tape from your device’s file.
- After pasting the URL, you will be given lots of customization options. Choose the effect of your choice for your GIF.
- Lastly, click on “Generate GIF” available on the right side of the screen. You can now share the GIF via your device or download it.
- Pros:
- Plenty of customization options.
- Fast conversion.
- Easy to upload and use.
- Cons:
- Ads pop up frequently.
- Offline conversion is unavailable.
7. GIPHY
It is a free GIF converter that helps you download free YouTube GIFs. You can also make GIFs from your photos, videos available on your device along with video URLs and images. The only problem is, to use Giphy you first have to log in to the app.
Follow the below steps to create a GIF from YouTube videos with Giphy:
- Open Giphy on your device and click on “Create” on the top right-side of your screen.
- Paste the URL in the space given below. A pop-up will tell you to log in. Log in to the website to continue.
- The video you choose should be less than 15 seconds and under 100MB. You will be given editing options from which you can select the start time and duration of your GIF along with Captions and Tags.
- In the end, press the “Create GIF” button to make the GIF. When it’s done, you will be redirected to the GIF page. You can then share your GIF on any social media site.
- Pros:
- Ads are absent
- Uploading is fast
- Wide range of free GIFs available
- Cons:
- Not perfect for green hands
8. Imgur
It is one of the best apps that offers tons of images, memes, and GIFs. You can make GIFs of less than 60 seconds with high quality, which you can share anywhere.
Here are three easy steps to make GIFs
- Visit the page “imgur.com/vidgif” and paste your YouTube URL there.
- Set a start time by clicking or dragging on the timeline. The total runtime is also adjustable, with 60 seconds as the maximum time for GIFs.
- Lastly, press on “Create GIF” to see the magic. The GIF is converted from the YouTube video.
- Pros:
- The users can share the post of their choice
- Users can save posts.
- Great collection of short GIFs and videos.
- Cons:
- During loading, the screen flashes.
9 VEED.IO
Veed is a simple YouTube video converter that makes your work super easy. It converts YouTube videos into GIFs with various editing options like crop, trim, text ads, and many more.
Check out how to use VEED in 3 steps.
- Start by pasting the URL of your YouTube video into VEED, Your video will be ready to convert into GIF.
- Now you are all set to edit your video. You have the option to crop and trim the video. You can also include different font styles, colors, and sizes of your choice.
- Lastly, download the GIF you made in VEED.
- Pros:
- Downloading the software is not mandatory.
- UI is simple and easy to navigate.
- The subtitle option is present.
- Cons:
- It takes a lot of time to upload video.
- Many basic tools.
10. Kapwing
Kapwing is a helpful video converter that can easily turn any video into GIFs with a click. It can also convert different files such as 3GP, GIF, WEBM.
To create beautiful GIFs with this video editor, follow these easy steps.
- Open Kapwing video editor and upload your video from YouTube.
- Choose the “Export dropdown” option and choose the format you wish to convert.
You can also preview the GIF and customize it as per your choice.
- In the final step, export the video by clicking the “Export Video” button. Save and download the newly created GIF and share it anywhere with your friends.
- Pros:
- Great editing tools.
- Easy to use.
- Cons:
- Available only on the website.
- Too many tools for the same purpose.
Final Thoughts
With the increased use of GIFs on social media, you can now easily convert your favorite YouTube videos into GIFs on your own. All you have to do is simply choose the tools mentioned above and share it with your friends.
Shanoon Cox
Shanoon Cox is a writer and a lover of all things video.
Follow @Shanoon Cox
Detailed Guide: YouTube’s End Screens Explained
Free YouTube End Screen Templates

Richard Bennett
Oct 26, 2023• Proven solutions
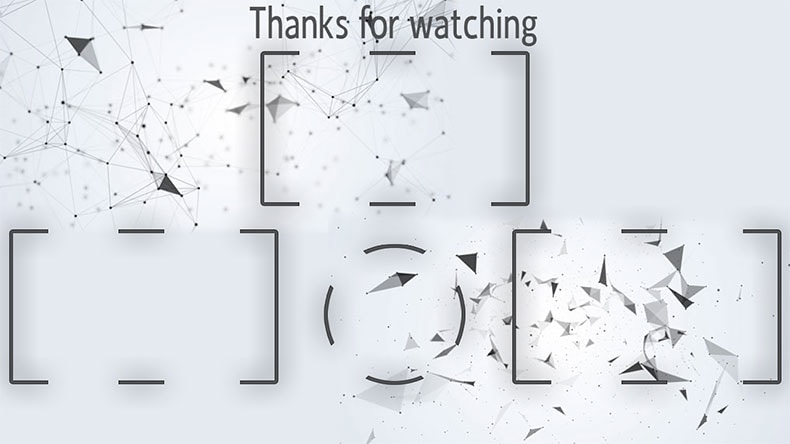
YouTube end screens are a great way to get your viewers who have watched your YouTube video until the end to subscribe to your channel, visit your website, or watch more of your videos. End screens work on all devices, including mobile phones and tablets. This was not the case for annotations (YouTube’s former way of doing these things). As more YouTubers have jumped onto using end screens, the need for well-designed end screen templates have rapidly grown. In this post, I will
- List some places you can download free end screen templates
- Give you a step-by-step tutorial on how to build your own outro for free


Part 1: Free End Screen Templates Download
Wondershare Filmstock Gaming Video Editing Skils ](https://filmstock.wondershare.com/creative-theme-game?source%5Fchannel=seo%5Farticle?spm=rs.filmora%5Fweb )
(The images displayed below are for preview purposes only. For the highest quality and ideal dimensions to add into your own video, click the image and follow the links that we provide)
1. The Sales Lion
In exchange for your name and e-mail address, the Sales Lion will let you download their YouTube templates pack, which includes a PhotoShop PSD file of their designed YouTube end screen.
sales-lion-outro-end-screen ](https://www.thesaleslion.com/download-youtube-templates-pack/ “The Sales Lion YouTube Templates Pack”)
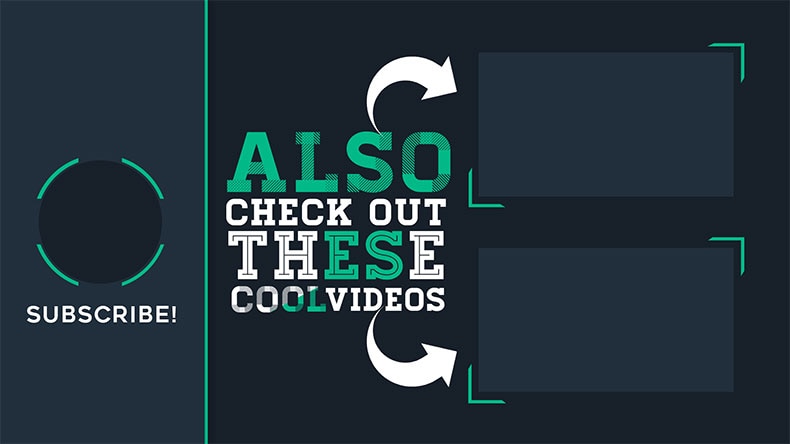
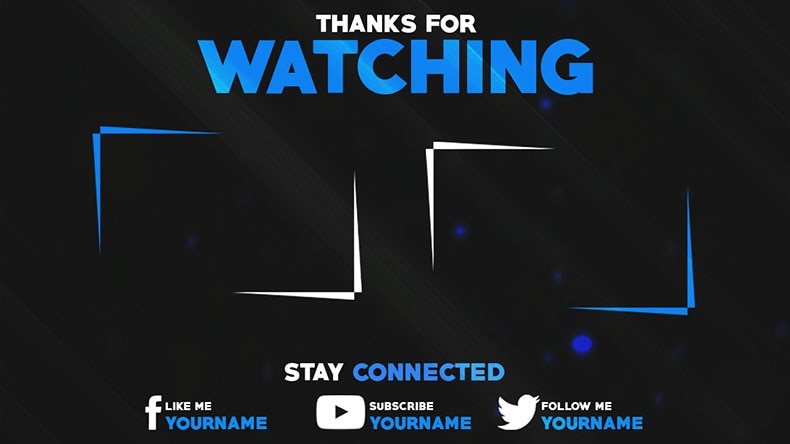
2. Grabster
Grabster offers five free YouTube end screen templates. With each download, you’ll get a PhotoShop PSD file and a font file so that you can change the text.
grabster-outro ](https://mega.nz/#!l5VVwR7J!w9hv%5FBgVIN2SsEdlf5IZViISJvXgmkDbErhG4A3gGYQ “Grabster Channel Art Template”)
grabster-your-channel-name-outro ](https://mega.nz/#!RoMXlTbR!ALzroPD6CNRVuDABR7Uv3WAPajr0WJ1BT9ZVDwF4m0Y “Grabster Channel Art Template”)
grabster-youtube-end-screen ](https://mega.nz/#!B8sAhL6Q!iIaTl4uGojXONee6k%5FdTLWdSVrGOiRWPQu4BjU2zJ5o “Grabster Channel Art Template”)
grabster-youtube-end-screen-2 ](https://mega.nz/#!RokxlYTK!vuKGcwG-ymNdR9tBfSp8xjhynNIkn%5F4PC9ob%5Fq2TvWc “Grabster Channel Art Template”)
grabster-youtube-end-screen-3 ](https://mega.nz/#!otc2wRaK!pk%5F7smhaRSuymYkKpf6DVPh2yt40Vlhz8xd8wRuu9Oo “Grabster Channel Art Template”)
3. Taha Chimar
Those who do not have PhotoShop can use Taha Chimar’s end screen designs that come in png file format.
To download, you will have to follow a URL link in the description box of the YouTube videos. Be careful, though, as a lot of the links lead to free hosting websites with pop-ups that can harm your computer if you are easily fooled by them.
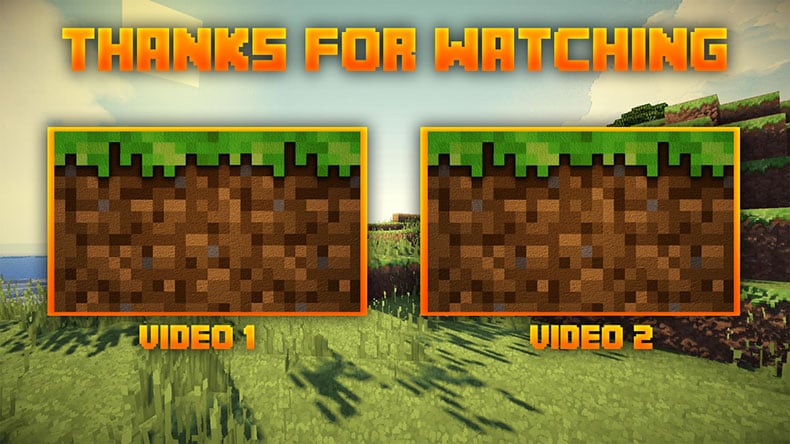
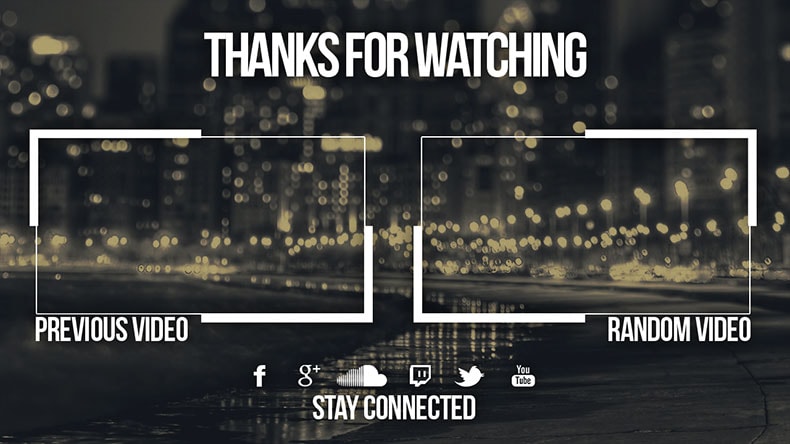
4. SoapyEdits
SoapyEdits is a YouTuber with a channel offering a whole playlist of PhotoShop PSD file end screen designs.
Here are some of our favorite ones.
Here’s one for the Minecraft fans:
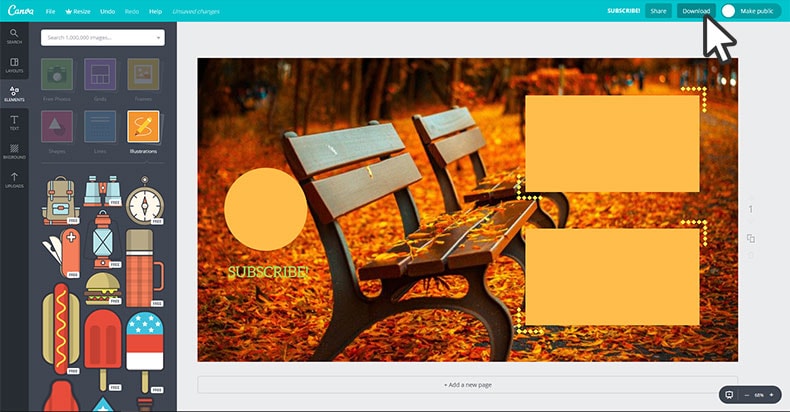
Another way to get your YouTube end screens for free, of course, is to make them yourself. Canva is a great free online design tool for this.
Part 2: How To Build Your Outro For Free (Step-by-step Canva Tutorial)
1. First, you have to sign up with an e-mail address

2. Once logged in, select “use custom dimensions” and plug in “1920” pixels as your width and “1080” pixels as your height (this, of course, may vary depending on the resolution of your video project).
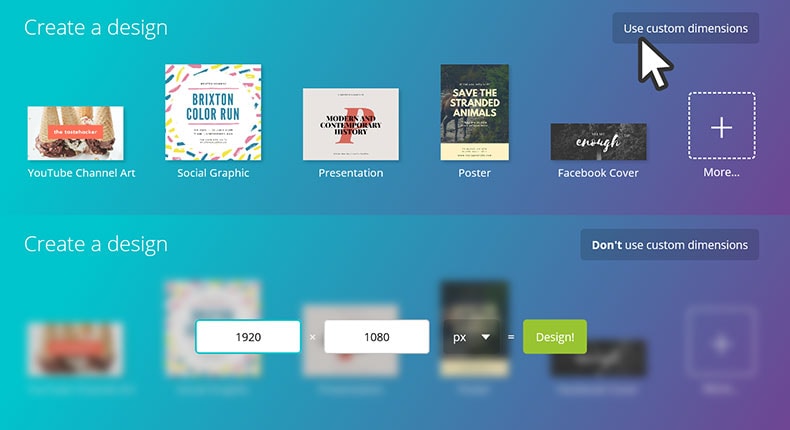
3. After clicking “Design!,” a new browser will open with a blank canvas.
4. Next, do an image search for “YouTube End Screen,” choose an end screen with a layout that you would like to build off of, and save the image onto your computer.
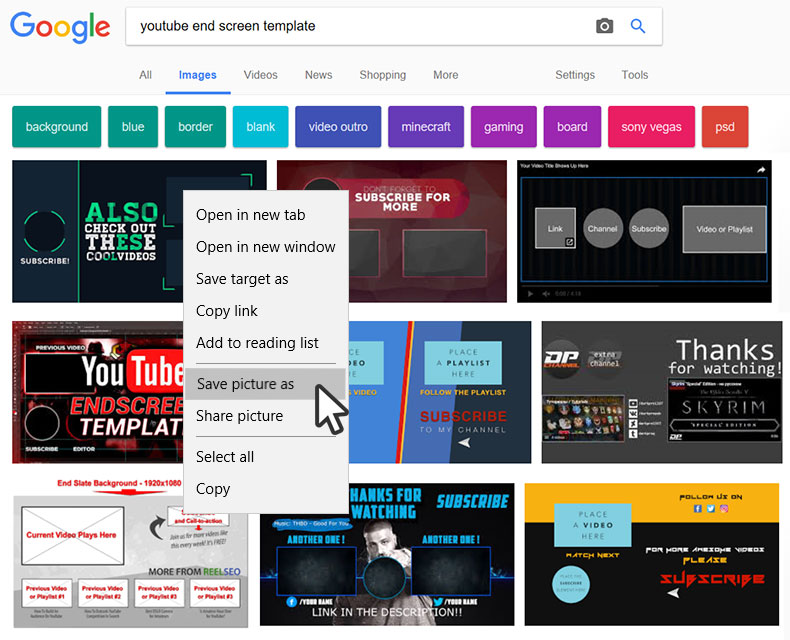
5. Upload the image onto your Canva project.

6. Stretch your image to the ends of your canvas.

7. Insert your own shapes, lines, colours, images, and text over the image.
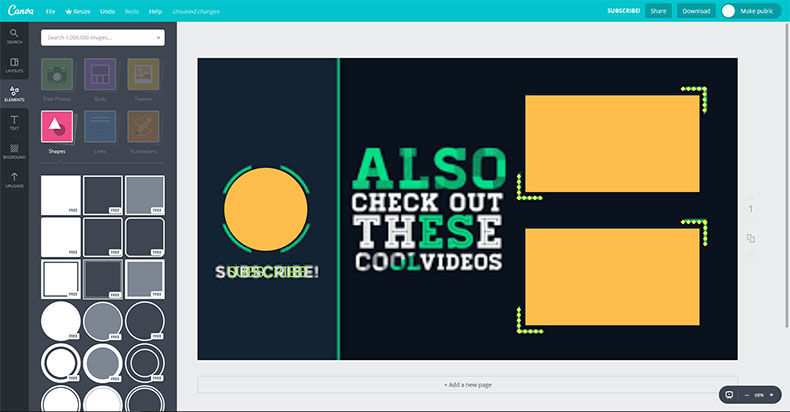
8. When you’re done, delete the original image so that you’re left with just your own design. Go ahead and click “download.”
If you’re looking for other options to design your end screen, make sure to also check out our article on The YouTube Outro Guide . To edit the YouTube video with more effects and templates, you can try Wondershare Filmora video editor.
Richard Bennett
Richard Bennett is a writer and a lover of all things video.
Follow @Richard Bennett
Richard Bennett
Oct 26, 2023• Proven solutions
YouTube end screens are a great way to get your viewers who have watched your YouTube video until the end to subscribe to your channel, visit your website, or watch more of your videos. End screens work on all devices, including mobile phones and tablets. This was not the case for annotations (YouTube’s former way of doing these things). As more YouTubers have jumped onto using end screens, the need for well-designed end screen templates have rapidly grown. In this post, I will
- List some places you can download free end screen templates
- Give you a step-by-step tutorial on how to build your own outro for free
Part 1: Free End Screen Templates Download
Wondershare Filmstock Gaming Video Editing Skils ](https://filmstock.wondershare.com/creative-theme-game?source%5Fchannel=seo%5Farticle?spm=rs.filmora%5Fweb )
(The images displayed below are for preview purposes only. For the highest quality and ideal dimensions to add into your own video, click the image and follow the links that we provide)
1. The Sales Lion
In exchange for your name and e-mail address, the Sales Lion will let you download their YouTube templates pack, which includes a PhotoShop PSD file of their designed YouTube end screen.
sales-lion-outro-end-screen ](https://www.thesaleslion.com/download-youtube-templates-pack/ “The Sales Lion YouTube Templates Pack”)
2. Grabster
Grabster offers five free YouTube end screen templates. With each download, you’ll get a PhotoShop PSD file and a font file so that you can change the text.
grabster-outro ](https://mega.nz/#!l5VVwR7J!w9hv%5FBgVIN2SsEdlf5IZViISJvXgmkDbErhG4A3gGYQ “Grabster Channel Art Template”)
grabster-your-channel-name-outro ](https://mega.nz/#!RoMXlTbR!ALzroPD6CNRVuDABR7Uv3WAPajr0WJ1BT9ZVDwF4m0Y “Grabster Channel Art Template”)
grabster-youtube-end-screen ](https://mega.nz/#!B8sAhL6Q!iIaTl4uGojXONee6k%5FdTLWdSVrGOiRWPQu4BjU2zJ5o “Grabster Channel Art Template”)
grabster-youtube-end-screen-2 ](https://mega.nz/#!RokxlYTK!vuKGcwG-ymNdR9tBfSp8xjhynNIkn%5F4PC9ob%5Fq2TvWc “Grabster Channel Art Template”)
grabster-youtube-end-screen-3 ](https://mega.nz/#!otc2wRaK!pk%5F7smhaRSuymYkKpf6DVPh2yt40Vlhz8xd8wRuu9Oo “Grabster Channel Art Template”)
3. Taha Chimar
Those who do not have PhotoShop can use Taha Chimar’s end screen designs that come in png file format.
To download, you will have to follow a URL link in the description box of the YouTube videos. Be careful, though, as a lot of the links lead to free hosting websites with pop-ups that can harm your computer if you are easily fooled by them.
4. SoapyEdits
SoapyEdits is a YouTuber with a channel offering a whole playlist of PhotoShop PSD file end screen designs.
Here are some of our favorite ones.
Here’s one for the Minecraft fans:
Another way to get your YouTube end screens for free, of course, is to make them yourself. Canva is a great free online design tool for this.
Part 2: How To Build Your Outro For Free (Step-by-step Canva Tutorial)
1. First, you have to sign up with an e-mail address
2. Once logged in, select “use custom dimensions” and plug in “1920” pixels as your width and “1080” pixels as your height (this, of course, may vary depending on the resolution of your video project).
3. After clicking “Design!,” a new browser will open with a blank canvas.
4. Next, do an image search for “YouTube End Screen,” choose an end screen with a layout that you would like to build off of, and save the image onto your computer.
5. Upload the image onto your Canva project.
6. Stretch your image to the ends of your canvas.
7. Insert your own shapes, lines, colours, images, and text over the image.
8. When you’re done, delete the original image so that you’re left with just your own design. Go ahead and click “download.”
If you’re looking for other options to design your end screen, make sure to also check out our article on The YouTube Outro Guide . To edit the YouTube video with more effects and templates, you can try Wondershare Filmora video editor.
Richard Bennett
Richard Bennett is a writer and a lover of all things video.
Follow @Richard Bennett
Also read:
- Snapchat to Subscribers How Jake Crafted YouTube Magic
- Chart New Horizons in Branding with These Top 10 YouTube Tools for 2024
- 2024 Approved Elevate Your Team with Expert Talent Selections
- Unleashing Longer Videos on YouTube Masterful Strategies
- In 2024, Ease Into Content Creation Crafting the Top 10 Accessible YouTube Videos
- Creating Simple Videos Top 10 YouTube Projects Anyone Can Do
- Mastering the Art of YouTube Creating Accessible Video Ideas
- Transforming Thumbnails with High-Impact FX Backdrops
- Code Commanders Elite Females on YT
- In 2024, Cultivate Inner Peace & Physical Strength with These Channels
- In 2024, Crafting Content for Specific Youtube Subsets
- [New] 10 Must-See VR Videos on YouTube for Deep Immersion
- [New] Crafting Collabs for YouTube Channel Expansion
- How to Effortlessly Eradicate Unwanted YouTube Feedback
- 2024 Approved Complete Annihilation of YouTube Shorts Accessibility
- [New] Effortless Guide to Free Melodies in YouTube Productions
- In 2024, Captivate Audiences with Perfectly Tailored Youtube Descriptions
- Transform Your Content Essential YouTube Studio Editing Skills
- Essential, Inexpensive Vlogging Tools Listed
- Easy Process Extracting YouTube Media Directly for 2024
- Ultra-Rich Viewable Ventures
- [New] Achieving Video Excellence YT Shorts to Premium MP4
- [Updated] Crafting Perfect YouTube Music Sets
- Comprehensive Directory Extracting Youtube Intros
- Immediate Favorites Week's Top Youtube Clips
- 2024 Approved Essential YouTube Video Editing Techniques
- Boost Your Visibility with a Cutting-Edge Set of Banners
- 2024 Approved Achieving Auditory Perfection Top Tips for Quality Audio
- Brand Makeover Made Easy Revel in Our Array of over 50 Free Online Promotional Artwork
- 2024 Approved Arena of Games 100+ Channel Spectrums Galore
- Elevating the Chilly Selecting Five Warm Video Backgrounds for 2024
- [Updated] Best YouTube Video to Text Converters On-Line
- [New] Boosting Your Online Presence A Step-by-Step Guide to Viral YouTube Shorts
- In 2024, Direct Download Destiny Ultimate Guide to Mp3 Makers
- Strategies to Elevate Your Video in the Trending Topics
- Enhancing Visual Appeal Tips for Striking Haul Videos
- 2024 Approved Boosting Budgets with Effective YouTube Marketing
- Paint a Picture of Perfection Chromatic Mastery for Beauty
- In 2024, Does Airplane Mode Turn off GPS Location On Realme GT Neo 5 SE? | Dr.fone
- [New] In 2024, Rapid Capture Sounds Alongside Images
- [Updated] Quick Tips Streamline Screen Capture on Dell Systems
- 2024 Approved Advanced Techniques for MOV File Editing in Win 11
- [New] In 2024, Pioneering Techniques in Screen Snatching
- In 2024, How to Change/Fake Your Gionee F3 Pro Location on Viber | Dr.fone
- Complete guide for recovering call logs on Itel S23
- 2024 Approved The Ultimate List 10 Best Video Trimmers for PC Users
- How to Hard Reset Nokia C22 Without Password | Dr.fone
- In 2024, How to Track a Lost Xiaomi Redmi A2 for Free? | Dr.fone
- Unlocking Snapchat's Secret Symbolic Messages for 2024
- [Updated] Top 3 Ways to Create Big Head Effects for a Striking TikTok Video for 2024
- Sony FDR-X1000V Action Camera Complete Review
- [Updated] Enhancing Profile Clips for Impact
- New In 2024, The Role of High-Stakes Soundtracks in Crafting Unforgettable Movie Experiences
- How To Unlock Apple iPhone 11 Without Passcode? 4 Easy Methods | Dr.fone
- [New] In 2024, 2023 | How to Autoplay Facebook Videos?
- [New] 2024 Approved Craft Impressive Content with Proficient Video Cropping & Exportation
- How To Reset Apple iPhone 11 Without iTunes? | Dr.fone
- 2024 Approved Turn FB HD Videos Into High-Quality MP4 – Free Online Method Unveiled
- [Updated] In 2024, Insta's Friendship Breakdown Detect It Fast
- [New] Hit TikTok Recipes 15 Must-Try Culinary Creations
- Best Snapchat Filters and Lenses That You Want to Try
- Extract Silence Eradicating Audio in Various Video Formats (MP4, MKV, AVI, MOV, WMV) - 2023 Edition
- 2024 Approved Freezing Gameplay Essential PC Screen Snaps
- How to Transfer Data from Huawei Nova Y91 to Other Android Devices? | Dr.fone
- [New] 2024 Approved 8 Compelling No-Cost Video Calls Applications for PC and MAC Users
- Updated 2024 Approved Free Video Editing on Ubuntu The Top 10 Options You Should Know
- MacBook Cam Captures A Filmmaking Starter Pack for 2024
- In 2024, How To Remove or Bypass Knox Enrollment Service On Xiaomi Redmi Note 12 Pro+ 5G
- [Updated] Classroom Aid Selecting Effective Recorders for 2024
- [New] In 2024, From Download to Usage Setting Up OBS on a Mac
- In 2024, The Ultimate Guide to Bypassing iCloud Activation Lock from iPhone 15 Plus
- Updated The Complete Guide to Make a Text Collage
- New Shaky Video? Fix It for Free The Best Online Stabilization Tools for 2024
- New Top Tools To Create Blend Image Collage
- [New] 2024 Approved Top 15 Inspirational Talents Transforming Lives Through TikTok
- Title: "Binge Your Way Into Animated Gifs Turning YouTube Content Without Downloads"
- Author: Steven
- Created at : 2024-05-25 18:50:57
- Updated at : 2024-05-26 18:50:57
- Link: https://youtube-clips.techidaily.com/binge-your-way-into-animated-gifs-turning-youtube-content-without-downloads/
- License: This work is licensed under CC BY-NC-SA 4.0.
