
:max_bytes(150000):strip_icc()/GettyImages-122061346-f4d63be5cfde470e9b7192d89497b501.jpg)
Best Budget Cameras for Creating Quality Vlogs for 2024
Best Budget Cameras for Creating Quality Vlogs
Top 11 Cheap Vlogging Cameras

Shanoon Cox
Oct 26, 2023• Proven solutions
Is the most expensive camera always the best for you? No. It depends. If you are a determined and ambitious beginner, it’s a good decision to invest in advanced cameras when you have an adequate budget. However, if you are not sure whether your enthusiasm for vlogging or photography will last or not, starting with an entry-level camera could be much wiser. As camera technology continues to advance, prices on cameras are coming down. Now, as a vlogger/YouTuber, you can get your hands on some decent vlogging cameras with a small budget. Before you get into the recommendation, please keep in mind that these budget camera still allows you to shoot fantastic videos and photos. Below, I have prepared a list of the top eleven cheap vlogging cameras, all of which can record at least full HD 1080p videos, that you can get for under $600.
If you have a bigger budget, you may prefer to check out my other posts on:
- 12 Best Vlogging Cameras
- 7 Best DSLR Cameras For Vlogging
- 8 Best Mirrorless Cameras For Vlogging
- 12 Best Vlogging Cameras With A Flip Screen
TOP 11 CHEAP VLOGGING CAMERAS
| Camera | Camera Type | Flip Screen | 4K | Price | |
|---|---|---|---|---|---|
| GoPro Hero5 |  |
Action Camera | No | No | Check on Amazon |
| Canon EOS M100 |  |
Mirrorless | Flip Up | No | Check on Amazon |
| Canon PowerShot SX730 HS |  |
Ultra Compact | Flip Up | No | Check on Amazon |
| Panasonic Lumix DC-ZS70 |  |
Compact | Flip Up | Yes | Check on Amazon |
| Yi 4K Action Camera |  |
Action Camera | No | Yes | Check on Amazon |
| Sony Cybershot DSC-HX80 |  |
Ultra Compact | Flip Up | No | Check on Amazon |
| Nikon Coolpix A900 |  |
Compact | Flip Up | Yes | Check on Amazon |
 |
Best Cheap Vlogging Camera Under $100: Polaroid Cube+ Recording outdoor action videos for your vlog with a DSLR camera is impractical. They’re heavy and bulky, getting in the way of whatever you’re doing. Action cameras like the GoPro and Polaroid Cube are much better for these occasions because they’re small enough to be mounted on a bike or a helmet. The Polaroid Cube also has built-in magnets on the top and bottom of the camera, giving you the ability to attach them to most metal surfaces. The camera’s 1.4-inch rubber body is resistant to water, shock, and all types of weather and it is capable of capturing footage even under the most extreme weather conditions. The Cube action camera can record full HD 1080p videos at 60 fps and it has a 124-degree wide-angle lens that performs best when it is used for exterior shots. The camera is compatible with microSDHC memory cards that can store up to 128GB of footage. The Cube’s battery can record up to 107 minutes before it needs another charge. With the Polaroid Cube+, you can preview or control your camera from your phone because it comes with Wi-Fi connectivity. PROS - Cheap vlogging camera for outdoor videos - Multiple mounting options CONS - Low-quality built-in microphone - No preview screen |
|---|---|
 |
Best Cheap Vlogging Camera Under $200: Yi 4K If you are looking for an affordable vlogging camera that costs less than $200, then currently the best option for you is the Yi 4K Action Camera. Its 2.19” LCD Gorilla Glass retina touchscreen is resistant to scratches and mild impacts. Much like a lot of action cameras, this camera is equipped with a wide-angle lens, 160-degree to be exact. The camera, however, is not waterproof, and you need to buy additional accessories so you can protect the camera from accidental damage. You can record 120 minutes of 4K footage at 60 fps without having to recharge the camera’s 4.35V lithium-ion battery. All the footage you record with the Yi 4K action camera can easily be transferred to a computer or broadcasted live on Facebook, YouTube, and other live streaming platforms using the camera’s high-speed 5GHz Wi-Fi feature. The built-in EIS (electronic image stabilization) contains a 3-axis gyroscope and 3-axis accelerometer that reduces the camera shakes caused by movements and enables you to produce smooth recordings of your wildest adventures. The Yi 4K action camera has two built-in microphones that can capture audio recordings, but there is no audio jack input for recording audio from an external microphone. PROS - Weighs only 3.4 Oz - Powerful electronic image stabilization CONS - Limited mounting capabilities - The camera’s fisheye lens can distort footage |
 |
Best Cheap Vlogging Camera Under $300: Nikon B500 Unlike the action cams that can capture ultra-wide-angle shots, the Nikon’s Coolpix B500 model is designed to also help you zoom in closer. The camera has a built-in 40X optical zoom NIKKOR lens that can be extended to 80X when used with the Dynamic Fine Zoom feature, which means you can easily record things that are further away. The Nikon Coolpix B500’s ISO can only go up to ISO 3200, despite the camera’s 16 MP BSI-CMOS sensor that supports full HD 1080p recording at 30 or 25 fps. The 3-inch 920K-dot LCD screen is fully adjustable but it doesn’t have touchscreen functionality, and the camera doesn’t have a viewfinder, which can slightly complicate the process of composing shots for your vlogs. The Nikon Coolpix B500 is conveniently powered by 4 AA batteries. This cheap vlogging camera offers more features than similar cameras in its price range. PROS - Great connectivity features - 80x optical zoom CONS - No manual exposure controls - Limited ISO sensitivity |
 |
Best Cheap Vlogging Camera Under $400: Nikon A900 This Coolpix series digital camera model is much more powerful than the Nikon B500 because it is a 20.3 MP camera that can record videos in UHD 4K quality. The non-interchangeable 35X optical zoom NIKKOR f/3.4-6.9 lens performs well in capturing footage of both closeup and faraway objects. Like the B500, the A900’s ISO sensitivity goes up to a maximum of 3200. Consequently, this camera won’t be ideal for filming in poorly lit conditions. The Nikon Coolpix A900 features a variety of handy modes, including creative, super lapse, and multiple exposure modes, to mention a few. The SnapBridge app allows you to connect the camera to a smartphone or a tablet via the built-in Wi-Fi NFC so you can transfer and edit the footage immediately after you stop recording. The A900 is a small and light digital camera, which makes it a great companion on your daily vlogging adventures. PROS - 4K and Full HD video recording options - Manual exposure control CONS - Limited audio recording features - No viewfinder |
 |
Best Cheap Vlogging Camera Under $500: Sony a5100 Sony’s a5100 is the successor of the NEX-5 series. Four years after its initial release in 2014, it is still considered the best vlogging camera under $500. The 24.3 MP Exmor APS-C CMOS sensor and the BIONZ X image processor reduce image noise and increase the level of detail in your vlogs. This mirrorless camera ships with the standard 16-50 mm lens, but it is compatible with all of Sony’s E-mount lenses. The Sony a5100 can record up to 1080p videos at 60 fps. Its HVAC S codec support enables you to produce videos that have 50Mbps bit rates. The Hybrid AF system featuring both a 179 phase-detect points as well as 25 contrast-detect points guarantees that all videos you record with the Sony a5100 will be sharp and in focus. Wi-Fi with NFC feature enables you to easily transfer or share your recorded footage. PROS - AF speeds exceed all expectations - The camera body is resistant to moderate impact CONS - Can’t record 4K videos - Fake shutter sounds |
Wondershare Filmora supports most video formats that you can find. If you have no idea about which software can edit the video filmed by your camera, try Filmora. It provides special effects, stock photo & video, sound library, etc., which will definitely enhance your productivity and helps to make money by making videos much easier


Shanoon Cox
Shanoon Cox is a writer and a lover of all things video.
Follow @Shanoon Cox
Shanoon Cox
Oct 26, 2023• Proven solutions
Is the most expensive camera always the best for you? No. It depends. If you are a determined and ambitious beginner, it’s a good decision to invest in advanced cameras when you have an adequate budget. However, if you are not sure whether your enthusiasm for vlogging or photography will last or not, starting with an entry-level camera could be much wiser. As camera technology continues to advance, prices on cameras are coming down. Now, as a vlogger/YouTuber, you can get your hands on some decent vlogging cameras with a small budget. Before you get into the recommendation, please keep in mind that these budget camera still allows you to shoot fantastic videos and photos. Below, I have prepared a list of the top eleven cheap vlogging cameras, all of which can record at least full HD 1080p videos, that you can get for under $600.
If you have a bigger budget, you may prefer to check out my other posts on:
- 12 Best Vlogging Cameras
- 7 Best DSLR Cameras For Vlogging
- 8 Best Mirrorless Cameras For Vlogging
- 12 Best Vlogging Cameras With A Flip Screen
TOP 11 CHEAP VLOGGING CAMERAS
| Camera | Camera Type | Flip Screen | 4K | Price | |
|---|---|---|---|---|---|
| GoPro Hero5 | |
Action Camera | No | No | Check on Amazon |
| Canon EOS M100 | |
Mirrorless | Flip Up | No | Check on Amazon |
| Canon PowerShot SX730 HS | |
Ultra Compact | Flip Up | No | Check on Amazon |
| Panasonic Lumix DC-ZS70 | |
Compact | Flip Up | Yes | Check on Amazon |
| Yi 4K Action Camera | |
Action Camera | No | Yes | Check on Amazon |
| Sony Cybershot DSC-HX80 | |
Ultra Compact | Flip Up | No | Check on Amazon |
| Nikon Coolpix A900 | |
Compact | Flip Up | Yes | Check on Amazon |
|
Best Cheap Vlogging Camera Under $100: Polaroid Cube+ Recording outdoor action videos for your vlog with a DSLR camera is impractical. They’re heavy and bulky, getting in the way of whatever you’re doing. Action cameras like the GoPro and Polaroid Cube are much better for these occasions because they’re small enough to be mounted on a bike or a helmet. The Polaroid Cube also has built-in magnets on the top and bottom of the camera, giving you the ability to attach them to most metal surfaces. The camera’s 1.4-inch rubber body is resistant to water, shock, and all types of weather and it is capable of capturing footage even under the most extreme weather conditions. The Cube action camera can record full HD 1080p videos at 60 fps and it has a 124-degree wide-angle lens that performs best when it is used for exterior shots. The camera is compatible with microSDHC memory cards that can store up to 128GB of footage. The Cube’s battery can record up to 107 minutes before it needs another charge. With the Polaroid Cube+, you can preview or control your camera from your phone because it comes with Wi-Fi connectivity. PROS - Cheap vlogging camera for outdoor videos - Multiple mounting options CONS - Low-quality built-in microphone - No preview screen |
|---|---|
|
Best Cheap Vlogging Camera Under $200: Yi 4K If you are looking for an affordable vlogging camera that costs less than $200, then currently the best option for you is the Yi 4K Action Camera. Its 2.19” LCD Gorilla Glass retina touchscreen is resistant to scratches and mild impacts. Much like a lot of action cameras, this camera is equipped with a wide-angle lens, 160-degree to be exact. The camera, however, is not waterproof, and you need to buy additional accessories so you can protect the camera from accidental damage. You can record 120 minutes of 4K footage at 60 fps without having to recharge the camera’s 4.35V lithium-ion battery. All the footage you record with the Yi 4K action camera can easily be transferred to a computer or broadcasted live on Facebook, YouTube, and other live streaming platforms using the camera’s high-speed 5GHz Wi-Fi feature. The built-in EIS (electronic image stabilization) contains a 3-axis gyroscope and 3-axis accelerometer that reduces the camera shakes caused by movements and enables you to produce smooth recordings of your wildest adventures. The Yi 4K action camera has two built-in microphones that can capture audio recordings, but there is no audio jack input for recording audio from an external microphone. PROS - Weighs only 3.4 Oz - Powerful electronic image stabilization CONS - Limited mounting capabilities - The camera’s fisheye lens can distort footage |
|
Best Cheap Vlogging Camera Under $300: Nikon B500 Unlike the action cams that can capture ultra-wide-angle shots, the Nikon’s Coolpix B500 model is designed to also help you zoom in closer. The camera has a built-in 40X optical zoom NIKKOR lens that can be extended to 80X when used with the Dynamic Fine Zoom feature, which means you can easily record things that are further away. The Nikon Coolpix B500’s ISO can only go up to ISO 3200, despite the camera’s 16 MP BSI-CMOS sensor that supports full HD 1080p recording at 30 or 25 fps. The 3-inch 920K-dot LCD screen is fully adjustable but it doesn’t have touchscreen functionality, and the camera doesn’t have a viewfinder, which can slightly complicate the process of composing shots for your vlogs. The Nikon Coolpix B500 is conveniently powered by 4 AA batteries. This cheap vlogging camera offers more features than similar cameras in its price range. PROS - Great connectivity features - 80x optical zoom CONS - No manual exposure controls - Limited ISO sensitivity |
|
Best Cheap Vlogging Camera Under $400: Nikon A900 This Coolpix series digital camera model is much more powerful than the Nikon B500 because it is a 20.3 MP camera that can record videos in UHD 4K quality. The non-interchangeable 35X optical zoom NIKKOR f/3.4-6.9 lens performs well in capturing footage of both closeup and faraway objects. Like the B500, the A900’s ISO sensitivity goes up to a maximum of 3200. Consequently, this camera won’t be ideal for filming in poorly lit conditions. The Nikon Coolpix A900 features a variety of handy modes, including creative, super lapse, and multiple exposure modes, to mention a few. The SnapBridge app allows you to connect the camera to a smartphone or a tablet via the built-in Wi-Fi NFC so you can transfer and edit the footage immediately after you stop recording. The A900 is a small and light digital camera, which makes it a great companion on your daily vlogging adventures. PROS - 4K and Full HD video recording options - Manual exposure control CONS - Limited audio recording features - No viewfinder |
|
Best Cheap Vlogging Camera Under $500: Sony a5100 Sony’s a5100 is the successor of the NEX-5 series. Four years after its initial release in 2014, it is still considered the best vlogging camera under $500. The 24.3 MP Exmor APS-C CMOS sensor and the BIONZ X image processor reduce image noise and increase the level of detail in your vlogs. This mirrorless camera ships with the standard 16-50 mm lens, but it is compatible with all of Sony’s E-mount lenses. The Sony a5100 can record up to 1080p videos at 60 fps. Its HVAC S codec support enables you to produce videos that have 50Mbps bit rates. The Hybrid AF system featuring both a 179 phase-detect points as well as 25 contrast-detect points guarantees that all videos you record with the Sony a5100 will be sharp and in focus. Wi-Fi with NFC feature enables you to easily transfer or share your recorded footage. PROS - AF speeds exceed all expectations - The camera body is resistant to moderate impact CONS - Can’t record 4K videos - Fake shutter sounds |
Wondershare Filmora supports most video formats that you can find. If you have no idea about which software can edit the video filmed by your camera, try Filmora. It provides special effects, stock photo & video, sound library, etc., which will definitely enhance your productivity and helps to make money by making videos much easier
Shanoon Cox
Shanoon Cox is a writer and a lover of all things video.
Follow @Shanoon Cox
Streamline Channels Effortlessly: Top 10 Online Design Aids
Youtube Banners Makers: 10+ Online Tools to Create Channel Art

Richard Bennett
Mar 27, 2024• Proven solutions
If you want to have more fans on your YouTube channel, it becomes really important to make your channel more attractive and fresh. YouTube banner is one of the important factors which represents the style, quality, and taste of your channel. Fortunately, there are many tools on the market that can help you make attractive banners. Therefore, we have brought you 10+ best-known YouTube banner makers that can enhance the beauty of your channel with their exceptionally amazing features. We will also let you know how to make a YouTube banner. Let’s explore.
You may also like: How to add custom thumbnails to YouTube videos >>
- Part 1: YouTube Banner Dimensions You Should Know
- Part 2: How to Make a YouTube Banner with Canva for Free
- Part 3: 10+ Best YouTube Banner Makers
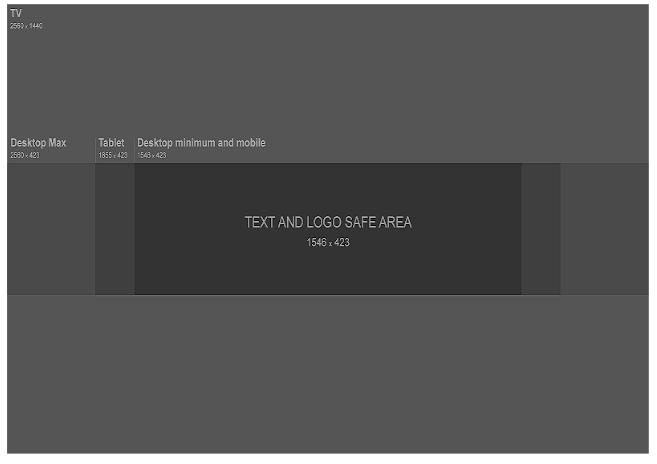
Part 1: YouTube Banner Dimensions You Should Know
YouTube banner dimensions varied on different platforms, so you need to make the YouTube banner look great on desktop, tablet, and phone. According to Google , the recommended dimension is 2560 x 1440 px as the YouTube banner will be cropped if its size is too large. Minimum dimension is 2048 x 1152 px for uploading. The maximum width is 2560 x 423 px. The largest file size is 6MB. You can also add links to your own social media on YouTube banner, so it is a great place to recommend your other social media.
Part 2: How to Make a YouTube Banner with Canva for Free
There are so many tools that you can make a YouTube banner in the market, but it is not easy to find the right tool to make a banner if you can’t find the right tools. We have listed one way to make a YouTube banner below. You can use Wondershare Filmora to edit YouTube videos as it is designed to be a YouTube editor. Besides the basic editing including cropping/trimming and adding transitions, you can use it to add various text, more than 300 effects/filters, free audio, and more. It is also easy to make a YouTube intro. Download it to have a try!
Download Mac Version ](https://tools.techidaily.com/wondershare/filmora/download/ )
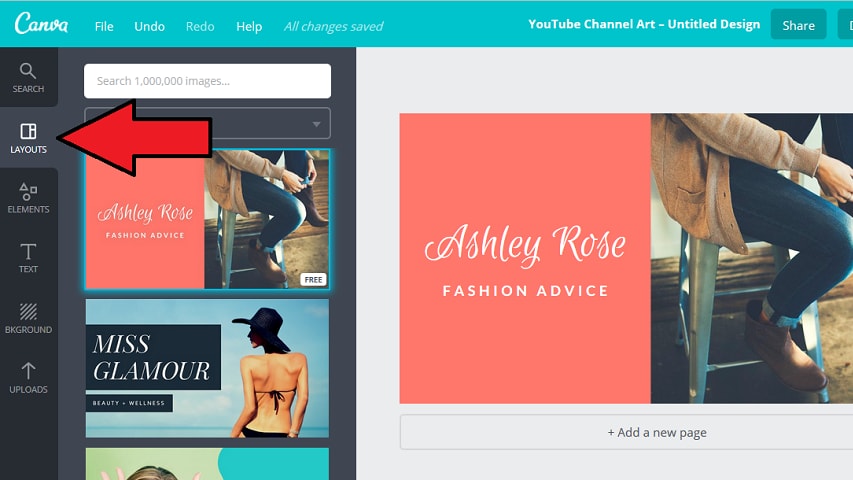
Step 1: Choose your template and layout
Canva is an online tool to make YouTube banner, so first you need to open it up . You are asked to log in.
After you’ve signed up for Canva you will see a variety of different templates. Scroll through them until you find YouTube Channel Art under Social Media & Email Headers.
This template will be the right size for a YouTube banner, but it will not show you the ‘safe zones’. Your banner will show up differently depending on the screen a viewer is watching on. Click here to download YouTube’s official template, which displays safe zones. You will be able to use it as a reference.
And Canva also provides you with sample layouts that you can build off of. They will include stock photos and text. Most are free, but some might cost a dollar.
If the one you happen to like isn’t free, don’t worry. It’s actually just the specific stock images being used in the example that cost money, and you’re probably planning on replacing those anyways.
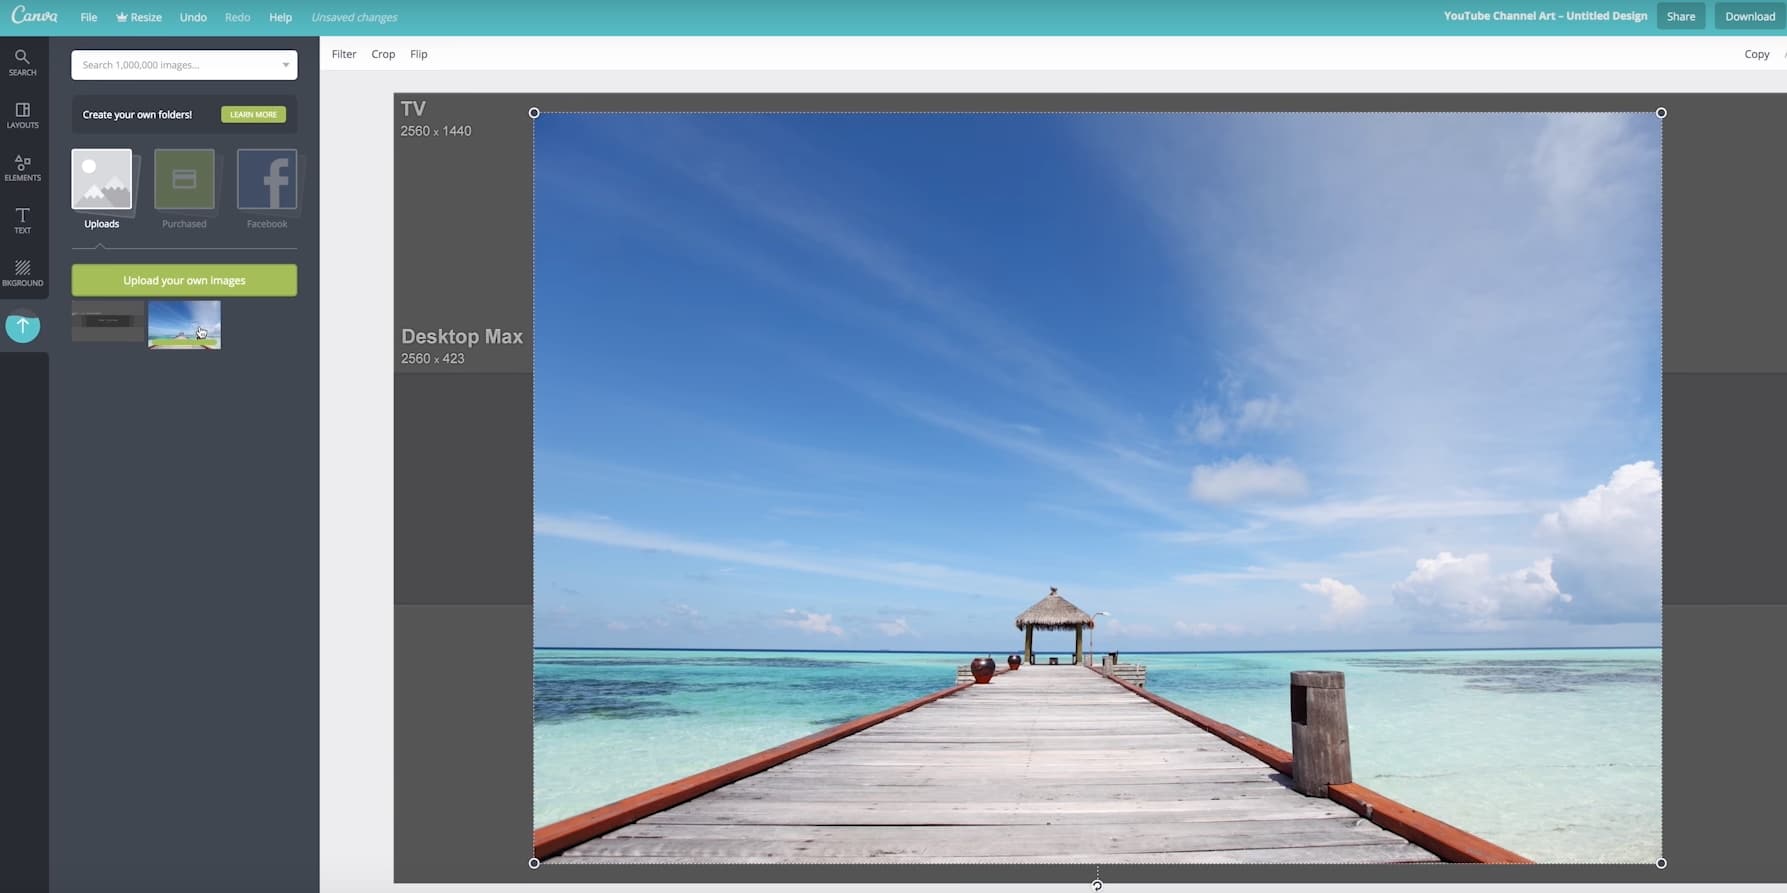
Step 2: Import your image
Canva provides a selection of stock images you can use for free. You can find them by clicking on Elements in the menu on the far left, and then clicking on Free Photos.
If you’d rather use your own images, click on Upload at the bottom of that same menu on the left. You’ll have the option of uploading images from your computer or importing them from Facebook.
After you have found the image you want to use or loaded it into Canva, click on it and it will appear in your layout.
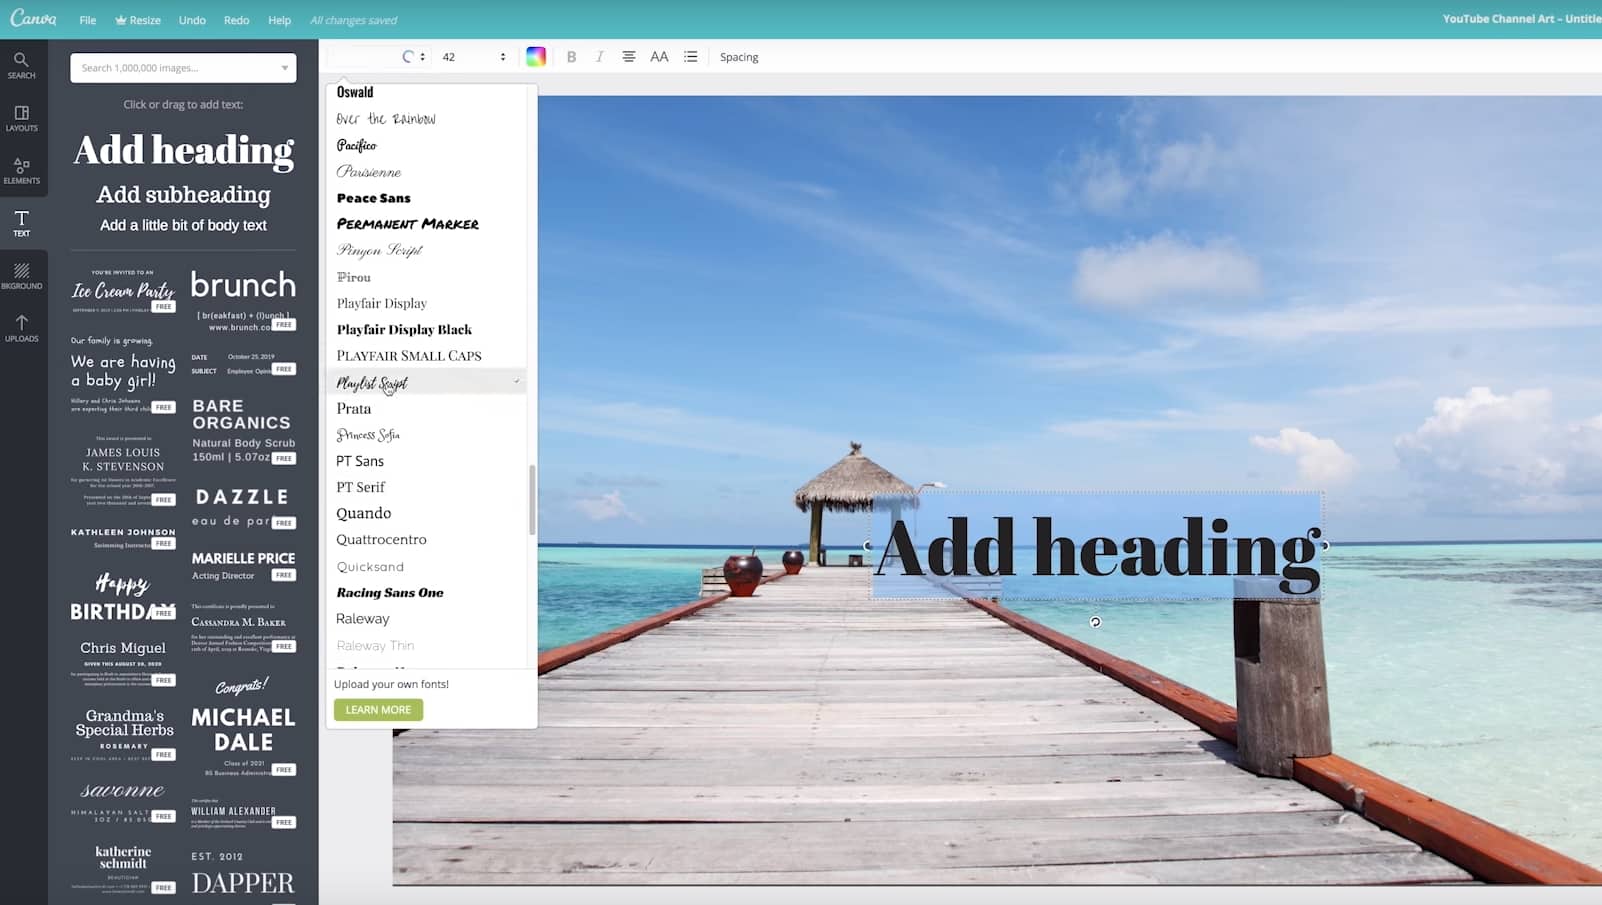
Step 3: Add text to YouTube banner
You can add various text after it is imported. There are lots of text templates in Canva, so just pick the one you like. You can also change text color and transparency to make it look great. Now to place it in the right position.
Step 4: Edit other elements
The layout you chose might include things like borders or backgrounds behind the text. You can change the colors of any of these just by clicking on them, then clicking on the color swatch in the top left corner of your design area.

Step 5: Download YouTube banner
Once you finish the editing, there is a download button in the top right corner of your screen. Click on it when you are finished to save your new channel art to your computer. It supports JPEG, PNG, and PDF. Now upload it to YouTube. So simple. Isn’t it?

Part 3: 10+ Best YouTube Banner Makers
1. Canva:
Canva is probably the most popular site for making channel art, for good reason. It has over 8000 templates for different kinds of graphics, including YouTube channel art, and there’s a huge variety of stock photos available either for free or $1. On Canva, creating your perfect banner is as easy as dragging and dropping images into a pre-built layout. Resizing is automatic, and you can flip/rotate or apply filters in just a few clicks
Pros: It contains millions of stock images, about 100 professional layouts, and lots of stunning filters.
Cons: Some high-quality images can be accessed only after payment of $1.
Price: The best thing to know is that this tool is available for free.
2. Wondershare PixStudio

Wondershare PixStudio is an all-in-one and powerful online graphic design maker for everyone. It has various types of templates for YouTube Thumbnails, Logos, Posters, etc. You can create a beautiful design by simply dragging and dropping the elements and photos. The online platform is free to use all templates, just One-Click to download your creations, and share to your Facebook, Instagram Story, and YouTube Thumbnails, etc. immediately.
Pros:
- Various types of templates
- Simple and Fast Design
- Background remover
Cons: The features of removing background be used after payment of $7.99 per month.
Price: The best thing to know is that this tool is available for free.
3. Fotor:
The makers of Fotor describe it as a ‘revolutionary photo editor and graphic designer’, and it is certainly a powerful tool. Fotor allows you to do a lot of fine editing on your photos – brightness, saturation, and color temperature are just a few of the things you can adjust – and its design feature is perfect for YouTube channel art.
Fotor has templates for YouTube channel art and a lot of fun sticker-like graphics. The Design interface is very similar to Canva, if slightly more complicated.
Pros: Complete art can be created within a few minutes and contains dozens of templates.
Cons: Little difficult to use for beginners.
Price: Free
4. Photovisi:
It is a great source of inspiration for your YouTube channel where you can easily design, save and share your customized banner.
Pros: It automatically adjusts the size of the banner to the required format and is loaded with unlimited themes. Works on Android, Windows, Mac, and iOS.
Cons: Demand some special skills for usage.
Price: It is available for free at the official website
5. iKomee:
It is possible to have customized results for your YouTube banner designing using the iKomee platform where few minutes are enough to create wonders. It is one of the most loved tools of all professionals.
Pros: Contains lots of cool templates for channel art.
Cons: Limited themes and layouts.
Price: Available for free.

6. Banners Nack:
Here is one of the most wonderful YouTube banner maker for you that can be accessed online with easy to use interface where one can design animated, static HTML5 with interactive banner ads.
Pros: Professional, easy to use platform with rich quality fonts, stock images, and animated effects.
Cons: Little costly.
Price: Users can go ahead with premium plans where the basic plan is worth $12/month and a professional plan is $18/month with a business plan offer of $24 per month.
7. BeFunky:
BeFunky allows users to create meaningful banners for YouTube business building. The platform consists of numerous effortless options for banner designs and the drag and drops features make everything much easier. It is possible to boost traffic on your YouTube channel with this highly ranked banner maker.
Pros: Four-step banner-making process that can be followed by beginners too.
Cons: The uploading and downloading process takes more time due to heavy projects.
Price: Get started for free.
8. Picmonkey:
With PicMonkey.com you will be able to get customized, readymade banners with a perfect look. It is much easier to make selections for fonts, colors, and graphics with advanced templates here.
Pros: The best platform to enhance your creativity; users will be able to get perfect sharpness of quality.
Cons: File size is more for output banner and special features can be accessed only after payment.
Price: Free trial.
9. iPiccy:
The number of steps to be followed for designing a YouTube banner here completely depends upon your demand of end banner design type. Generally, four-step method is capable enough to provide you professional output with proper cropping dimensions and small file size for download
Pros: Various additional features are available like adding text etc so that highly customized designs can be created for YouTube Banners.
Cons: Demands more time of the user for making quality banner.
Price: Get started for free within a few seconds.
10. Adobe Spark:
Adobe Spark is one of the amazing online YouTube banner makers that helps you create the desired banner for your YouTube channel with ease. All that you need to do is browse to the site and pick the ‘YouTube channel art’ option to get the YouTube banner of the right size, though there are other options as well. Due to its easily customizable features, you can alter or change the background completely and try different color combinations to match your brand’s logo.
Pros:
- The drag-n-drop feature of Adobe Spark enables you to craft eye-catching and engaging banners effortlessly.
- Adobe Spark offers you the freedom to experiment with unlimited alterations in alignments, text, layouts, and themes like a trusted YouTube banner creator.
Cons: Though Adobe Spark is free, it annoys the users when it automatically adds Adobe Spark’s watermark logo to your creation. To get it removed, you must be an active subscriber of Adobe products.

11. Fotojet:
FotoJet being a reliable YouTube banner maker assists you in creating personalized banners using numerous free templates. You get hold of interesting YouTube banner without toiling with the intricacies of graphic designing. Impressing your visitors with your unique and brand new banner from FotoJet YouTube banner creator is class apart.
Pros: It offers you the flexibility to add anything and everything on your channel art and upload it on YouTube right away.
Cons: Similar to Adobe Spark, FotoJet too adds a watermark logo of its name to your creation which is again a bit of nuisance.
Conclusion
Want to make your YouTube video more attractive and beautiful? Wondershare Filmora is such video editing software designed for YouTube creators. It not only allows you to cut, trim, crop, zoom, reverse, rotate the video clips, but also makes the advanced features like green screen, PIP, tilt-shift, and mosaic easy like a piece of cake. With Wondershare Filmora, you can ignite your YouTube videos with over 300 effects like Fashion, Beauty, BlockBuster, Travel, etc.
Richard Bennett
Richard Bennett is a writer and a lover of all things video.
Follow @Richard Bennett
Richard Bennett
Mar 27, 2024• Proven solutions
If you want to have more fans on your YouTube channel, it becomes really important to make your channel more attractive and fresh. YouTube banner is one of the important factors which represents the style, quality, and taste of your channel. Fortunately, there are many tools on the market that can help you make attractive banners. Therefore, we have brought you 10+ best-known YouTube banner makers that can enhance the beauty of your channel with their exceptionally amazing features. We will also let you know how to make a YouTube banner. Let’s explore.
You may also like: How to add custom thumbnails to YouTube videos >>
- Part 1: YouTube Banner Dimensions You Should Know
- Part 2: How to Make a YouTube Banner with Canva for Free
- Part 3: 10+ Best YouTube Banner Makers
Part 1: YouTube Banner Dimensions You Should Know
YouTube banner dimensions varied on different platforms, so you need to make the YouTube banner look great on desktop, tablet, and phone. According to Google , the recommended dimension is 2560 x 1440 px as the YouTube banner will be cropped if its size is too large. Minimum dimension is 2048 x 1152 px for uploading. The maximum width is 2560 x 423 px. The largest file size is 6MB. You can also add links to your own social media on YouTube banner, so it is a great place to recommend your other social media.
Part 2: How to Make a YouTube Banner with Canva for Free
There are so many tools that you can make a YouTube banner in the market, but it is not easy to find the right tool to make a banner if you can’t find the right tools. We have listed one way to make a YouTube banner below. You can use Wondershare Filmora to edit YouTube videos as it is designed to be a YouTube editor. Besides the basic editing including cropping/trimming and adding transitions, you can use it to add various text, more than 300 effects/filters, free audio, and more. It is also easy to make a YouTube intro. Download it to have a try!
Download Mac Version ](https://tools.techidaily.com/wondershare/filmora/download/ )
Step 1: Choose your template and layout
Canva is an online tool to make YouTube banner, so first you need to open it up . You are asked to log in.
After you’ve signed up for Canva you will see a variety of different templates. Scroll through them until you find YouTube Channel Art under Social Media & Email Headers.
This template will be the right size for a YouTube banner, but it will not show you the ‘safe zones’. Your banner will show up differently depending on the screen a viewer is watching on. Click here to download YouTube’s official template, which displays safe zones. You will be able to use it as a reference.
And Canva also provides you with sample layouts that you can build off of. They will include stock photos and text. Most are free, but some might cost a dollar.
If the one you happen to like isn’t free, don’t worry. It’s actually just the specific stock images being used in the example that cost money, and you’re probably planning on replacing those anyways.
Step 2: Import your image
Canva provides a selection of stock images you can use for free. You can find them by clicking on Elements in the menu on the far left, and then clicking on Free Photos.
If you’d rather use your own images, click on Upload at the bottom of that same menu on the left. You’ll have the option of uploading images from your computer or importing them from Facebook.
After you have found the image you want to use or loaded it into Canva, click on it and it will appear in your layout.
Step 3: Add text to YouTube banner
You can add various text after it is imported. There are lots of text templates in Canva, so just pick the one you like. You can also change text color and transparency to make it look great. Now to place it in the right position.
Step 4: Edit other elements
The layout you chose might include things like borders or backgrounds behind the text. You can change the colors of any of these just by clicking on them, then clicking on the color swatch in the top left corner of your design area.
Step 5: Download YouTube banner
Once you finish the editing, there is a download button in the top right corner of your screen. Click on it when you are finished to save your new channel art to your computer. It supports JPEG, PNG, and PDF. Now upload it to YouTube. So simple. Isn’t it?
Part 3: 10+ Best YouTube Banner Makers
1. Canva:
Canva is probably the most popular site for making channel art, for good reason. It has over 8000 templates for different kinds of graphics, including YouTube channel art, and there’s a huge variety of stock photos available either for free or $1. On Canva, creating your perfect banner is as easy as dragging and dropping images into a pre-built layout. Resizing is automatic, and you can flip/rotate or apply filters in just a few clicks
Pros: It contains millions of stock images, about 100 professional layouts, and lots of stunning filters.
Cons: Some high-quality images can be accessed only after payment of $1.
Price: The best thing to know is that this tool is available for free.
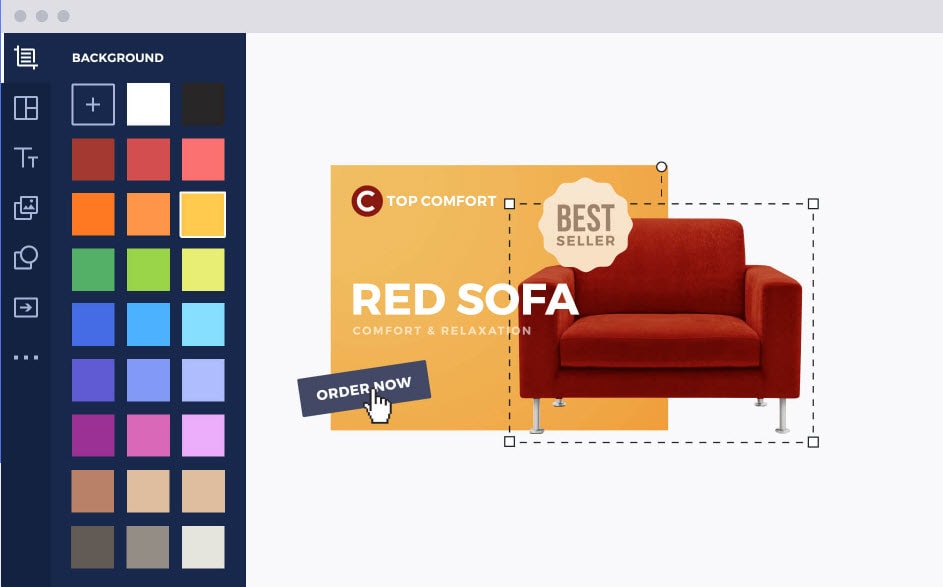
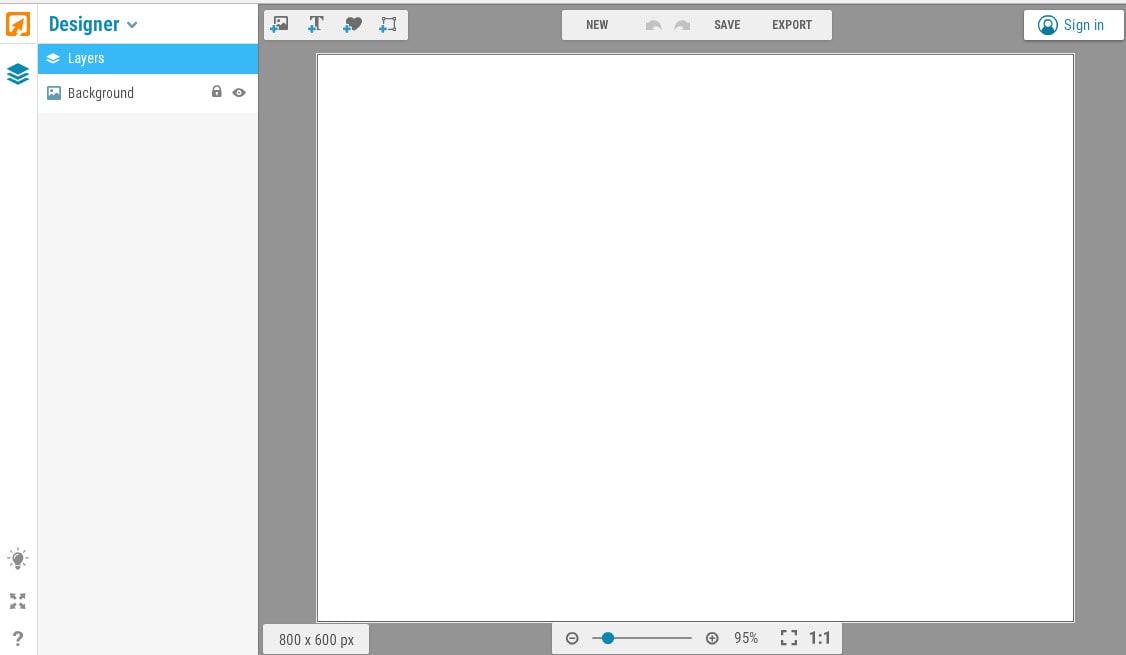
2. Wondershare PixStudio
Wondershare PixStudio is an all-in-one and powerful online graphic design maker for everyone. It has various types of templates for YouTube Thumbnails, Logos, Posters, etc. You can create a beautiful design by simply dragging and dropping the elements and photos. The online platform is free to use all templates, just One-Click to download your creations, and share to your Facebook, Instagram Story, and YouTube Thumbnails, etc. immediately.
Pros:
- Various types of templates
- Simple and Fast Design
- Background remover
Cons: The features of removing background be used after payment of $7.99 per month.
Price: The best thing to know is that this tool is available for free.
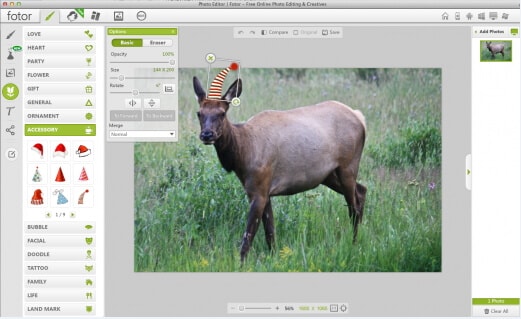
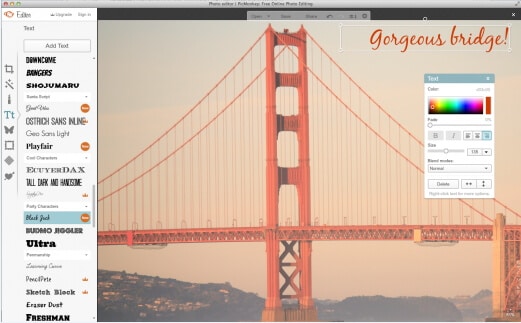
3. Fotor:
The makers of Fotor describe it as a ‘revolutionary photo editor and graphic designer’, and it is certainly a powerful tool. Fotor allows you to do a lot of fine editing on your photos – brightness, saturation, and color temperature are just a few of the things you can adjust – and its design feature is perfect for YouTube channel art.
Fotor has templates for YouTube channel art and a lot of fun sticker-like graphics. The Design interface is very similar to Canva, if slightly more complicated.
Pros: Complete art can be created within a few minutes and contains dozens of templates.
Cons: Little difficult to use for beginners.
Price: Free
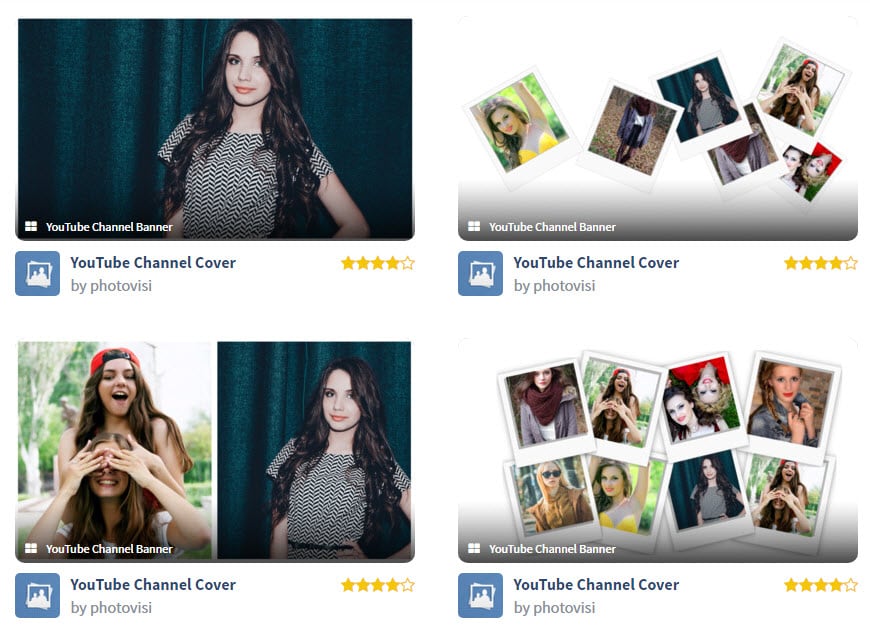
4. Photovisi:
It is a great source of inspiration for your YouTube channel where you can easily design, save and share your customized banner.
Pros: It automatically adjusts the size of the banner to the required format and is loaded with unlimited themes. Works on Android, Windows, Mac, and iOS.
Cons: Demand some special skills for usage.
Price: It is available for free at the official website
5. iKomee:
It is possible to have customized results for your YouTube banner designing using the iKomee platform where few minutes are enough to create wonders. It is one of the most loved tools of all professionals.
Pros: Contains lots of cool templates for channel art.
Cons: Limited themes and layouts.
Price: Available for free.
6. Banners Nack:
Here is one of the most wonderful YouTube banner maker for you that can be accessed online with easy to use interface where one can design animated, static HTML5 with interactive banner ads.
Pros: Professional, easy to use platform with rich quality fonts, stock images, and animated effects.
Cons: Little costly.
Price: Users can go ahead with premium plans where the basic plan is worth $12/month and a professional plan is $18/month with a business plan offer of $24 per month.
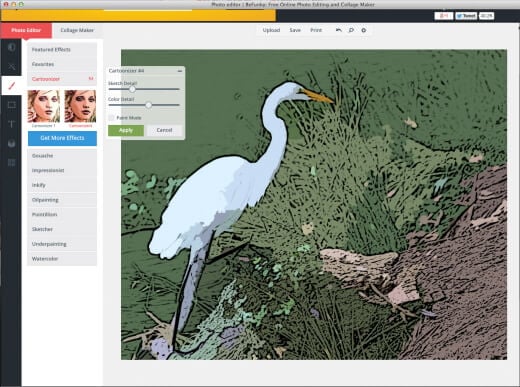
7. BeFunky:
BeFunky allows users to create meaningful banners for YouTube business building. The platform consists of numerous effortless options for banner designs and the drag and drops features make everything much easier. It is possible to boost traffic on your YouTube channel with this highly ranked banner maker.
Pros: Four-step banner-making process that can be followed by beginners too.
Cons: The uploading and downloading process takes more time due to heavy projects.
Price: Get started for free.
8. Picmonkey:
With PicMonkey.com you will be able to get customized, readymade banners with a perfect look. It is much easier to make selections for fonts, colors, and graphics with advanced templates here.
Pros: The best platform to enhance your creativity; users will be able to get perfect sharpness of quality.
Cons: File size is more for output banner and special features can be accessed only after payment.
Price: Free trial.
9. iPiccy:
The number of steps to be followed for designing a YouTube banner here completely depends upon your demand of end banner design type. Generally, four-step method is capable enough to provide you professional output with proper cropping dimensions and small file size for download
Pros: Various additional features are available like adding text etc so that highly customized designs can be created for YouTube Banners.
Cons: Demands more time of the user for making quality banner.
Price: Get started for free within a few seconds.
10. Adobe Spark:
Adobe Spark is one of the amazing online YouTube banner makers that helps you create the desired banner for your YouTube channel with ease. All that you need to do is browse to the site and pick the ‘YouTube channel art’ option to get the YouTube banner of the right size, though there are other options as well. Due to its easily customizable features, you can alter or change the background completely and try different color combinations to match your brand’s logo.
Pros:
- The drag-n-drop feature of Adobe Spark enables you to craft eye-catching and engaging banners effortlessly.
- Adobe Spark offers you the freedom to experiment with unlimited alterations in alignments, text, layouts, and themes like a trusted YouTube banner creator.
Cons: Though Adobe Spark is free, it annoys the users when it automatically adds Adobe Spark’s watermark logo to your creation. To get it removed, you must be an active subscriber of Adobe products.
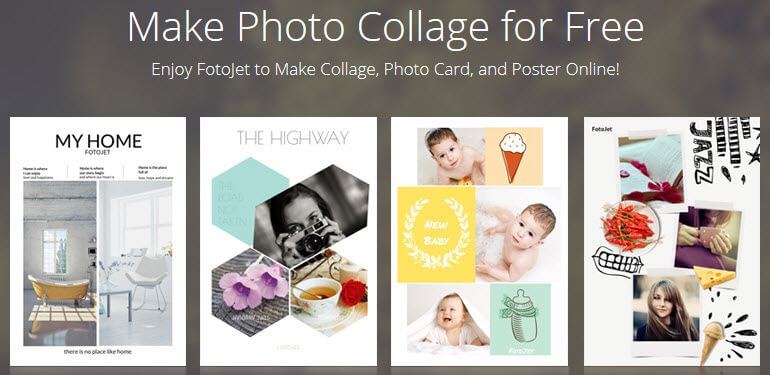
11. Fotojet:
FotoJet being a reliable YouTube banner maker assists you in creating personalized banners using numerous free templates. You get hold of interesting YouTube banner without toiling with the intricacies of graphic designing. Impressing your visitors with your unique and brand new banner from FotoJet YouTube banner creator is class apart.
Pros: It offers you the flexibility to add anything and everything on your channel art and upload it on YouTube right away.
Cons: Similar to Adobe Spark, FotoJet too adds a watermark logo of its name to your creation which is again a bit of nuisance.
Conclusion
Want to make your YouTube video more attractive and beautiful? Wondershare Filmora is such video editing software designed for YouTube creators. It not only allows you to cut, trim, crop, zoom, reverse, rotate the video clips, but also makes the advanced features like green screen, PIP, tilt-shift, and mosaic easy like a piece of cake. With Wondershare Filmora, you can ignite your YouTube videos with over 300 effects like Fashion, Beauty, BlockBuster, Travel, etc.
Richard Bennett
Richard Bennett is a writer and a lover of all things video.
Follow @Richard Bennett
Richard Bennett
Mar 27, 2024• Proven solutions
If you want to have more fans on your YouTube channel, it becomes really important to make your channel more attractive and fresh. YouTube banner is one of the important factors which represents the style, quality, and taste of your channel. Fortunately, there are many tools on the market that can help you make attractive banners. Therefore, we have brought you 10+ best-known YouTube banner makers that can enhance the beauty of your channel with their exceptionally amazing features. We will also let you know how to make a YouTube banner. Let’s explore.
You may also like: How to add custom thumbnails to YouTube videos >>
- Part 1: YouTube Banner Dimensions You Should Know
- Part 2: How to Make a YouTube Banner with Canva for Free
- Part 3: 10+ Best YouTube Banner Makers
Part 1: YouTube Banner Dimensions You Should Know
YouTube banner dimensions varied on different platforms, so you need to make the YouTube banner look great on desktop, tablet, and phone. According to Google , the recommended dimension is 2560 x 1440 px as the YouTube banner will be cropped if its size is too large. Minimum dimension is 2048 x 1152 px for uploading. The maximum width is 2560 x 423 px. The largest file size is 6MB. You can also add links to your own social media on YouTube banner, so it is a great place to recommend your other social media.
Part 2: How to Make a YouTube Banner with Canva for Free
There are so many tools that you can make a YouTube banner in the market, but it is not easy to find the right tool to make a banner if you can’t find the right tools. We have listed one way to make a YouTube banner below. You can use Wondershare Filmora to edit YouTube videos as it is designed to be a YouTube editor. Besides the basic editing including cropping/trimming and adding transitions, you can use it to add various text, more than 300 effects/filters, free audio, and more. It is also easy to make a YouTube intro. Download it to have a try!
Download Mac Version ](https://tools.techidaily.com/wondershare/filmora/download/ )
Step 1: Choose your template and layout
Canva is an online tool to make YouTube banner, so first you need to open it up . You are asked to log in.
After you’ve signed up for Canva you will see a variety of different templates. Scroll through them until you find YouTube Channel Art under Social Media & Email Headers.
This template will be the right size for a YouTube banner, but it will not show you the ‘safe zones’. Your banner will show up differently depending on the screen a viewer is watching on. Click here to download YouTube’s official template, which displays safe zones. You will be able to use it as a reference.
And Canva also provides you with sample layouts that you can build off of. They will include stock photos and text. Most are free, but some might cost a dollar.
If the one you happen to like isn’t free, don’t worry. It’s actually just the specific stock images being used in the example that cost money, and you’re probably planning on replacing those anyways.
Step 2: Import your image
Canva provides a selection of stock images you can use for free. You can find them by clicking on Elements in the menu on the far left, and then clicking on Free Photos.
If you’d rather use your own images, click on Upload at the bottom of that same menu on the left. You’ll have the option of uploading images from your computer or importing them from Facebook.
After you have found the image you want to use or loaded it into Canva, click on it and it will appear in your layout.
Step 3: Add text to YouTube banner
You can add various text after it is imported. There are lots of text templates in Canva, so just pick the one you like. You can also change text color and transparency to make it look great. Now to place it in the right position.
Step 4: Edit other elements
The layout you chose might include things like borders or backgrounds behind the text. You can change the colors of any of these just by clicking on them, then clicking on the color swatch in the top left corner of your design area.
Step 5: Download YouTube banner
Once you finish the editing, there is a download button in the top right corner of your screen. Click on it when you are finished to save your new channel art to your computer. It supports JPEG, PNG, and PDF. Now upload it to YouTube. So simple. Isn’t it?
Part 3: 10+ Best YouTube Banner Makers
1. Canva:
Canva is probably the most popular site for making channel art, for good reason. It has over 8000 templates for different kinds of graphics, including YouTube channel art, and there’s a huge variety of stock photos available either for free or $1. On Canva, creating your perfect banner is as easy as dragging and dropping images into a pre-built layout. Resizing is automatic, and you can flip/rotate or apply filters in just a few clicks
Pros: It contains millions of stock images, about 100 professional layouts, and lots of stunning filters.
Cons: Some high-quality images can be accessed only after payment of $1.
Price: The best thing to know is that this tool is available for free.
2. Wondershare PixStudio
Wondershare PixStudio is an all-in-one and powerful online graphic design maker for everyone. It has various types of templates for YouTube Thumbnails, Logos, Posters, etc. You can create a beautiful design by simply dragging and dropping the elements and photos. The online platform is free to use all templates, just One-Click to download your creations, and share to your Facebook, Instagram Story, and YouTube Thumbnails, etc. immediately.
Pros:
- Various types of templates
- Simple and Fast Design
- Background remover
Cons: The features of removing background be used after payment of $7.99 per month.
Price: The best thing to know is that this tool is available for free.
3. Fotor:
The makers of Fotor describe it as a ‘revolutionary photo editor and graphic designer’, and it is certainly a powerful tool. Fotor allows you to do a lot of fine editing on your photos – brightness, saturation, and color temperature are just a few of the things you can adjust – and its design feature is perfect for YouTube channel art.
Fotor has templates for YouTube channel art and a lot of fun sticker-like graphics. The Design interface is very similar to Canva, if slightly more complicated.
Pros: Complete art can be created within a few minutes and contains dozens of templates.
Cons: Little difficult to use for beginners.
Price: Free
4. Photovisi:
It is a great source of inspiration for your YouTube channel where you can easily design, save and share your customized banner.
Pros: It automatically adjusts the size of the banner to the required format and is loaded with unlimited themes. Works on Android, Windows, Mac, and iOS.
Cons: Demand some special skills for usage.
Price: It is available for free at the official website
5. iKomee:
It is possible to have customized results for your YouTube banner designing using the iKomee platform where few minutes are enough to create wonders. It is one of the most loved tools of all professionals.
Pros: Contains lots of cool templates for channel art.
Cons: Limited themes and layouts.
Price: Available for free.
6. Banners Nack:
Here is one of the most wonderful YouTube banner maker for you that can be accessed online with easy to use interface where one can design animated, static HTML5 with interactive banner ads.
Pros: Professional, easy to use platform with rich quality fonts, stock images, and animated effects.
Cons: Little costly.
Price: Users can go ahead with premium plans where the basic plan is worth $12/month and a professional plan is $18/month with a business plan offer of $24 per month.
7. BeFunky:
BeFunky allows users to create meaningful banners for YouTube business building. The platform consists of numerous effortless options for banner designs and the drag and drops features make everything much easier. It is possible to boost traffic on your YouTube channel with this highly ranked banner maker.
Pros: Four-step banner-making process that can be followed by beginners too.
Cons: The uploading and downloading process takes more time due to heavy projects.
Price: Get started for free.
8. Picmonkey:
With PicMonkey.com you will be able to get customized, readymade banners with a perfect look. It is much easier to make selections for fonts, colors, and graphics with advanced templates here.
Pros: The best platform to enhance your creativity; users will be able to get perfect sharpness of quality.
Cons: File size is more for output banner and special features can be accessed only after payment.
Price: Free trial.
9. iPiccy:
The number of steps to be followed for designing a YouTube banner here completely depends upon your demand of end banner design type. Generally, four-step method is capable enough to provide you professional output with proper cropping dimensions and small file size for download
Pros: Various additional features are available like adding text etc so that highly customized designs can be created for YouTube Banners.
Cons: Demands more time of the user for making quality banner.
Price: Get started for free within a few seconds.
10. Adobe Spark:
Adobe Spark is one of the amazing online YouTube banner makers that helps you create the desired banner for your YouTube channel with ease. All that you need to do is browse to the site and pick the ‘YouTube channel art’ option to get the YouTube banner of the right size, though there are other options as well. Due to its easily customizable features, you can alter or change the background completely and try different color combinations to match your brand’s logo.
Pros:
- The drag-n-drop feature of Adobe Spark enables you to craft eye-catching and engaging banners effortlessly.
- Adobe Spark offers you the freedom to experiment with unlimited alterations in alignments, text, layouts, and themes like a trusted YouTube banner creator.
Cons: Though Adobe Spark is free, it annoys the users when it automatically adds Adobe Spark’s watermark logo to your creation. To get it removed, you must be an active subscriber of Adobe products.
11. Fotojet:
FotoJet being a reliable YouTube banner maker assists you in creating personalized banners using numerous free templates. You get hold of interesting YouTube banner without toiling with the intricacies of graphic designing. Impressing your visitors with your unique and brand new banner from FotoJet YouTube banner creator is class apart.
Pros: It offers you the flexibility to add anything and everything on your channel art and upload it on YouTube right away.
Cons: Similar to Adobe Spark, FotoJet too adds a watermark logo of its name to your creation which is again a bit of nuisance.
Conclusion
Want to make your YouTube video more attractive and beautiful? Wondershare Filmora is such video editing software designed for YouTube creators. It not only allows you to cut, trim, crop, zoom, reverse, rotate the video clips, but also makes the advanced features like green screen, PIP, tilt-shift, and mosaic easy like a piece of cake. With Wondershare Filmora, you can ignite your YouTube videos with over 300 effects like Fashion, Beauty, BlockBuster, Travel, etc.
Richard Bennett
Richard Bennett is a writer and a lover of all things video.
Follow @Richard Bennett
Also read:
- Guffaws in Grooves Parody Playlist
- Hashtag Hacks for Amplifying Gamer Content
- 2024 Approved Creating Momentum in Life Coaching Video Series
- In 2024, Engage Enthusiastically, Earn Enticingly The Entrepreneurial Editor’s Handbook
- Create Professional Movies on YouTube Quickly
- Charting a Course Through Websites of YouTube Affiliates
- In 2024, Best YouTube Ad Creators
- Tech Tutorial Download YouTube for Your iDevice Securely
- Exploring 12 Premium Cameras for Professional Vloggers
- [New] Binge-Free Bliss YouTube's Ultimate Guide to No-Cost Movies
- Creative Freedom on a Budget Essential Green Screen Effects From Top 4 Tutorial Sources
- [Updated] Captivating Audiences with Thrilling Unboxing Vids
- How to Turn YouTube Shorts Into a Money Machine Key Requirements & Income Potential
- In 2024, Elevate the Visual Appeal of Your Video Credits
- Captivating Channels Spotlight on the Most Popular Female Creators for 2024
- Easy Peasy Automating the Repetitive View of YouTube Videos for 2024
- In 2024, Creating a Viral YouTube Sensation Simplified Action Plan
- [Updated] Dive Into a Stream of 9 Full-Length Festive Flicks - No Charge
- 2024 Approved Do Paid Subscribers Truly Influence Content Reach?
- Viewer Count Trophies & Channel Prominence Honors
- Building a Brand Through Consistently Engaging Vlogs
- 5 Innovative YT Tales Share Your Life Journey
- Elevate Your Content YouTube Movie Maker 101 for 2024
- Free, Safe Steps to Extract Audio From YouTube Videos
- [Updated] Cutting-Edge PC Techniques for Stellar YouTube Video Production
- [New] Embrace the Pause Button 3 Techniques for Decelerating YouTube Video Playback (59 Chars, Slight Overage with Rich Content Justification)
- Final Flourishes Crafting Memorable Video Closures
- 2024 Approved Effortless Spotify-to-YouTube Playlist Conversion 5 Must-Have Apps
- The Rise of Virtual Personalities in Gaming Worlds
- [New] Channel Conclusion Mastery Customized Screens in Focus
- [New] Beauty Tutorials Unveiled Creating a YouTube Channel From Scratch
- [New] Breakthrough 8 Creators Dominating Video Space
- Navigating the Short-Form Space YouTube's Bite Vs. TikTok' Written by a Marketing Analyst with Expertise in Social Media Trends and Platforms.
- Navigate YouTube's Studio Editor to Master Videography
- Brief Video Joust The Showdown Between YouTubes Shorts and TikTok's Flavor for 2024
- Boosting Engagement Perfect Time-Stamping Techniques for Videos
- In 2024, Elevate Your Content with Top-Ranked YouTube Channels
- Settled Evasive Behavior of Shorts Content
- In 2024, Cultivating Commitment Gentle Subscription Strategies
- Addressing Missing Image Display in YouTubes Shorts for 2024
- The Ultimate Guide to Student-Centric Historical YT Channels
- Chronicles of Time Student-Approved Historical YT Content for 2024
- Drafting Dynamic News Endings
- 2024 Approved 5 Next-Level Editors to Transcend the Standard Youtube Videos
- Beyond Popularity – YouTube Earnings for 1M Viewer Base for 2024
- The Art of Combining Multiple iPhone Photos
- [Updated] Expert Tips for OBS and Facebook Integration
- How Do I Stop Someone From Tracking My Realme 11X 5G? | Dr.fone
- [Updated] Top 15 Simulation Games for Android for 2024
- [Updated] Navigating Through Instagram Video Hiccups for 2024
- 2024 Approved [Step-by-Step Guide] Find Your Own TikTok Stream Key
- Updated In 2024, How To Create A YouTube Intro
- [New] Stop Losses Maintaining Seamless OBS Recording for 2024
- Edit and Send Fake Location on Telegram For your Oppo A79 5G in 3 Ways | Dr.fone
- [New] How to Smoothly Embed Facebook Live on Your Site
- How to Mirror Vivo V29 to Mac? | Dr.fone
- [New] 2024 Approved Unlock the Potential of PC Games Recording in Win10
- Can I use iTools gpx file to catch the rare Pokemon On Xiaomi 14 Ultra | Dr.fone
- [New] Original Visual Storytelling Appraisal & Substitutions for 2024
- 2024 Approved Mastering TikTok's Popularity with #7 Iconic Emojis and Clandestine Icons
- How to use Device Manager to update drivers in Windows 11 & 10
- Best Pokemons for PVP Matches in Pokemon Go For Honor X7b | Dr.fone
- New Adobe Premiere Pro Must-Haves Top Plugins for Video Editors (Free & Premium)
- All You Need To Know About Mega Greninja For Nokia XR21 | Dr.fone
- [Updated] Elite 4 Covert Content Retrievers for 2024
- Updated Professional-Grade Glitch Video Editors Top Paid and Free Tools for Windows, Mac, and Online for 2024
- Updated Spring Fling Sale Wondershare Filmora Coupon Code - Limited Time Only for 2024
- 2024 Approved Get Noticed with a Professional Video Resume Top 4 Makers
- [New] In 2024, 5 Best Snipping Tool For Chromebook
- Best Phantom Slow-Mo Camera For Recording Slow Motion Videos
- Tailoring Auditory Experiences to Your Videos with Ease and Precision for 2024
- Easy Steps on How To Create a New Apple ID Account On Apple iPhone 6s | Dr.fone
- 7 Solutions to Fix Chrome Crashes or Wont Open on Motorola Moto G23 | Dr.fone
- 2024 Approved Recognizing Inactive Accounts by Snap
- [New] 2024 Approved Unparalleled 12 Solo-Focused Replay Apps
- In 2024, Decibel Defense Empowering Users to Tame Digital Audio Chaos
- In 2024, How to Transfer Contacts from Honor Magic Vs 2 to iPhone XS/11 | Dr.fone
- [New] Maximizing Engagement with Dual-Screen Broadcasting Techniques in Facebook
- 10+ Best Video Editing Apps for Kids
- 2024 Approved Getting Started with Mac Video Editing Tips for Choosing the Best Software
- Can Life360 Track You When Your Itel P55T is off? | Dr.fone
- Title: Best Budget Cameras for Creating Quality Vlogs for 2024
- Author: Steven
- Created at : 2024-05-25 18:49:35
- Updated at : 2024-05-26 18:49:35
- Link: https://youtube-clips.techidaily.com/best-budget-cameras-for-creating-quality-vlogs-for-2024/
- License: This work is licensed under CC BY-NC-SA 4.0.
