
:max_bytes(150000):strip_icc()/iPad-Pro-2024-Normal-04a9c15834e44801b665c308088cdf91.jpg)
"Best 7 High-Motion DSLRs for Dynamic Live Content Creation for 2024"
Best 7 High-Motion DSLRs for Dynamic Live Content Creation
Best 7 DSLR Vlogging Cameras

Shanoon Cox
Nov 01, 2022• Proven solutions
DSLR cameras are great for vloggers who are serious about filmmaking. But with so many DSLR cameras to choose from, it can be difficult to make a decision on one. We have come up with a list of seven of the best DSLR vlogging cameras to help you with your search.
WHAT TO LOOK FOR IN A VLOGGING CAMERA
1. Fully articulated screen (flip screen)
2. Good continual autofocus while recording video
3. Good focus priority through face recognition
4. Touch to focus
5. Good low-light performance
6. external mic jack, hot/cold shoe bracket
7. optical image stabilization
8. good battery life
Check out my full list of 10 Things To Look For In A Vlogging Camera to understand the importance of these camera features.
THE 7 BEST DSLR CAMERAS FOR VLOGGING
| Camera | Release Date | Sensor Size | Flip Screen | Mic Port | Price | |
|---|---|---|---|---|---|---|
| CanonEOS6D Mark II | 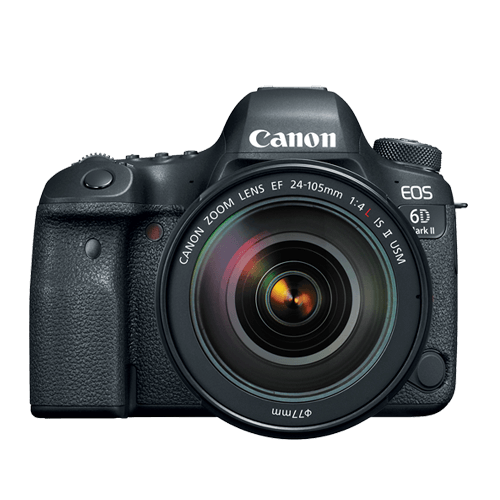 |
June2017 | Full frame(35.9 x 24 mm) | Fully Articulated | Yes | $$ |
| CanonEOS RebelSL2 | 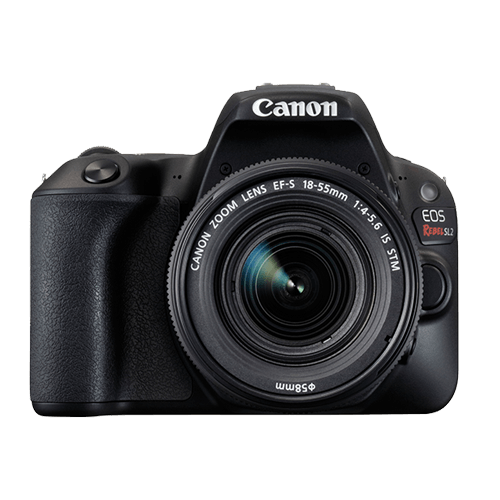 |
June2017 | APS-C(22.3 x 14.9 mm) | Fully Articulated | Yes | $ |
| CanonEOS RebelT7i | 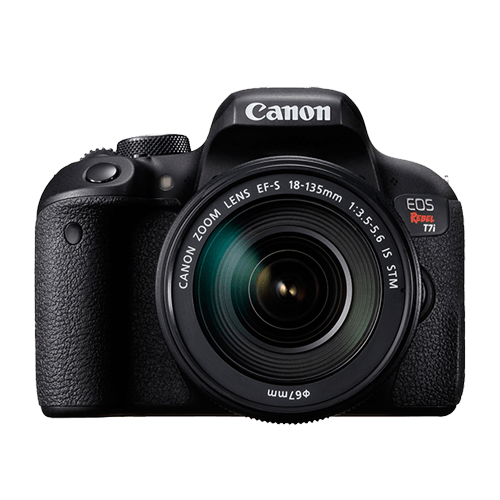 |
February2017 | APS-C(22.3 x 14.9 mm) | Fully Articulated | Yes | $- |
| CanonEOS77D | 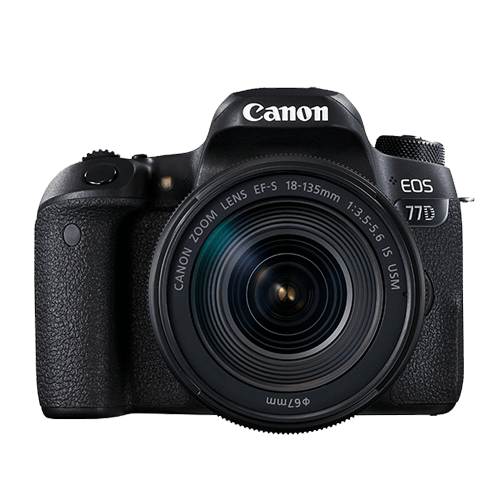 |
February2017 | APS-C(22.3 x 14.9 mm) | Fully Articulated | Yes | $- |
| NikonD5600 |  |
November2016 | APS-C(23.5 x 15.6 mm) | Fully Articulated | Yes | $- |
| CanonEOS5D Mark IV |  |
August2017 | Full frame(36 x 24 mm) | No | Yes | $$$ |
| CanonEOS80D |  |
February2016 | APS-C(22.5 x 15 mm) | Fully Articulated | Yes | $$ |
|
Best daily DSLR camera for vlogging: Canon EOS T7i The camera you use to record your daily vlogs doesn’t have to be the best camera on the market. It just has to offer enough options to make the process of making a vlog as smooth as it can possibly be. The T7i is not the most powerful DSLR camera out there, but its 24.2 MP APS-C CMOS sensor and a DIGIC 7 image processor are more than enough to meet the needs of most daily vloggers. You can record full HD 1080p videos at 60 fps and use this camera to create HDR and time-lapse movies. You can set the T7i’s ISO up as high as 51200, which is pretty good. The T7i’s dual pixel CMOS AF system makes sure that the camera focuses quickly and it helps you avoid creating video clips that are out focus. There’s also a built-in Wi-FI with an NFC feature that enables you to share your videos with a smartphone device you connect to the camera. PROS - Long battery life - Remarkable image quality at high ISO values CONS - Can’t record 4K videos - Viewfinder is tiny |
|---|---|
|
Best entry-level DSLR camera for vlogging: Canon EOS SL2 The Canon EOS SL2 was released just a year ago and it wins our 2018 vote for the best entry-level DSLR camera for vlogging. The SL2 packs a lot of features in a compact camera body. The camera only weighs 1 lb, which is considered light among most DSLR cameras. Many vloggers may enjoy the fact that they can hold up this light camera in front of themselves with more ease. Like a lot of entry-level DSLR cameras, the SL2 comes with an APS-C crop sensor. With ISO capabilities that can reach up to 51200, you’ll be able to film up to full HD 1080p videos at 60 fps, even under low light conditions. All recent Canon cameras perform very well when it comes to autofocus and the SL2 is no exception. It does, however, have fewer points of focus. The SL2 comes with a 9-point AF system. The SL2 also has a fully-articulated screen and a microphone jack. PROS - Microphone jack - Wi-Fi connectivity CONS - No 4K video support - Optical image stabilizer could be better |
|
Best mid-range DSLR camera for vlogging: Canon EOS 80D The Canon EOS 80D is the successor of the 70D which was at one time considered by many YouTubers the ultimate DSLR camera for vlogging. The 80D is a larger camera than the SL2, weighing 1.61 lbs. In its larger build, this camera additionally (compared to the SL2) packs a 45-point AF system, longer battery life, a headphone port, and it is environmentally sealed so you can shoot in tough conditions. This camera’s great performance in autofocusing makes it a great mid-range DSLR camera for vlogging. PROS - Feature-rich - Continuous AF feature performs beautifully while recording high-res videos CONS - Just one SD card slot - PC sync connection features could be better |
|
Best professional DSLR camera for vlogging: Canon EOS 6D Mark II There’s a lot of DSLR cameras that come with a fully-articulated screen and a microphone jack, but the Canon EOS 6D Mark II is actually the only one in the market that comes equipped with both of those, plus a full-frame sensor. It is its full-frame sensor that really sets this camera apart from the other vlogging DLSR cameras. Because of its full-frame sensor, this camera performs much better in low light conditions. With this larger sensor, you’ll also be able to capture footage that looks more cinematic with high-quality bokeh (more blur to your out-of-focus areas). The 6D Mark II also has great battery life compared to all the reviewed cameras above. Unfortunately, this camera does not shoot in 4K. PROS - ISO sensitivity goes up to 102400 - Amazing touchscreen controls CONS - No 4K video recording option - No USB 3.0 |
Want to compare even more cameras? Check out…
12 Best Vlogging Cameras
Top 11 Cheap Vlogging Cameras
8 Best Mirrorless Cameras For Vlogging
12 Best Vlogging Cameras With A Flip Screen
Shanoon Cox
Shanoon Cox is a writer and a lover of all things video.
Follow @Shanoon Cox
Shanoon Cox
Nov 01, 2022• Proven solutions
DSLR cameras are great for vloggers who are serious about filmmaking. But with so many DSLR cameras to choose from, it can be difficult to make a decision on one. We have come up with a list of seven of the best DSLR vlogging cameras to help you with your search.
WHAT TO LOOK FOR IN A VLOGGING CAMERA
1. Fully articulated screen (flip screen)
2. Good continual autofocus while recording video
3. Good focus priority through face recognition
4. Touch to focus
5. Good low-light performance
6. external mic jack, hot/cold shoe bracket
7. optical image stabilization
8. good battery life
Check out my full list of 10 Things To Look For In A Vlogging Camera to understand the importance of these camera features.
THE 7 BEST DSLR CAMERAS FOR VLOGGING
| Camera | Release Date | Sensor Size | Flip Screen | Mic Port | Price | |
|---|---|---|---|---|---|---|
| CanonEOS6D Mark II | |
June2017 | Full frame(35.9 x 24 mm) | Fully Articulated | Yes | $$ |
| CanonEOS RebelSL2 | |
June2017 | APS-C(22.3 x 14.9 mm) | Fully Articulated | Yes | $ |
| CanonEOS RebelT7i | |
February2017 | APS-C(22.3 x 14.9 mm) | Fully Articulated | Yes | $- |
| CanonEOS77D | |
February2017 | APS-C(22.3 x 14.9 mm) | Fully Articulated | Yes | $- |
| NikonD5600 | |
November2016 | APS-C(23.5 x 15.6 mm) | Fully Articulated | Yes | $- |
| CanonEOS5D Mark IV | |
August2017 | Full frame(36 x 24 mm) | No | Yes | $$$ |
| CanonEOS80D | |
February2016 | APS-C(22.5 x 15 mm) | Fully Articulated | Yes | $$ |
|
Best daily DSLR camera for vlogging: Canon EOS T7i The camera you use to record your daily vlogs doesn’t have to be the best camera on the market. It just has to offer enough options to make the process of making a vlog as smooth as it can possibly be. The T7i is not the most powerful DSLR camera out there, but its 24.2 MP APS-C CMOS sensor and a DIGIC 7 image processor are more than enough to meet the needs of most daily vloggers. You can record full HD 1080p videos at 60 fps and use this camera to create HDR and time-lapse movies. You can set the T7i’s ISO up as high as 51200, which is pretty good. The T7i’s dual pixel CMOS AF system makes sure that the camera focuses quickly and it helps you avoid creating video clips that are out focus. There’s also a built-in Wi-FI with an NFC feature that enables you to share your videos with a smartphone device you connect to the camera. PROS - Long battery life - Remarkable image quality at high ISO values CONS - Can’t record 4K videos - Viewfinder is tiny |
|---|---|
|
Best entry-level DSLR camera for vlogging: Canon EOS SL2 The Canon EOS SL2 was released just a year ago and it wins our 2018 vote for the best entry-level DSLR camera for vlogging. The SL2 packs a lot of features in a compact camera body. The camera only weighs 1 lb, which is considered light among most DSLR cameras. Many vloggers may enjoy the fact that they can hold up this light camera in front of themselves with more ease. Like a lot of entry-level DSLR cameras, the SL2 comes with an APS-C crop sensor. With ISO capabilities that can reach up to 51200, you’ll be able to film up to full HD 1080p videos at 60 fps, even under low light conditions. All recent Canon cameras perform very well when it comes to autofocus and the SL2 is no exception. It does, however, have fewer points of focus. The SL2 comes with a 9-point AF system. The SL2 also has a fully-articulated screen and a microphone jack. PROS - Microphone jack - Wi-Fi connectivity CONS - No 4K video support - Optical image stabilizer could be better |
|
Best mid-range DSLR camera for vlogging: Canon EOS 80D The Canon EOS 80D is the successor of the 70D which was at one time considered by many YouTubers the ultimate DSLR camera for vlogging. The 80D is a larger camera than the SL2, weighing 1.61 lbs. In its larger build, this camera additionally (compared to the SL2) packs a 45-point AF system, longer battery life, a headphone port, and it is environmentally sealed so you can shoot in tough conditions. This camera’s great performance in autofocusing makes it a great mid-range DSLR camera for vlogging. PROS - Feature-rich - Continuous AF feature performs beautifully while recording high-res videos CONS - Just one SD card slot - PC sync connection features could be better |
|
Best professional DSLR camera for vlogging: Canon EOS 6D Mark II There’s a lot of DSLR cameras that come with a fully-articulated screen and a microphone jack, but the Canon EOS 6D Mark II is actually the only one in the market that comes equipped with both of those, plus a full-frame sensor. It is its full-frame sensor that really sets this camera apart from the other vlogging DLSR cameras. Because of its full-frame sensor, this camera performs much better in low light conditions. With this larger sensor, you’ll also be able to capture footage that looks more cinematic with high-quality bokeh (more blur to your out-of-focus areas). The 6D Mark II also has great battery life compared to all the reviewed cameras above. Unfortunately, this camera does not shoot in 4K. PROS - ISO sensitivity goes up to 102400 - Amazing touchscreen controls CONS - No 4K video recording option - No USB 3.0 |
Want to compare even more cameras? Check out…
12 Best Vlogging Cameras
Top 11 Cheap Vlogging Cameras
8 Best Mirrorless Cameras For Vlogging
12 Best Vlogging Cameras With A Flip Screen
Shanoon Cox
Shanoon Cox is a writer and a lover of all things video.
Follow @Shanoon Cox
Optimizing Your Online Video Strategy: YouTube + TikTok
Best Video Editor for Beginners on Windows and Mac
Wondershare Filmora is one of the most popular video editing software among TikTokers , download and have a try.
There is no better time for singers, actors, and content creators to join TikTok. With over a billion downloads, TikTok is now more influential than ever. Here, you can consider all TikTok users to be prospective audiences or followers. Videos go viral every day, and a substantial portion of them come from a single source: TikTok.
The massively popular short-video app is the latest craze, with individuals from all over the world using it to watch and produce content. Instagram stars, YouTube stars, and even real-life movie stars have switched to this platform, so what’s stopping you? It has so much to offer. Both seem to work in a connected way as Tiktok stars are seen converting videos from YouTube to TikTok.
In this article
01 How to Link a YouTube Video to TikTok Post?
02 How to Convert YouTube Video and Post to TikTok? [3 ways]
Part 1: How to Link a YouTube Video to TikTok Post?
There is no social network available online that gives more relevancy, popularity, and engagement than TikTok. Even though Tiktok’s operations were only launched outside of China a few years ago, Tiktok has entirely taken over the social sphere when it comes to producing amusing and enjoyable short videos, which has been seen after a very long time after the app ‘VINE’ was shut down back in 2016.
You can reap multiple benefits if you’re a content creator by connecting all your social media platforms. You can extend your reach and exposure to an immense number of people by linking your YouTube video to the TikTok post. Let’s look at your options of connecting videos from YouTube to TikTok and highlight how to connect TikTok to YouTube.
Step 1: Open the TikTok app on your phone and tap on your profile option.
Step 2: Tap on the edit profile option and further select Add YouTube to Your Profile option.
Note: If you haven’t previously linked your YouTube account to your TikTok channel, tapping on this will very certainly take you to another page with the Google login screen.
Step 3: Click on “Allow” option. By tapping on this, your YouTube channel will display as a link in your bio area.
Note: However, as we continue with this knowledge, it is worth noting that when you put your channel description and links under the videos you publish, the link is not always clickable. It is recommended that you keep with the bio section and conclude your short films by urging your viewers to visit your YouTube channel, which is included in the bio of your Tiktok profile.
Part 2: How to Convert YouTube Video and Post to TikTok? [3 ways]
Further, we feel that differences in posting (such as formats, aspect ratios , and durations) should be accounted for when YouTube videos are converted into TikTok videos. Tiktok offers a 9:16 aspect ratio compared to most videos on YouTube, where the aspect ratio is primarily 16:9.
As for the format, the resolution can only be set to 1080p since TikTok only supports it to utilize the entire canvas. Tiktok is a platform that promotes videos ranging from 15 seconds to 3 minutes, compared to its initial support for content up to 15 seconds only. You will most likely have to resize your video if you plan to share it on Tiktok with all the above elements. Here are some of the video dimension details for TikTok.
- Dimensions: 1080 x 1920
- Resolution: 9:16 Aspect Ratio
- File Format:.mp4 or .mov
- Code: encoded
We might have left you perplexed with all the information about how to connect TikTok to YouTube, but don’t worry, here are a variety of apps and a step-by-step guide for posting your videos on Tiktok without any issues.
1. Kapwing Studio
Within the various applications available, Kapwing Studio provides users with support and resources to help them edit and convert their YouTube videos to TikTok. It allows creators to upload the video from anywhere, anytime, via media library support since it is a web-base video editor. Moreover, Kapwing supports .mp4, .mov, .png, .gif, .jpg, .avi and plenty of other formats as well. All in all, Kapwing can be a complete transcoding and conversion package to optimize and convert your YouTube videos to post on TikTok.
Step 1: Copy the YouTube Video’s link
To get started, go to YouTube and search for the video you wish to convert. You can copy the link by right-clicking on YouTube’s video and paste it on Kapwing directly.
Note: Alternatively, if you’re already logged in, choose Create New Project. This will lead you to the Kapwing Studio, on which you can access all of Kapwing’s video editing capabilities in a single location.
Step 2: Resize YouTube video to 9:16
Double click the video in the timeline, and then click the Crop menu on the right top corner. To convert a YouTube video to TikTok, click the 9:16 option to start. Or, you can move the handles in the timeline until it reaches the precise length you need.
Note: When you process your video, make sure it has a 9:16 aspect ratio so it will fit on TikTok.

Step 3: Download & share on TikTok!
After you’ve uploaded your video to the Studio, just select the Export Video option in the upper right corner to save your video and share it on TikTok.
2. Kamua
On TikTok, content always takes precedence. One strategy to grow your TikTok audience is to convert your existing YouTube videos to post, and Kamua is the perfect tool for this! Kamua, a cloud-based video tool, allows creators to resize, crop, edit and save videos. Everything, including cutting, retouching, and repurposing of the video, is available in a single place.
Perhaps you have some daring, humorous, or legendary videos in a neglected collection that would be perfect for a TikTok trend or challenge- it’s time to edit them with Kamua! Transforming Landscape films vertically into the 9:16 aspect ratio is now easier and faster than ever before with Kamua.
Step 1: Copy the YouTube Video link and paste it into the Kamua.
Note: You can right-click on any video on YouTube to copy the link or click on the Share option.

Step 2: To turn on AutoCrop, select the Portrait (9:16) setting under the Settings menu on the left. You can also choose Remove Black Bars to resize the video.

Note: To preview how your videos would look on a TikTok mobile app, click the Phone symbol underneath the video
Step 3: Once done, click on the render project option in the below right corner to save the optimized video file. To watch the final video or to download it, click on the Outputs option. From here, you can watch as well as download your video.
3. Use Auto Reframe Feature in Filmora Video Editor
Auto Reframe , as clear from the name, can automatically visualize and detect the video’s focal point to resize or crop it in an optimal way. The Auto Reframe tool can identify a moving item in any video and rapidly trim it to multiple aspect ratios. What initially took hours, if not days, of editing may now be completed in moments with Filmora. You can also manually set the focal point in any video to adjust the aspect ratio and preferences as per your choice.
If you frequently have to upload videos to your social networking networks such as YouTube, Instagram, Facebook, and TikTok, Filmora will ease your life! We’ll teach you how to utilize Filmora’s Auto-Reframe option to reframe sequences for your YouTube to TikTok videos in the below-listed steps.
Step 1: Start by Launching Filmora on your device. Choose the Auto Reframe option from the starting window.

Step 2:Click on Import Media and select the video file you wish to convert. A separate dialogue box will open. From here, choose the aspect ratio and click on Analyze. The reframing process will start automatically.

You can choose from five different aspect ratios: square (1:1), vertical (9:16), standard (4:3), widescreen (16:9), and cinema (21:9). You can also adjust the frame’s dimensions by moving the crop box.

Step 3: When you’re through with the adjustments and reframing, click the Export option to preserve your work.

Note: Click Save after you enter a file name and select a destination folder. Add music, titles, effects, or transitions to improve the clip. You can move the clip to the timeline for more editing. You can share and save your video on TikTok once you have completed editing by clicking the Export option.
This vido tutorial introduces several ways to convert a 16:9 YouTube video to TikTok in Filmora. Download this smart auto reframe tool now and have a try.
For Win 7 or later (64-bit)
For macOS 10.12 or later
Conclusion
Good luck with your endeavors as a content creator, musician, comedian, or whatever else you choose. This article heavily emphasized on how you can convert YouTube to TikTok and be famous. Still, you can also reverse this process by posting your TikTok username on YouTube and in your YouTube videos. We hope this article has proved out to be helpful, if you have any further questions, don’t hesitate to contact us.
There is no better time for singers, actors, and content creators to join TikTok. With over a billion downloads, TikTok is now more influential than ever. Here, you can consider all TikTok users to be prospective audiences or followers. Videos go viral every day, and a substantial portion of them come from a single source: TikTok.
The massively popular short-video app is the latest craze, with individuals from all over the world using it to watch and produce content. Instagram stars, YouTube stars, and even real-life movie stars have switched to this platform, so what’s stopping you? It has so much to offer. Both seem to work in a connected way as Tiktok stars are seen converting videos from YouTube to TikTok.
In this article
01 How to Link a YouTube Video to TikTok Post?
02 How to Convert YouTube Video and Post to TikTok? [3 ways]
Part 1: How to Link a YouTube Video to TikTok Post?
There is no social network available online that gives more relevancy, popularity, and engagement than TikTok. Even though Tiktok’s operations were only launched outside of China a few years ago, Tiktok has entirely taken over the social sphere when it comes to producing amusing and enjoyable short videos, which has been seen after a very long time after the app ‘VINE’ was shut down back in 2016.
You can reap multiple benefits if you’re a content creator by connecting all your social media platforms. You can extend your reach and exposure to an immense number of people by linking your YouTube video to the TikTok post. Let’s look at your options of connecting videos from YouTube to TikTok and highlight how to connect TikTok to YouTube.
Step 1: Open the TikTok app on your phone and tap on your profile option.
Step 2: Tap on the edit profile option and further select Add YouTube to Your Profile option.
Note: If you haven’t previously linked your YouTube account to your TikTok channel, tapping on this will very certainly take you to another page with the Google login screen.
Step 3: Click on “Allow” option. By tapping on this, your YouTube channel will display as a link in your bio area.
Note: However, as we continue with this knowledge, it is worth noting that when you put your channel description and links under the videos you publish, the link is not always clickable. It is recommended that you keep with the bio section and conclude your short films by urging your viewers to visit your YouTube channel, which is included in the bio of your Tiktok profile.
Part 2: How to Convert YouTube Video and Post to TikTok? [3 ways]
Further, we feel that differences in posting (such as formats, aspect ratios , and durations) should be accounted for when YouTube videos are converted into TikTok videos. Tiktok offers a 9:16 aspect ratio compared to most videos on YouTube, where the aspect ratio is primarily 16:9.
As for the format, the resolution can only be set to 1080p since TikTok only supports it to utilize the entire canvas. Tiktok is a platform that promotes videos ranging from 15 seconds to 3 minutes, compared to its initial support for content up to 15 seconds only. You will most likely have to resize your video if you plan to share it on Tiktok with all the above elements. Here are some of the video dimension details for TikTok.
- Dimensions: 1080 x 1920
- Resolution: 9:16 Aspect Ratio
- File Format:.mp4 or .mov
- Code: encoded
We might have left you perplexed with all the information about how to connect TikTok to YouTube, but don’t worry, here are a variety of apps and a step-by-step guide for posting your videos on Tiktok without any issues.
1. Kapwing Studio
Within the various applications available, Kapwing Studio provides users with support and resources to help them edit and convert their YouTube videos to TikTok. It allows creators to upload the video from anywhere, anytime, via media library support since it is a web-base video editor. Moreover, Kapwing supports .mp4, .mov, .png, .gif, .jpg, .avi and plenty of other formats as well. All in all, Kapwing can be a complete transcoding and conversion package to optimize and convert your YouTube videos to post on TikTok.
Step 1: Copy the YouTube Video’s link
To get started, go to YouTube and search for the video you wish to convert. You can copy the link by right-clicking on YouTube’s video and paste it on Kapwing directly.
Note: Alternatively, if you’re already logged in, choose Create New Project. This will lead you to the Kapwing Studio, on which you can access all of Kapwing’s video editing capabilities in a single location.
Step 2: Resize YouTube video to 9:16
Double click the video in the timeline, and then click the Crop menu on the right top corner. To convert a YouTube video to TikTok, click the 9:16 option to start. Or, you can move the handles in the timeline until it reaches the precise length you need.
Note: When you process your video, make sure it has a 9:16 aspect ratio so it will fit on TikTok.
Step 3: Download & share on TikTok!
After you’ve uploaded your video to the Studio, just select the Export Video option in the upper right corner to save your video and share it on TikTok.
2. Kamua
On TikTok, content always takes precedence. One strategy to grow your TikTok audience is to convert your existing YouTube videos to post, and Kamua is the perfect tool for this! Kamua, a cloud-based video tool, allows creators to resize, crop, edit and save videos. Everything, including cutting, retouching, and repurposing of the video, is available in a single place.
Perhaps you have some daring, humorous, or legendary videos in a neglected collection that would be perfect for a TikTok trend or challenge- it’s time to edit them with Kamua! Transforming Landscape films vertically into the 9:16 aspect ratio is now easier and faster than ever before with Kamua.
Step 1: Copy the YouTube Video link and paste it into the Kamua.
Note: You can right-click on any video on YouTube to copy the link or click on the Share option.
Step 2: To turn on AutoCrop, select the Portrait (9:16) setting under the Settings menu on the left. You can also choose Remove Black Bars to resize the video.
Note: To preview how your videos would look on a TikTok mobile app, click the Phone symbol underneath the video
Step 3: Once done, click on the render project option in the below right corner to save the optimized video file. To watch the final video or to download it, click on the Outputs option. From here, you can watch as well as download your video.
3. Use Auto Reframe Feature in Filmora Video Editor
Auto Reframe , as clear from the name, can automatically visualize and detect the video’s focal point to resize or crop it in an optimal way. The Auto Reframe tool can identify a moving item in any video and rapidly trim it to multiple aspect ratios. What initially took hours, if not days, of editing may now be completed in moments with Filmora. You can also manually set the focal point in any video to adjust the aspect ratio and preferences as per your choice.
If you frequently have to upload videos to your social networking networks such as YouTube, Instagram, Facebook, and TikTok, Filmora will ease your life! We’ll teach you how to utilize Filmora’s Auto-Reframe option to reframe sequences for your YouTube to TikTok videos in the below-listed steps.
Step 1: Start by Launching Filmora on your device. Choose the Auto Reframe option from the starting window.
Step 2:Click on Import Media and select the video file you wish to convert. A separate dialogue box will open. From here, choose the aspect ratio and click on Analyze. The reframing process will start automatically.
You can choose from five different aspect ratios: square (1:1), vertical (9:16), standard (4:3), widescreen (16:9), and cinema (21:9). You can also adjust the frame’s dimensions by moving the crop box.
Step 3: When you’re through with the adjustments and reframing, click the Export option to preserve your work.
Note: Click Save after you enter a file name and select a destination folder. Add music, titles, effects, or transitions to improve the clip. You can move the clip to the timeline for more editing. You can share and save your video on TikTok once you have completed editing by clicking the Export option.
This vido tutorial introduces several ways to convert a 16:9 YouTube video to TikTok in Filmora. Download this smart auto reframe tool now and have a try.
For Win 7 or later (64-bit)
For macOS 10.12 or later
Conclusion
Good luck with your endeavors as a content creator, musician, comedian, or whatever else you choose. This article heavily emphasized on how you can convert YouTube to TikTok and be famous. Still, you can also reverse this process by posting your TikTok username on YouTube and in your YouTube videos. We hope this article has proved out to be helpful, if you have any further questions, don’t hesitate to contact us.
Also read:
- In 2024, Elevating Audio Rates on YouTube Dual Device Approach
- Downloading the Latest Hits Top YouTube Playlist Savers for PC
- [New] Achieve Perfect Views with Aspect Ratio Knowledge on YOUTUBE
- Where Creativity Meets Technology in YouTube Studio
- In 2024, Dual-Watch Dynamics Navigating YouTube in Parallel
- [New] Elevating Your YouTube Projects with Enhancements
- In 2024, Essential 20 YouTube Playlists Bringing You the Beat
- 10 Best YouTube Stations for Market Reports for 2024
- [Updated] Essential Illumination Strategies for Filming
- [New] 2024'S Lightning-Fast Video Growth Reaching 100 Million Quickly
- 2024 Approved Directly Download YouTube Videos
- YouTube's Everlasting Titles with Millions of Viewers
- [Updated] Channel Cash Crusade Harnessing Every Device with YT Studio
- The Essentials for Transforming Your Google Meet Into Youtube Live
- Champion Toolkit 10 Budget-Friendly Caption Extractors for 2024
- Achieve More Engagement on YouTube Learn the Best Thumbnail Size for 2024
- 15 DIY Music Production Tutorial Videos for Home Studios for 2024
- Key Video Beginnings Identifying the Best 16 for More Watches
- [New] Creating a Singular Stream From Diverse YouTube Videos
- [Updated] Easy Replay on iPhone Set Videos Cycling
- In 2024, Crafting Impactful Video Campaigns for Startups
- Delightful, No-Cost Access to YouTube's Nine Full-Length Yule Celebrations
- Brand Your Content Download Complimentary Templates for YouTube Makers for 2024
- Best FreeFire YouTube Hashtags and Tips For YouTube Gaming Videos
- In 2024, Charting a Course Through YouTube's Maker Domain
- 2024 Approved A Deep Dive Into YouTube's Latest Monetization Policy
- Effortless Transition From Spotify to YouTube Find the Best Apps
- [New] Boost Your Channels A Guide to Best YouTube SEO Resources
- In 2024, Enhancing Presentations Adding YouTube to Google Slides
- [New] Building a Cross-Platform Social Media Presence
- Contrasting YouTube's Ownership Norms with CC Ideals for 2024
- [New] Demystifying YouTube's Video Editing Power
- Captivating Viewers with Youtube's Visual Polishing
- Continuous Streams Perfect Loops of YouTube Videos for TVs for 2024
- Toddler Tycoon Ryan Kaji and the Wealthy Web World
- [Updated] Cultivating a Distinctive Presence in the Marketplace
- Easy Loop Keeping iPhone Videos Running for 2024
- Removing Advertisements From YouTube Videos on Chrome/Firefox
- [New] Surrender to Serenity Top 10 Game Guides
- 2024 Approved Exclusive Look Top 5 Value-for-Money Gaming Mice & Keyboards
- In 2024, How to Remove and Reset Face ID on Apple iPhone 13 Pro
- New Cut, Edit, Repeat Top 10 Free Video Editing Software for Chromebooks for 2024
- 3 Effective Methods to Fake GPS location on Android For your Oppo A1x 5G | Dr.fone
- [Updated] Filmmaker’s Finesse for Fabulous TikTok Reactions with Filmora Pro Tools
- Top 10 Password Cracking Tools For Samsung Galaxy F15 5G
- Fixing Persistent Pandora Crashes on Vivo Y200 | Dr.fone
- Updated Top 10 Free Video Editing Programs for Windows 10 with Trimming Features
- In 2024, How Many Attempts To Unlock iPhone 13 mini | Dr.fone
- [Updated] 2024 Approved Elevate Your Social Storytelling with Added Musicality
- How to Mirror Apple iPhone 6s to PC via USB? | Dr.fone
- [New] Are High-End TVs with Aurora HDR Worth It? Analyzed
- [Updated] 2024 Approved Unveiling the Hidden Gems in Discord Stickers
- Unlock the Secret to Insta Cash with Our Guidebook
- 2024 Approved Melody & Motion Crafting Music Video Beats That Drive Visual Narratives Forward
- [Updated] Premier Microphones for University Podcasts
- New What Is AI Advertising, In 2024
- [New] Frameworks for Dynamic FB Video Marketing for 2024
- Essential Insights Into the Functionality of TwistedWave Sound Editing Software for 2024
- Quick Tips for Converting Snapshots Directly From the App for 2024
- Title: "Best 7 High-Motion DSLRs for Dynamic Live Content Creation for 2024"
- Author: Steven
- Created at : 2024-05-25 18:49:22
- Updated at : 2024-05-26 18:49:22
- Link: https://youtube-clips.techidaily.com/best-7-high-motion-dslrs-for-dynamic-live-content-creation-for-2024/
- License: This work is licensed under CC BY-NC-SA 4.0.
