
:max_bytes(150000):strip_icc()/close-up-of-male-hands-holding-an-arduino-microcontroller-board-640998456-5bd360ffc9e77c00261958a9.jpg)
"2024 Approved Discovering the Power Behind YouTube Statistics Interpretation"
Discovering the Power Behind YouTube Statistics Interpretation
How to View YouTube Statistics

Richard Bennett
Oct 26, 2023• Proven solutions
Learn how to view YouTube statistics and you can grow your channel faster. By paying attention to your statistics, which are available for free to every YouTuber in the Analytics section of the Creator Studio, you will be able to see how successful your individual videos are and replicate that success.
The information available for each video includes how many new subscribers it attracted and how much watch time it has so far (which is important if you want to monetize someday). By looking at which videos are performing well in these areas you can determine what you are doing right and replicate that success in future videos.
- How to View Your YouTube Statistics
- Interpreting YouTube Watch Time Reports
- Interpreting YouTube Interaction Reports
- How to View Other People’s YouTube Statistics
Making Better YouTube Videos with Filmora to Get More Views
As one of the best video editing software for YouTube, Filmora provides lots of templates and effects with an intuitive interface, which saves much time. After editing, you can upload the video to YouTube directly when export. Download the free trial version below and start making YouTube videos with Filmora.


How to View Your YouTube Statistics
In order to view your YouTube Analytics, sign in to your YouTube account and go to your Creator Studio. From there, click into the Analytics tab in the menu on the left of your screen.
In order to check which of your videos are performing the best, click on Watch time under Watch time reports. At the top of the page there’ll be a graph of your watch time in general, and if you scroll down you’ll see a list of your videos ranked by watch time. The best performing ones will be at the top and, to see more stats related to these high-performing videos, simply click on their titles. Afterwards, you’ll be able to click around the different sections in your Analytics and see reports relating to the specific video you clicked on.
The two main types of analytics reports are Watch Time Reports and Interaction Reports.
1. Interpreting YouTube Watch Time Reports
To find Watch time reports you just need to log into your Google account, go to the Creator studio, click the analytics tab, and then click on watch time. You can see the watch time of every video on your channel, which is important data to have because watch time is the most important factor when it comes to ranking your video in search results.
A watch time report includes the total amount of time that your video, or a selection of videos, is actually being watched for. In order to make sure that you are publishing only quality videos you need to make sure that your viewers are consistently sticking to your videos and watching them all away through, or at least to the half-way mark. Watch time represents one of the most meaningful metrics in ensuring that you are engaging your audience.
YouTube analytics can now display a watch time of every video that you have produced. Seeing the metrics on how long people are actually watching every video that you produce can show you what you’ve done right in the past and what you need to do more of to continue raising your watch time.
Alongside watch time you can see the average duration individual viewers are watching your videos for. The average percentage of your video that gets viewed will showcase areas where you may be struggling with your video content. For example, if an abnormally high number of viewers are clicking away during your intro, there’s probably something about that clip that needs to be changed.
In the watch time reports for individual videos, you will be able to see data on where your views are coming from and which demographics are watching the most. Where your viewers are watching, in terms of desktop or mobile, is also interesting data that is available in this section.
Click here for more tips onincreasing your views .
2. Interpreting YouTube Interaction Reports
Interaction reports are related to the actions viewers take – i.e. subscribing to your channel, liking your videos, or leaving a comments. You can find interaction reports in the Creator Studio under Analytics.
Interaction reports can be broken down into several different reports that can help determine the overall performance of any YouTube videos. The main interaction reports that you should be interested in include:
1. Subscribers: You can find extensive data on your subscribers, like demographics including age groups and gender. Learning more about your subscribers can help you to tailor your content. For example, if you learn that your viewers are mostly young women under 24 in the USA, you can do research into what is currently popular with young women under 24 in the USA.
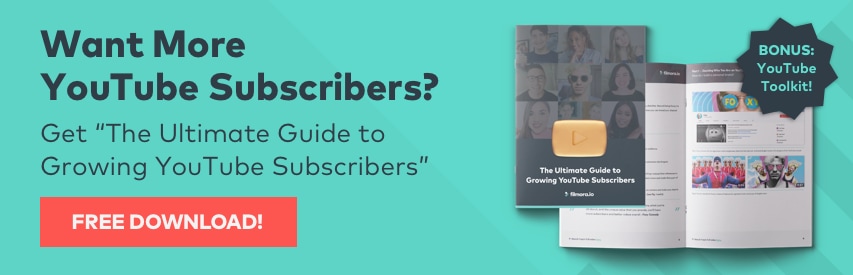
Want to see your subscriber count in real-time?
2. Likes and dislikes: Likes and dislikes aren’t a powerful metric when it comes to search engine rankings, but they provide useful information to creators. If you’re getting a lot of dislikes on a video, you should look into why. If you’re getting a lot of likes on a video, it can indicate that you should focus on creating similar content.
3. Playlists: A viewer watching a video in a playlist is much more likely to keep watching more videos from that playlist, making playlists great for the growth of your channel. Reports in this section will help you figure out which of your playlists is performing best, which could give you an idea of which types of videos or video topics are going over best with your viewers.
4. Comments: Reading comments is a great way to figure out what your viewers think, but that’s not all they’re good for. If viewers return to a video to continue talking to you or other viewers then that will drive up your views and watch time. If a video is especially good at generating discussion, you should figure out why (i.e. your sign-off question) and keep doing it.
5. Sharing: Discovering where your video is being shared can be important for figuring out what platforms you should be on besides YouTube. If your video is shared and viewed a lot on Twitter, you should consider making a Twitter account for your channel.
6. Cards: Tracking the performance of your Cards will help you optimize them to direct traffic between your videos. By testing out different time stamps for cards you’ll find the perfect places to put them. By trying different messages in your cards you’ll learn how to write ‘calls to action’ that mobilize your viewers.
End screens: End Screens are essential for keeping viewers on your channel. The report of the click-through rates of your end screens is important for helping you figure out which kinds of links work, and which style of ends screen is most effective for you. Are people more likely to click when you talk to them through the end screen, or when it’s a static card?
7. 360 heat map reports: A heat map report works specifically with 360° videos if you are choosing to engage your audience with this type of content. Viewing YouTube video statistics for 360° heat maps will help to show the areas on your video that viewers are most interested in.
How to View Other Peoples YouTube Statistics
If you want to check out the statistics of rival YouTube channels (including the most subscribed channels on YouTube ), or channels you’re a fan of, try using Social Blade . Social Blade is one of the most trusted sources of YouTube data, and it may actually be easier to check your own basic stats there than in the Creator Studio sometimes due to their simple layout. To get started all you need to do is type the name of any YouTube channel into the search bar. You’ll be able to see reports on daily views, channel growth, and even estimated ad revenue (learn more about how to view a channel’s ad revenue here ).
Now that you know how to view YouTube statistics, what will you do with them?
Richard Bennett
Richard Bennett is a writer and a lover of all things video.
Follow @Richard Bennett
Richard Bennett
Oct 26, 2023• Proven solutions
Learn how to view YouTube statistics and you can grow your channel faster. By paying attention to your statistics, which are available for free to every YouTuber in the Analytics section of the Creator Studio, you will be able to see how successful your individual videos are and replicate that success.
The information available for each video includes how many new subscribers it attracted and how much watch time it has so far (which is important if you want to monetize someday). By looking at which videos are performing well in these areas you can determine what you are doing right and replicate that success in future videos.
- How to View Your YouTube Statistics
- Interpreting YouTube Watch Time Reports
- Interpreting YouTube Interaction Reports
- How to View Other People’s YouTube Statistics
Making Better YouTube Videos with Filmora to Get More Views
As one of the best video editing software for YouTube, Filmora provides lots of templates and effects with an intuitive interface, which saves much time. After editing, you can upload the video to YouTube directly when export. Download the free trial version below and start making YouTube videos with Filmora.
How to View Your YouTube Statistics
In order to view your YouTube Analytics, sign in to your YouTube account and go to your Creator Studio. From there, click into the Analytics tab in the menu on the left of your screen.
In order to check which of your videos are performing the best, click on Watch time under Watch time reports. At the top of the page there’ll be a graph of your watch time in general, and if you scroll down you’ll see a list of your videos ranked by watch time. The best performing ones will be at the top and, to see more stats related to these high-performing videos, simply click on their titles. Afterwards, you’ll be able to click around the different sections in your Analytics and see reports relating to the specific video you clicked on.
The two main types of analytics reports are Watch Time Reports and Interaction Reports.
1. Interpreting YouTube Watch Time Reports
To find Watch time reports you just need to log into your Google account, go to the Creator studio, click the analytics tab, and then click on watch time. You can see the watch time of every video on your channel, which is important data to have because watch time is the most important factor when it comes to ranking your video in search results.
A watch time report includes the total amount of time that your video, or a selection of videos, is actually being watched for. In order to make sure that you are publishing only quality videos you need to make sure that your viewers are consistently sticking to your videos and watching them all away through, or at least to the half-way mark. Watch time represents one of the most meaningful metrics in ensuring that you are engaging your audience.
YouTube analytics can now display a watch time of every video that you have produced. Seeing the metrics on how long people are actually watching every video that you produce can show you what you’ve done right in the past and what you need to do more of to continue raising your watch time.
Alongside watch time you can see the average duration individual viewers are watching your videos for. The average percentage of your video that gets viewed will showcase areas where you may be struggling with your video content. For example, if an abnormally high number of viewers are clicking away during your intro, there’s probably something about that clip that needs to be changed.
In the watch time reports for individual videos, you will be able to see data on where your views are coming from and which demographics are watching the most. Where your viewers are watching, in terms of desktop or mobile, is also interesting data that is available in this section.
Click here for more tips onincreasing your views .
2. Interpreting YouTube Interaction Reports
Interaction reports are related to the actions viewers take – i.e. subscribing to your channel, liking your videos, or leaving a comments. You can find interaction reports in the Creator Studio under Analytics.
Interaction reports can be broken down into several different reports that can help determine the overall performance of any YouTube videos. The main interaction reports that you should be interested in include:
1. Subscribers: You can find extensive data on your subscribers, like demographics including age groups and gender. Learning more about your subscribers can help you to tailor your content. For example, if you learn that your viewers are mostly young women under 24 in the USA, you can do research into what is currently popular with young women under 24 in the USA.
Want to see your subscriber count in real-time?
2. Likes and dislikes: Likes and dislikes aren’t a powerful metric when it comes to search engine rankings, but they provide useful information to creators. If you’re getting a lot of dislikes on a video, you should look into why. If you’re getting a lot of likes on a video, it can indicate that you should focus on creating similar content.
3. Playlists: A viewer watching a video in a playlist is much more likely to keep watching more videos from that playlist, making playlists great for the growth of your channel. Reports in this section will help you figure out which of your playlists is performing best, which could give you an idea of which types of videos or video topics are going over best with your viewers.
4. Comments: Reading comments is a great way to figure out what your viewers think, but that’s not all they’re good for. If viewers return to a video to continue talking to you or other viewers then that will drive up your views and watch time. If a video is especially good at generating discussion, you should figure out why (i.e. your sign-off question) and keep doing it.
5. Sharing: Discovering where your video is being shared can be important for figuring out what platforms you should be on besides YouTube. If your video is shared and viewed a lot on Twitter, you should consider making a Twitter account for your channel.
6. Cards: Tracking the performance of your Cards will help you optimize them to direct traffic between your videos. By testing out different time stamps for cards you’ll find the perfect places to put them. By trying different messages in your cards you’ll learn how to write ‘calls to action’ that mobilize your viewers.
End screens: End Screens are essential for keeping viewers on your channel. The report of the click-through rates of your end screens is important for helping you figure out which kinds of links work, and which style of ends screen is most effective for you. Are people more likely to click when you talk to them through the end screen, or when it’s a static card?
7. 360 heat map reports: A heat map report works specifically with 360° videos if you are choosing to engage your audience with this type of content. Viewing YouTube video statistics for 360° heat maps will help to show the areas on your video that viewers are most interested in.
How to View Other Peoples YouTube Statistics
If you want to check out the statistics of rival YouTube channels (including the most subscribed channels on YouTube ), or channels you’re a fan of, try using Social Blade . Social Blade is one of the most trusted sources of YouTube data, and it may actually be easier to check your own basic stats there than in the Creator Studio sometimes due to their simple layout. To get started all you need to do is type the name of any YouTube channel into the search bar. You’ll be able to see reports on daily views, channel growth, and even estimated ad revenue (learn more about how to view a channel’s ad revenue here ).
Now that you know how to view YouTube statistics, what will you do with them?
Richard Bennett
Richard Bennett is a writer and a lover of all things video.
Follow @Richard Bennett
Increase Viewership Quickly: Smart Streaming Across Platforms Like Youtube and Twitch
Youtube Video Maker - Wondershare Filmora
Provide abundant video effects - A creative video editor
Powerful color correction and grading
Detailed tutorials provided by the official channel
As the world has progressed, a great deal has changed, and it has transformed into a digital hub. People have started to use different platforms to entertain themselves, watch their favorite content online, gaming, music, sports, or any other form of entertainment.
Cross-platform streaming is a concept people have started to follow especially when it comes to gaming. The audience has a wide variety of choices when it comes to viewing live content online.
YouTube and Twitch are two major platforms streamers use to publish their content online for their targeted audience. They need to stream their content on YouTube and Twitch simultaneously as it engages a wider range of audiences worldwide, and newer streamers can benefit from it.
In this article
Part 1: How Can You Stream on Twitch and YouTube at the Same Time?
Part 2: How to Multi-stream using Streamlabs Prime
Part 3: Bonus Tips | Enlarge your Live Stream Performance!
Part 1: How Can You Stream on Twitch and YouTube at the Same Time?
To stream simultaneously on multiple platforms, a certain program or application is required to provide you with the required tools to enable you to broadcast your content. Several programs provide the option to stream to multiple websites at the same time e.g., Restream, Streamlabs Prime, and MelonApp.
Restream
Restream.io is a service that provides you with the option to broadcast your content to more than 30 different platforms including Twitch and YouTube. When you log in, you can choose the channels you wish to broadcast on and restream will issue a unique key for you.

After you have selected your desired selection, go to your broadcasting software, and choose Restream.io as your preferred service and insert your unique key provided by Restream.
Restream will let you use their services for free provided you use it with their watermark. It is recommended for newer users but if you wish to remove the watermark and go ad-free you will have to upgrade your plan.
Below is a step-by-step guide to help you stream using Restream.io
Step 1: Sign up or log in
The first step is to sign up on Restream. It will require you to choose a unique username, password and enter a valid email address.
Step 2: Choose your desired Platforms
From the list of different platforms, choose the ones you wish to stream to and add your channels by authorizing with the required credentials. Restream has an option of more than 30 platforms including YouTube, Twitch, Facebook, Twitter, and LinkedIn.

Step 3: Choose your subscription plan
Choose your desired plan that caters to your needs. Keep in mind that Restream is 100% free but free accounts do not come with recording or storage and will show a Restream watermark.

You can remove this watermark by upgrading your subscription plan to a Professional one from the dashboard.
Step 4: Choose the final streaming platforms
Connect all your channels so you can stream from a single platform. Click the platform icon and connect your preferred accounts with Restream.
Step 5: Tweak the settings according to your preference
Set up for streaming preferences and settings along with your streaming software. You can broadcast directly from your browser, multiple members from different locations, from your mobile phone, or even your GoPro. More available streaming features can be found on the Restream Help Center.

Restream also offers a wide range of services including the option to stream pre-recorded videos on Twitch at a preselected time and date. However, there is a caveat that you will not be able to multi-stream after you get an affiliate status on your Twitch channel.
Part 2: How to Multi-stream using Streamlabs Prime
Streamlabs Prime is the premium version of Streamlabs. It provides you with a range of 40+ apps that can also improve the quality of your streams and allow you to multi-stream. It is one of the best streaming software in the game currently.
Many content creators use Streamlabs to simultaneously run their streams on YouTube along with Twitch to grasp a wider range of audiences and get more views. One of the best things about Streamlabs is that you can connect to the broadcast services directly from the program without entering any stream key.
Streamlabs has included the option to Multi Stream on different platforms within its OBS client. Below are the steps required to set you up for streaming on YouTube and Twitch at the same time.
Step 1: Open the settings of your desired client
Click on the gear icon to open the settings on the bottom left of the client, click on the Stream tab where you will see the three main platforms for streaming.
Step 2: Add your preferred platforms
Add YouTube and Twitch by pressing the connect button; you can also add other services as well with the Add Destination feature.

Your stream will automatically be broadcast to all selected platforms when you go live. Although, you will be required to use the premium service of Streamlabs to ensure you can Multistream to different platforms at the same time.

Melon is a web-based service that lets you live-stream onto different platforms at the same time such as YouTube, Twitch, Facebook, and LinkedIn in just a matter of a few clicks. No downloads are required and there are umpteen options of customizations to personalize your feed according to your preference.
You can earn through donations from your live stream and are provided with the best customer support 24/7. Everything is hosted on a cloud-based setup and you can stream and record in 1080p.
Below are the steps to guide you on how to stream using the MelonApp.
Step 1: Login or Sign up
Login or Signup with your credentials into Melon and allow the required permissions i.e., microphone and camera.

Step 2: Choose your subscription plan
Choose your premium plan to avail of multi-streaming along with high-quality broadcasting, unlimited streaming, and tons of customization.

Step 3: Choose your desired platforms
Choose and connect the platforms you want to stream to from the Settings in the top right corner. If you have to reselect, simply click x, and reconnect to a different service.
Step 4: Finalize your preferences
Click on ‘Go Live’ and select the platforms for the current stream you wish to broadcast. Selected platforms will be highlighted.

Step 5: Go live
In the end, click next, put in the title of your stream and its description and you are all set to broadcast your content.
Part 3: Bonus Tips | Enlarge your Live Stream Performance
Now that you know how to stream on Twitch and YouTube, here are some tips to improve your live streams!
Tip # 1: Enhance Your Content
You can enhance your content in multiple ways to grasp a wider audience and get your message all around the globe.
Tip # 2: Introduce Graphics and Transitions
You can use interesting gifs, screens, intros, and outros for your streams. Announcing your streams beforehand can also help build up hype and make people anticipate your feed.
Tip # 3: Work More on Post Production
People stream different content on these streaming platforms including gaming, podcasts, educational and entertainment videos. Editing your content to near perfection is one of the most major aspects of a successful broadcast.
Tip # 4: Use Editing Tools to Make Your Videos Interesting
You can use different editing tools such as Wondershare Filmora which is a great video editing software that allows you to edit, trim, cut, add sounds and apply tons of effects to your content no matter what type or genre it is.
Tip # 5: Add Certain Effects to Appear Professional
You can also introduce motion tracking, keyframing, and use other powerful features, and that too for free using Wondershare Filmora. However, if you wish to go a step further you can always opt for their premium version and transcend into a world of endless options and opportunities to edit and enhance your content.
Tip # 6: Promote Your Content Using Social Media
Multi-streaming helps build up a wider community of fans as it is targeting different sets of people and you can also earn from your streams using advertisements and introducing click-on banners for brand endorsements.
Some platforms also let you promote and manage your merchandise, so it is always a good opportunity for these streaming clients and platforms.
Conclusion
Now you can also monetize your streams and broadcast on different platforms such as YouTube and Twitch at the same time. This will boost your reach and views in a very positive way. You can also tweak your content by editing it and inserting sound effects, gifs, and much more to make it more interesting and catchier.
And by multi-streaming on YouTube and Twitch, you will have a greater chance of being found by gaming sponsors and your growth will not be tied just to a single platform. You can also promote your streams on other social media platforms and your handles as well.
Pre-recorded videos are also a great way to present your content with perfection without any chances of being prone to any potential online mishaps.
As the world has progressed, a great deal has changed, and it has transformed into a digital hub. People have started to use different platforms to entertain themselves, watch their favorite content online, gaming, music, sports, or any other form of entertainment.
Cross-platform streaming is a concept people have started to follow especially when it comes to gaming. The audience has a wide variety of choices when it comes to viewing live content online.
YouTube and Twitch are two major platforms streamers use to publish their content online for their targeted audience. They need to stream their content on YouTube and Twitch simultaneously as it engages a wider range of audiences worldwide, and newer streamers can benefit from it.
In this article
Part 1: How Can You Stream on Twitch and YouTube at the Same Time?
Part 2: How to Multi-stream using Streamlabs Prime
Part 3: Bonus Tips | Enlarge your Live Stream Performance!
Part 1: How Can You Stream on Twitch and YouTube at the Same Time?
To stream simultaneously on multiple platforms, a certain program or application is required to provide you with the required tools to enable you to broadcast your content. Several programs provide the option to stream to multiple websites at the same time e.g., Restream, Streamlabs Prime, and MelonApp.
Restream
Restream.io is a service that provides you with the option to broadcast your content to more than 30 different platforms including Twitch and YouTube. When you log in, you can choose the channels you wish to broadcast on and restream will issue a unique key for you.
After you have selected your desired selection, go to your broadcasting software, and choose Restream.io as your preferred service and insert your unique key provided by Restream.
Restream will let you use their services for free provided you use it with their watermark. It is recommended for newer users but if you wish to remove the watermark and go ad-free you will have to upgrade your plan.
Below is a step-by-step guide to help you stream using Restream.io
Step 1: Sign up or log in
The first step is to sign up on Restream. It will require you to choose a unique username, password and enter a valid email address.
Step 2: Choose your desired Platforms
From the list of different platforms, choose the ones you wish to stream to and add your channels by authorizing with the required credentials. Restream has an option of more than 30 platforms including YouTube, Twitch, Facebook, Twitter, and LinkedIn.
Step 3: Choose your subscription plan
Choose your desired plan that caters to your needs. Keep in mind that Restream is 100% free but free accounts do not come with recording or storage and will show a Restream watermark.
You can remove this watermark by upgrading your subscription plan to a Professional one from the dashboard.
Step 4: Choose the final streaming platforms
Connect all your channels so you can stream from a single platform. Click the platform icon and connect your preferred accounts with Restream.
Step 5: Tweak the settings according to your preference
Set up for streaming preferences and settings along with your streaming software. You can broadcast directly from your browser, multiple members from different locations, from your mobile phone, or even your GoPro. More available streaming features can be found on the Restream Help Center.
Restream also offers a wide range of services including the option to stream pre-recorded videos on Twitch at a preselected time and date. However, there is a caveat that you will not be able to multi-stream after you get an affiliate status on your Twitch channel.
Part 2: How to Multi-stream using Streamlabs Prime
Streamlabs Prime is the premium version of Streamlabs. It provides you with a range of 40+ apps that can also improve the quality of your streams and allow you to multi-stream. It is one of the best streaming software in the game currently.
Many content creators use Streamlabs to simultaneously run their streams on YouTube along with Twitch to grasp a wider range of audiences and get more views. One of the best things about Streamlabs is that you can connect to the broadcast services directly from the program without entering any stream key.
Streamlabs has included the option to Multi Stream on different platforms within its OBS client. Below are the steps required to set you up for streaming on YouTube and Twitch at the same time.
Step 1: Open the settings of your desired client
Click on the gear icon to open the settings on the bottom left of the client, click on the Stream tab where you will see the three main platforms for streaming.
Step 2: Add your preferred platforms
Add YouTube and Twitch by pressing the connect button; you can also add other services as well with the Add Destination feature.
Your stream will automatically be broadcast to all selected platforms when you go live. Although, you will be required to use the premium service of Streamlabs to ensure you can Multistream to different platforms at the same time.
Melon is a web-based service that lets you live-stream onto different platforms at the same time such as YouTube, Twitch, Facebook, and LinkedIn in just a matter of a few clicks. No downloads are required and there are umpteen options of customizations to personalize your feed according to your preference.
You can earn through donations from your live stream and are provided with the best customer support 24/7. Everything is hosted on a cloud-based setup and you can stream and record in 1080p.
Below are the steps to guide you on how to stream using the MelonApp.
Step 1: Login or Sign up
Login or Signup with your credentials into Melon and allow the required permissions i.e., microphone and camera.
Step 2: Choose your subscription plan
Choose your premium plan to avail of multi-streaming along with high-quality broadcasting, unlimited streaming, and tons of customization.
Step 3: Choose your desired platforms
Choose and connect the platforms you want to stream to from the Settings in the top right corner. If you have to reselect, simply click x, and reconnect to a different service.
Step 4: Finalize your preferences
Click on ‘Go Live’ and select the platforms for the current stream you wish to broadcast. Selected platforms will be highlighted.
Step 5: Go live
In the end, click next, put in the title of your stream and its description and you are all set to broadcast your content.
Part 3: Bonus Tips | Enlarge your Live Stream Performance
Now that you know how to stream on Twitch and YouTube, here are some tips to improve your live streams!
Tip # 1: Enhance Your Content
You can enhance your content in multiple ways to grasp a wider audience and get your message all around the globe.
Tip # 2: Introduce Graphics and Transitions
You can use interesting gifs, screens, intros, and outros for your streams. Announcing your streams beforehand can also help build up hype and make people anticipate your feed.
Tip # 3: Work More on Post Production
People stream different content on these streaming platforms including gaming, podcasts, educational and entertainment videos. Editing your content to near perfection is one of the most major aspects of a successful broadcast.
Tip # 4: Use Editing Tools to Make Your Videos Interesting
You can use different editing tools such as Wondershare Filmora which is a great video editing software that allows you to edit, trim, cut, add sounds and apply tons of effects to your content no matter what type or genre it is.
Tip # 5: Add Certain Effects to Appear Professional
You can also introduce motion tracking, keyframing, and use other powerful features, and that too for free using Wondershare Filmora. However, if you wish to go a step further you can always opt for their premium version and transcend into a world of endless options and opportunities to edit and enhance your content.
Tip # 6: Promote Your Content Using Social Media
Multi-streaming helps build up a wider community of fans as it is targeting different sets of people and you can also earn from your streams using advertisements and introducing click-on banners for brand endorsements.
Some platforms also let you promote and manage your merchandise, so it is always a good opportunity for these streaming clients and platforms.
Conclusion
Now you can also monetize your streams and broadcast on different platforms such as YouTube and Twitch at the same time. This will boost your reach and views in a very positive way. You can also tweak your content by editing it and inserting sound effects, gifs, and much more to make it more interesting and catchier.
And by multi-streaming on YouTube and Twitch, you will have a greater chance of being found by gaming sponsors and your growth will not be tied just to a single platform. You can also promote your streams on other social media platforms and your handles as well.
Pre-recorded videos are also a great way to present your content with perfection without any chances of being prone to any potential online mishaps.
Also read:
- 2024 Approved Enhancing Winter Vlogs with Five Heartwarming Backdrops
- Essential Software to Rip YouTube Trailers
- Streamlining Your YouTube Vids for IGTV Adoption
- Navigating Netflix & YouTubers How Jake Paul Succeeded
- Do YouTubers Get Paid Monthly for 2024
- Mastering Content Discovery with Powerful Title & Tag Use
- Understanding Legality in Screenshots From YouTube
- Decoding Revenue How Much Do Creators Earn on Youtube for 2024
- [Updated] Bypassing YouTube's Copyright Strike Legal Strategies and Precautions
- 2024 Approved 2023'S Must-Watch Alternatives to Top Films
- In 2024, Bite-Sized Beginnings Easy Steps to Launch Personal/Business Channels From Phones
- [New] Channel Expansion via YouTube Outros Maximizing Visibility
- How To Make a YouTube Trailer
- [Updated] Everything Uncovered About the World of YT Shorts
- [New] Audio Artists' Almanac Your Guide to Video Submission
- [Updated] Audiovisual Improvement Voice Changing Apps Reviewed
- 2024 Approved Elevating Your Video's Status on YouTube
- [Updated] Budget-Friendly Strategies to Infuse Text & Video
- Crafting Perfect YouTube Music Sets for 2024
- [New] Does Rapid Subscription Improve Video Watching?
- Best Budget Cameras for Creating Quality Vlogs
- Social Media Titans Face-Off Will the Next Leader Be Likes over TikTok, In 2024
- Vivacious Talker Examined Revision No. 8
- Beyond VLC A Deep Dive Into Media Players
- In 2024, Crafting Striking Instagram Profile Overviews
- [Updated] 2024 Approved LOL Streaming Made Easy Mastering Video Capture in 3 Steps
- Decoding Music Copyright Rules in the World of Instagram for 2024
- How To Unlock SIM Cards Of Motorola Moto G34 5G Without PUK Codes
- ElitePixel Recorder WinOS Series for 2024
- In 2024, How to Intercept Text Messages on Realme Note 50 | Dr.fone
- 5 Solutions For Motorola Moto G23 Unlock Without Password
- In 2024, How To Fix Apple iPhone 12 mini Unavailable Issue With Ease
- 2024 Approved Instantaneous Sharability Tweeting Videos on Snapchat Network
- Title: "2024 Approved Discovering the Power Behind YouTube Statistics Interpretation"
- Author: Steven
- Created at : 2024-05-25 18:35:27
- Updated at : 2024-05-26 18:35:27
- Link: https://youtube-clips.techidaily.com/2024-approved-discovering-the-power-behind-youtube-statistics-interpretation/
- License: This work is licensed under CC BY-NC-SA 4.0.
