
:max_bytes(150000):strip_icc():format(webp)/sony-ps5-d3975e63d2ff47e6ac4e81768b79801c.jpg)
"2024 Approved Cutting-Edge Camera Technology For YouTube Stars"
Cutting-Edge Camera Technology For YouTube Stars
The Best Cameras for YouTube from Beginners to Professionals

Max Wales
Mar 27, 2024• Proven solutions
Whether you’re a beginner or a pro as a YouTuber, your YouTube equipment shouldn’t be the thing that holds you back from becoming a YouTube star. But, how do you find the best camera for making YouTube videos? What options do you have?
In this article, we’re going to explore some of the best cameras for YouTube. We’ll label each one based on what we believe is best for particular uses, so that you can better parse what it is that you want to purchase. All of this is in hopes that you can find the video camera for YouTube that is right for you and what you need.
Part 1: 7 Best Best Camera for Youtube to Make Videos
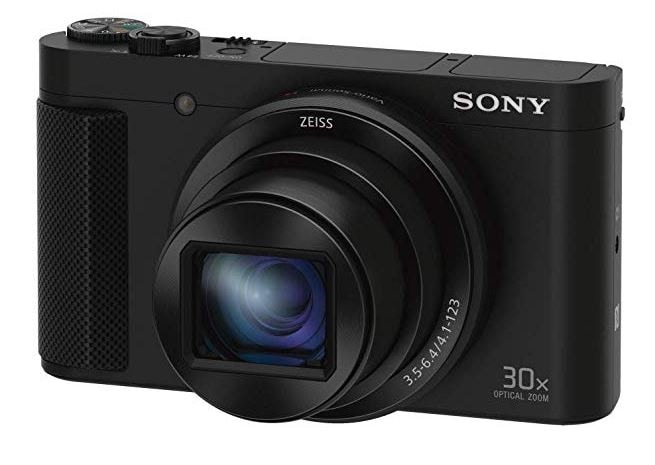
1. Sony DSC WX350 Digital Camera – Best Point and Shoot Video Camera
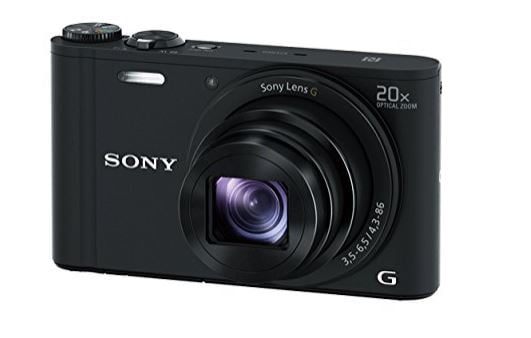
Specifications:
- 40x clear image zoom; 20x optical zoom
- Lock-on Auto Focus
- Wi-Fi with NFC3 connectivity for mobile devices
- 4 megapixels
- CMOS sensor that provides top quality images, even in low lighting
- Motion shot video with up to 4k quality output
Description: Have you been looking for a 20x zoom camera that fits in your pocket ? Get the best pictures with the Sony DSC WX350. This camera offers both still photos and video recording, using technology that minimizes how much the camera shakes, even if you’re filming on the go.
Pros: The image stabilizer makes this one of the best cameras for making YouTube videos out there, alongside of the 20x optical zoom. The battery life is quite long as well, which means you can get a lot of content done without any problems. Lastly, you can film in HD, which makes any YouTube influencer happy.
Cons: The LED screen can be quite dim, so it’s hard to see it when you’re out in bright sunlight; be sure you make adjustments before you go outside. There is also not your typical viewfinder installed, so experienced videographers may not like using it.
2. GoPro HERO8 Action Camera - Best Wearable Sports Camera
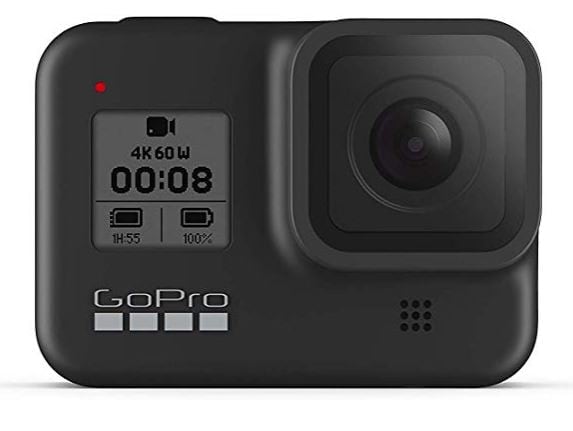
Specifications:
- Up to 60 FPS
- 4k and HD capabilities
- HyperSmooth 2.0 stabilization options.
- Optional Battery Mod available.
- Integrated Mount
- Crisp, easy to use and navigate LCD.
Description: If you need an on-the-go video camera for YouTube, there’s nothing better than a GoPro. With their HERO series of GoPros, they have all sorts of great features that allow you to capture the smoothest video, even when you’re out and on the go. Their top end stabilization makes their cameras the best for the active YouTuber.
Pros: The rugged, waterproof design of the HERO7 is a great option for anyone who is looking to be on the go with their YouTube. The integrated mount makes it simple for anyone who wants to put it on a selfie stick or something else, and it even has a companion app for easy, on the go editing!
Cons: The Wi-Fi capabilities are great, but the video transfer can take a bit of time due to how large the files may be. So, if you’re uploading the transfer, you may want to consider using the USB port instead. Also, the memory card slot is in an awkward place near the mount, so those with larger fingers may have trouble putting a card in there.
3. Logitech BRIO HD Webcam for Video – Best Video Recording and Streaming Camera
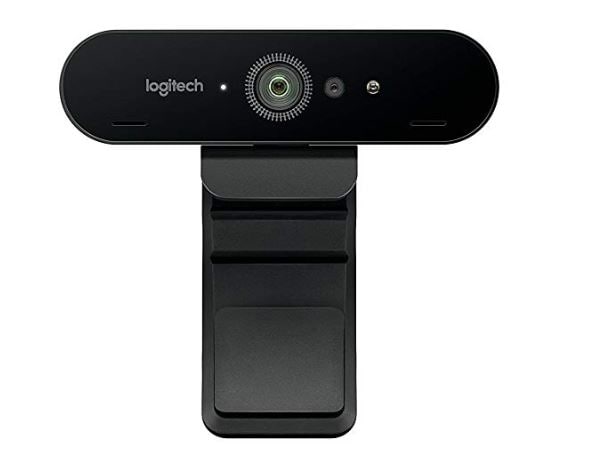
Specifications:
- 5x zoom
- Premium glass lens
- 4k image sensor for videoing and HDR with autofocus
- Light exposure automatically adjusts for whatever lighting that you’re filming in.
- Streaming and recording available.
- Enterprise ready for any use.
- Plug and play software automatically installs upon first use.
- Cover clip so you can cover the camera quickly, when needed.
Description: If you need an easy to use, simple to install option for filming and streaming from your computer, then this Logitech is the best camera for YouTube videos of this type. With multiple features and a design that has been made for streamers like you, you’ll always be able to just turn it on, make adjustments with ease, and get streaming in no time.
Pros: The camera is incredibly easy to use and install; it connects to your PC with a USB type C to USB type 3.0 cord (backwards compatible to 2.0). You can easily tinker with all of the settings and such in the included software.
Cons: The arm is designed for thick edges; those with flat monitors or borderless monitors may find that it’s difficult to attach it to your monitor. The software is easy to use, but it’s missing a handful of settings that more experienced streamers would want to have available. There is a crop out background feature, but it can be hard to find and use.
4. PANASONIC Lumix G7 4K Digital Camera - Best Mirrorless Camera for Professionals

Specifications:
- 16 megapixels
- No pass filter with four thirds sensor
- Wi-Fi capability
- 4k and HD video capture available at 30 frames per second.
- Aperture and shutter settings are adjusted via knobs, not menus.
- 3 inch tilt and swivel display
- High resolution viewfinder
Description: If you want to have professional looking photos and videos, the PANASONIC Lumix G7 4K is a solid choice for a mirrorless camera. All of the controls make it easy to get things the way that you want it, and it comes with multiple ports so that you can plug it into any device and get it ready to go.
Pros: This one of the best 4k video options out there, and you don’t need to spend an arm and a leg on it. The dual control dials and the variable touch LCD allow for maximum control, making it simple to film what you want with minimal editing after you’ve filmed.
Cons: There is a tracking focus, which can be good, but it makes the burst rate (which helps with motion blur) a lot slower. It does have a plastic build, rather than metal, so it’s not as heavy duty as other options. And, you need to purchase it with everything included, instead of just purchasing the body.
5. Sony CX405 Full HD - Best Camcorder (Only) for Video
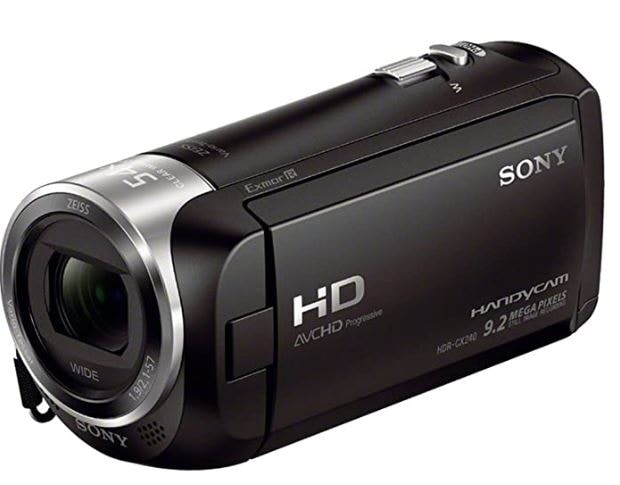
Specifications:
- 60x clear image zoom with Zeiss Lens
- 50 Mbps XAVC
- MP4 and AVCHD codecs
- SteadyShot image stabilization
- Built-in USB cable
- Face detection and noise reduction
- 7 picture effects for video
Description: If you’re looking for the best cheap camera for YouTube, this is a pretty solid option. It has a Carl Zeiss lens (low light capable) and SteadyShot technology for stabilization. It’s the starter camera that beginners dream of due to its ease of use and affordability.
Pros: The image stabilization is some of the best out there, and it’s got a user friendly interface. Dual recording options make for great YouTube and other social media use. Lightweight makes it easy to take anywhere.
Cons: Connectivity ports are in strange spots, and can be hard to get to. You cannot add an external mic, so you have to use the on-board ones. After extensive use of the ports, the on-board USB cable may have some issues with connectivity over time.
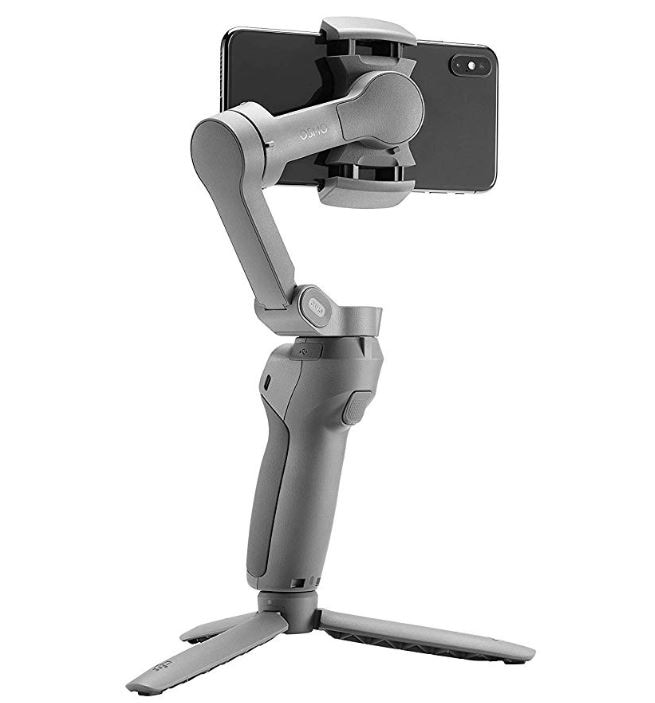
6. DJI OSMO Handheld Gimbal – Best Easy to Use Holder for Camera Phone for Beginners
Specifications:
- 3 axis Gimbal that reduces shaky footage
- Ultra-responsive design reacts in real time.
- Easily folds up for maximum portability
- Battery operated ensures that you don’t always need a connection
- Comfortable grip allows you to use the gimbal without discomfort or pain.
Description: If your phone is currently the best camera for YouTube videos, then the DJI OSMO Handheld Gimbal makes it really easy for you to use it on the go. This has been designed to keep your camera flat, no matter where you’re moving, and it helps you take some pretty great shots. This is an option if you need freedom in your movement.
Pros: The DJI OSMO Handheld Gimbal is really easy to use and compatible with most mobile phones that are out there. With multiple settings and options, you can easily turn your phone into the very best option for getting footage, even if your regular video camera isn’t nearby.
Cons: Some people note that it doesn’t work with wide-screen mobile devices or “phablets” as they are called. Another complaint is that it can be difficult to get used the construction of the Gimbal, but that’s something that you can sort out with practice.
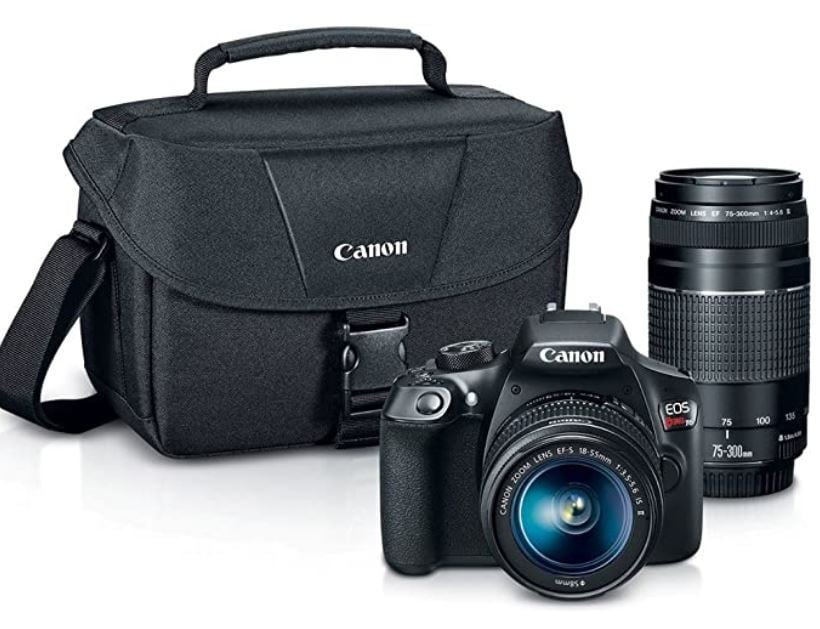
7. Canon Digital SLR Camera Kit – Best Cheap SLR Choice
Specifications:
- Wi-Fi and NFC built in for ease of video and photo transfer
- 18 Megapixel
- Image sensor with an IS of 100 to 6400 (and the option to expand to 12800)
- Full HD videos with manual controls for focus and exposure
- 3 inch LCD monitor turns and adjusts as needed.
- Interchangeable lens, Bayonet mount for tripods and selfie sticks.
Description: The Canon Digital SLR Camera Kit is an all-in-one kit that makes it simple for you to start making videos right out of the bag. Complete with everything that you need in order to use an SLR well, you’ll find it’s quite simple to get the hang of, and that you have a lot of flexibility in how you use it.
Pros: The Canon Digital SLR Camera Kit has Wi-Fi capability, offers a great auto focus and is made from heavy duty materials. Plus, it can shoot stills, video, and rolls, which makes it really versatile for anyone.
Cons: This particular set doesn’t have Bluetooth with it, so you can’t connect a remote. Its lens is interchangeable, but you can only use Canon lenses and flashes with it, so that decreases the number of options you have here.
Want to know more about camera? Watch this!
What Gear Do Creators Actually Use | Vidcon 2023 | Sony vs Canon
Part 2: Frequently Asked Questions
1. What is a good camera for YouTube beginners?
Sony DSCHX80/B Point & Shoot Camera is the best cheap camera for YouTube that you can find if you’re on any sort of budget. It has a 60x clear image zoom and incredibly versatile video with multiple viewfinder and autofocus options. It’s selfie ready with a multi-angle LCD display and you can customize your setting sin whatever way that you wish to do so. It also comes with pretty much anything that you need in the box, so you’re ready to start filming as soon as you charge it.
2. What equipment do you need to start a YouTube channel?
- A camera that meets all of your needs and purposes.
- A microphone that is easy to use and produces high quality audio options.
- A sturdy, reliable tripod that is compatible with your camera
- Lighting equipment for the space that you’re filming in.
- An idea as to what you’re going to do and how you’d like to proceed.
3. What software do YouTubers use to edit videos?
There are a number of different options that you can consider if you’re looking to edit your videos well. Here is a quick list of some of the top options that you’ll see them using alongside of the best cameras for YouTube
Beginners
- Filmora : A simple to download and use option which can create high-quality videos in just a few clicks.
- iMovie: Only for Macs, this is a simple to use, intuitively designed video editor has a lot of features, and comes pre-installed on most Macs.
- Adobe Rush: Adobe Rush is a simple to use, browser based, video editing program that is also available as a phone app.
Professional
- Adobe Premiere: One of the top programs out there for editing video, this is part of the Adobe series and has endless options and features.
- Final Cut Pro: A Mac-Only, high end video editing software, many people who use the best YouTube camera also use this.
Max Wales
Max Wales is a writer and a lover of all things video.
Follow @Max Wales
Max Wales
Mar 27, 2024• Proven solutions
Whether you’re a beginner or a pro as a YouTuber, your YouTube equipment shouldn’t be the thing that holds you back from becoming a YouTube star. But, how do you find the best camera for making YouTube videos? What options do you have?
In this article, we’re going to explore some of the best cameras for YouTube. We’ll label each one based on what we believe is best for particular uses, so that you can better parse what it is that you want to purchase. All of this is in hopes that you can find the video camera for YouTube that is right for you and what you need.
Part 1: 7 Best Best Camera for Youtube to Make Videos
1. Sony DSC WX350 Digital Camera – Best Point and Shoot Video Camera
Specifications:
- 40x clear image zoom; 20x optical zoom
- Lock-on Auto Focus
- Wi-Fi with NFC3 connectivity for mobile devices
- 4 megapixels
- CMOS sensor that provides top quality images, even in low lighting
- Motion shot video with up to 4k quality output
Description: Have you been looking for a 20x zoom camera that fits in your pocket ? Get the best pictures with the Sony DSC WX350. This camera offers both still photos and video recording, using technology that minimizes how much the camera shakes, even if you’re filming on the go.
Pros: The image stabilizer makes this one of the best cameras for making YouTube videos out there, alongside of the 20x optical zoom. The battery life is quite long as well, which means you can get a lot of content done without any problems. Lastly, you can film in HD, which makes any YouTube influencer happy.
Cons: The LED screen can be quite dim, so it’s hard to see it when you’re out in bright sunlight; be sure you make adjustments before you go outside. There is also not your typical viewfinder installed, so experienced videographers may not like using it.
2. GoPro HERO8 Action Camera - Best Wearable Sports Camera
Specifications:
- Up to 60 FPS
- 4k and HD capabilities
- HyperSmooth 2.0 stabilization options.
- Optional Battery Mod available.
- Integrated Mount
- Crisp, easy to use and navigate LCD.
Description: If you need an on-the-go video camera for YouTube, there’s nothing better than a GoPro. With their HERO series of GoPros, they have all sorts of great features that allow you to capture the smoothest video, even when you’re out and on the go. Their top end stabilization makes their cameras the best for the active YouTuber.
Pros: The rugged, waterproof design of the HERO7 is a great option for anyone who is looking to be on the go with their YouTube. The integrated mount makes it simple for anyone who wants to put it on a selfie stick or something else, and it even has a companion app for easy, on the go editing!
Cons: The Wi-Fi capabilities are great, but the video transfer can take a bit of time due to how large the files may be. So, if you’re uploading the transfer, you may want to consider using the USB port instead. Also, the memory card slot is in an awkward place near the mount, so those with larger fingers may have trouble putting a card in there.
3. Logitech BRIO HD Webcam for Video – Best Video Recording and Streaming Camera
Specifications:
- 5x zoom
- Premium glass lens
- 4k image sensor for videoing and HDR with autofocus
- Light exposure automatically adjusts for whatever lighting that you’re filming in.
- Streaming and recording available.
- Enterprise ready for any use.
- Plug and play software automatically installs upon first use.
- Cover clip so you can cover the camera quickly, when needed.
Description: If you need an easy to use, simple to install option for filming and streaming from your computer, then this Logitech is the best camera for YouTube videos of this type. With multiple features and a design that has been made for streamers like you, you’ll always be able to just turn it on, make adjustments with ease, and get streaming in no time.
Pros: The camera is incredibly easy to use and install; it connects to your PC with a USB type C to USB type 3.0 cord (backwards compatible to 2.0). You can easily tinker with all of the settings and such in the included software.
Cons: The arm is designed for thick edges; those with flat monitors or borderless monitors may find that it’s difficult to attach it to your monitor. The software is easy to use, but it’s missing a handful of settings that more experienced streamers would want to have available. There is a crop out background feature, but it can be hard to find and use.
4. PANASONIC Lumix G7 4K Digital Camera - Best Mirrorless Camera for Professionals
Specifications:
- 16 megapixels
- No pass filter with four thirds sensor
- Wi-Fi capability
- 4k and HD video capture available at 30 frames per second.
- Aperture and shutter settings are adjusted via knobs, not menus.
- 3 inch tilt and swivel display
- High resolution viewfinder
Description: If you want to have professional looking photos and videos, the PANASONIC Lumix G7 4K is a solid choice for a mirrorless camera. All of the controls make it easy to get things the way that you want it, and it comes with multiple ports so that you can plug it into any device and get it ready to go.
Pros: This one of the best 4k video options out there, and you don’t need to spend an arm and a leg on it. The dual control dials and the variable touch LCD allow for maximum control, making it simple to film what you want with minimal editing after you’ve filmed.
Cons: There is a tracking focus, which can be good, but it makes the burst rate (which helps with motion blur) a lot slower. It does have a plastic build, rather than metal, so it’s not as heavy duty as other options. And, you need to purchase it with everything included, instead of just purchasing the body.
5. Sony CX405 Full HD - Best Camcorder (Only) for Video
Specifications:
- 60x clear image zoom with Zeiss Lens
- 50 Mbps XAVC
- MP4 and AVCHD codecs
- SteadyShot image stabilization
- Built-in USB cable
- Face detection and noise reduction
- 7 picture effects for video
Description: If you’re looking for the best cheap camera for YouTube, this is a pretty solid option. It has a Carl Zeiss lens (low light capable) and SteadyShot technology for stabilization. It’s the starter camera that beginners dream of due to its ease of use and affordability.
Pros: The image stabilization is some of the best out there, and it’s got a user friendly interface. Dual recording options make for great YouTube and other social media use. Lightweight makes it easy to take anywhere.
Cons: Connectivity ports are in strange spots, and can be hard to get to. You cannot add an external mic, so you have to use the on-board ones. After extensive use of the ports, the on-board USB cable may have some issues with connectivity over time.
6. DJI OSMO Handheld Gimbal – Best Easy to Use Holder for Camera Phone for Beginners
Specifications:
- 3 axis Gimbal that reduces shaky footage
- Ultra-responsive design reacts in real time.
- Easily folds up for maximum portability
- Battery operated ensures that you don’t always need a connection
- Comfortable grip allows you to use the gimbal without discomfort or pain.
Description: If your phone is currently the best camera for YouTube videos, then the DJI OSMO Handheld Gimbal makes it really easy for you to use it on the go. This has been designed to keep your camera flat, no matter where you’re moving, and it helps you take some pretty great shots. This is an option if you need freedom in your movement.
Pros: The DJI OSMO Handheld Gimbal is really easy to use and compatible with most mobile phones that are out there. With multiple settings and options, you can easily turn your phone into the very best option for getting footage, even if your regular video camera isn’t nearby.
Cons: Some people note that it doesn’t work with wide-screen mobile devices or “phablets” as they are called. Another complaint is that it can be difficult to get used the construction of the Gimbal, but that’s something that you can sort out with practice.
7. Canon Digital SLR Camera Kit – Best Cheap SLR Choice
Specifications:
- Wi-Fi and NFC built in for ease of video and photo transfer
- 18 Megapixel
- Image sensor with an IS of 100 to 6400 (and the option to expand to 12800)
- Full HD videos with manual controls for focus and exposure
- 3 inch LCD monitor turns and adjusts as needed.
- Interchangeable lens, Bayonet mount for tripods and selfie sticks.
Description: The Canon Digital SLR Camera Kit is an all-in-one kit that makes it simple for you to start making videos right out of the bag. Complete with everything that you need in order to use an SLR well, you’ll find it’s quite simple to get the hang of, and that you have a lot of flexibility in how you use it.
Pros: The Canon Digital SLR Camera Kit has Wi-Fi capability, offers a great auto focus and is made from heavy duty materials. Plus, it can shoot stills, video, and rolls, which makes it really versatile for anyone.
Cons: This particular set doesn’t have Bluetooth with it, so you can’t connect a remote. Its lens is interchangeable, but you can only use Canon lenses and flashes with it, so that decreases the number of options you have here.
Want to know more about camera? Watch this!
What Gear Do Creators Actually Use | Vidcon 2023 | Sony vs Canon
Part 2: Frequently Asked Questions
1. What is a good camera for YouTube beginners?
Sony DSCHX80/B Point & Shoot Camera is the best cheap camera for YouTube that you can find if you’re on any sort of budget. It has a 60x clear image zoom and incredibly versatile video with multiple viewfinder and autofocus options. It’s selfie ready with a multi-angle LCD display and you can customize your setting sin whatever way that you wish to do so. It also comes with pretty much anything that you need in the box, so you’re ready to start filming as soon as you charge it.
2. What equipment do you need to start a YouTube channel?
- A camera that meets all of your needs and purposes.
- A microphone that is easy to use and produces high quality audio options.
- A sturdy, reliable tripod that is compatible with your camera
- Lighting equipment for the space that you’re filming in.
- An idea as to what you’re going to do and how you’d like to proceed.
3. What software do YouTubers use to edit videos?
There are a number of different options that you can consider if you’re looking to edit your videos well. Here is a quick list of some of the top options that you’ll see them using alongside of the best cameras for YouTube
Beginners
- Filmora : A simple to download and use option which can create high-quality videos in just a few clicks.
- iMovie: Only for Macs, this is a simple to use, intuitively designed video editor has a lot of features, and comes pre-installed on most Macs.
- Adobe Rush: Adobe Rush is a simple to use, browser based, video editing program that is also available as a phone app.
Professional
- Adobe Premiere: One of the top programs out there for editing video, this is part of the Adobe series and has endless options and features.
- Final Cut Pro: A Mac-Only, high end video editing software, many people who use the best YouTube camera also use this.
Max Wales
Max Wales is a writer and a lover of all things video.
Follow @Max Wales
The Ultimate Guide to YouTube Thumbnail Sizes
Best YouTube Thumbnail Size: How to Make a Thumbnail for YouTube in 2024

Benjamin Arango
Mar 27, 2024• Proven solutions
You must have heard the phrase, Never judge a book by its cover. But actually, we do judge everything by its cover. The same is the case with Youtube videos. No matter how good the content of your video is if you are unable to convey that with the thumbnail of your video, it will not bring any good to your channel. If you are looking forward to growing your channel and attracting more viewers, then having an appealing and eye-catching thumbnail is one of the most important factors. There are several things to be considered while creating a custom thumbnail if you want to make your videos look stunning and engaging. By following all these points, you can increase the chances of your channel’s growth.
In this article, we have 5 chapters for you:
- Best YouTube Thumbnail Size
- How Important is a Custom Thumbnail?
- Best Practices From Experiences
- How to Make a Fortnite Thumbnail
- How to Add a Custom Thumbnail to Your Video
Best YouTube Thumbnail Size
Being a content creator, you never know which device is being used by the viewer to watch your videos. It can be a smartphone, laptop, pc, or smart TV. It is very important to keep all these devices in mind while choosing a Youtube thumbnail size. For the best possible results, consider the following points while making a thumbnail for your Youtube videos.
- To cover all the devices perfectly, set the thumbnail resolution to 1280x720
- Save the thumbnail in JPG, GIF, or PNG format
- Try not to cross the 2MB limit
- Make sure to use a 16:9 aspect ratio for perfect results throughout the devices

How Important is a Custom Thumbnail?
Custom Thumbnail is a tool through which the viewers can understand everything about a video. It tells the viewers what to expect from a video, what not to expect, and what the video is all about. no matter if you create amazing content, if the thumbnail is not good enough to covey that to the viewers, all your hard work will be of no use and will not bring any good to your channel and its growth. According to Google ,90% of best-performing videos have custom thumbnails. It shows the importance of custom thumbnails.

Best Practice From Experiences
Now, since we know the importance of having a custom thumbnail, it is important to know how to make a thumbnail for Youtube look perfect, appealing, and eye-catching at the same time. There are some points to be considered while creating a thumbnail for Youtube. We will provide you with the best practices that we have learned throughout our journey of using Youtube and growing it from zero.
7 best practices can help you make your Youtube thumbnail stand out from the crowd and make its way out.
In a world full of machines and computers, people love to listen and interact with people instead of computer-generated voices and a voice without a face. Showing your face on a Youtube thumbnail makes it more appealing to users to click and listen to the person who is being shown in the thumbnail. Humans are more inclined towards faces. When there is a human element in a video, it increases its effectiveness. Check out the pics below, which one are you most likely to click through?

With your face, it is necessary to put some text on your Youtube thumbnail to let viewers know what this video is all about without clicking or watching it. Don’t use fancy fonts on Youtube thumbnail. It makes it hard for the viewers to read and understand what to expect in the video, especially for those watching YouTube on their 5 inches screen smartphone, ultimately decreasing the chances of your video being clicked and watched. I personally recommend you to use give these fonts a go while making YouTube thumbnail.

If you have ever noticed, Youtube thumbnails are very small in size, making it hard for viewers to notice any small elements. According to YouTube , more than 70% of Youtube watch time comes from mobile devices. While adding text in a thumbnail, instead of using sentences, make sure to use only words and make them large in size that can easily be noticed on small screens. Summurise your video in no more than 5 words.


When we navigate to a Youtube thumbnail and place the cursor on it, it shows us two icons, “Watch Later” and “Add to Queue,” located on its right size. Come on, you don’t want your beautiful thumbnail that cost you a few hours be covered. To avoid these icons from hiding your important stuff of thumbnail, make sure to put everything on the right side of your thumbnail.

Try to make all your thumbnails follow the same style. Following the same style for all your Youtube thumbnails will make your channel look unique and all your videos identical. It will be easy for viewers to identify your videos when they see them. It gives your channel a touch of its unique brand.

To make your Youtube thumbnail more appealing to the viewers, add circles and arrows to grab viewers’ attention to something very important in the video. It will increase the curiosity in the viewers and make them click your videos to learn more.

This whole process seems to be very hectic and time taking, but do you know, you can do everything on just one software? There is no need to edit a video in a different software then make a thumbnail in another software. With Filmora X, you can perform all these tasks on a single platform with so many amazing features. Whether you want to remove the background of your image or add attractive titles to it, Filmora X has got you covered.
It is one of the old tricks that so many people on Youtube use. It undoubtedly brings you clicks and more views, but once the viewer realizes that you have used irrelevant pictures or texts to attract them**. I**n reality, your video doesn’t contain any information related to it, you are going to lose their trust. They are never going to click on your videos again. Even if you don’t use such a trick anymore. Try to avoid such activities. Avoiding such activities can make your channel grow in the long term. Only use the text and images that are relevant to your content and stick to that.
Do you know that Youtube can show a 3-second preview of your video when someone hovers the cursor over it? It is one of the best ways to show the viewers the content of your video even when they don’t click on your video. These three seconds will help them decide whether to click on your video or not. This preview is selected by the system from the first half of your video according to its relevance and similarity with the topic. That’s why it is very important to add related information in the first half of the video, otherwise, Youtube will choose it randomly. If the preview is not selected for two days, it means your video is not eligible for it.

How to Make a Fortnite Thumbnail Super Fast and Free?
Many of you might be interested in how to make a fortnite thumbnail, so here it is. To make a Fortnite thumbnail for free, we are going to use Filmora X. Filmora X contains all kinds of features and elements that are required for a perfect and eye-catching thumbnail. To get started, make sure to download and install the latest version of Filmora X.
- Before we start making Fortnite Thumbnails, we have to take a screenshot of the gameplay. Open Fortnite and go to the Career tab. Here you will find Replays.

- It contains all your recent gameplays. We can use it to take a screenshot. If you are using a console, you will find 10 recent gameplays here. But if you are a PC user, you can find the last 100 gameplays. Select the gameplay you want to take a screenshot from.

- For our preferred angle, choose “Drone Free Camera” mode from the bottom right corner of the screen. It will allow us to use our preferred angle without any restriction. Choose an angle and take a screenshot.

- Open Filmora X, make sure to select the 16:9 screen ratio. Import the screenshot that you have taken from Fortnite.

- Place it into the timeline to start working on it.

- Now to separate the character from the background, go to the Effects. Under effects, you can find a tab named AI Portraits. Click on AI Portrait. Now drag the Human Segmentation and drop it on the screenshot in the timeline.

- It will ask you to purchase it. But there is no need to do that. Just hit Try It.

- This effect will remove the background of your screenshot.

- Now you can add a background of your choice. You can upload an image or choose a simple color from Filmora’s Media tab and drag it below the screenshot in the timeline.

- To add text to the screenshot, go to Titles. Here you can find a wide range of different and unique titles to choose from for your Fortnite Thumbnail. Choose any of the titles and place them accordingly.

- To make it more attractive, we can add icons and other elements from Filmora’s Element tab. You can also download the stickers from the internet and use them.

- After completing the thumbnail, click on the Snapshot icon located below the preview tab of Filmora. Or press “CTRL+ALT+S”. It will save a screenshot into the media panel of Filmora.

- Right-click on the screenshot and navigate to “Reveal in Explorer”. It will open the folder that contains all the screenshots taken from Filmora. Now you can use it as a Fortnite Thumbnail.

How to Add a Custom YouTube Thumbnail to Your Video in YouTube
Once you have successfully created a custom thumbnail, you can use it in your videos on Youtube.
- Open Youtube Studio and upload your video. While uploading the video, you can see a section named “Thumbnail”. Under this section, click on “Upload Thumbnail”.

- Select the thumbnail that you have made. Just like the one Fortnite thumbnail that we have created using Filmora X.

- The thumbnail will be uploaded and attached to the video. Now you can process all the settings and publish the video.

Conclusion
Thumbnail is the first thing that helps the viewer decide whether to click on a video or ignore it. Which increases the importance of having a well-structured and attractive thumbnail. By following the above guide, you can make an astonishing and clickable thumbnail in no time. For better and quick results, we recommend you using Filmora X. It allows you to perform all the tasks from video editing to thumbnail creation on a single platform.


Benjamin Arango
Benjamin Arango is a writer and a lover of all things video.
Follow @Benjamin Arango
Benjamin Arango
Mar 27, 2024• Proven solutions
You must have heard the phrase, Never judge a book by its cover. But actually, we do judge everything by its cover. The same is the case with Youtube videos. No matter how good the content of your video is if you are unable to convey that with the thumbnail of your video, it will not bring any good to your channel. If you are looking forward to growing your channel and attracting more viewers, then having an appealing and eye-catching thumbnail is one of the most important factors. There are several things to be considered while creating a custom thumbnail if you want to make your videos look stunning and engaging. By following all these points, you can increase the chances of your channel’s growth.
In this article, we have 5 chapters for you:
- Best YouTube Thumbnail Size
- How Important is a Custom Thumbnail?
- Best Practices From Experiences
- How to Make a Fortnite Thumbnail
- How to Add a Custom Thumbnail to Your Video
Best YouTube Thumbnail Size
Being a content creator, you never know which device is being used by the viewer to watch your videos. It can be a smartphone, laptop, pc, or smart TV. It is very important to keep all these devices in mind while choosing a Youtube thumbnail size. For the best possible results, consider the following points while making a thumbnail for your Youtube videos.
- To cover all the devices perfectly, set the thumbnail resolution to 1280x720
- Save the thumbnail in JPG, GIF, or PNG format
- Try not to cross the 2MB limit
- Make sure to use a 16:9 aspect ratio for perfect results throughout the devices
How Important is a Custom Thumbnail?
Custom Thumbnail is a tool through which the viewers can understand everything about a video. It tells the viewers what to expect from a video, what not to expect, and what the video is all about. no matter if you create amazing content, if the thumbnail is not good enough to covey that to the viewers, all your hard work will be of no use and will not bring any good to your channel and its growth. According to Google ,90% of best-performing videos have custom thumbnails. It shows the importance of custom thumbnails.
Best Practice From Experiences
Now, since we know the importance of having a custom thumbnail, it is important to know how to make a thumbnail for Youtube look perfect, appealing, and eye-catching at the same time. There are some points to be considered while creating a thumbnail for Youtube. We will provide you with the best practices that we have learned throughout our journey of using Youtube and growing it from zero.
7 best practices can help you make your Youtube thumbnail stand out from the crowd and make its way out.
In a world full of machines and computers, people love to listen and interact with people instead of computer-generated voices and a voice without a face. Showing your face on a Youtube thumbnail makes it more appealing to users to click and listen to the person who is being shown in the thumbnail. Humans are more inclined towards faces. When there is a human element in a video, it increases its effectiveness. Check out the pics below, which one are you most likely to click through?
With your face, it is necessary to put some text on your Youtube thumbnail to let viewers know what this video is all about without clicking or watching it. Don’t use fancy fonts on Youtube thumbnail. It makes it hard for the viewers to read and understand what to expect in the video, especially for those watching YouTube on their 5 inches screen smartphone, ultimately decreasing the chances of your video being clicked and watched. I personally recommend you to use give these fonts a go while making YouTube thumbnail.
If you have ever noticed, Youtube thumbnails are very small in size, making it hard for viewers to notice any small elements. According to YouTube , more than 70% of Youtube watch time comes from mobile devices. While adding text in a thumbnail, instead of using sentences, make sure to use only words and make them large in size that can easily be noticed on small screens. Summurise your video in no more than 5 words.
When we navigate to a Youtube thumbnail and place the cursor on it, it shows us two icons, “Watch Later” and “Add to Queue,” located on its right size. Come on, you don’t want your beautiful thumbnail that cost you a few hours be covered. To avoid these icons from hiding your important stuff of thumbnail, make sure to put everything on the right side of your thumbnail.
Try to make all your thumbnails follow the same style. Following the same style for all your Youtube thumbnails will make your channel look unique and all your videos identical. It will be easy for viewers to identify your videos when they see them. It gives your channel a touch of its unique brand.
To make your Youtube thumbnail more appealing to the viewers, add circles and arrows to grab viewers’ attention to something very important in the video. It will increase the curiosity in the viewers and make them click your videos to learn more.
This whole process seems to be very hectic and time taking, but do you know, you can do everything on just one software? There is no need to edit a video in a different software then make a thumbnail in another software. With Filmora X, you can perform all these tasks on a single platform with so many amazing features. Whether you want to remove the background of your image or add attractive titles to it, Filmora X has got you covered.
It is one of the old tricks that so many people on Youtube use. It undoubtedly brings you clicks and more views, but once the viewer realizes that you have used irrelevant pictures or texts to attract them**. I**n reality, your video doesn’t contain any information related to it, you are going to lose their trust. They are never going to click on your videos again. Even if you don’t use such a trick anymore. Try to avoid such activities. Avoiding such activities can make your channel grow in the long term. Only use the text and images that are relevant to your content and stick to that.
Do you know that Youtube can show a 3-second preview of your video when someone hovers the cursor over it? It is one of the best ways to show the viewers the content of your video even when they don’t click on your video. These three seconds will help them decide whether to click on your video or not. This preview is selected by the system from the first half of your video according to its relevance and similarity with the topic. That’s why it is very important to add related information in the first half of the video, otherwise, Youtube will choose it randomly. If the preview is not selected for two days, it means your video is not eligible for it.
How to Make a Fortnite Thumbnail Super Fast and Free?
Many of you might be interested in how to make a fortnite thumbnail, so here it is. To make a Fortnite thumbnail for free, we are going to use Filmora X. Filmora X contains all kinds of features and elements that are required for a perfect and eye-catching thumbnail. To get started, make sure to download and install the latest version of Filmora X.
- Before we start making Fortnite Thumbnails, we have to take a screenshot of the gameplay. Open Fortnite and go to the Career tab. Here you will find Replays.
- It contains all your recent gameplays. We can use it to take a screenshot. If you are using a console, you will find 10 recent gameplays here. But if you are a PC user, you can find the last 100 gameplays. Select the gameplay you want to take a screenshot from.
- For our preferred angle, choose “Drone Free Camera” mode from the bottom right corner of the screen. It will allow us to use our preferred angle without any restriction. Choose an angle and take a screenshot.
- Open Filmora X, make sure to select the 16:9 screen ratio. Import the screenshot that you have taken from Fortnite.
- Place it into the timeline to start working on it.
- Now to separate the character from the background, go to the Effects. Under effects, you can find a tab named AI Portraits. Click on AI Portrait. Now drag the Human Segmentation and drop it on the screenshot in the timeline.
- It will ask you to purchase it. But there is no need to do that. Just hit Try It.
- This effect will remove the background of your screenshot.
- Now you can add a background of your choice. You can upload an image or choose a simple color from Filmora’s Media tab and drag it below the screenshot in the timeline.
- To add text to the screenshot, go to Titles. Here you can find a wide range of different and unique titles to choose from for your Fortnite Thumbnail. Choose any of the titles and place them accordingly.
- To make it more attractive, we can add icons and other elements from Filmora’s Element tab. You can also download the stickers from the internet and use them.
- After completing the thumbnail, click on the Snapshot icon located below the preview tab of Filmora. Or press “CTRL+ALT+S”. It will save a screenshot into the media panel of Filmora.
- Right-click on the screenshot and navigate to “Reveal in Explorer”. It will open the folder that contains all the screenshots taken from Filmora. Now you can use it as a Fortnite Thumbnail.
How to Add a Custom YouTube Thumbnail to Your Video in YouTube
Once you have successfully created a custom thumbnail, you can use it in your videos on Youtube.
- Open Youtube Studio and upload your video. While uploading the video, you can see a section named “Thumbnail”. Under this section, click on “Upload Thumbnail”.
- Select the thumbnail that you have made. Just like the one Fortnite thumbnail that we have created using Filmora X.
- The thumbnail will be uploaded and attached to the video. Now you can process all the settings and publish the video.
Conclusion
Thumbnail is the first thing that helps the viewer decide whether to click on a video or ignore it. Which increases the importance of having a well-structured and attractive thumbnail. By following the above guide, you can make an astonishing and clickable thumbnail in no time. For better and quick results, we recommend you using Filmora X. It allows you to perform all the tasks from video editing to thumbnail creation on a single platform.
Benjamin Arango
Benjamin Arango is a writer and a lover of all things video.
Follow @Benjamin Arango
Also read:
- 2024 Approved Channel Transformation Unleash Potential with TubeBuddy
- In 2024, Backwards Play Mastering YouTube Video Reversals
- [New] Decoding Dimensions The Key to Perfect Aspect Ratios in Video
- How to Upload a Video to YouTube From iPhone or iPad 2024
- Diverging Paths YouTube Licensing & Creative Commons
- 2024 Approved Essential YouTube Tagging Strategies for Optimal Visibility
- Best Soundshapers for Content Makers on YouTube
- [Updated] Achieve Professional Quality on YT with Simple Blurring
- YouTube's Quick Tunes Essential Insights for Short Video Fans
- A Novice's Roadmap to YouTube Traffic Success for 2024
- Elite Collective Photo, Music + Visual Creation Fusion
- [New] Elevate Your Profits YouTube's Studio Monetization Simplified
- Streamline Content Discovery Leveraging Youtube's Featured Channel Guide
- Bring Playlists Down to YouTube The 5 Best Conversion Resources for 2024
- Top Essentials for Launching a YouTube Success Story
- [Updated] Comparing Streams Vimeo Versus YouTube
- Strategies for Finding & Forming YouTube Content Partnerships
- MCB Template Pack Download Now
- Maximize Marketing - YouTube's Best SEO Aids for Videos
- In 2024, Empower Your Video Creation Blending YouTube and iMovie for Impressive Results
- 2024 Approved Discover the Top Free Platforms for YouTube Ops
- Exclusive Webcast Winners
- [Updated] Effortless Sound Transformation From YouTube to WAV Format
- [Updated] Designing Effective Thumbnails with Imagery
- In 2024, Crafting Standout YouTube Thumbnails with Ease
- Techniques to Brighten Up Your Content Creation Spaces
- In 2024, Enthralling Escapade YouTube Editors Magic Spectacle
- The Ultimate Checklist for YouTube Short Success
- In 2024, Engage, Enchant, Excel The Quintessential 5 Strategies for YouTube Marketing
- Decoding Vtubers The Path From Concept to Career for 2024
- In 2024, What Legendaries Are In Pokemon Platinum On Huawei Nova Y91? | Dr.fone
- How to Watch Hulu Outside US On Samsung Galaxy S23+ | Dr.fone
- Ways to stop parent tracking your Oppo F23 5G | Dr.fone
- [Updated] Which Is Better Video Editor for iPhone for 2024 Cameo or FilmoraGo?
- Complete guide for recovering music files on Infinix Hot 30 5G
- Streamlining Media Edits StoryRemix & Windows 11 Photos Integration
- [Updated] Peek Into Past Posts Panel
- [Updated] Palate Pleasures International Eats to Try
- Unleashing Your Ad's Potential Maximizing Revenue with FB Animation Strategies
- In 2024, How to Change your OnePlus Ace 3 Location on Twitter | Dr.fone
- In 2024, How to Transfer Contacts from Nokia C32 to iPhone XS/11 | Dr.fone
- How to Send and Fake Live Location on Facebook Messenger Of your Vivo Y36 | Dr.fone
- [New] The Ultimate Strategy for a Wider Reach Tips for Using TikTok Hashtags
- [New] Secure Whole-Page Scene for 2024
- [New] 2024 Approved The Ultimate Guide for Enthusiasts on Screenshotting with ZD Software
- In 2024, Exclusive Guide to the Best Chrome Extensions for FB Videos
- Premier Chillout PC Game Hits
- Title: "2024 Approved Cutting-Edge Camera Technology For YouTube Stars"
- Author: Steven
- Created at : 2024-05-25 18:33:02
- Updated at : 2024-05-26 18:33:02
- Link: https://youtube-clips.techidaily.com/2024-approved-cutting-edge-camera-technology-for-youtube-stars/
- License: This work is licensed under CC BY-NC-SA 4.0.
