
"2024 Approved Crafting Perfect YouTube Intro/End Videos at No Cost"
Crafting Perfect YouTube Intro/End Videos at No Cost
How to Create YouTube Intros & End Cards - Free and Easy


Shanoon Cox
Oct 26, 2023• Proven solutions
Part1: Intros
Elements of an Intro
Intros should only last about five seconds, and that can be cut down to two or three if you have a larger following.
When your intro video is longer than five seconds viewers are more likely to click away. The first 15 seconds of a video is when viewers are most likely to decide to click on one of the recommended videos, or go back to their search results and choose something else. The odds of them leaving within these first 15 seconds are greater if you do not get right to the main point of your video. That is why long intro sequences are bad for your watch time.
Whether it is better to put your intro at the very beginning of your video, or after you introduce your topic, will depend on your viewers. You may want to try it both ways and then look at your retention report (found in your YouTube Creator Studio under Analytics) to see which works best for you.
Top Intro Sites
There are a few different sites where you can download animated intros, customized to include your username or logo. Here are two of the best:
FlixPress.com
This is probably the most popular intro site. There are a lot of great animated intros available for under $5, or even for free.
IntroMaker.net
This is another site with really professional looking intros for $5. They only have two free options, though.
Creating an Intro in Filmora
You can create a simple intro card in Filmora.


- Choose your background. You may want to use a short clip as your intro, or you may just want a colored background.
- Drag your clip or background into the video track of your timeline and trim it down to five seconds.
- If you have a logo, import it into Filmora and drag it into your picture-in-picture track.
- With your logo selected, click on the Green Screen icon. In the pop-up, select the background of your logo to make it transparent. For this to work your logo cannot be the same color as its background.
- Click on the editing icon with your logo selected and choose an animation.
- Go to the Text/Titles menu and choose an animated title that suits your channel. Drag it into your text track and edit it to include your name.
- The last piece of your intro is sound. You can choose a song from Filmora’s library and cut it down to five seconds, or import your sound effect.
- Export your video and save it for use in all of your other videos.
Part 2: End Cards
When your video ends, YouTube will recommend a selection of videos users may want to watch next. Often, these recommendations will not include more of your videos.
To keep viewers on your channel, you can create your End Card which recommends other content you have created.
Elements of an End Card
An end card includes clips from two or three of your videos, muted, and shrunk down to thumbnail-size. Using spotlight annotations you can make these thumbnails click-able.
It is also important that your end card includes multiple calls to action. A call to action is meant to spur a viewer to some kind of action. Writing ‘Check out this video’ above one of your thumbnails is a call to action.
You should also have a subscribe link somewhere in your end card, ideally a very noticeable button with a proven call to action like ‘Subscribe Now!’.
Some creators will leave their end cards at that and play music overtop, but it can be even more effective to include a voiceover where you ask viewers to subscribe and watch your other videos.
How To Make an End Card
- Choose a static background. You may want to download an end card template or create one in a drawing program. If you do, make sure to include calls to action like ‘Watch more!’ and ‘Subscribe’.
- Drag your background into your timeline at the end of your video.
- Import two or three of your previous videos and drag them into your picture in picture tracks. Each clip should be on its track.
- Trim the clips in your picture in picture track down to the same length as your end card.
- Shrink your clips down to thumbnail-size by dragging their corners in the preview window.
- Position your clips so they are spaced evenly by dragging them in the preview screen.
- Mute your clips.
- If your background does not include any calls to action, choose a title from the Text/Titles menu in Filmora and create at least two – one asking viewers to subscribe, and one asking them to watch your suggested videos.
- Export your video from Filmora and upload it to YouTube.
- Go to your Video Manager and select Annotations in the drop-down menu next to your video.
- Go to your end card in the previewer, as that is where you want to add your annotations.
- Click Add Annotation and add a spotlight annotation to your video. Stretch it over one of your thumbnails and then check the Link box under your Annotation’s timing. Insert a link to the video you are previewing.
- Repeat for any other thumbnails. For your subscribe button, change where it said ‘Video’ to ‘Subscribe’ and enter your channel URL.
- Click Apply Changes.
Shanoon Cox
Shanoon Cox is a writer and a lover of all things video.
Follow @Shanoon Cox
Shanoon Cox
Oct 26, 2023• Proven solutions
Part1: Intros
Elements of an Intro
Intros should only last about five seconds, and that can be cut down to two or three if you have a larger following.
When your intro video is longer than five seconds viewers are more likely to click away. The first 15 seconds of a video is when viewers are most likely to decide to click on one of the recommended videos, or go back to their search results and choose something else. The odds of them leaving within these first 15 seconds are greater if you do not get right to the main point of your video. That is why long intro sequences are bad for your watch time.
Whether it is better to put your intro at the very beginning of your video, or after you introduce your topic, will depend on your viewers. You may want to try it both ways and then look at your retention report (found in your YouTube Creator Studio under Analytics) to see which works best for you.
Top Intro Sites
There are a few different sites where you can download animated intros, customized to include your username or logo. Here are two of the best:
FlixPress.com
This is probably the most popular intro site. There are a lot of great animated intros available for under $5, or even for free.
IntroMaker.net
This is another site with really professional looking intros for $5. They only have two free options, though.
Creating an Intro in Filmora
You can create a simple intro card in Filmora.
- Choose your background. You may want to use a short clip as your intro, or you may just want a colored background.
- Drag your clip or background into the video track of your timeline and trim it down to five seconds.
- If you have a logo, import it into Filmora and drag it into your picture-in-picture track.
- With your logo selected, click on the Green Screen icon. In the pop-up, select the background of your logo to make it transparent. For this to work your logo cannot be the same color as its background.
- Click on the editing icon with your logo selected and choose an animation.
- Go to the Text/Titles menu and choose an animated title that suits your channel. Drag it into your text track and edit it to include your name.
- The last piece of your intro is sound. You can choose a song from Filmora’s library and cut it down to five seconds, or import your sound effect.
- Export your video and save it for use in all of your other videos.
 PearlMountain Image Converter
Part 2: End Cards
When your video ends, YouTube will recommend a selection of videos users may want to watch next. Often, these recommendations will not include more of your videos.
To keep viewers on your channel, you can create your End Card which recommends other content you have created.
Elements of an End Card
An end card includes clips from two or three of your videos, muted, and shrunk down to thumbnail-size. Using spotlight annotations you can make these thumbnails click-able.
It is also important that your end card includes multiple calls to action. A call to action is meant to spur a viewer to some kind of action. Writing ‘Check out this video’ above one of your thumbnails is a call to action.
You should also have a subscribe link somewhere in your end card, ideally a very noticeable button with a proven call to action like ‘Subscribe Now!’.
Some creators will leave their end cards at that and play music overtop, but it can be even more effective to include a voiceover where you ask viewers to subscribe and watch your other videos.
How To Make an End Card
- Choose a static background. You may want to download an end card template or create one in a drawing program. If you do, make sure to include calls to action like ‘Watch more!’ and ‘Subscribe’.
- Drag your background into your timeline at the end of your video.
- Import two or three of your previous videos and drag them into your picture in picture tracks. Each clip should be on its track.
- Trim the clips in your picture in picture track down to the same length as your end card.
- Shrink your clips down to thumbnail-size by dragging their corners in the preview window.
- Position your clips so they are spaced evenly by dragging them in the preview screen.
- Mute your clips.
- If your background does not include any calls to action, choose a title from the Text/Titles menu in Filmora and create at least two – one asking viewers to subscribe, and one asking them to watch your suggested videos.
- Export your video from Filmora and upload it to YouTube.
- Go to your Video Manager and select Annotations in the drop-down menu next to your video.
- Go to your end card in the previewer, as that is where you want to add your annotations.
- Click Add Annotation and add a spotlight annotation to your video. Stretch it over one of your thumbnails and then check the Link box under your Annotation’s timing. Insert a link to the video you are previewing.
- Repeat for any other thumbnails. For your subscribe button, change where it said ‘Video’ to ‘Subscribe’ and enter your channel URL.
- Click Apply Changes.
 vMix HD - Software based live production. vMix HD includes everything in vMix Basic HD plus 1000 inputs, Video List, 4 Overlay Channels, and 1 vMix Call
Shanoon Cox
Shanoon Cox is a writer and a lover of all things video.
Follow @Shanoon Cox
Shanoon Cox
Oct 26, 2023• Proven solutions
Part1: Intros
Elements of an Intro
Intros should only last about five seconds, and that can be cut down to two or three if you have a larger following.
When your intro video is longer than five seconds viewers are more likely to click away. The first 15 seconds of a video is when viewers are most likely to decide to click on one of the recommended videos, or go back to their search results and choose something else. The odds of them leaving within these first 15 seconds are greater if you do not get right to the main point of your video. That is why long intro sequences are bad for your watch time.
Whether it is better to put your intro at the very beginning of your video, or after you introduce your topic, will depend on your viewers. You may want to try it both ways and then look at your retention report (found in your YouTube Creator Studio under Analytics) to see which works best for you.
Top Intro Sites
There are a few different sites where you can download animated intros, customized to include your username or logo. Here are two of the best:
FlixPress.com
This is probably the most popular intro site. There are a lot of great animated intros available for under $5, or even for free.
IntroMaker.net
This is another site with really professional looking intros for $5. They only have two free options, though.
Creating an Intro in Filmora
You can create a simple intro card in Filmora.
 Forex Robotron Basic Package
- Choose your background. You may want to use a short clip as your intro, or you may just want a colored background.
- Drag your clip or background into the video track of your timeline and trim it down to five seconds.
- If you have a logo, import it into Filmora and drag it into your picture-in-picture track.
- With your logo selected, click on the Green Screen icon. In the pop-up, select the background of your logo to make it transparent. For this to work your logo cannot be the same color as its background.
- Click on the editing icon with your logo selected and choose an animation.
- Go to the Text/Titles menu and choose an animated title that suits your channel. Drag it into your text track and edit it to include your name.
- The last piece of your intro is sound. You can choose a song from Filmora’s library and cut it down to five seconds, or import your sound effect.
- Export your video and save it for use in all of your other videos.
Part 2: End Cards
When your video ends, YouTube will recommend a selection of videos users may want to watch next. Often, these recommendations will not include more of your videos.
To keep viewers on your channel, you can create your End Card which recommends other content you have created.
Elements of an End Card
An end card includes clips from two or three of your videos, muted, and shrunk down to thumbnail-size. Using spotlight annotations you can make these thumbnails click-able.
It is also important that your end card includes multiple calls to action. A call to action is meant to spur a viewer to some kind of action. Writing ‘Check out this video’ above one of your thumbnails is a call to action.
You should also have a subscribe link somewhere in your end card, ideally a very noticeable button with a proven call to action like ‘Subscribe Now!’.
Some creators will leave their end cards at that and play music overtop, but it can be even more effective to include a voiceover where you ask viewers to subscribe and watch your other videos.
How To Make an End Card
- Choose a static background. You may want to download an end card template or create one in a drawing program. If you do, make sure to include calls to action like ‘Watch more!’ and ‘Subscribe’.
- Drag your background into your timeline at the end of your video.
- Import two or three of your previous videos and drag them into your picture in picture tracks. Each clip should be on its track.
- Trim the clips in your picture in picture track down to the same length as your end card.
- Shrink your clips down to thumbnail-size by dragging their corners in the preview window.
- Position your clips so they are spaced evenly by dragging them in the preview screen.
- Mute your clips.
- If your background does not include any calls to action, choose a title from the Text/Titles menu in Filmora and create at least two – one asking viewers to subscribe, and one asking them to watch your suggested videos.
- Export your video from Filmora and upload it to YouTube.
- Go to your Video Manager and select Annotations in the drop-down menu next to your video.
- Go to your end card in the previewer, as that is where you want to add your annotations.
- Click Add Annotation and add a spotlight annotation to your video. Stretch it over one of your thumbnails and then check the Link box under your Annotation’s timing. Insert a link to the video you are previewing.
- Repeat for any other thumbnails. For your subscribe button, change where it said ‘Video’ to ‘Subscribe’ and enter your channel URL.
- Click Apply Changes.
Shanoon Cox
Shanoon Cox is a writer and a lover of all things video.
Follow @Shanoon Cox
Shanoon Cox
Oct 26, 2023• Proven solutions
 SwifDoo PDF Perpetual (1 PC) Free upgrade. No monthly fees ever.
Part1: Intros
Elements of an Intro
Intros should only last about five seconds, and that can be cut down to two or three if you have a larger following.
When your intro video is longer than five seconds viewers are more likely to click away. The first 15 seconds of a video is when viewers are most likely to decide to click on one of the recommended videos, or go back to their search results and choose something else. The odds of them leaving within these first 15 seconds are greater if you do not get right to the main point of your video. That is why long intro sequences are bad for your watch time.
Whether it is better to put your intro at the very beginning of your video, or after you introduce your topic, will depend on your viewers. You may want to try it both ways and then look at your retention report (found in your YouTube Creator Studio under Analytics) to see which works best for you.
Top Intro Sites
There are a few different sites where you can download animated intros, customized to include your username or logo. Here are two of the best:
FlixPress.com
This is probably the most popular intro site. There are a lot of great animated intros available for under $5, or even for free.
IntroMaker.net
This is another site with really professional looking intros for $5. They only have two free options, though.
Creating an Intro in Filmora
You can create a simple intro card in Filmora.
- Choose your background. You may want to use a short clip as your intro, or you may just want a colored background.
- Drag your clip or background into the video track of your timeline and trim it down to five seconds.
- If you have a logo, import it into Filmora and drag it into your picture-in-picture track.
- With your logo selected, click on the Green Screen icon. In the pop-up, select the background of your logo to make it transparent. For this to work your logo cannot be the same color as its background.
- Click on the editing icon with your logo selected and choose an animation.
- Go to the Text/Titles menu and choose an animated title that suits your channel. Drag it into your text track and edit it to include your name.
- The last piece of your intro is sound. You can choose a song from Filmora’s library and cut it down to five seconds, or import your sound effect.
- Export your video and save it for use in all of your other videos.
Part 2: End Cards
When your video ends, YouTube will recommend a selection of videos users may want to watch next. Often, these recommendations will not include more of your videos.
To keep viewers on your channel, you can create your End Card which recommends other content you have created.
Elements of an End Card
An end card includes clips from two or three of your videos, muted, and shrunk down to thumbnail-size. Using spotlight annotations you can make these thumbnails click-able.
It is also important that your end card includes multiple calls to action. A call to action is meant to spur a viewer to some kind of action. Writing ‘Check out this video’ above one of your thumbnails is a call to action.
You should also have a subscribe link somewhere in your end card, ideally a very noticeable button with a proven call to action like ‘Subscribe Now!’.
Some creators will leave their end cards at that and play music overtop, but it can be even more effective to include a voiceover where you ask viewers to subscribe and watch your other videos.
How To Make an End Card
- Choose a static background. You may want to download an end card template or create one in a drawing program. If you do, make sure to include calls to action like ‘Watch more!’ and ‘Subscribe’.
- Drag your background into your timeline at the end of your video.
- Import two or three of your previous videos and drag them into your picture in picture tracks. Each clip should be on its track.
- Trim the clips in your picture in picture track down to the same length as your end card.
- Shrink your clips down to thumbnail-size by dragging their corners in the preview window.
- Position your clips so they are spaced evenly by dragging them in the preview screen.
- Mute your clips.
- If your background does not include any calls to action, choose a title from the Text/Titles menu in Filmora and create at least two – one asking viewers to subscribe, and one asking them to watch your suggested videos.
- Export your video from Filmora and upload it to YouTube.
- Go to your Video Manager and select Annotations in the drop-down menu next to your video.
- Go to your end card in the previewer, as that is where you want to add your annotations.
- Click Add Annotation and add a spotlight annotation to your video. Stretch it over one of your thumbnails and then check the Link box under your Annotation’s timing. Insert a link to the video you are previewing.
- Repeat for any other thumbnails. For your subscribe button, change where it said ‘Video’ to ‘Subscribe’ and enter your channel URL.
- Click Apply Changes.
 /a>
/a>
Shanoon Cox
Shanoon Cox is a writer and a lover of all things video.
Follow @Shanoon Cox
Make a Mark with Your First Cool Mac Video Post on YouTube
How do Beginners Make a Cool Video for YouTube on Mac
Shanoon Cox
Dec 14, 2023• Proven solutions
To get the right video editors to cut a video for YouTube on your Mac can be a bit of a problem for beginners. It is understandable that there will be a learning curve if you just want to get tons of subscribers on your channel – who doesn’t? Ultimately, in getting a standard video that will attract and sustain the interest of the viewers, you will need to employ certain strategies that will enhance your credibility.
Let’s tell each other the truth, no one wants to watch a video that is not aesthetically appealing even if it is a close friend. So, if you have got the relevant content and the video to pull traffic to your channel, what you will need is editing software that will help you make the correct adjustments to your video
Nobody wants a random viewer to comment “This video is a little bit tacky, touch-up properly”, that will definitely leave a sting. As such, understand the best technique that works for you as well as the software that meets your needs based on the current level of expertise. It is okay for you to grow.


Five Video Cutting Skills Youtubers Must Have
As much as the enthusiasm is brewing to get on your mac and upload the video you just shot, there are certain elements you need to implement to make a cool video for YouTube. Beginners sometimes feel their content is the best, the excitement of posting their very first series can be overwhelming. Sometimes, it blocks off other ideas for making the video better.
However, having amazing content dies not to exclude the need for the right editing technique. Here are five methods for editing your YouTube videos:
1.Control the video duration
The length of a particular scene can have different meanings depending on how long or short it is in a video. This means the duration can impact the message you are trying to pass across to your viewers, hence it is important to know what places to accelerate and cut in the video.
You can have a system where each part of the content is labeled in their order of importance such as A, B, C. This means from the most important to the least important. Consequently, you will be able to sieve through the content and make the appropriate changes while editing the video.
 Screensaver Factory, Create stunning professional screensavers within minutes. Create screensavers for yourself, for marketing or unlimited royalty-free commercial distribution. Make screensavers from images, video and swf flash, add background music and smooth sprite and transition effects. Screensaver Factory is very easy to use, and it enables you to make self-installing screensaver files and CDs for easy setup and distribution. Screensaver Factory is the most advanced software of its kind.
![]()
2.Customize the intro and end of the video
It is possible to grab the attention of the viewer in the intro and even more likely to lose someone once the opening montage comes in. Creating an intro that is captivating and appealing to drag the audience to your video is an important technique for editing your videos. Also, the end of the video, from the signing out to the closing montage has to appeal to the audience. You will be surprised by the number of people that love seeing end credits if the closing montage is good. Customize the intro and the end of the video so the audience is tuned all through.
You May Like: Best YouTube Banner Size and Channel Art Dimension (The Ultimate Guide)
You May Like: How to Add Logo or Watermark to YouTube Video
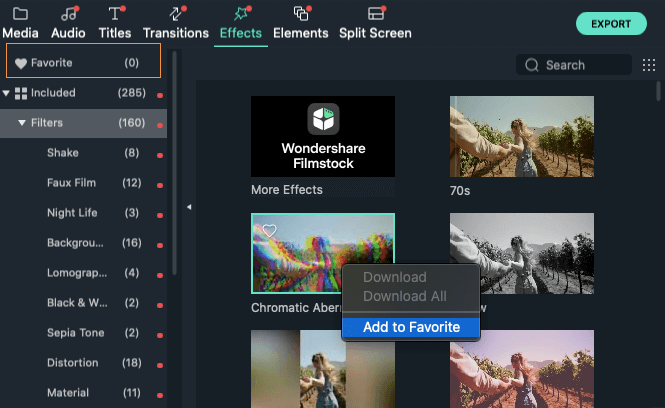
3.Use Cool transitions or filters
If there is anything the audience love to see, it is the way you move from different points in the vudeo. The ability to use transition that does not affect their attention but leaves them wanting more is very key. Use fanciful transitions that do noy hurt the eyes and allows for easy comprehension.
4.Match the cuts
Whatever you cut has to match the next phase of the video. You do not want to leave the audience behind as they will wonder how the last scene correlates with a new one. You need to ensure that all cuts match the next scenes.

5.Cutaway shots
This is very good in providing the audience context. You can take shots of the room or item that you are trying to discuss in your video. If people keep staring at a particular thing for long, they get bored, cutaway shots keep the excitement alive for the audience.
 EmEditor Professional (Lifetime License, non-store app)
What Editing Software can Meet Your Needs?
As a beginner, it is important to use software that is easily adaptable to your needs. If you want to make a cool video for you be on your mac, getting software that allows you to be creative without confusion is key. Here are two software for making cool YouTube videos for your Mac;
Filmora X
This is one of the simplest yet powerful tools that is lightweight and apt for your Mac. One of the perks of using the Filmora X is the feature that allows you to upload the video directly to YouTube, saving you any extended hassles.

There are also 400+ transition effects as well as a stylish text editor that is fun to use. There is also a built-in music and sound effect feature that enables you to select sounds to match the video you are editing. This is if you do not have the music you want for the video already.
Other pros of Filmora are:
• It has fast rendering sped for your video
• The lifetime price is affordable.
However, there are some disadvantages to the usage of Filmora X, which are:
• The free version contains the Filmora X watermark
• The color grading tool is limited.

Blender
If you are looking for software for the model, game creating, and animation then opting for Blender will be a good fit. You can trim videos, insert filters, and add as many videos as you want.
Pros
- The 3D graphics make it suitable for editing YouTube videos.
- Composting system and node-based material
- It supports your Mac.
Cons:
- It could be slow when running
- Some think it might be a bit complicated.
Although there is other editing software for your Mac, Filmora X simplifies the whole process. If you are looking for quality wrapped in affordability and convenience, then Filmora X will be right for you. Start editing and enjoy the ride!
 vMix Basic HD - Software based live production. vMix Basic HD includes 4 inputs, 3 cameras, streaming, recording, playlist.
Learn More: YouTuber Skillshare: Essential Video Cutting Skills For YouTubers

Shanoon Cox
Shanoon Cox is a writer and a lover of all things video.
Follow @Shanoon Cox
Shanoon Cox
Dec 14, 2023• Proven solutions
To get the right video editors to cut a video for YouTube on your Mac can be a bit of a problem for beginners. It is understandable that there will be a learning curve if you just want to get tons of subscribers on your channel – who doesn’t? Ultimately, in getting a standard video that will attract and sustain the interest of the viewers, you will need to employ certain strategies that will enhance your credibility.
Let’s tell each other the truth, no one wants to watch a video that is not aesthetically appealing even if it is a close friend. So, if you have got the relevant content and the video to pull traffic to your channel, what you will need is editing software that will help you make the correct adjustments to your video
Nobody wants a random viewer to comment “This video is a little bit tacky, touch-up properly”, that will definitely leave a sting. As such, understand the best technique that works for you as well as the software that meets your needs based on the current level of expertise. It is okay for you to grow.
Five Video Cutting Skills Youtubers Must Have
As much as the enthusiasm is brewing to get on your mac and upload the video you just shot, there are certain elements you need to implement to make a cool video for YouTube. Beginners sometimes feel their content is the best, the excitement of posting their very first series can be overwhelming. Sometimes, it blocks off other ideas for making the video better.
However, having amazing content dies not to exclude the need for the right editing technique. Here are five methods for editing your YouTube videos:
1.Control the video duration
The length of a particular scene can have different meanings depending on how long or short it is in a video. This means the duration can impact the message you are trying to pass across to your viewers, hence it is important to know what places to accelerate and cut in the video.
You can have a system where each part of the content is labeled in their order of importance such as A, B, C. This means from the most important to the least important. Consequently, you will be able to sieve through the content and make the appropriate changes while editing the video.
![]()

2.Customize the intro and end of the video
It is possible to grab the attention of the viewer in the intro and even more likely to lose someone once the opening montage comes in. Creating an intro that is captivating and appealing to drag the audience to your video is an important technique for editing your videos. Also, the end of the video, from the signing out to the closing montage has to appeal to the audience. You will be surprised by the number of people that love seeing end credits if the closing montage is good. Customize the intro and the end of the video so the audience is tuned all through.
You May Like: Best YouTube Banner Size and Channel Art Dimension (The Ultimate Guide)
You May Like: How to Add Logo or Watermark to YouTube Video
3.Use Cool transitions or filters
If there is anything the audience love to see, it is the way you move from different points in the vudeo. The ability to use transition that does not affect their attention but leaves them wanting more is very key. Use fanciful transitions that do noy hurt the eyes and allows for easy comprehension.
 vMix Pro - Software based live production. vMix Pro includes everything in vMix 4K plus 8 channels of Replay and 8 vMix Call

4.Match the cuts
Whatever you cut has to match the next phase of the video. You do not want to leave the audience behind as they will wonder how the last scene correlates with a new one. You need to ensure that all cuts match the next scenes.
5.Cutaway shots
This is very good in providing the audience context. You can take shots of the room or item that you are trying to discuss in your video. If people keep staring at a particular thing for long, they get bored, cutaway shots keep the excitement alive for the audience.
What Editing Software can Meet Your Needs?
As a beginner, it is important to use software that is easily adaptable to your needs. If you want to make a cool video for you be on your mac, getting software that allows you to be creative without confusion is key. Here are two software for making cool YouTube videos for your Mac;
Filmora X
This is one of the simplest yet powerful tools that is lightweight and apt for your Mac. One of the perks of using the Filmora X is the feature that allows you to upload the video directly to YouTube, saving you any extended hassles.

There are also 400+ transition effects as well as a stylish text editor that is fun to use. There is also a built-in music and sound effect feature that enables you to select sounds to match the video you are editing. This is if you do not have the music you want for the video already.
Other pros of Filmora are:
• It has fast rendering sped for your video
• The lifetime price is affordable.
However, there are some disadvantages to the usage of Filmora X, which are:
• The free version contains the Filmora X watermark
• The color grading tool is limited.
Blender
If you are looking for software for the model, game creating, and animation then opting for Blender will be a good fit. You can trim videos, insert filters, and add as many videos as you want.
Pros
- The 3D graphics make it suitable for editing YouTube videos.
- Composting system and node-based material
- It supports your Mac.
Cons:
- It could be slow when running
- Some think it might be a bit complicated.
Although there is other editing software for your Mac, Filmora X simplifies the whole process. If you are looking for quality wrapped in affordability and convenience, then Filmora X will be right for you. Start editing and enjoy the ride!

Learn More: YouTuber Skillshare: Essential Video Cutting Skills For YouTubers
Shanoon Cox
Shanoon Cox is a writer and a lover of all things video.
Follow @Shanoon Cox
Shanoon Cox
Dec 14, 2023• Proven solutions
To get the right video editors to cut a video for YouTube on your Mac can be a bit of a problem for beginners. It is understandable that there will be a learning curve if you just want to get tons of subscribers on your channel – who doesn’t? Ultimately, in getting a standard video that will attract and sustain the interest of the viewers, you will need to employ certain strategies that will enhance your credibility.
Let’s tell each other the truth, no one wants to watch a video that is not aesthetically appealing even if it is a close friend. So, if you have got the relevant content and the video to pull traffic to your channel, what you will need is editing software that will help you make the correct adjustments to your video
Nobody wants a random viewer to comment “This video is a little bit tacky, touch-up properly”, that will definitely leave a sting. As such, understand the best technique that works for you as well as the software that meets your needs based on the current level of expertise. It is okay for you to grow.
Five Video Cutting Skills Youtubers Must Have
As much as the enthusiasm is brewing to get on your mac and upload the video you just shot, there are certain elements you need to implement to make a cool video for YouTube. Beginners sometimes feel their content is the best, the excitement of posting their very first series can be overwhelming. Sometimes, it blocks off other ideas for making the video better.
However, having amazing content dies not to exclude the need for the right editing technique. Here are five methods for editing your YouTube videos:
1.Control the video duration
The length of a particular scene can have different meanings depending on how long or short it is in a video. This means the duration can impact the message you are trying to pass across to your viewers, hence it is important to know what places to accelerate and cut in the video.
You can have a system where each part of the content is labeled in their order of importance such as A, B, C. This means from the most important to the least important. Consequently, you will be able to sieve through the content and make the appropriate changes while editing the video.
![]()
2.Customize the intro and end of the video
It is possible to grab the attention of the viewer in the intro and even more likely to lose someone once the opening montage comes in. Creating an intro that is captivating and appealing to drag the audience to your video is an important technique for editing your videos. Also, the end of the video, from the signing out to the closing montage has to appeal to the audience. You will be surprised by the number of people that love seeing end credits if the closing montage is good. Customize the intro and the end of the video so the audience is tuned all through.
You May Like: Best YouTube Banner Size and Channel Art Dimension (The Ultimate Guide)
You May Like: How to Add Logo or Watermark to YouTube Video
3.Use Cool transitions or filters
If there is anything the audience love to see, it is the way you move from different points in the vudeo. The ability to use transition that does not affect their attention but leaves them wanting more is very key. Use fanciful transitions that do noy hurt the eyes and allows for easy comprehension.
4.Match the cuts
Whatever you cut has to match the next phase of the video. You do not want to leave the audience behind as they will wonder how the last scene correlates with a new one. You need to ensure that all cuts match the next scenes.
5.Cutaway shots
This is very good in providing the audience context. You can take shots of the room or item that you are trying to discuss in your video. If people keep staring at a particular thing for long, they get bored, cutaway shots keep the excitement alive for the audience.
What Editing Software can Meet Your Needs?
As a beginner, it is important to use software that is easily adaptable to your needs. If you want to make a cool video for you be on your mac, getting software that allows you to be creative without confusion is key. Here are two software for making cool YouTube videos for your Mac;
Filmora X
This is one of the simplest yet powerful tools that is lightweight and apt for your Mac. One of the perks of using the Filmora X is the feature that allows you to upload the video directly to YouTube, saving you any extended hassles.
There are also 400+ transition effects as well as a stylish text editor that is fun to use. There is also a built-in music and sound effect feature that enables you to select sounds to match the video you are editing. This is if you do not have the music you want for the video already.
Other pros of Filmora are:
• It has fast rendering sped for your video
• The lifetime price is affordable.
However, there are some disadvantages to the usage of Filmora X, which are:
• The free version contains the Filmora X watermark
• The color grading tool is limited.
Parental Control Software
## BlenderIf you are looking for software for the model, game creating, and animation then opting for Blender will be a good fit. You can trim videos, insert filters, and add as many videos as you want.
Pros
- The 3D graphics make it suitable for editing YouTube videos.
- Composting system and node-based material
- It supports your Mac.
Cons:
- It could be slow when running
- Some think it might be a bit complicated.
Although there is other editing software for your Mac, Filmora X simplifies the whole process. If you are looking for quality wrapped in affordability and convenience, then Filmora X will be right for you. Start editing and enjoy the ride!
Learn More: YouTuber Skillshare: Essential Video Cutting Skills For YouTubers
Shanoon Cox
Shanoon Cox is a writer and a lover of all things video.
Follow @Shanoon Cox
Shanoon Cox
Dec 14, 2023• Proven solutions
To get the right video editors to cut a video for YouTube on your Mac can be a bit of a problem for beginners. It is understandable that there will be a learning curve if you just want to get tons of subscribers on your channel – who doesn’t? Ultimately, in getting a standard video that will attract and sustain the interest of the viewers, you will need to employ certain strategies that will enhance your credibility.
Let’s tell each other the truth, no one wants to watch a video that is not aesthetically appealing even if it is a close friend. So, if you have got the relevant content and the video to pull traffic to your channel, what you will need is editing software that will help you make the correct adjustments to your video
Nobody wants a random viewer to comment “This video is a little bit tacky, touch-up properly”, that will definitely leave a sting. As such, understand the best technique that works for you as well as the software that meets your needs based on the current level of expertise. It is okay for you to grow.
Five Video Cutting Skills Youtubers Must Have
As much as the enthusiasm is brewing to get on your mac and upload the video you just shot, there are certain elements you need to implement to make a cool video for YouTube. Beginners sometimes feel their content is the best, the excitement of posting their very first series can be overwhelming. Sometimes, it blocks off other ideas for making the video better.
However, having amazing content dies not to exclude the need for the right editing technique. Here are five methods for editing your YouTube videos:
1.Control the video duration
The length of a particular scene can have different meanings depending on how long or short it is in a video. This means the duration can impact the message you are trying to pass across to your viewers, hence it is important to know what places to accelerate and cut in the video.
You can have a system where each part of the content is labeled in their order of importance such as A, B, C. This means from the most important to the least important. Consequently, you will be able to sieve through the content and make the appropriate changes while editing the video.
![]()
2.Customize the intro and end of the video
It is possible to grab the attention of the viewer in the intro and even more likely to lose someone once the opening montage comes in. Creating an intro that is captivating and appealing to drag the audience to your video is an important technique for editing your videos. Also, the end of the video, from the signing out to the closing montage has to appeal to the audience. You will be surprised by the number of people that love seeing end credits if the closing montage is good. Customize the intro and the end of the video so the audience is tuned all through.
You May Like: Best YouTube Banner Size and Channel Art Dimension (The Ultimate Guide)
You May Like: How to Add Logo or Watermark to YouTube Video
3.Use Cool transitions or filters
If there is anything the audience love to see, it is the way you move from different points in the vudeo. The ability to use transition that does not affect their attention but leaves them wanting more is very key. Use fanciful transitions that do noy hurt the eyes and allows for easy comprehension.
4.Match the cuts
Whatever you cut has to match the next phase of the video. You do not want to leave the audience behind as they will wonder how the last scene correlates with a new one. You need to ensure that all cuts match the next scenes.
5.Cutaway shots
This is very good in providing the audience context. You can take shots of the room or item that you are trying to discuss in your video. If people keep staring at a particular thing for long, they get bored, cutaway shots keep the excitement alive for the audience.
 Project Manager - Asset Browser for 3Ds Max
What Editing Software can Meet Your Needs?
As a beginner, it is important to use software that is easily adaptable to your needs. If you want to make a cool video for you be on your mac, getting software that allows you to be creative without confusion is key. Here are two software for making cool YouTube videos for your Mac;
Filmora X
This is one of the simplest yet powerful tools that is lightweight and apt for your Mac. One of the perks of using the Filmora X is the feature that allows you to upload the video directly to YouTube, saving you any extended hassles.
 Project Manager - Asset Browser for 3Ds Max
There are also 400+ transition effects as well as a stylish text editor that is fun to use. There is also a built-in music and sound effect feature that enables you to select sounds to match the video you are editing. This is if you do not have the music you want for the video already.
Other pros of Filmora are:
• It has fast rendering sped for your video
• The lifetime price is affordable.
However, there are some disadvantages to the usage of Filmora X, which are:
• The free version contains the Filmora X watermark
• The color grading tool is limited.
Blender
If you are looking for software for the model, game creating, and animation then opting for Blender will be a good fit. You can trim videos, insert filters, and add as many videos as you want.
Pros
- The 3D graphics make it suitable for editing YouTube videos.
- Composting system and node-based material
- It supports your Mac.
Cons:
- It could be slow when running
- Some think it might be a bit complicated.
Although there is other editing software for your Mac, Filmora X simplifies the whole process. If you are looking for quality wrapped in affordability and convenience, then Filmora X will be right for you. Start editing and enjoy the ride!
Learn More: YouTuber Skillshare: Essential Video Cutting Skills For YouTubers
Shanoon Cox
Shanoon Cox is a writer and a lover of all things video.
Follow @Shanoon Cox
- Title: 2024 Approved Crafting Perfect YouTube Intro/End Videos at No Cost
- Author: Steven
- Created at : 2024-08-03 03:14:43
- Updated at : 2024-08-04 03:14:43
- Link: https://youtube-clips.techidaily.com/2024-approved-crafting-perfect-youtube-introend-videos-at-no-cost/
- License: This work is licensed under CC BY-NC-SA 4.0.