
:max_bytes(150000):strip_icc():format(webp)/social-media-text-588a94263df78caebc620f05.jpg)
"2024 Approved Bringing Your Vision Alive Transferring Vids From Premiere"
Bringing Your Vision Alive: Transferring Vids From Premiere
How Do I Use Adobe Premiere To Upload YouTube Videos?

Benjamin Arango
Mar 27, 2024• Proven solutions
Whilst getting the editing and post work just right on any project is what we all aim for, the ultimate aim is for other people to see our creations, and the most popular way to achieve that is YouTube . Chances are, if you are producing video, you will be putting some of it on YouTube at some point, so let’s have a look at the most efficient way to get your work from Premiere to YouTube.
Check if your computer meet the Premiere System Requirements >>
This is a basic tutorial about Adobe Premiere, professional video editing software. However, if video editing is new to you, consider Wondershare Filmora , which is a powerful but easy-to-use tool for users just starting out. Download the free trial version below.
 Download Mac Version ](https://tools.techidaily.com/wondershare/filmora/download/ )
How Do I Use Adobe Premiere To Upload YouTube Videos
1. Master Copy
Before exporting your work, it is important to first create a master copy of your project that is ‘as is’, in that it reflects the settings and codecs used in the original footage.
To do this you simply select the sequence within the Timeline or in the Project Panel, and go through the menu tree via File > Export > Media to bring up the export dialogue.

To create your Master Copy, simply select the first option of ‘Match Sequence Settings’, this exports a file that is of the same quality as your original footage, essentially producing a digital copy of the work for archiving before anything else is done.
With you work safe and secure it is now time to look at ensuring the project is suitable for YouTube. With our sequence selected in the Timeline or Project Panel again, we go through the same File > Export > Media path to bring up the media export dialogue as before.
2. Container
The first option we have to consider is the file format that our finished video needs to be in. Here you should refer to YouTube for its guidelines, whilst they do accept a number of file formats, digging through the YouTube help system to find the settings for highest quality we find that they recommend MPEG4 as the container, using the codec.

We can also see further recommended settings in this screenshot that will be covered later.
The good news is that Premiere automatically selects the appropriate container for us when we select our codec, however it is worth knowing the file type YouTube is expecting just to check yourself.
3. Video Codec
So having established that YouTube recommends the MPEG4 container using the codec, the first option we need to look for in the media export dialogue is to select the appropriate Format.
This is the first drop down in the dialogue box, and in this case we simply select from the list.

Once you select you can check the ‘output name’ field and see that premiere is automatically set the output file to .mp4 which is exactly what we need.
4. Preset
The next field we come to is the ‘Preset’ dropdown menu. This is a major help to most people, as Adobe have very kindly included large numbers of presets to quickly adapt video settings to suit specific uses. They vary depending on the exact version of Premiere you are using, and each format type does have its own list of presets, as we can see has a large number for YouTube, but also has many presets for specific devices (presets for iPad, Kindle, Nook, various other tablets and phones, Vimeo and a host of others) to make getting the right settings that bit easier for us.

It is important here to select the correct preset from the various YouTube options. You want to select the resolution and frame rate that match your source file, for the best results. So, if your source file is 1080p with a frame rate of 29.97 fps then that is the YouTube setting you would select.
Once a preset is selected a summary of the settings is displayed below, normally these will be well suited to your project, however you can fine tune anything you wish by selecting the video or audio tabs at the bottom which give you the chance to adjust each parameter individually. If you do this, you can save these changes as a custom preset by clicking the button at the side of the Preset dropdown menu and simply use it on later projects by selecting it from the list the same as any other, a great time saving tool.

5. Rendering
Once you are satisfied with the settings, either from the Preset alone or if you have adjusted anything yourself, you are nearly ready to render the file and export it.
For YouTube it is recommended you select the ‘Use Maximum Render Quality’ option to maintain the best output you can, it does add time to the render process but if you value the quality of your work it is worthwhile.
Finally you can choose a suitable filename and the destination of the file by clicking on the ‘Output Name’ field.
I normally use a filename that includes the destination medium so I can differentiate between different versions of a project and know which one to upload where, in this case I include ‘youtube’, but if I were planning on uploading clips of the project to vimeo as well for instance there may be a cut of the project with ‘vimeo’ in the name too. The destination is personal preference, because I do use filenames to differentiate versions I can put the various iterations into a single project file, others have folder structures for each type of file , so all YouTube output goes into a single folder and so on, how you organize is entirely dependent on how you work.

Once those are selected clicking ‘Export’ starts the rendering process, and eventually (how long depends on the speed of your computer and the size and type of file involved), you will end up with your YouTube optimized video in the location you chose.
Here I created 4 key frames that let the ‘Animation’ object move around the ‘Demo Text’ Object and finally come to rest below it. Whilst this type of effect does look very effective on screen, such is the ease of use of After Effects it really is just a few minutes work to achieve.
Learn more details about How to add text in Premiere >>
6. Uploading
Now you have your file, the next step is to go to your YouTube account and log in if you need to.
On the top of your homepage on the right is the upload button, selecting that brings up the select file menu as below.

You can either drag your file into the window or click on it to open a standard file browser to locate the desired file, click and the upload will begin. The dropdown underneath allows you to set the video as Public, Unlisted or Private. You can change this at any time once the video is uploaded as well.
This opens the upload progress window, where you can add in a name, description and tags as well as add the video to a playlist or adjust the privacy settings as the video is uploading.

Once the upload as finished, you can do final adjustments to settings and choose a thumbnail for the video. The final step is to click the ‘Publish’ button and your video will be processed and go live.

Benjamin Arango
Benjamin Arango is a writer and a lover of all things video.
Follow @Benjamin Arango
Benjamin Arango
Mar 27, 2024• Proven solutions
Whilst getting the editing and post work just right on any project is what we all aim for, the ultimate aim is for other people to see our creations, and the most popular way to achieve that is YouTube . Chances are, if you are producing video, you will be putting some of it on YouTube at some point, so let’s have a look at the most efficient way to get your work from Premiere to YouTube.
Check if your computer meet the Premiere System Requirements >>
This is a basic tutorial about Adobe Premiere, professional video editing software. However, if video editing is new to you, consider Wondershare Filmora , which is a powerful but easy-to-use tool for users just starting out. Download the free trial version below.
Download Mac Version ](https://tools.techidaily.com/wondershare/filmora/download/ )
How Do I Use Adobe Premiere To Upload YouTube Videos
1. Master Copy
Before exporting your work, it is important to first create a master copy of your project that is ‘as is’, in that it reflects the settings and codecs used in the original footage.
To do this you simply select the sequence within the Timeline or in the Project Panel, and go through the menu tree via File > Export > Media to bring up the export dialogue.
To create your Master Copy, simply select the first option of ‘Match Sequence Settings’, this exports a file that is of the same quality as your original footage, essentially producing a digital copy of the work for archiving before anything else is done.
With you work safe and secure it is now time to look at ensuring the project is suitable for YouTube. With our sequence selected in the Timeline or Project Panel again, we go through the same File > Export > Media path to bring up the media export dialogue as before.
2. Container
The first option we have to consider is the file format that our finished video needs to be in. Here you should refer to YouTube for its guidelines, whilst they do accept a number of file formats, digging through the YouTube help system to find the settings for highest quality we find that they recommend MPEG4 as the container, using the codec.
We can also see further recommended settings in this screenshot that will be covered later.
The good news is that Premiere automatically selects the appropriate container for us when we select our codec, however it is worth knowing the file type YouTube is expecting just to check yourself.
3. Video Codec
So having established that YouTube recommends the MPEG4 container using the codec, the first option we need to look for in the media export dialogue is to select the appropriate Format.
This is the first drop down in the dialogue box, and in this case we simply select from the list.
Once you select you can check the ‘output name’ field and see that premiere is automatically set the output file to .mp4 which is exactly what we need.
4. Preset
The next field we come to is the ‘Preset’ dropdown menu. This is a major help to most people, as Adobe have very kindly included large numbers of presets to quickly adapt video settings to suit specific uses. They vary depending on the exact version of Premiere you are using, and each format type does have its own list of presets, as we can see has a large number for YouTube, but also has many presets for specific devices (presets for iPad, Kindle, Nook, various other tablets and phones, Vimeo and a host of others) to make getting the right settings that bit easier for us.
It is important here to select the correct preset from the various YouTube options. You want to select the resolution and frame rate that match your source file, for the best results. So, if your source file is 1080p with a frame rate of 29.97 fps then that is the YouTube setting you would select.
Once a preset is selected a summary of the settings is displayed below, normally these will be well suited to your project, however you can fine tune anything you wish by selecting the video or audio tabs at the bottom which give you the chance to adjust each parameter individually. If you do this, you can save these changes as a custom preset by clicking the button at the side of the Preset dropdown menu and simply use it on later projects by selecting it from the list the same as any other, a great time saving tool.
5. Rendering
Once you are satisfied with the settings, either from the Preset alone or if you have adjusted anything yourself, you are nearly ready to render the file and export it.
For YouTube it is recommended you select the ‘Use Maximum Render Quality’ option to maintain the best output you can, it does add time to the render process but if you value the quality of your work it is worthwhile.
Finally you can choose a suitable filename and the destination of the file by clicking on the ‘Output Name’ field.
I normally use a filename that includes the destination medium so I can differentiate between different versions of a project and know which one to upload where, in this case I include ‘youtube’, but if I were planning on uploading clips of the project to vimeo as well for instance there may be a cut of the project with ‘vimeo’ in the name too. The destination is personal preference, because I do use filenames to differentiate versions I can put the various iterations into a single project file, others have folder structures for each type of file , so all YouTube output goes into a single folder and so on, how you organize is entirely dependent on how you work.
Once those are selected clicking ‘Export’ starts the rendering process, and eventually (how long depends on the speed of your computer and the size and type of file involved), you will end up with your YouTube optimized video in the location you chose.
Here I created 4 key frames that let the ‘Animation’ object move around the ‘Demo Text’ Object and finally come to rest below it. Whilst this type of effect does look very effective on screen, such is the ease of use of After Effects it really is just a few minutes work to achieve.
Learn more details about How to add text in Premiere >>
6. Uploading
Now you have your file, the next step is to go to your YouTube account and log in if you need to.
On the top of your homepage on the right is the upload button, selecting that brings up the select file menu as below.
You can either drag your file into the window or click on it to open a standard file browser to locate the desired file, click and the upload will begin. The dropdown underneath allows you to set the video as Public, Unlisted or Private. You can change this at any time once the video is uploaded as well.
This opens the upload progress window, where you can add in a name, description and tags as well as add the video to a playlist or adjust the privacy settings as the video is uploading.
Once the upload as finished, you can do final adjustments to settings and choose a thumbnail for the video. The final step is to click the ‘Publish’ button and your video will be processed and go live.
Benjamin Arango
Benjamin Arango is a writer and a lover of all things video.
Follow @Benjamin Arango
Subforsup’s Impact: Safe or Not for Increasing YouTube Loyalty?
Create High-Quality Video - Wondershare Filmora
An easy and powerful YouTube video editor
Numerous video and audio effects to choose from
Detailed tutorials provided by the official channel
YouTube streaming service is a beehive of activities. Promoters strive for a higher number of subscribers to boost their content. Several ways are available for you to increase the number of subscribers and visitors to your site. YouTube sub for sub is one common practice for this noble cause. In this practice, a person subscribes, in anticipation of the recipient subscribing back as well.
However, the practice may not give your channel that genuine growth. The subscribers may not even watch your videos or care much about leaving comments or other engagements. All in all, the aim is to hit a certain number of subscribers so that you can get into the recommended territory and probably start earning. But are there other options to increase YouTube subscriptions apart from Sub4Sub? Be genuine and use real avenues to rise to the top. This article corresponds adequately on the matter by giving you alternative ways to gain real subscribers who will stick around to grow your channel.
In this article
03 Tips & tricks to use sub for sub
04 Additional thoughts - Should we rely on subforsub to get more subscribers?
What is sub for sub?
Subforsub means a subscription for a subscription. In this practice, there are subscribers and subscriptions. Those who subscribe to you on YouTube are the subscribers while those whom you subscribe to, are the subscriptions. Both video makers’ subscribers are, therefore, increased equally and doesn’t give each other a competitive advantage against the other member. Sub for sub was founded in Germany, 4 years ago. It is easy to use and free platform that takes only about 5 minutes to contact a subscriber and complete the initiative. To get started, a user signs up and creates a new account on the home page. You can then reach out to other members for a subscription.
How does sub for sub work?
With YouTube sub for sub, you market your YouTube channel to get more subscribers. Simply sub to one another’s channel and they sub back.
You can do this on different channels such as YouTube live videos, among other channels. But again, these subscribers are not so much concerned about getting the real subs. What matters is that you get 1,000 subscribers to enable you to monetize on YouTube. However, YouTube also has its measures in place, and manipulating the matrix is one of which they don’t advocate for. But in most cases, subforsub participants operate fake YouTube accounts and you can find one person corresponding up to 5 accounts to gain subscriptions. This isn’t good for your rating as you don’t get real subscribers but you only boost the number of subscribers. And since they don’t watch your videos, neither will they share them with other viewers.
Tips & tricks to use sub for sub
Subforsub isn’t genuine and all you get is bot subscribers who don’t engage. However, you can use available tricks to gain popularity.
- Using fake accounts

A user should only run one genuine YouTube account. However, the trick that most subscribers use to gain more subs is by creating other additional fake accounts to gain more subs in return. But again, it is not a guarantee as some subscribers may not sub back to all the accounts.
- Subscribers don’t watch the videos
Perhaps there is no time for subscribers to watch the potential sub videos before subscribing. Your mission is to gain as many subs as possible even if your watch time doesn’t go up. This doesn’t bring any positivity to your channel rather an increased number of subscribers.
- Reach out to friends
You can also boost your sub for sub by reaching out to friends to inform them of your channel and ask for subscriptions in return for theirs as well. This, however, could be a slow process as not all your friends will be attracted to what you do.
- Don’t do subforsub for followers
A subforsub may not give you followers parse. So, don’t get into it for genuine followers. Those who sub to your channel won’t follow you in most cases. Rather, they might unsubscribe after a short duration of time.
- Use channel branding
This trick will glue viewers to your channel. These can include banner art to welcome everyone who clicks into your channel.
Additional thoughts - Should we rely on subforsub to get more subscribers?
You should not rely on subforsub as it doesn’t give the real figures but manipulates the outcome. Nonetheless, you need real subscribers to climb the YouTube ladder. That’s the best way to push the YouTube algorithm. There are genuine aspects of gaining subscribers to grow your channel.
Get to social media platforms
These include Facebook, Instagram, WhatsApp, and other sites. Introduce your YouTube channel to your followers and remind them to subscribe. Likewise, demonstrate why your channel is worth subscribing to.
Upload content consistently
Ensure your upload schedule is consistent and you’ll see viewers having a reason to subscribe to your channel. Once you introduce your channel with the first video, post a second and third video to build more momentum on your potential subscribers.
Incorporate YouTube stories
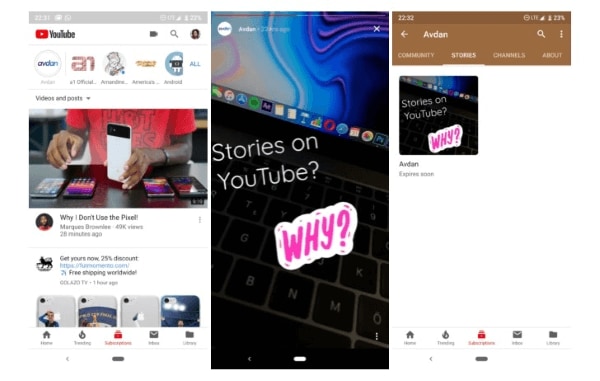
Stories can be a good starting point for those who have not subscribed to your content yet despite watching. Short video stories will attract viewers’ attention and want to get more from your channel.
Use Calls to Action

Ask your audience to subscribe after watching your videos. A great idea is to use animation or graphics to attract the viewers’ attention instantly. Other free options like green screen are also available for use.
Make it easy for viewers to understand your channel
You can make it easy by giving your viewers a guided tour. By this, they’ll know where to find important sections like comments. You can also create a channel banner that tells your audience what you do. They’ll soon familiarize themselves with your channel and be friends in no time.
Build a relationship with your audience
It is good to connect with your audience in various aspects. Expressing yourself probably in front of a camera has a deeper impact. You can also use illustrations to bring out your points for a quick understanding. Engaging them in the process is the best way to make them feel like they belong and eventually turn into subscribers.
Focus on the video that’s working for you
You should know which video is working and which is not. Judge and put more emphasis on the video that’s working for you. Check out which videos turn viewers into subscribers as that’s your main aim. More so, be creative and innovative.
A video editor is worth a try – Filmora
Since creativity is paramount, engaging a video editor tool will make you achieve your goal in a few clicks. Filmora Video Editor will transform your videos into magical content. It comes with powerful editing tools to make your video stand tall from the rest. You will also manage to import and export your videos in various formats for easy access on different platforms and devices. Whether you wish to create a tutorial for learning or promotional purposes, Filmora will give you exceptional results. The steps are as easy as 1-2-3 and the process is effective. Check out its key features to help you produce quality videos.
For Win 7 or later (64-bit)
For macOS 10.12 or later
Key Features of Filmora Video Editor
- 4K editing support: Quality and sharp videos are attractive to viewers. Filmora lets you edit and export your videos at high resolutions of up to 4K.
- Noise removal: Make your videos noise-free by removing unwanted background sounds. Viewers won’t be destructed and can concentrate more on the important aspects of the video.
- Speed control: There are important sections of your video that you may wish to emphasize more. You can slow down the speed in such sections for your viewers to understand them in detail. Nonetheless, you can speed up certain parts that don’t require too much emphasis.
- Reverse: What about being creative using this feature. Simply flip your clips and play them backward with this feature.
- Preview frame by frame: Focus on precise editing by using this feature. It lets you move to any section of the frame at a time to ascertain that the final product will be the best.
- Audio separation: Do it in a few clicks. Detach audio from video and put any other background music depending on the theme of that moment.
Conclusion
● You may gain subscribers from the YouTube sub for sub but you will be violating YouTube’s terms of service. Additionally, the YouTube algorithm will eventually notice that your subscribers are not watching your videos. It will presume that you are buying subscribers, which is illegal in the long run. Be smart and engage the Filmora video editor. It works in simple steps to create wanting videos that will upsell your brand. Editing isn’t a worry either as it presents you with numerous stunning effects to transform your video to a compelling piece of art.
YouTube streaming service is a beehive of activities. Promoters strive for a higher number of subscribers to boost their content. Several ways are available for you to increase the number of subscribers and visitors to your site. YouTube sub for sub is one common practice for this noble cause. In this practice, a person subscribes, in anticipation of the recipient subscribing back as well.
However, the practice may not give your channel that genuine growth. The subscribers may not even watch your videos or care much about leaving comments or other engagements. All in all, the aim is to hit a certain number of subscribers so that you can get into the recommended territory and probably start earning. But are there other options to increase YouTube subscriptions apart from Sub4Sub? Be genuine and use real avenues to rise to the top. This article corresponds adequately on the matter by giving you alternative ways to gain real subscribers who will stick around to grow your channel.
In this article
03 Tips & tricks to use sub for sub
04 Additional thoughts - Should we rely on subforsub to get more subscribers?
What is sub for sub?
Subforsub means a subscription for a subscription. In this practice, there are subscribers and subscriptions. Those who subscribe to you on YouTube are the subscribers while those whom you subscribe to, are the subscriptions. Both video makers’ subscribers are, therefore, increased equally and doesn’t give each other a competitive advantage against the other member. Sub for sub was founded in Germany, 4 years ago. It is easy to use and free platform that takes only about 5 minutes to contact a subscriber and complete the initiative. To get started, a user signs up and creates a new account on the home page. You can then reach out to other members for a subscription.
How does sub for sub work?
With YouTube sub for sub, you market your YouTube channel to get more subscribers. Simply sub to one another’s channel and they sub back.
You can do this on different channels such as YouTube live videos, among other channels. But again, these subscribers are not so much concerned about getting the real subs. What matters is that you get 1,000 subscribers to enable you to monetize on YouTube. However, YouTube also has its measures in place, and manipulating the matrix is one of which they don’t advocate for. But in most cases, subforsub participants operate fake YouTube accounts and you can find one person corresponding up to 5 accounts to gain subscriptions. This isn’t good for your rating as you don’t get real subscribers but you only boost the number of subscribers. And since they don’t watch your videos, neither will they share them with other viewers.
Tips & tricks to use sub for sub
Subforsub isn’t genuine and all you get is bot subscribers who don’t engage. However, you can use available tricks to gain popularity.
- Using fake accounts
A user should only run one genuine YouTube account. However, the trick that most subscribers use to gain more subs is by creating other additional fake accounts to gain more subs in return. But again, it is not a guarantee as some subscribers may not sub back to all the accounts.
- Subscribers don’t watch the videos
Perhaps there is no time for subscribers to watch the potential sub videos before subscribing. Your mission is to gain as many subs as possible even if your watch time doesn’t go up. This doesn’t bring any positivity to your channel rather an increased number of subscribers.
- Reach out to friends
You can also boost your sub for sub by reaching out to friends to inform them of your channel and ask for subscriptions in return for theirs as well. This, however, could be a slow process as not all your friends will be attracted to what you do.
- Don’t do subforsub for followers
A subforsub may not give you followers parse. So, don’t get into it for genuine followers. Those who sub to your channel won’t follow you in most cases. Rather, they might unsubscribe after a short duration of time.
- Use channel branding
This trick will glue viewers to your channel. These can include banner art to welcome everyone who clicks into your channel.
Additional thoughts - Should we rely on subforsub to get more subscribers?
You should not rely on subforsub as it doesn’t give the real figures but manipulates the outcome. Nonetheless, you need real subscribers to climb the YouTube ladder. That’s the best way to push the YouTube algorithm. There are genuine aspects of gaining subscribers to grow your channel.
Get to social media platforms
These include Facebook, Instagram, WhatsApp, and other sites. Introduce your YouTube channel to your followers and remind them to subscribe. Likewise, demonstrate why your channel is worth subscribing to.
Upload content consistently
Ensure your upload schedule is consistent and you’ll see viewers having a reason to subscribe to your channel. Once you introduce your channel with the first video, post a second and third video to build more momentum on your potential subscribers.
Incorporate YouTube stories
Stories can be a good starting point for those who have not subscribed to your content yet despite watching. Short video stories will attract viewers’ attention and want to get more from your channel.
Use Calls to Action
Ask your audience to subscribe after watching your videos. A great idea is to use animation or graphics to attract the viewers’ attention instantly. Other free options like green screen are also available for use.
Make it easy for viewers to understand your channel
You can make it easy by giving your viewers a guided tour. By this, they’ll know where to find important sections like comments. You can also create a channel banner that tells your audience what you do. They’ll soon familiarize themselves with your channel and be friends in no time.
Build a relationship with your audience
It is good to connect with your audience in various aspects. Expressing yourself probably in front of a camera has a deeper impact. You can also use illustrations to bring out your points for a quick understanding. Engaging them in the process is the best way to make them feel like they belong and eventually turn into subscribers.
Focus on the video that’s working for you
You should know which video is working and which is not. Judge and put more emphasis on the video that’s working for you. Check out which videos turn viewers into subscribers as that’s your main aim. More so, be creative and innovative.
A video editor is worth a try – Filmora
Since creativity is paramount, engaging a video editor tool will make you achieve your goal in a few clicks. Filmora Video Editor will transform your videos into magical content. It comes with powerful editing tools to make your video stand tall from the rest. You will also manage to import and export your videos in various formats for easy access on different platforms and devices. Whether you wish to create a tutorial for learning or promotional purposes, Filmora will give you exceptional results. The steps are as easy as 1-2-3 and the process is effective. Check out its key features to help you produce quality videos.
For Win 7 or later (64-bit)
For macOS 10.12 or later
Key Features of Filmora Video Editor
- 4K editing support: Quality and sharp videos are attractive to viewers. Filmora lets you edit and export your videos at high resolutions of up to 4K.
- Noise removal: Make your videos noise-free by removing unwanted background sounds. Viewers won’t be destructed and can concentrate more on the important aspects of the video.
- Speed control: There are important sections of your video that you may wish to emphasize more. You can slow down the speed in such sections for your viewers to understand them in detail. Nonetheless, you can speed up certain parts that don’t require too much emphasis.
- Reverse: What about being creative using this feature. Simply flip your clips and play them backward with this feature.
- Preview frame by frame: Focus on precise editing by using this feature. It lets you move to any section of the frame at a time to ascertain that the final product will be the best.
- Audio separation: Do it in a few clicks. Detach audio from video and put any other background music depending on the theme of that moment.
Conclusion
● You may gain subscribers from the YouTube sub for sub but you will be violating YouTube’s terms of service. Additionally, the YouTube algorithm will eventually notice that your subscribers are not watching your videos. It will presume that you are buying subscribers, which is illegal in the long run. Be smart and engage the Filmora video editor. It works in simple steps to create wanting videos that will upsell your brand. Editing isn’t a worry either as it presents you with numerous stunning effects to transform your video to a compelling piece of art.
Also read:
- In 2024, Decoding YouTube's Earning Rules Update
- [New] Best Vocal Modification Software for Content Creators
- Mastering YouTube Audio Uploads
- Perfect Shots Start With The Right Camera & Lens Selection
- Adding a Vibrancy Edge YouTube Thumbnails Meet Neons for 2024
- Elevate Your Brand - Discover the Riches in Our Gallery of 50 Free YouTube Banners for 2024
- Audio Matters Ensuring Excellent Sound in Your YouTube Shots
- [New] Dive Into the World of Dynamic and Entertaining Video Shopping Content
- [New] 10 Must-Watch Historical Channels for Students
- 2024 Approved Beef up Your CGI with These 8 Online Repositories of FREE Green Screens and Clips
- 2024 Approved Best of the Best Top 10 YouTube Trimmers Reviewed
- Maximizing Exposure The Art of Applying YouTube Tags
- Best ASMR Microphones
- [New] Building a Cross-Platform Social Media Presence
- The Role of Timestamps in Content Longevity and Popularity
- In 2024, Audio Ambition Selecting Top 6 Free Downloader Apps From YouTube Vaults
- Beginner's Guide Capturing YouTube Videos as Screencasts Without Payment for 2024
- [New] A Treasure Trove Sifting Through the Top 10 Economical Online Art Hubs
- Maximize Your Content Interaction
- Making a Mark with Google Slides by Adding YouTube Videos
- 2024 Approved City Planning for Climate Action A Comprehensive Guide
- In 2024, Collect Premium Audio for Video Editors
- The Art of Saving Just a Bit From YouTube Videos
- [Updated] Amplify Your iMovie with YouTube Audio Streams
- [New] Creative Music Videos A List of 15 YouTube Projects
- Building Direct URLs for YouTube Channel Subscribers for 2024
- Your Yearly List Prime Free Video Editing Software
- The Business of Blogging and Earning on YouTube Platform
- In 2024, Earth's Richest Digital Content Wizard
- 2024 Approved Cutting-Edge Tools to Snatch and Save Videos Flawlessly
- Today's Ultimate Tutorial IOS-Based YouTube Videos Uploading
- Cooking Chronicles Video Production Insights for 2024
- [Updated] 2023'S Must-Watch Alternatives to Top Films
- YouTube Video Ranking Breakdown How It Works
- 2024 Approved Breakdown of Profit Earning Potential From Each YouTube Sponsored Post?
- [New] Complete Investigation Virtual Stars' Journey Explored
- [New] In 2024, Visual Victory Apple & Android Highlight Covers
- 2024 Approved The Ultimate Guide to Choosing Top Audio Reversing Applications For Your PC, Phone, and Tablet
- Go From Camera to Cellphone VT Adjustments in FCPX for 2024
- 2024 Approved Free Online Conversion 6 Best TikTop to MP3 Extractors
- Full Tutorial to Bypass Your Lava Yuva 3 Pro Face Lock?
- [New] Echoes of Harmony in a Social Sphere for 2024
- How To Change Text In Premiere Pro for 2024
- How To Restore Missing Call Logs from HTC U23
- [Updated] Facebook Frenzy Top Downloader Tools that Bring Videos to Life on iDevices
- In 2024, How To Bypass iCloud Activation Lock on Mac For Apple iPhone 15 Plus?
- Apple iPhone 13 Pro Max Screen Mirroring You Must Know | Dr.fone
- 2024 Approved From Novice to Veteran Implementing Roles in Discord
- [New] In 2024, Maximize Memories Overwatch Game Footage
- New 2024 Approved Learn Final Cut Pro at No Cost 90-Day Free Trial Available
- [New] How to Rectify Silent Streams with OBS
- [New] 2024 Approved Ideal Low-Impact Recording Devices for Eco-Conscious Filmmakers
- [Updated] Master the Game with Standout TikTok Profile Frames
- 2024 Approved Unveiling Simple Sync OBS + Zoom Journey
- How to Show Wi-Fi Password on Poco
- New In 2024, 15 Aesthetic Background Music For YouTube Videos or Vlogs
- [New] 2024 Approved Effortlessly Excel at Creating Instagram Reels
- Heres Everything You Should Know About Pokemon Stops in Detail On Apple iPhone 14 Pro Max | Dr.fone
- [New] A Comprehensive Guide to Creating High-Impact Slow Motion Images and Video Content on Instagram for 2024
- How to Fix Unfortunately, Contacts Has Stopped Error on Vivo Y56 5G | Dr.fone
- [Updated] In 2024, Take Control of Your Audio - A Compreenas Guide to TikTok Changes
- [New] 2024 Approved Craft Cartoony Snaps Master Snapchat’s Anime Filters Guide
- [New] In 2024, IOS Guide to Premium PS2 Emulation Software
- [Updated] 2024 Approved Convert Facebook to MP4 – Hack for Quick Access
- New Audacity Tutorial Boost or Mute Your Sound Effectively for 2024
- In 2024, Foodie Frenzy TikTok's Most Shared Meals and Munchies
- [New] 2024 Approved Step-by-Step Guide to PC-Based Live Broadcasts on TikTok
- In 2024, The Best Android SIM Unlock Code Generators Unlock Your Oppo A2 Phone Hassle-Free
- 2024 Approved The Best Free WMV Video Editors You Need to Try
- Title: "2024 Approved Bringing Your Vision Alive Transferring Vids From Premiere"
- Author: Steven
- Created at : 2024-05-25 18:28:18
- Updated at : 2024-05-26 18:28:18
- Link: https://youtube-clips.techidaily.com/2024-approved-bringing-your-vision-alive-transferring-vids-from-premiere/
- License: This work is licensed under CC BY-NC-SA 4.0.
