
:max_bytes(150000):strip_icc()/Cahlaflour1-31d410658870432f8ea92f42d16f89f8.jpeg)
"2024 Approved Best 12 YouTube Game Openers A Comparative Guide (No Expense)"
Best 12 YouTube Game Openers: A Comparative Guide (No Expense)
Best 12 YouTube Gaming Intro Makers - Free and Paid

Richard Bennett
Mar 27, 2024• Proven solutions
When searching the words “intro maker”, thousands of results jump into your eyes, but only a few of them are suitable for YouTube gamers . Luckily, we did it for you. After 34 hours’ research and comparison, we finally rounded up the 12 best gaming intro makers, sorted by online and desktop solutions. Hopefully, these intro makers will help you convert more viewers to your subscribers like those noted YouTubers did.
Read on to know how to take your video to the next level with these gaming intro makers and templates.
You may also like: Top 10 Best Free Music and Sound Effect Resources for Games >>
- Part 1: 4 Best Desktop YouTube Gaming Intro Makers
- Part 2: 8 Best Online Intro Makers for YouTube Gaming
- Part 3: 3 Easiest Ways to Make a Gaming Intro
- Bonus: Best Intro Templates for YouTube Gamer
Wondershare Filmstock Gaming Video Editing Skils ](https://filmstock.wondershare.com/creative-theme-game?source%5Fchannel=seo%5Farticle&spm=rs.filmora%5Fweb )
Part 1: Best YouTube Intro Makers for Gaming [Desktop Software Solutions for Windows/Mac/Linux]
Before I recommend the YouTube Gaming Intro Makers, I want to share how we make a stunning YouTube intro, so that you can see in creating a video intro, which elements should be included. Check the video tutorial below to get some tips and tricks for making YouTube Intro.


Those who wish to have more control over their video editing needs are advised to pick desktop software solutions like Filmora and After Effects, and Blender, etc. They can serve the editing needs of beginners as well as professionals. So, in the first part, I’ll show you some of the best gaming intro makers for YouTube video, some of them are free to use, others may need to subscribe.
1. Wondershare Filmora: Freemium
Wondershare Filmora is a great tool that you can use to create a film-look YouTube video, including gaming video intros. What’s more, it offers you lots of pre-made intros with text and title animation, elements, overlays, effects, and transitions. Besides the inbuilt presets and templates for making gaming intro makers, you can find more video effects for gaming intro making in the Filmstock effects store . The 8 Bit Gamer and blockbuster effects are also perfect choices for making gaming intros. After finishing the editing, you can directly upload the video to YouTube from the program.
Download Mac Version ](https://tools.techidaily.com/wondershare/filmora/download/ )
You may also like: Best 3D Intro Makers for YouTube Videos
2. After Effects: ($19.99/month)
Editing YouTube gaming intro task becomes easier when you have Adobe Effects on your desktop computer. Most of the professionals love to access this platform due to its wide range of effects and presentation templates.
Now, if you are a member of Filmstock, you can download some Free After Effects Templates and use it in After Effects to make a stunning gaming intro without paying extra money.
3. Blender: (Free)
It is a well known open source and free of cost gaming intro maker that can process 3D pipelines with ease. It can easily handle processes like motion tracking, composition, rendering, simulation, animation, rigging and modeling etc. It may appear difficult for beginners to make a gaming intro with this free intro maker but professionals can definitely create wonders with this software tool.
4. Cinema 4D: $3510.5
This is a complete and complex software for 3D video animation, it’s developed by MAXON Computer GmbH in Germany, and it gives you almost all the power and control over 3D design and creation. It is very expensive ($3510.5) and complex, so if you just want a simple and quick intro, we don’t recommend this to you to make a simple gaming intro.
Part 2: Best YouTube Intro Makers for Gaming - Online solution
If you are a beginner, then you should go ahead with the online free gaming intro maker tools below. They have a wide range of pre-made templates and you can operate them with ease even without messing up with deep any technical details.
1. Panzoid(Free):
It is a well known online video editing software tool that also possesses abilities of background editor and can also generate quick clips to fulfill instant needs. As it is available for free and works online so beginners can easily switch to this editor anytime from anywhere using their handheld devices. This free to use software tool allows users to complete editing tasks with advanced 3D animations , but the only downside of this tool is its too many annoying ads.
You can find many tutorials about how to use Panzoid on YouTube if you have any questions.
2. Renderfx ($24.99 only):
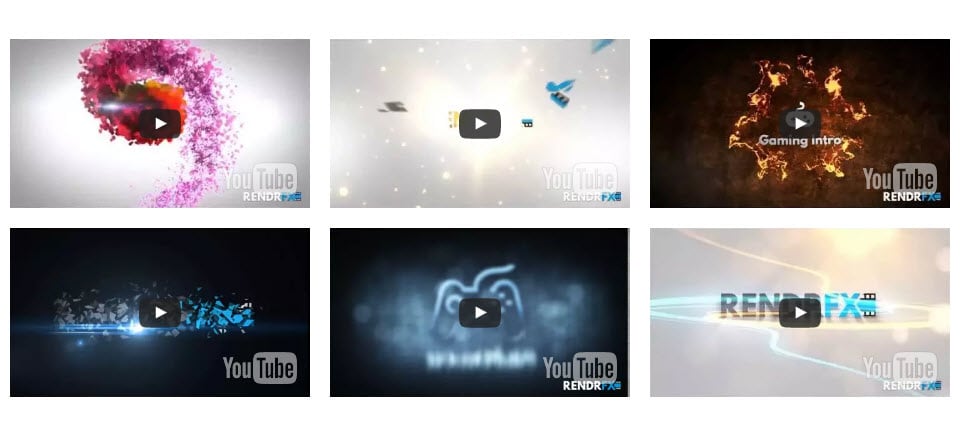
The high definition effect is the most beautiful part in my opinion. You would definitely love to have a professional class video editing solution for your YouTube gaming needs. Renderfx allows gamers to generate eye-catching videos for YouTube channel uploads; they can prepare presentations, outros, and intros over here.
3. Renderforest ($29.99/Export):

There are lots of interesting things to talk about Renderforest. It contains a wide range of video templates such as neon power logo, electromagnetic logo, neon lightroom, fly-in-fire logo, and many more. You can create various videos for free by utilizing all its advanced features, but in case if you want to expert your created video out without the watermark, then you have to pay $29.99 per export.
4. ivipid($1.99 to $34.99)
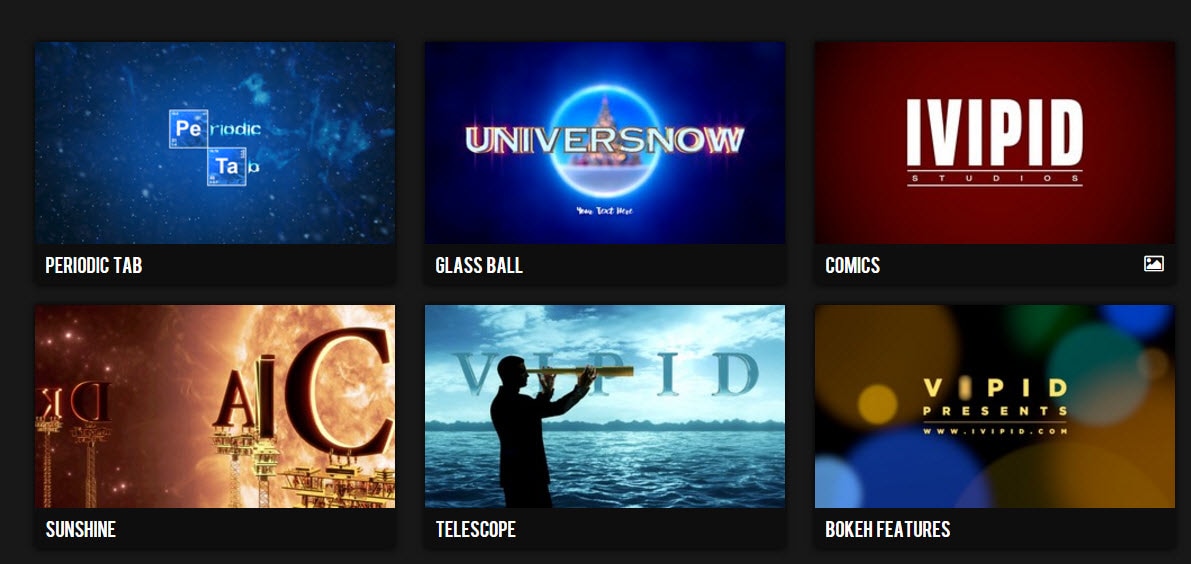
If you are more focused on customization needs and want to create something unique for your next YouTube gaming video, then Lvipid.com is here to serve all your needs. There are unlimited stunning themes, including awesome animation cards and video intro personalization options. Note that you have to use credits to start producing a new video on this platform.
5. Moovly Studio: ($5 per Month)

Here is an advanced multimedia solution that is hosted over the cloud platform and assists users in developing promotional videos and animations with a few simple to follow steps. You can enjoy these services with payment of $5/month only.
6. Introchamp: ($5 per template)
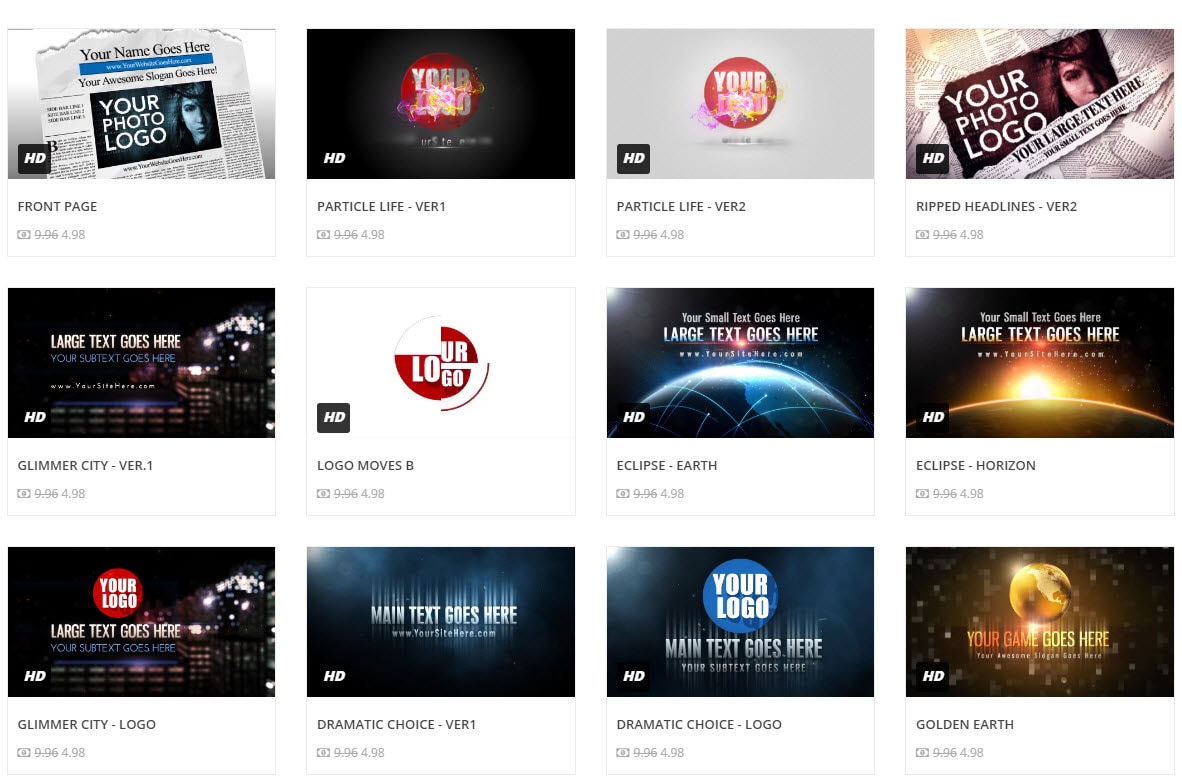
As the name indicates, this online tool is master in the creation of video intros, so you need not apply additional efforts to get desired results. Simply pay amount $4.98 to $11.95 and collect all fantastic graphics, text options, and music to complete your task.
7. Intromaker: ($5 to $20 only)
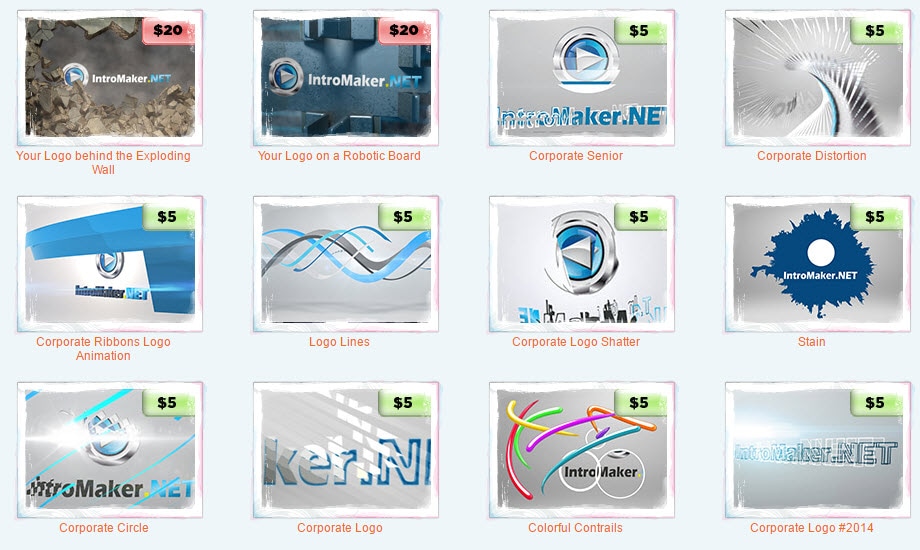
Its stunning designer wizard can assist you in logo designing; just upload your desired image with .jpg or .png extension and merge it into your video background to have impressive results. Its simple editing interface makes editing tasks much easier for beginners. One of the disadvantages is that you can’t preview the result before you finish the order.
8. Flixpress: ($49.44/month)
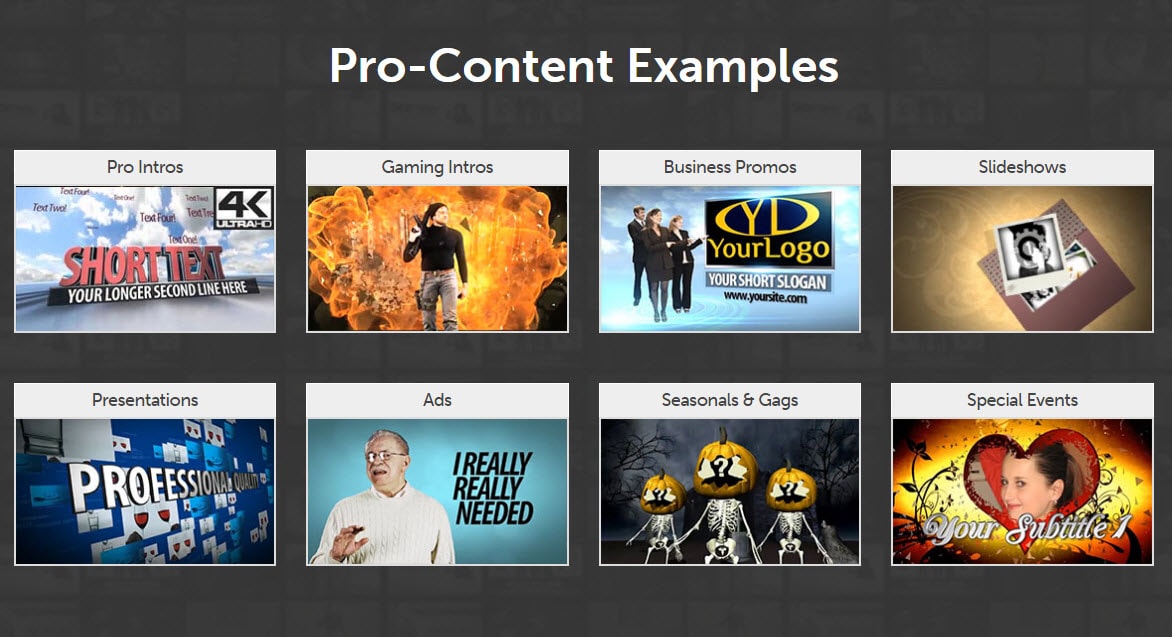
It provides a wide range of services like handling business promos, slideshows, ads, and YouTube Intros. It offers variable pricing plans so that beginners can start with free ones, and professionals can choose low-cost plans with ease. One can avail access to a full library with a payment of $49.44/month.
Part 3: 3 Easiest Ways to Make a Gaming Intro
If you’re new to YouTube video creation, here we introduce 3 easiest ways that can help you make fascinating gaming intros.
1. Using video intro makers
No matter you are a beginner or a professional, these intro makers offer you multiples options to make wonderful gaming intros from pre-made templates or from nothing.
2. Hiring freelancers
It is also possible to get professional assistance online from top platforms like Peopleperhour , Upwork , Fiverr and, Valoso etc. Those who are not able to find enough time to edit their game videos can hire a well experienced professional online. They charge an hourly basis or as per the work offered by you. They can complete the customization task on your behalf.
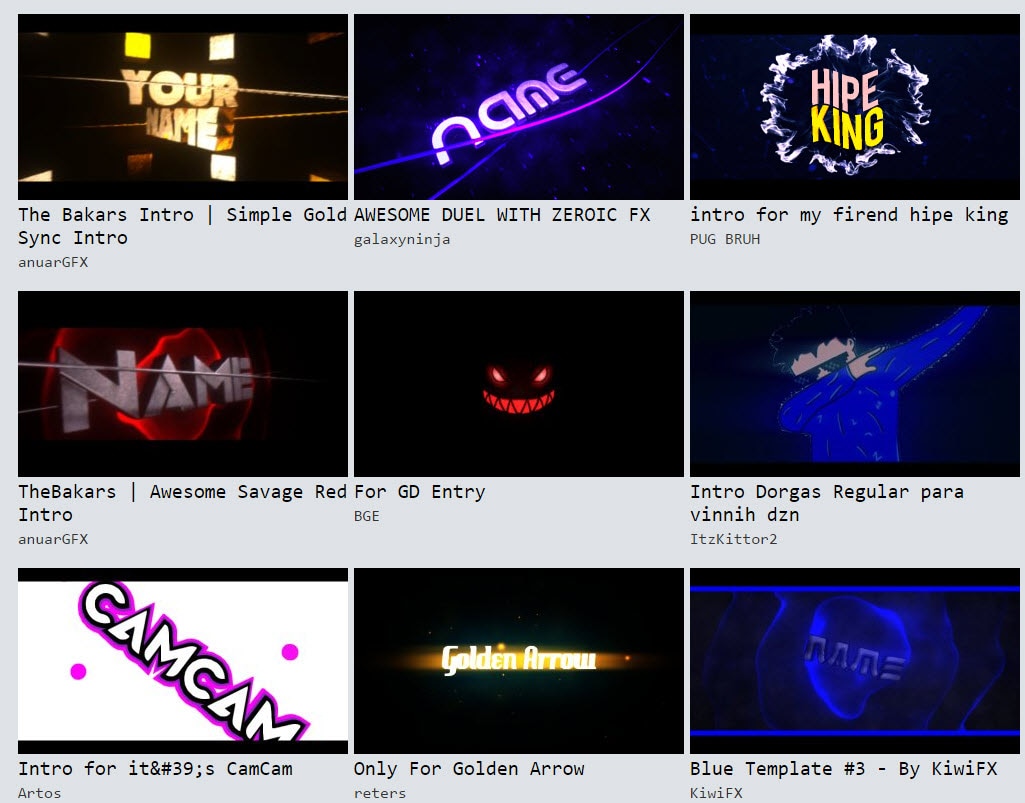
3. Taking use of pre-made intro templates
Some websites/YouTube channels over the Internet also offer attractive pre-made templates that are time-saving solutions and can definitely fulfill the purpose of excellent video intro. You can collect fantastic templates from sites like Editorsdepot, VideoBlocks, and Pushedtionsanity, etc.
Note: The intro part is needed to be very short; probably, a maximum of 5 seconds is sufficient to create the impact; otherwise, your audience will become impatient, and they will run away.
Part 4: Best Intro Templates for YouTube gamer [Free Intro Templates Download Sites]
If you’re using Blender, After Effects, Sony Vegas, Cinema 4D, etc, you’ll be happy to find that there are a lot of free intro templates on the Internet. Just download them, and replace the text by your channel name, no further editing skills asked. You can pick some of the best collections from here.
The newly released stock media library Filmstock effects store is a good website to download free intros and customize it based on your personalized needs.
Download Mac Version ](https://tools.techidaily.com/wondershare/filmora/download/ )
Click the image below to visit this effects store directly. If you are looking for some free items which are totally free to download and use, you can check the Free video effects, footage, music and photos .
Filmstock Stock Media Library ](https://tools.techidaily.com/wondershare/filmora/download/ )
1. Editors Depot
Editors depot has thousands of stock videos and templates with free intros available. You can download them then edit in Blender, Cinema 4D, After Effects, or Sony Vegas.
2. VideoBlocks
Videoblocks has after effect templates you can simply download and bring into Photoshop. All you need to do with these templates is insert your name and import the music, the background images and graphics are all generated.
3. Pushedtionsanity
PushedToInsanity is a site designed to provide the users with the latest and best FREE templates for Cinema 4D, After Effects, and Sony Vegas. You will find lots of Intro Templates, Outro Templates, Banner Templates, and almost everything you need for your YouTube videos. You can check their YouTube Channel to watch all the intro templates
After reading so many YouTube gaming intro makers, you may have exhausted. So we have made a simple comparison table about each intro maker, and below is the list of best online and desktop gaming intro makers that can complete the intro making the task as per your choice, pick any of these as per your needs.
You can click the platform name in the form to check the detailed intro about it directly.
| Type | Platform | Price |
|---|---|---|
| Online | Panzoid.com | Free |
| Renderfx | $24.99 to remove the watermark | |
| Renderforest | $29.99/export | |
| Ivipid.com | 1.99$ to $34.99 | |
| Moovly Studio | $5/month | |
| Introchamp | $5 per templates | |
| Intromaker | $5 to $20 | |
| Flixpress | $129.99 monthly for full libray and liftime storage | |
| Desktop | Wondershare Filmora | $59.99 lifetime |
| After Effects | $19.99/monthly | |
| Blender | Free | |
| Cinema 4D | $3510.5 |
Wondershare Filmora is an amazing intro maker for YouTube gamers, besides the various inbuilt titles, animations, filters, transitions and music library, Filmora also has some stunning editing tools to empower your creativity.
Richard Bennett
Richard Bennett is a writer and a lover of all things video.
Follow @Richard Bennett
Richard Bennett
Mar 27, 2024• Proven solutions
When searching the words “intro maker”, thousands of results jump into your eyes, but only a few of them are suitable for YouTube gamers . Luckily, we did it for you. After 34 hours’ research and comparison, we finally rounded up the 12 best gaming intro makers, sorted by online and desktop solutions. Hopefully, these intro makers will help you convert more viewers to your subscribers like those noted YouTubers did.
Read on to know how to take your video to the next level with these gaming intro makers and templates.
You may also like: Top 10 Best Free Music and Sound Effect Resources for Games >>
- Part 1: 4 Best Desktop YouTube Gaming Intro Makers
- Part 2: 8 Best Online Intro Makers for YouTube Gaming
- Part 3: 3 Easiest Ways to Make a Gaming Intro
- Bonus: Best Intro Templates for YouTube Gamer
Wondershare Filmstock Gaming Video Editing Skils ](https://filmstock.wondershare.com/creative-theme-game?source%5Fchannel=seo%5Farticle&spm=rs.filmora%5Fweb )
Part 1: Best YouTube Intro Makers for Gaming [Desktop Software Solutions for Windows/Mac/Linux]
Before I recommend the YouTube Gaming Intro Makers, I want to share how we make a stunning YouTube intro, so that you can see in creating a video intro, which elements should be included. Check the video tutorial below to get some tips and tricks for making YouTube Intro.
Those who wish to have more control over their video editing needs are advised to pick desktop software solutions like Filmora and After Effects, and Blender, etc. They can serve the editing needs of beginners as well as professionals. So, in the first part, I’ll show you some of the best gaming intro makers for YouTube video, some of them are free to use, others may need to subscribe.
1. Wondershare Filmora: Freemium
Wondershare Filmora is a great tool that you can use to create a film-look YouTube video, including gaming video intros. What’s more, it offers you lots of pre-made intros with text and title animation, elements, overlays, effects, and transitions. Besides the inbuilt presets and templates for making gaming intro makers, you can find more video effects for gaming intro making in the Filmstock effects store . The 8 Bit Gamer and blockbuster effects are also perfect choices for making gaming intros. After finishing the editing, you can directly upload the video to YouTube from the program.
Download Mac Version ](https://tools.techidaily.com/wondershare/filmora/download/ )
You may also like: Best 3D Intro Makers for YouTube Videos
2. After Effects: ($19.99/month)
Editing YouTube gaming intro task becomes easier when you have Adobe Effects on your desktop computer. Most of the professionals love to access this platform due to its wide range of effects and presentation templates.
Now, if you are a member of Filmstock, you can download some Free After Effects Templates and use it in After Effects to make a stunning gaming intro without paying extra money.
3. Blender: (Free)
It is a well known open source and free of cost gaming intro maker that can process 3D pipelines with ease. It can easily handle processes like motion tracking, composition, rendering, simulation, animation, rigging and modeling etc. It may appear difficult for beginners to make a gaming intro with this free intro maker but professionals can definitely create wonders with this software tool.
4. Cinema 4D: $3510.5
This is a complete and complex software for 3D video animation, it’s developed by MAXON Computer GmbH in Germany, and it gives you almost all the power and control over 3D design and creation. It is very expensive ($3510.5) and complex, so if you just want a simple and quick intro, we don’t recommend this to you to make a simple gaming intro.
Part 2: Best YouTube Intro Makers for Gaming - Online solution
If you are a beginner, then you should go ahead with the online free gaming intro maker tools below. They have a wide range of pre-made templates and you can operate them with ease even without messing up with deep any technical details.
1. Panzoid(Free):
It is a well known online video editing software tool that also possesses abilities of background editor and can also generate quick clips to fulfill instant needs. As it is available for free and works online so beginners can easily switch to this editor anytime from anywhere using their handheld devices. This free to use software tool allows users to complete editing tasks with advanced 3D animations , but the only downside of this tool is its too many annoying ads.
You can find many tutorials about how to use Panzoid on YouTube if you have any questions.
2. Renderfx ($24.99 only):
The high definition effect is the most beautiful part in my opinion. You would definitely love to have a professional class video editing solution for your YouTube gaming needs. Renderfx allows gamers to generate eye-catching videos for YouTube channel uploads; they can prepare presentations, outros, and intros over here.
3. Renderforest ($29.99/Export):
There are lots of interesting things to talk about Renderforest. It contains a wide range of video templates such as neon power logo, electromagnetic logo, neon lightroom, fly-in-fire logo, and many more. You can create various videos for free by utilizing all its advanced features, but in case if you want to expert your created video out without the watermark, then you have to pay $29.99 per export.
4. ivipid($1.99 to $34.99)
If you are more focused on customization needs and want to create something unique for your next YouTube gaming video, then Lvipid.com is here to serve all your needs. There are unlimited stunning themes, including awesome animation cards and video intro personalization options. Note that you have to use credits to start producing a new video on this platform.
5. Moovly Studio: ($5 per Month)
Here is an advanced multimedia solution that is hosted over the cloud platform and assists users in developing promotional videos and animations with a few simple to follow steps. You can enjoy these services with payment of $5/month only.
6. Introchamp: ($5 per template)
As the name indicates, this online tool is master in the creation of video intros, so you need not apply additional efforts to get desired results. Simply pay amount $4.98 to $11.95 and collect all fantastic graphics, text options, and music to complete your task.
7. Intromaker: ($5 to $20 only)
Its stunning designer wizard can assist you in logo designing; just upload your desired image with .jpg or .png extension and merge it into your video background to have impressive results. Its simple editing interface makes editing tasks much easier for beginners. One of the disadvantages is that you can’t preview the result before you finish the order.
8. Flixpress: ($49.44/month)
It provides a wide range of services like handling business promos, slideshows, ads, and YouTube Intros. It offers variable pricing plans so that beginners can start with free ones, and professionals can choose low-cost plans with ease. One can avail access to a full library with a payment of $49.44/month.
Part 3: 3 Easiest Ways to Make a Gaming Intro
If you’re new to YouTube video creation, here we introduce 3 easiest ways that can help you make fascinating gaming intros.
1. Using video intro makers
No matter you are a beginner or a professional, these intro makers offer you multiples options to make wonderful gaming intros from pre-made templates or from nothing.
2. Hiring freelancers
It is also possible to get professional assistance online from top platforms like Peopleperhour , Upwork , Fiverr and, Valoso etc. Those who are not able to find enough time to edit their game videos can hire a well experienced professional online. They charge an hourly basis or as per the work offered by you. They can complete the customization task on your behalf.
3. Taking use of pre-made intro templates
Some websites/YouTube channels over the Internet also offer attractive pre-made templates that are time-saving solutions and can definitely fulfill the purpose of excellent video intro. You can collect fantastic templates from sites like Editorsdepot, VideoBlocks, and Pushedtionsanity, etc.
Note: The intro part is needed to be very short; probably, a maximum of 5 seconds is sufficient to create the impact; otherwise, your audience will become impatient, and they will run away.
Part 4: Best Intro Templates for YouTube gamer [Free Intro Templates Download Sites]
If you’re using Blender, After Effects, Sony Vegas, Cinema 4D, etc, you’ll be happy to find that there are a lot of free intro templates on the Internet. Just download them, and replace the text by your channel name, no further editing skills asked. You can pick some of the best collections from here.
The newly released stock media library Filmstock effects store is a good website to download free intros and customize it based on your personalized needs.
Download Mac Version ](https://tools.techidaily.com/wondershare/filmora/download/ )
Click the image below to visit this effects store directly. If you are looking for some free items which are totally free to download and use, you can check the Free video effects, footage, music and photos .
Filmstock Stock Media Library ](https://tools.techidaily.com/wondershare/filmora/download/ )
1. Editors Depot
Editors depot has thousands of stock videos and templates with free intros available. You can download them then edit in Blender, Cinema 4D, After Effects, or Sony Vegas.
2. VideoBlocks
Videoblocks has after effect templates you can simply download and bring into Photoshop. All you need to do with these templates is insert your name and import the music, the background images and graphics are all generated.
3. Pushedtionsanity
PushedToInsanity is a site designed to provide the users with the latest and best FREE templates for Cinema 4D, After Effects, and Sony Vegas. You will find lots of Intro Templates, Outro Templates, Banner Templates, and almost everything you need for your YouTube videos. You can check their YouTube Channel to watch all the intro templates
After reading so many YouTube gaming intro makers, you may have exhausted. So we have made a simple comparison table about each intro maker, and below is the list of best online and desktop gaming intro makers that can complete the intro making the task as per your choice, pick any of these as per your needs.
You can click the platform name in the form to check the detailed intro about it directly.
| Type | Platform | Price |
|---|---|---|
| Online | Panzoid.com | Free |
| Renderfx | $24.99 to remove the watermark | |
| Renderforest | $29.99/export | |
| Ivipid.com | 1.99$ to $34.99 | |
| Moovly Studio | $5/month | |
| Introchamp | $5 per templates | |
| Intromaker | $5 to $20 | |
| Flixpress | $129.99 monthly for full libray and liftime storage | |
| Desktop | Wondershare Filmora | $59.99 lifetime |
| After Effects | $19.99/monthly | |
| Blender | Free | |
| Cinema 4D | $3510.5 |
Wondershare Filmora is an amazing intro maker for YouTube gamers, besides the various inbuilt titles, animations, filters, transitions and music library, Filmora also has some stunning editing tools to empower your creativity.
Richard Bennett
Richard Bennett is a writer and a lover of all things video.
Follow @Richard Bennett
Achieving Peak Performance in Video Submissions on YouTube
How To Upload Videos to YouTube [a Step-by-Step Guide]
Richard Bennett
Mar 27, 2024• Proven solutions
Want to learn how to upload videos to YouTube? Millions of people watch YouTube every day. Creating and posting YouTube videos can be a lot of fun, and if you get a lot of views and become popular you can also make money. YouTube videos are a creative way to connect with people all around the world.
These simple steps can assist you in learning how to upload YouTube videos from a desktop computer. You are going to Learn:
Edit YouTube with Powerful Video Editor
As a YouTuber, it is necessary to have an easy-to-use video editor, especially for beginners. Download Filmora for free and start your editing journey happily.
Part 1: Basic Rules You Need to Know Before Uploading
Clicking the ‘upload’ button is easy, but during the upload process, there are things you can do to help your video get views and maintain its quality. You should also keep an eye on the length and file size limits. The more basic things you need to consider carefully when you upload are the title, description, and tags of your video. These are part of what determines if and where your video comes up in people’s search results. There are also slightly more advanced video specs, like your video’s resolution, which will be helpful for you to understand as somebody who will be producing video content frequently. These sorts of specs will affect how long it takes your videos to upload and how much of the quality they maintain.
1. How Long Can my Video Be?
By default, your YouTube videos can only be 15 minutes long. You can post longer videos by going to the upload page and clicking on ‘Increase your Limit’ at the bottom. After you have followed the steps to verify your account you will be able to post videos that are a maximum of 11 hours long.
2. How Big a File Can I Upload?
Your file size was capped at 20GB, initially. If you follow the same steps for posting videos longer than 15 minutes then you can also increase your maximum file size to 128GB.
3. Other Basics
After you click the ‘upload’ button on YouTube you are taken to a page where you choose a category for your video and add a title, description, and tags. These are all important for getting hits so you should put some thought into them.
Title: Keep your title under 70 characters so none of it disappears into a ‘…’. The best titles make people curious or elicit an emotional response. Terms like ‘video’, ‘how-to’, and ‘tutorial’ are often typed into people’s searches so if they apply to your video it can help to put them in the title.
Description: A short synopsis of your video which includes your most important keyword. You have about three lines before your text is hidden by a ‘show more’ tab. If you are including the URL of your channel or other videos then you should make sure they are above the ‘show more’.
Tags: Use a lot of them. These are the keywords and terms people will be searching for when they find your video. YouTube will suggest some after you start adding. A quick way to find good keywords to use is to search for videos similar to yours and check out their tags. A while ago YouTube started hiding video tags by default but you can download a free, YouTube-certified, extension for Google Chrome which will allow you to see them from vidIQ.com.
4. Digging Deeper
To get your viewers to subscribe to your channel you will need to make sure your videos are not losing quality when you upload them. Here are some things to be aware of if you want your videos to look great on YouTube.
Resolution: the number of pixels in your image. For example when a video has a resolution of 1080p that means it has a grid of pixels that is 1920 x 1080. The more pixels you have the sharper your image.
Bitrate: Bitrate is a measurement of how compressed your file is, and the less compressed it is the more information there is per frame. Higher bitrates mean larger file sizes.
Your resolution and bitrate should complement each other. If you have a higher bitrate than is needed for your video’s resolution your file will be unnecessarily large. If your bitrate is too low for your resolution then you will not see the quality you expect.
YouTube has a list of recommended resolutions and bitrates at support.google.com/youtube/answer/1722171.
Aspect Ratio: the dimensions of your video, in terms of width and height. YouTube’s aspect ratio is 16:9, so your videos should also be 16:9. If they are not then you will get black bars on either side of your video after you upload it. The most common way that people end up with the wrong aspect ratio is by creating videos on their smartphones and holding them up and down instead of sideways.
Part 2: Steps to Upload Videos to YouTube
Uploading YouTube Video on Desktop:
1. Sign in to your YouTube account
2. Hit the upload button
3. Select your video type (Public, Private, Unlisted)
4. Manage the upload
5. Choose your thumbnail
Step 1: Sign in to your YouTube account
In order to upload videos to YouTube, the very first thing you need to do is sign in. The sign-in button is located at the top right corner of the YouTube homepage. If you have multiple accounts registered to one device, you will be asked to choose one to log in to.

Step 2: Hit the upload button
It is a simple step that you will have to follow right after you log in to YouTube. As soon as you enter YouTube, after using your Google account and password for login, you will find the upload button in the top right corner of the screen. Click on this button and it will take you to the dedicated upload page.
Step 3: Select your video type (Public, Private, Unlisted)
Choose your audience. If you wish to make your video available to everyone on YouTube, simply go to the privacy settings and choose the “Public” option from the drop-down menu.
If you do not want your video to be searchable, but still want to be able to easily share a link to it with your friends and family, choose the “Unlisted” option.
Those who wish to keep their video personal can choose the “Private” option from the drop-down menu. You can still share a private video with a limited number of people (as long as they have Google accounts).
The “Scheduled” option is available for choosing a future date and time to make the video available to viewers. Once you have selected your privacy level, simply upload your video from your device storage.

Step 4: Manage the upload
As soon as you have confirmed your video upload, you will find a progress bar on the screen. It will take some time depending on factors such as the resolution of the video and how long it is. In the meanwhile, you can write a title, description and add relevant tags for your video so that YouTube knows what search results to include it in and viewers can find it. Remember that YouTube is the second biggest search engine on the Internet, so take some time to optimize your keywords .
Step 5: Choose your thumbnail
Once your video uploading is complete, it is time to choose a creative thumbnail for your video. The system provides you with three options to choose from automatically, all of which will be screenshots from your video. It is usually better toupload your own custom thumbnail , as thumbnails are a very important factor in attracting viewers. Hit the “Done” button or use the “Publish” button to finalize your upload.
That’s how to upload a video on YouTube! Any questions?
Richard Bennett
Richard Bennett is a writer and a lover of all things video.
Follow @Richard Bennett
Richard Bennett
Mar 27, 2024• Proven solutions
Want to learn how to upload videos to YouTube? Millions of people watch YouTube every day. Creating and posting YouTube videos can be a lot of fun, and if you get a lot of views and become popular you can also make money. YouTube videos are a creative way to connect with people all around the world.
These simple steps can assist you in learning how to upload YouTube videos from a desktop computer. You are going to Learn:
Edit YouTube with Powerful Video Editor
As a YouTuber, it is necessary to have an easy-to-use video editor, especially for beginners. Download Filmora for free and start your editing journey happily.
Part 1: Basic Rules You Need to Know Before Uploading
Clicking the ‘upload’ button is easy, but during the upload process, there are things you can do to help your video get views and maintain its quality. You should also keep an eye on the length and file size limits. The more basic things you need to consider carefully when you upload are the title, description, and tags of your video. These are part of what determines if and where your video comes up in people’s search results. There are also slightly more advanced video specs, like your video’s resolution, which will be helpful for you to understand as somebody who will be producing video content frequently. These sorts of specs will affect how long it takes your videos to upload and how much of the quality they maintain.
1. How Long Can my Video Be?
By default, your YouTube videos can only be 15 minutes long. You can post longer videos by going to the upload page and clicking on ‘Increase your Limit’ at the bottom. After you have followed the steps to verify your account you will be able to post videos that are a maximum of 11 hours long.
2. How Big a File Can I Upload?
Your file size was capped at 20GB, initially. If you follow the same steps for posting videos longer than 15 minutes then you can also increase your maximum file size to 128GB.
3. Other Basics
After you click the ‘upload’ button on YouTube you are taken to a page where you choose a category for your video and add a title, description, and tags. These are all important for getting hits so you should put some thought into them.
Title: Keep your title under 70 characters so none of it disappears into a ‘…’. The best titles make people curious or elicit an emotional response. Terms like ‘video’, ‘how-to’, and ‘tutorial’ are often typed into people’s searches so if they apply to your video it can help to put them in the title.
Description: A short synopsis of your video which includes your most important keyword. You have about three lines before your text is hidden by a ‘show more’ tab. If you are including the URL of your channel or other videos then you should make sure they are above the ‘show more’.
Tags: Use a lot of them. These are the keywords and terms people will be searching for when they find your video. YouTube will suggest some after you start adding. A quick way to find good keywords to use is to search for videos similar to yours and check out their tags. A while ago YouTube started hiding video tags by default but you can download a free, YouTube-certified, extension for Google Chrome which will allow you to see them from vidIQ.com.
4. Digging Deeper
To get your viewers to subscribe to your channel you will need to make sure your videos are not losing quality when you upload them. Here are some things to be aware of if you want your videos to look great on YouTube.
Resolution: the number of pixels in your image. For example when a video has a resolution of 1080p that means it has a grid of pixels that is 1920 x 1080. The more pixels you have the sharper your image.
Bitrate: Bitrate is a measurement of how compressed your file is, and the less compressed it is the more information there is per frame. Higher bitrates mean larger file sizes.
Your resolution and bitrate should complement each other. If you have a higher bitrate than is needed for your video’s resolution your file will be unnecessarily large. If your bitrate is too low for your resolution then you will not see the quality you expect.
YouTube has a list of recommended resolutions and bitrates at support.google.com/youtube/answer/1722171.
Aspect Ratio: the dimensions of your video, in terms of width and height. YouTube’s aspect ratio is 16:9, so your videos should also be 16:9. If they are not then you will get black bars on either side of your video after you upload it. The most common way that people end up with the wrong aspect ratio is by creating videos on their smartphones and holding them up and down instead of sideways.
Part 2: Steps to Upload Videos to YouTube
Uploading YouTube Video on Desktop:
1. Sign in to your YouTube account
2. Hit the upload button
3. Select your video type (Public, Private, Unlisted)
4. Manage the upload
5. Choose your thumbnail
Step 1: Sign in to your YouTube account
In order to upload videos to YouTube, the very first thing you need to do is sign in. The sign-in button is located at the top right corner of the YouTube homepage. If you have multiple accounts registered to one device, you will be asked to choose one to log in to.
Step 2: Hit the upload button
It is a simple step that you will have to follow right after you log in to YouTube. As soon as you enter YouTube, after using your Google account and password for login, you will find the upload button in the top right corner of the screen. Click on this button and it will take you to the dedicated upload page.
Step 3: Select your video type (Public, Private, Unlisted)
Choose your audience. If you wish to make your video available to everyone on YouTube, simply go to the privacy settings and choose the “Public” option from the drop-down menu.
If you do not want your video to be searchable, but still want to be able to easily share a link to it with your friends and family, choose the “Unlisted” option.
Those who wish to keep their video personal can choose the “Private” option from the drop-down menu. You can still share a private video with a limited number of people (as long as they have Google accounts).
The “Scheduled” option is available for choosing a future date and time to make the video available to viewers. Once you have selected your privacy level, simply upload your video from your device storage.
Step 4: Manage the upload
As soon as you have confirmed your video upload, you will find a progress bar on the screen. It will take some time depending on factors such as the resolution of the video and how long it is. In the meanwhile, you can write a title, description and add relevant tags for your video so that YouTube knows what search results to include it in and viewers can find it. Remember that YouTube is the second biggest search engine on the Internet, so take some time to optimize your keywords .
Step 5: Choose your thumbnail
Once your video uploading is complete, it is time to choose a creative thumbnail for your video. The system provides you with three options to choose from automatically, all of which will be screenshots from your video. It is usually better toupload your own custom thumbnail , as thumbnails are a very important factor in attracting viewers. Hit the “Done” button or use the “Publish” button to finalize your upload.
That’s how to upload a video on YouTube! Any questions?
Richard Bennett
Richard Bennett is a writer and a lover of all things video.
Follow @Richard Bennett
Also read:
- [Updated] Elevate Your Mobile Shoot - Ranking the Best 9 CamGear Innovations
- Permanent Deactivation The Ultimate Guide to YouTube Shorts
- 2024 Approved 2023'S Standout YouTube Music Playback Gems
- [Updated] 11 FREE YouTube Video Rippers to Download YouTube Videos
- In 2024, How to Edit YouTube Videos in iMovie?
- Unveiling Allure Comprehensive Beauty How-Tos on Youtube
- In 2024, Charting the Course for YouTube Music Uploads
- Skyrocket Your YouTube Dollars with Short Video Monetization
- Streamline Success A Review of Top Name Generators
- The Blueprint for Successful Valorant Thumbnails on Social Media Platforms
- Youtube Milestone Mastery Breaking Into the Millions
- In 2024, Ease and Speed Effective Methods for Comment Removal
- Creating Profit on YouTube The Ultimate List of Top Business Channels
- Achieve Video Excellence Learn the Studio Editor Way for 2024
- 2024 Approved Boosting Revenue with YouTube Short Videos – A Complete Plan
- Becoming a Master at the Art of Engaging Thumbnails for 2024
- Maximize Your Green Screen Potential with These Top 8 Download Sites
- Pioneering the Past Selecting Top Historical Educational YTs
- Converting Your Clips Upload to YouTube Via Premiere for 2024
- 2024 Approved Top 3 iPad Voice Logging Strategies
- The Sound Experts Choice 7 Innovative Free Transitions to Revolutionize Your Work for 2024
- [New] In 2024, Find Zen with These 10 Game Choices
- Updated 2024 Approved Premier Top 10 Audio Manipulation Software for Windows and Mac Users
- [Updated] Examining OBS's Recording Features in Detail for 2024
- 2024 Approved Video Mastery Posting on Snapchat From Twitter Revealed
- 11 Proven Solutions to Fix Google Play Store Not Working Issue on HTC U23 | Dr.fone
- In 2024, How to Transfer Contacts from OnePlus Ace 2 Pro to Other Android Devices Devices? | Dr.fone
- [Updated] In 2024, Essential 10 Royale Confrontations
- How to Reduce the Size of Video Files Online? In This Article, Well Share the Top 10 Free Online Video Compressors that You Can Use Anywhere at Any Time and on Any Device
- In 2024, Guidelines for Legally Reposting on Insta
- New The Ultimate List of Glitch Video Editors Online and Offline Options
- 4 Ways to Fix Android Blue Screen of Death On Infinix Zero 30 5G | Dr.fone
- [Updated] 2024 Approved Instagram Pro Tips Effortless Video Upload From PC/Mac
- [New] 2024 Approved Advanced Tips for NVIDIA Recorded Content
- In 2024, How can I get more stardust in pokemon go On Samsung Galaxy Z Flip 5? | Dr.fone
- Updated In 2024, The Most Acclaimed Digital Voice Synthesis Services
- Explore Unlimited Free Fun with Top Meme Templates
- In 2024, How To Bypass iCloud By Checkra1n Even From iPhone X If Youve Tried Everything
- Title: "2024 Approved Best 12 YouTube Game Openers A Comparative Guide (No Expense)"
- Author: Steven
- Created at : 2024-05-25 18:26:14
- Updated at : 2024-05-26 18:26:14
- Link: https://youtube-clips.techidaily.com/2024-approved-best-12-youtube-game-openers-a-comparative-guide-no-expense/
- License: This work is licensed under CC BY-NC-SA 4.0.
