
:max_bytes(150000):strip_icc()/SafariTwitterSidebar-56a5d5143df78cf7728a0f97.jpg)
"2024 Approved Adobe's Toolset Perfecting Your YouTube Uploads"
Adobe’s Toolset: Perfecting Your YouTube Uploads
How Do I Use Adobe Premiere To Upload YouTube Videos?

Benjamin Arango
Mar 27, 2024• Proven solutions
Whilst getting the editing and post work just right on any project is what we all aim for, the ultimate aim is for other people to see our creations, and the most popular way to achieve that is YouTube . Chances are, if you are producing video, you will be putting some of it on YouTube at some point, so let’s have a look at the most efficient way to get your work from Premiere to YouTube.
Check if your computer meet the Premiere System Requirements >>
This is a basic tutorial about Adobe Premiere, professional video editing software. However, if video editing is new to you, consider Wondershare Filmora , which is a powerful but easy-to-use tool for users just starting out. Download the free trial version below.
 Download Mac Version ](https://tools.techidaily.com/wondershare/filmora/download/ )
How Do I Use Adobe Premiere To Upload YouTube Videos
1. Master Copy
Before exporting your work, it is important to first create a master copy of your project that is ‘as is’, in that it reflects the settings and codecs used in the original footage.
To do this you simply select the sequence within the Timeline or in the Project Panel, and go through the menu tree via File > Export > Media to bring up the export dialogue.

To create your Master Copy, simply select the first option of ‘Match Sequence Settings’, this exports a file that is of the same quality as your original footage, essentially producing a digital copy of the work for archiving before anything else is done.
With you work safe and secure it is now time to look at ensuring the project is suitable for YouTube. With our sequence selected in the Timeline or Project Panel again, we go through the same File > Export > Media path to bring up the media export dialogue as before.
2. Container
The first option we have to consider is the file format that our finished video needs to be in. Here you should refer to YouTube for its guidelines, whilst they do accept a number of file formats, digging through the YouTube help system to find the settings for highest quality we find that they recommend MPEG4 as the container, using the codec.

We can also see further recommended settings in this screenshot that will be covered later.
The good news is that Premiere automatically selects the appropriate container for us when we select our codec, however it is worth knowing the file type YouTube is expecting just to check yourself.
3. Video Codec
So having established that YouTube recommends the MPEG4 container using the codec, the first option we need to look for in the media export dialogue is to select the appropriate Format.
This is the first drop down in the dialogue box, and in this case we simply select from the list.

Once you select you can check the ‘output name’ field and see that premiere is automatically set the output file to .mp4 which is exactly what we need.
4. Preset
The next field we come to is the ‘Preset’ dropdown menu. This is a major help to most people, as Adobe have very kindly included large numbers of presets to quickly adapt video settings to suit specific uses. They vary depending on the exact version of Premiere you are using, and each format type does have its own list of presets, as we can see has a large number for YouTube, but also has many presets for specific devices (presets for iPad, Kindle, Nook, various other tablets and phones, Vimeo and a host of others) to make getting the right settings that bit easier for us.

It is important here to select the correct preset from the various YouTube options. You want to select the resolution and frame rate that match your source file, for the best results. So, if your source file is 1080p with a frame rate of 29.97 fps then that is the YouTube setting you would select.
Once a preset is selected a summary of the settings is displayed below, normally these will be well suited to your project, however you can fine tune anything you wish by selecting the video or audio tabs at the bottom which give you the chance to adjust each parameter individually. If you do this, you can save these changes as a custom preset by clicking the button at the side of the Preset dropdown menu and simply use it on later projects by selecting it from the list the same as any other, a great time saving tool.

5. Rendering
Once you are satisfied with the settings, either from the Preset alone or if you have adjusted anything yourself, you are nearly ready to render the file and export it.
For YouTube it is recommended you select the ‘Use Maximum Render Quality’ option to maintain the best output you can, it does add time to the render process but if you value the quality of your work it is worthwhile.
Finally you can choose a suitable filename and the destination of the file by clicking on the ‘Output Name’ field.
I normally use a filename that includes the destination medium so I can differentiate between different versions of a project and know which one to upload where, in this case I include ‘youtube’, but if I were planning on uploading clips of the project to vimeo as well for instance there may be a cut of the project with ‘vimeo’ in the name too. The destination is personal preference, because I do use filenames to differentiate versions I can put the various iterations into a single project file, others have folder structures for each type of file , so all YouTube output goes into a single folder and so on, how you organize is entirely dependent on how you work.

Once those are selected clicking ‘Export’ starts the rendering process, and eventually (how long depends on the speed of your computer and the size and type of file involved), you will end up with your YouTube optimized video in the location you chose.
Here I created 4 key frames that let the ‘Animation’ object move around the ‘Demo Text’ Object and finally come to rest below it. Whilst this type of effect does look very effective on screen, such is the ease of use of After Effects it really is just a few minutes work to achieve.
Learn more details about How to add text in Premiere >>
6. Uploading
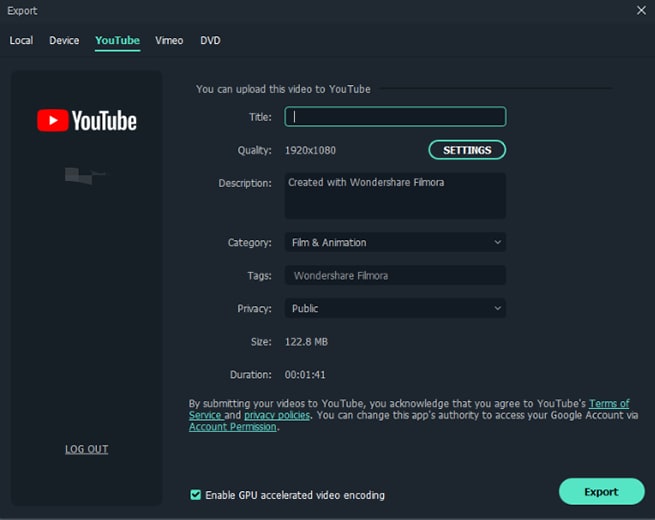
Now you have your file, the next step is to go to your YouTube account and log in if you need to.
On the top of your homepage on the right is the upload button, selecting that brings up the select file menu as below.

You can either drag your file into the window or click on it to open a standard file browser to locate the desired file, click and the upload will begin. The dropdown underneath allows you to set the video as Public, Unlisted or Private. You can change this at any time once the video is uploaded as well.
This opens the upload progress window, where you can add in a name, description and tags as well as add the video to a playlist or adjust the privacy settings as the video is uploading.

Once the upload as finished, you can do final adjustments to settings and choose a thumbnail for the video. The final step is to click the ‘Publish’ button and your video will be processed and go live.

Benjamin Arango
Benjamin Arango is a writer and a lover of all things video.
Follow @Benjamin Arango
Benjamin Arango
Mar 27, 2024• Proven solutions
Whilst getting the editing and post work just right on any project is what we all aim for, the ultimate aim is for other people to see our creations, and the most popular way to achieve that is YouTube . Chances are, if you are producing video, you will be putting some of it on YouTube at some point, so let’s have a look at the most efficient way to get your work from Premiere to YouTube.
Check if your computer meet the Premiere System Requirements >>
This is a basic tutorial about Adobe Premiere, professional video editing software. However, if video editing is new to you, consider Wondershare Filmora , which is a powerful but easy-to-use tool for users just starting out. Download the free trial version below.
Download Mac Version ](https://tools.techidaily.com/wondershare/filmora/download/ )
How Do I Use Adobe Premiere To Upload YouTube Videos
1. Master Copy
Before exporting your work, it is important to first create a master copy of your project that is ‘as is’, in that it reflects the settings and codecs used in the original footage.
To do this you simply select the sequence within the Timeline or in the Project Panel, and go through the menu tree via File > Export > Media to bring up the export dialogue.
To create your Master Copy, simply select the first option of ‘Match Sequence Settings’, this exports a file that is of the same quality as your original footage, essentially producing a digital copy of the work for archiving before anything else is done.
With you work safe and secure it is now time to look at ensuring the project is suitable for YouTube. With our sequence selected in the Timeline or Project Panel again, we go through the same File > Export > Media path to bring up the media export dialogue as before.
2. Container
The first option we have to consider is the file format that our finished video needs to be in. Here you should refer to YouTube for its guidelines, whilst they do accept a number of file formats, digging through the YouTube help system to find the settings for highest quality we find that they recommend MPEG4 as the container, using the codec.
We can also see further recommended settings in this screenshot that will be covered later.
The good news is that Premiere automatically selects the appropriate container for us when we select our codec, however it is worth knowing the file type YouTube is expecting just to check yourself.
3. Video Codec
So having established that YouTube recommends the MPEG4 container using the codec, the first option we need to look for in the media export dialogue is to select the appropriate Format.
This is the first drop down in the dialogue box, and in this case we simply select from the list.
Once you select you can check the ‘output name’ field and see that premiere is automatically set the output file to .mp4 which is exactly what we need.
4. Preset
The next field we come to is the ‘Preset’ dropdown menu. This is a major help to most people, as Adobe have very kindly included large numbers of presets to quickly adapt video settings to suit specific uses. They vary depending on the exact version of Premiere you are using, and each format type does have its own list of presets, as we can see has a large number for YouTube, but also has many presets for specific devices (presets for iPad, Kindle, Nook, various other tablets and phones, Vimeo and a host of others) to make getting the right settings that bit easier for us.
It is important here to select the correct preset from the various YouTube options. You want to select the resolution and frame rate that match your source file, for the best results. So, if your source file is 1080p with a frame rate of 29.97 fps then that is the YouTube setting you would select.
Once a preset is selected a summary of the settings is displayed below, normally these will be well suited to your project, however you can fine tune anything you wish by selecting the video or audio tabs at the bottom which give you the chance to adjust each parameter individually. If you do this, you can save these changes as a custom preset by clicking the button at the side of the Preset dropdown menu and simply use it on later projects by selecting it from the list the same as any other, a great time saving tool.
5. Rendering
Once you are satisfied with the settings, either from the Preset alone or if you have adjusted anything yourself, you are nearly ready to render the file and export it.
For YouTube it is recommended you select the ‘Use Maximum Render Quality’ option to maintain the best output you can, it does add time to the render process but if you value the quality of your work it is worthwhile.
Finally you can choose a suitable filename and the destination of the file by clicking on the ‘Output Name’ field.
I normally use a filename that includes the destination medium so I can differentiate between different versions of a project and know which one to upload where, in this case I include ‘youtube’, but if I were planning on uploading clips of the project to vimeo as well for instance there may be a cut of the project with ‘vimeo’ in the name too. The destination is personal preference, because I do use filenames to differentiate versions I can put the various iterations into a single project file, others have folder structures for each type of file , so all YouTube output goes into a single folder and so on, how you organize is entirely dependent on how you work.
Once those are selected clicking ‘Export’ starts the rendering process, and eventually (how long depends on the speed of your computer and the size and type of file involved), you will end up with your YouTube optimized video in the location you chose.
Here I created 4 key frames that let the ‘Animation’ object move around the ‘Demo Text’ Object and finally come to rest below it. Whilst this type of effect does look very effective on screen, such is the ease of use of After Effects it really is just a few minutes work to achieve.
Learn more details about How to add text in Premiere >>
6. Uploading
Now you have your file, the next step is to go to your YouTube account and log in if you need to.
On the top of your homepage on the right is the upload button, selecting that brings up the select file menu as below.
You can either drag your file into the window or click on it to open a standard file browser to locate the desired file, click and the upload will begin. The dropdown underneath allows you to set the video as Public, Unlisted or Private. You can change this at any time once the video is uploaded as well.
This opens the upload progress window, where you can add in a name, description and tags as well as add the video to a playlist or adjust the privacy settings as the video is uploading.
Once the upload as finished, you can do final adjustments to settings and choose a thumbnail for the video. The final step is to click the ‘Publish’ button and your video will be processed and go live.
Benjamin Arango
Benjamin Arango is a writer and a lover of all things video.
Follow @Benjamin Arango
How to Make a YouTube Intro With Best YouTube Intro Makers
How to Make a YouTube Intro With Best YouTube Intro Makers

Richard Bennett
Mar 27, 2024• Proven solutions
A high-quality YouTube intro is the short clip at the beginning of a YouTube video that introduces the topic and, usually, the vlogger. YouTube intro videos usually include things like the name of your channel and your logo if you have one. The colors, music, and graphics you use in your intro should all be related to the theme and tone of your vlog.
Your intro is your chance to make a great first impression. A good one lets viewers know what kind of experience they can expect to have if they keep watching your video – whether it’s going to be funny or serious, for example. Having an awesome YouTube intro sequence also helps make your vlog look more like a real show instead of somebody just ranting at their webcam (not that you cannot make a great video that way!).
Luckily, making a sleek, professional-looking YouTube intro is easy. There are a lot of sites that offer template videos that are either very affordable or completely free. Or, you can make your own intro in your video editing program. In this article, you will learn how to make YouTube intros easily with Filmora. In the end, you will also know the best tools to make intros for YouTube.
- Part 1: What Makes Excellent YouTube Intros
- Part 2: How to Create a YouTube Intro with Filmora
- Part 3: Recommended Tools to Make Intros for YouTube
- Part 4: 5 Tips for Making YouTube Intro Awesome
Part 1: What Makes Excellent YouTube Intros
Before you are making intros for YouTube, you should know the metrics of making a high-quality YouTube intro. Now, let’s take a look at these important ingredients.
1. Keep It Relevant
If your intro doesn’t fit in with the content that follows it people will get confused. Then probably, they will close your video. So your intros must be relevant to your video type. Funny YouTube intros for interesting lifestyle videos. High tech intros for reviews.
2. Keep It Short
if it lasts too long people will get bored and click away. Five seconds is the ideal length. It can be shorter, but only once your channel gains some popularity and you need the intro less. You always need to remember to capture the viewer’s attention first.
Part 2: How to Create a YouTube Intro With Filmora
Filmora is designed for beginners who want to make intros for YouTube easily. Filmora offers more than 20 free YouTube templates, so it is so easy to make it with dragging and dropping. In this part, you will learn how to make a YouTube intro step by step. Download it now to have a try!
Step 1: Import Video
If you have downloaded Filmora, open it directly and choose New Project. If you haven’t, you can download this video editor to quickly get started.
Click Import Media Files Here in the Media library to import the video that you want to edit. Then drag it to the timeline.

Step 2: Make a YouTube Intro
Choose Titles at the top first, and select Openers. There are 25 intros for YouTube you can use. Double click on the intro thumbnail to preview it. Then click the plus icon to add it to the timeline after you hover your mouse on a thumbnail.
After double click on the YouTube intro clip in the timeline, you can input your intro text in the basic setting which includes adjusting text style, color, and more. If you feel like music will touch up your intro, please feel free to add royalty-free music to the video.

Step 3: Export YouTube Intro
After you are done with editing, click Export in the toolbar. A pop-up window will appear. You can directly choose the output format, device, and export platforms, like YouTube and Vimeo. Now, just click Export at the right top corner. A YouTube intro video is done quickly. Share your video and start getting likes!
Bonus Tips: Create YouTube Intros in a Snap with Filmora Template Mode
Filmora recently released a new mode - Filmora Template Mode, which offers a wide range of intro templates that you can quickly make stunning YouTube intros effortlessly.
Part 3: Tools to Make Intros for YouTube
You can also make intros for YouTube by using other tools. Here are the best YouTube intro makers you can use. Some of them are online video makers, so if you don’t want to download software, you can also use online tools with limited functions.
1. Renderforest
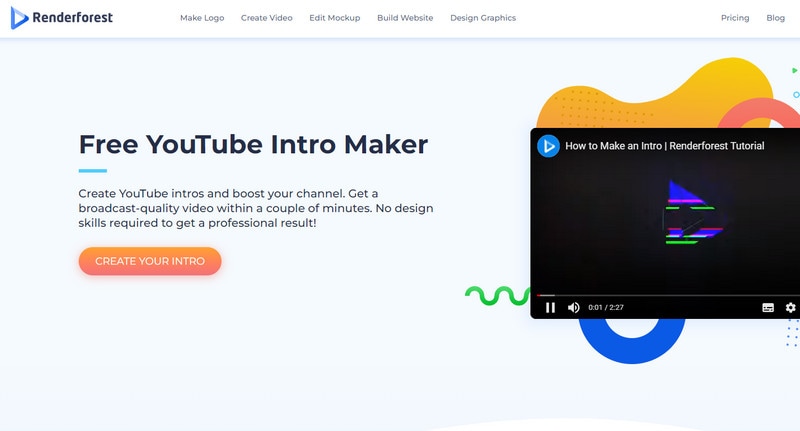
Renderforest is a popular online branding platform where you can create intro videos for your YouTube videos instantly. The platform lets you create videos, graphics, logos and even websites so that you can create a proper online brand with your identity as a video creator. There are several video templates available to create intro videos instantly. Some of these templates are extremely eye-catching and you have to choose as per the theme of your YouTube channel. Here are the key features of Renderforest YouTube intro maker.
- Comes with 1000+ intro video templates.
- Search option to find template as per category.
- Option to select video aspect ratio and frame rate.
- Massive collection of graphics, photos, fonts, and sound clips.
- Free plan offers 500 MB of storage.
- Unlimited videos of up to 3 minutes.
2. IntroMaker

IntroMaker.net also has some exciting animated intros, but instead of text, you add your own unique logo into your video. Videos on IntroMaker cost between $5 and $20, although there are two free options. Intro Maker is a dedicated YouTube intro creator and it is designed for beginners as well as advanced users. You can learn how to make professional intro videos from its tutorials and create stunning intro videos to grab the attention of the audiences. There are tons of templates available and you can make 3D intro, whiteboard animations, corporate intro videos and much more in a few steps. Here are the key features of Intro Maker.
- Customizable templates to choose from categorically.
- Log animation and color customization for advanced users.
- Eliminates the sign-up requirements.
- You can save the video in full HD 1080p.
- Intro videos compatible with all devices.
3. iVidID
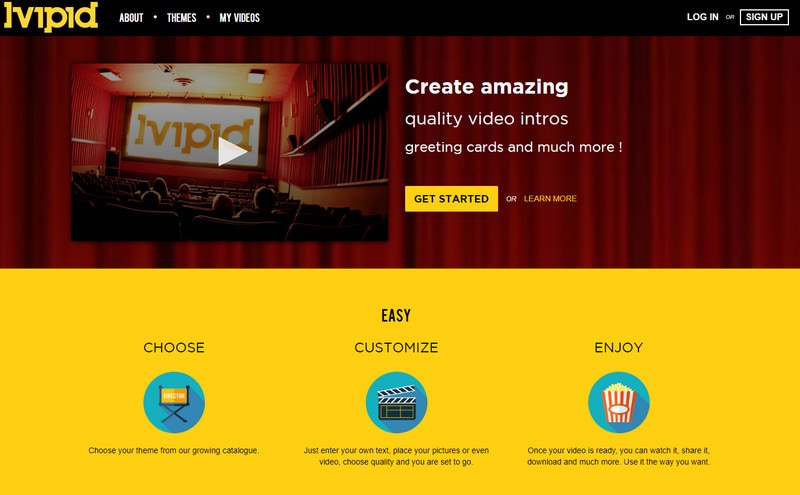
iVipID is a site with intros based on Hollywood movies. Pricing depends on the resolution you want your intro to have. The highest quality videos are $6.99. You can get a really low-resolution video for free, but it will have a watermark. A lot of VipID videos are longer than you generally want a Youtube intro to be. Ivipid makes it super easy to create YouTube intro videos in three simple steps. You have to choose a template, customize it instantly and get the video ready to publish. Therefore, you can make different intro videos for different videos you want to upload on YouTube. There are heavily features templates available that look stunning and attention-grabbing. The videos you make on the platform are saved in the cloud for instant access. Here are the key features of Ivipid.
- Easy interface makes it ideal for beginners.
- Enables easy customization of templates.
- Simple three-step process for making videos.
- Comes with the feature of Cloud storage.
- Comes with featured templates as per modern trends.
4. Placeit

Placeit is a trusted platform for creating YouTube intro video easily. The platform has options to create videos, logos, and mockup designs. Coming specifically to video creation, there are innovative templates available for all online platforms including YouTube. You can easily create stunning YouTube videos instantly that will look unique to your audiences. Even professional video creators use the platform for making advanced videos. Here are the key features of Placeit by Envato.
- Comes with categorized templates for saving time.
- Simple interface but advanced features.
- Includes video templates for intro and outros.
- Step-by-step tutorials for hassle-free video creation.
- Allows adding images, music, and slides.
- Wide range of stock audio library.
5. Flixpress
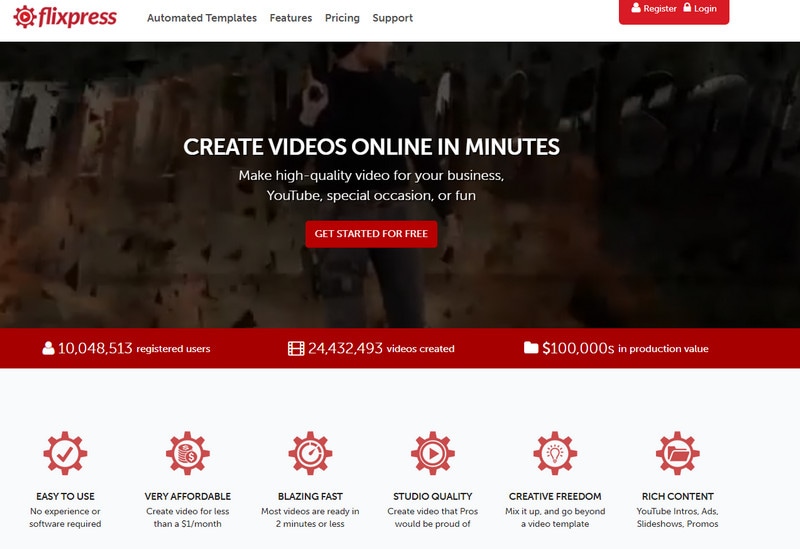
This is a great YouTube intro creator where you do not need any experience to create stunning videos instantly. The user interface is intuitive to make videos in a few minutes. You can create videos that can have studio-like quality. The platform offers ultimate creative freedom and there are templates and elements available for better intro video creation. Here are the key features of Flixpress.
- Create promos, ads, intros, and quick presentation videos.
- Customizable templates and editable layouts.
- Ability to create 3D video files.
- Comes with a massive library of stock images.
- Compatible with different devices.
- Feature of drag and drop for quick editing.
6. Animaker

If you like to have an animation-style intro for YouTube, Animaker is the best tool you can use. You can select a built-in template to use. After importing, you can also import your logo to make it unique. So convenient. Besides, it is also a great way to add some music to make it interesting.
Animaker lets you create professional-quality intro videos that you can incorporate in your YouTube videos easily. There are loads of customizable templates available to choose from as per the theme of your video or channel. It is a completely free online platform and you can get awesome avatars, text animations, and graphical objects to insert in your intro video. The process of making intro videos is extremely easy and you can complete in a few minutes. Here are the key features of Animaker.
- A wide range of customizable templates.
- Comes with a vast stock library of animations.
- A wide range of sound and background effects.
- Different graphical elements and objects to add to video.
- Powerful HTML5 engine for seamless performance.
- Powerful avatar creator and advanced animations.
7. Motionden

We know your time is valuable, so if you want to make an intro for YouTube easily, you can consider using Motionden. It includes hundreds of intros for YouTube that you just need to pick the one you like. You can use customizable layers to add brand logos.
Are you on a hurry to make an intro video so that you can publish your video content instantly? Motionden provides you a quick solution to intro making instantly. The platform offers stunning templates based on which you can create intro videos with proper customization as per your requirements. Starting from graphical elements and animations to stock music and audio effects, there is no dearth of options to create amazing videos. Here are the key features of Motionden.
- Includes a customization editor to edit templates.
- Suitable for creating different types of intro videos.
- Has animated texts and logos to add to videos.
- Allows selecting from hundreds of templates.
- Intuitive interface for simple operation.
8. Biteable

If you want to make collaborative intro videos for YouTube, this is the best platform. If you have a team, you can include them all to design eh intro video in the best possible way. Biteable is perfect for brands to add intro videos on all their videos before publishing and the interface has a specific feature for the same. Apart from that, there are sales enablement options, internal communication features, and loads of templates to customize to get the perfect intro video. Here are the key features of Biteable.
- Comes with a wide range of templates.
- Powerful interface for team collaboration.
- High-impact animations and effects available.
- Options for internal communication among team members.
- Automatically attaches branding elements as per settings.
- Text animations, creative logos and graphical elements.
9. Videobolt
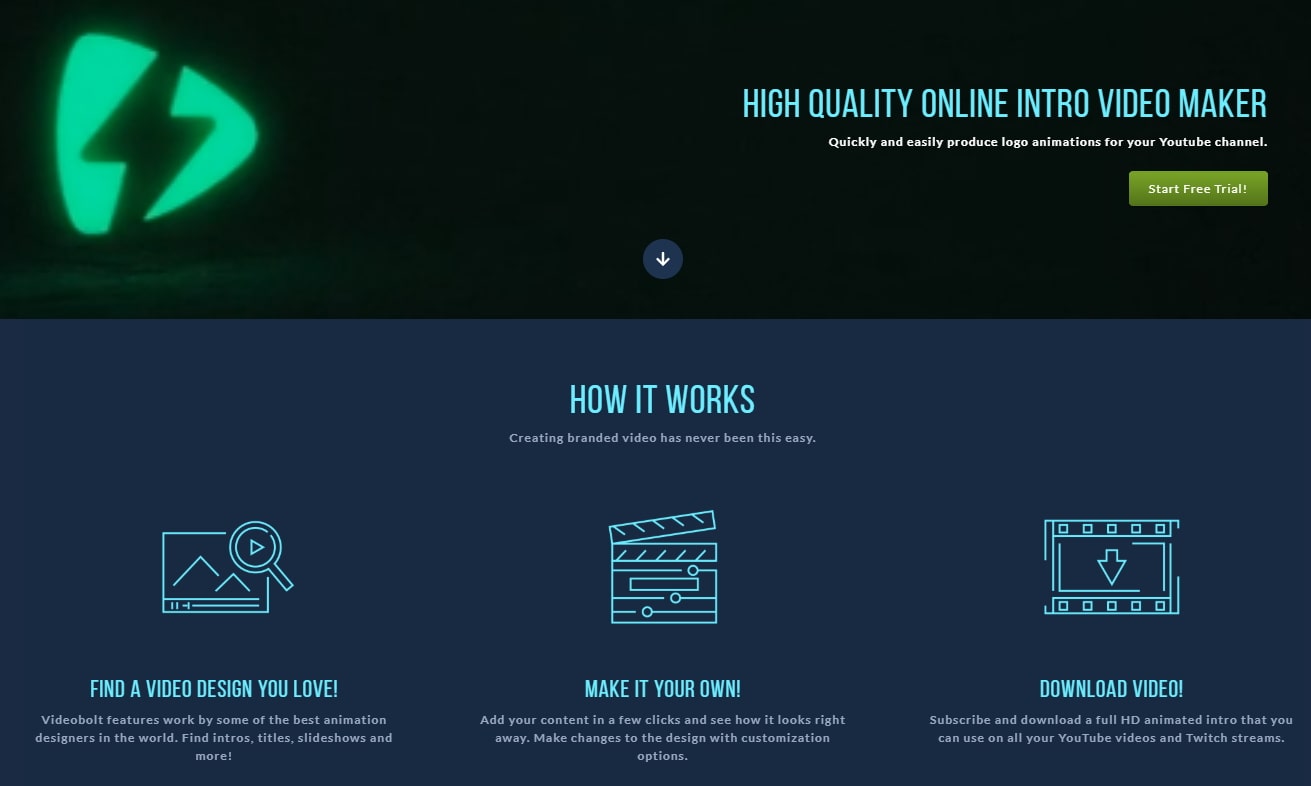
If you want to make professional intro videos for better branding, this is the platform for you. Starting from cinematic, retro and minimalist to 3D motion graphics and stomp, there are templates available for everything. All you need to do is select your video type followed by the industry to which the video belongs and you will get the templates of your dream. You can customize the templates and publish intro videos instantly. Here are the key features of VideoBolt.
- 2500+ high-quality templates to choose from.
- Simple but powerful interface for easy operation.
- Saves the video in high-resolution with compression.
- Template editor that can run on any device.
- Includes abstract effects and large stock library.
- Option to create scalable video intros with custom fonts.
10. Intro Maker
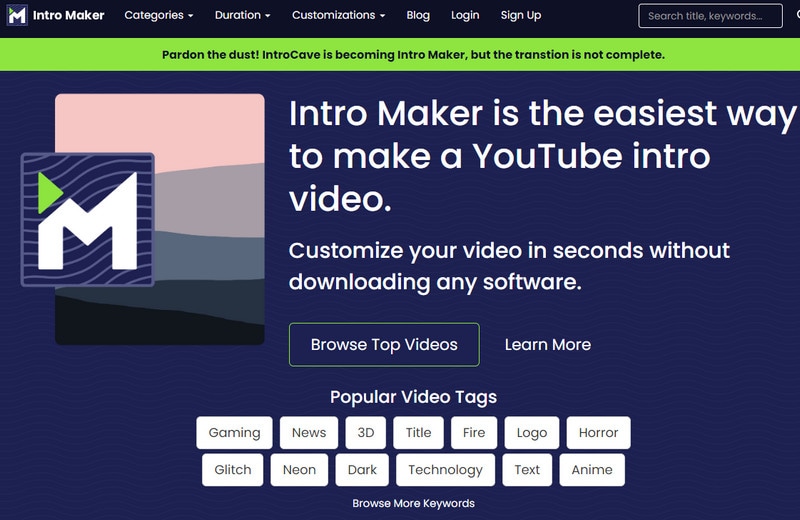
As the name suggests, this is a dedicated platform to make intro videos for YouTube. They have lined up the popular and trending video templates so that you can choose from them immediately and get started. There are featured templates available with amazing animations. Making intro videos on this platform cannot get any easier. Here are the key features of Intro Maker you should be aware of.
- Choose from popular video tags for perfect templates.
- Comes with photo montages and hybrid sequences.
- Clean interface for customizing the templates swiftly.
- Ability to save the video in a high-quality format.
- Choose from different video durations for apt templates.
11. Tube Arsenal
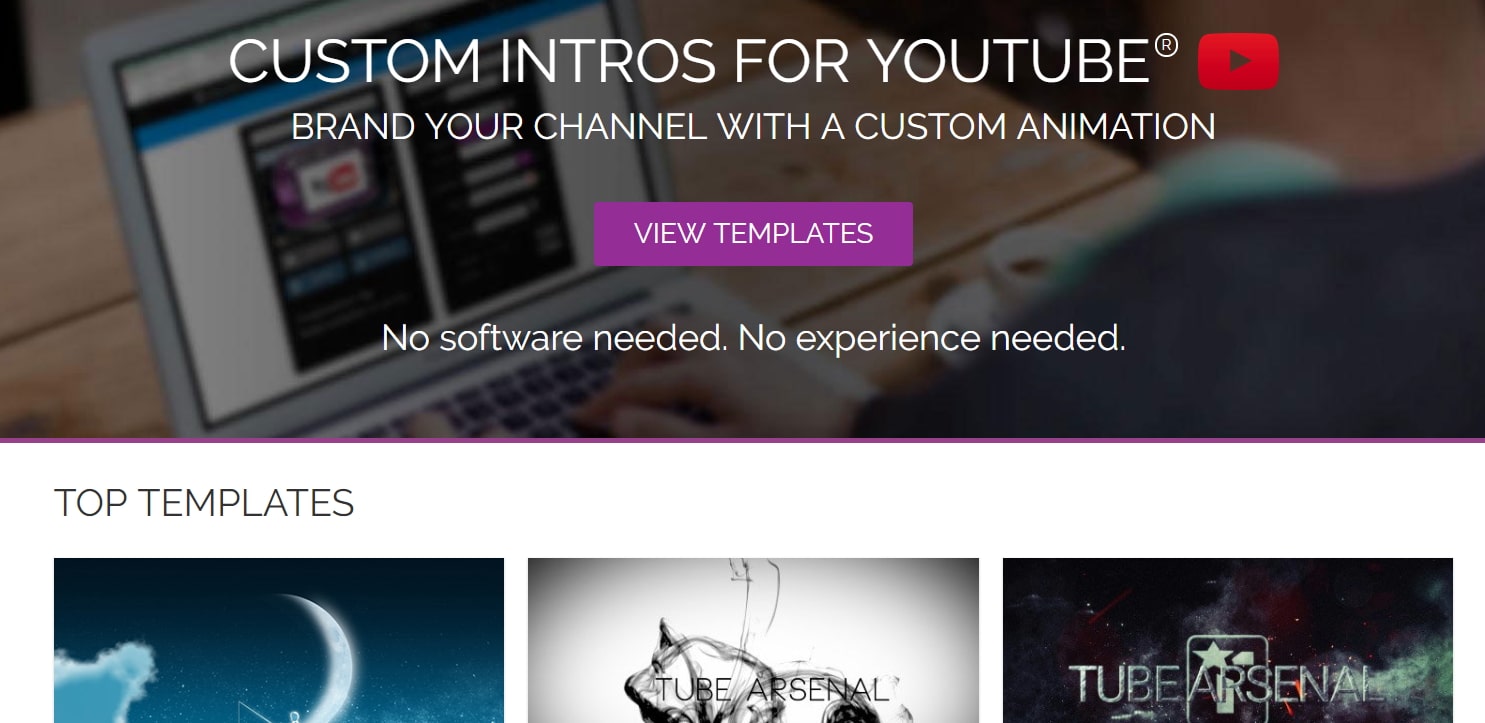
There are various YouTube intro templates you can use. Some are even movie-style. You can preview it still, or preview the movie. The price is $9 for 720p, $13 for HD intros, so you can buy it one by one without paying too much money.
This is another platform that is suitable for creating intro videos for branding purposes. Most of the templates are for professional-quality intro videos with stunning animations in the background. The platform is suitable for beginners as there is no learning curve. They have curated collection of graphical objects and animations to add to your videos. Here are the key features of Tube Arsenal.
- Unique set of curate templates.
- Filterable and tagged templates for easy selection.
- Intuitive online editor to customize the templates.
- Eliminates the need for plugins.
- Feature of one-click download of the videos.
12. VistaCreate
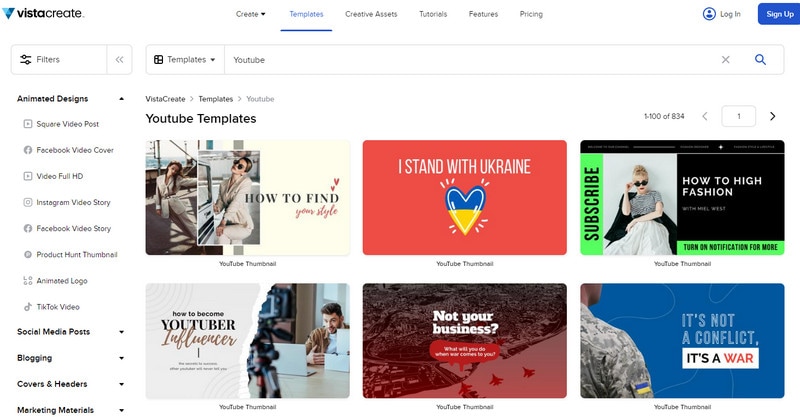
Creating a video in VistaCreate is as easy as creating a website from a template. Search for any category of templates and select the perfect one as per your video theme. There are templates available for different social media platforms including YouTube. There are various creative assets available that will make the video stand out easily. Starting from photos to vectors, there is no dearth of stock items. Here are the key features of VistaCreate.
- Different categories of customizable templates.
- Wide range of creative assets for video enhancement.
- The intuitive interface prevents any hassle in operation.
- Option to choose from millions of stock images and elements.
- Allows uploading images and fonts to add to videos.
- Tutorials available for better intro video creation.
13. InVideo
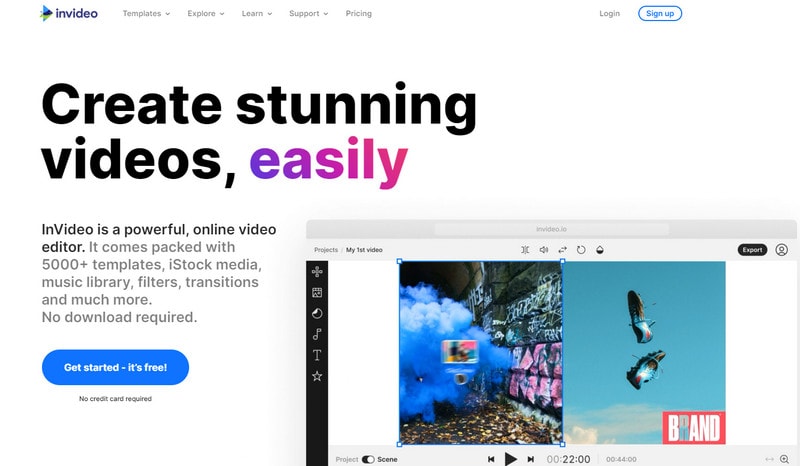
InVideo is a powerful video creation platform where you will have everything you need to create stunning YouTube intro videos. Starting from thousands of templates to stock media library, everything is available instantly as per your requirements. There are premium media assets also available for purchasing and making videos stand out. You can create videos in different languages as per your audiences. Here are the key features of InVideo.
- Thousands of customizable video templates.
- Millions of royalty-free stock images.
- Option to purchase premium media files.
- Automatic conversion of articles into videos.
- Option to create intro videos in different languages.
- Amazing text effects and editing options available.
14. Promo

Promo is a great YouTube intro creator that you can use to create quirky intro videos instantly. If you want to make intro videos that look fresh and different, Promo is the platform for you. Some of the video templates are not very usual and hence, they have better chances of grabbing attention. The platform has different types of tools for better video creation. There is also no dearth of resources through which you can create better video content easily. Here are the key features of Promo.
- Different types of customizable video templates.
- Wide range of tools for different categories of videos.
- Features premium library for multiple options.
- Comes with a user-friendly interface.
- Allows adding music and text animations.
- Option to save the video in a high-quality format.
15. Canva
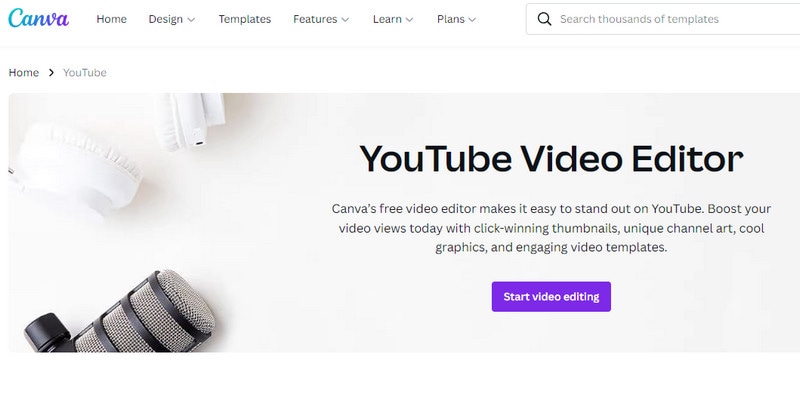
Here is another dedicated online platform for YouTube intro video creation. You must have used Canva for creating infographic designs and photo editing. Video creation is as easy as editing photos. All you have to do is find the perfect video templates of your choice and edit the templates as per your preference. There are millions of stock media items to explore and enhance your video quality and content. Here are the key features of Canva video intro creator.
- Video templates for specifically for YouTube intro videos.
- Simple interface with proper flow of steps.
- Wide range of customizable options.
- Option to upload audio and images.
- Millions of free stock media items.
5 Tips for Making YouTube Intro Awesome
In this part, we’ll share 5 ways to make your YouTube intro awesome.
1. Keep It Under 10 Seconds
A 10-second intro should have lots of movement and exciting music to hold viewers’ attention. If your intro is more subdued then aim for more than 5 seconds.
2. Support Your Brand
One of the most important things your intro can do is strengthen your personal brand. Your intro should look related to your channel art and video thumbnails, but even beyond that, it should match the tone of your content.
3. Use Music
When there’s a silent pause in your video the chances of viewers clicking away increase. Make sure your intro includes music that suits the tone of your channel.
4. Include Your Channel Name
Your channel name should be a huge, prominent, visual in your intro. This may seem like a given, but there are intros out there where the channel name is either small easy to overlook, or left out completely in favor of a logo.
5. Do a Cold Open
On TV, shows usually have at least one scene before they play the theme song. That’s because nobody is tuning in just for the theme, or in your case the intro. Make sure you have at least a short clip before your intro to get viewers interested in the rest of your video. Beyond setting the tone for the rest of the video and introducing your topic, you can use this first clip to create a ‘curiosity gap’. This means generating curiosity and making your viewers feel invested in the video so they stay on the page.
Conclusion
We have listed 16 different YouTube intro makers that you can use conveniently any time you want. Some are completely free while others have limitations in free versions. You can also purchase premium templates for making your YouTube intro video stand out. Go through all of them and choose the best ones that you can use alternatively as per your requirements.
Download Mac Version ](https://tools.techidaily.com/wondershare/filmora/download/ )
Richard Bennett
Richard Bennett is a writer and a lover of all things video.
Follow @Richard Bennett
Richard Bennett
Mar 27, 2024• Proven solutions
A high-quality YouTube intro is the short clip at the beginning of a YouTube video that introduces the topic and, usually, the vlogger. YouTube intro videos usually include things like the name of your channel and your logo if you have one. The colors, music, and graphics you use in your intro should all be related to the theme and tone of your vlog.
Your intro is your chance to make a great first impression. A good one lets viewers know what kind of experience they can expect to have if they keep watching your video – whether it’s going to be funny or serious, for example. Having an awesome YouTube intro sequence also helps make your vlog look more like a real show instead of somebody just ranting at their webcam (not that you cannot make a great video that way!).
Luckily, making a sleek, professional-looking YouTube intro is easy. There are a lot of sites that offer template videos that are either very affordable or completely free. Or, you can make your own intro in your video editing program. In this article, you will learn how to make YouTube intros easily with Filmora. In the end, you will also know the best tools to make intros for YouTube.
- Part 1: What Makes Excellent YouTube Intros
- Part 2: How to Create a YouTube Intro with Filmora
- Part 3: Recommended Tools to Make Intros for YouTube
- Part 4: 5 Tips for Making YouTube Intro Awesome
Part 1: What Makes Excellent YouTube Intros
Before you are making intros for YouTube, you should know the metrics of making a high-quality YouTube intro. Now, let’s take a look at these important ingredients.
1. Keep It Relevant
If your intro doesn’t fit in with the content that follows it people will get confused. Then probably, they will close your video. So your intros must be relevant to your video type. Funny YouTube intros for interesting lifestyle videos. High tech intros for reviews.
2. Keep It Short
if it lasts too long people will get bored and click away. Five seconds is the ideal length. It can be shorter, but only once your channel gains some popularity and you need the intro less. You always need to remember to capture the viewer’s attention first.
Part 2: How to Create a YouTube Intro With Filmora
Filmora is designed for beginners who want to make intros for YouTube easily. Filmora offers more than 20 free YouTube templates, so it is so easy to make it with dragging and dropping. In this part, you will learn how to make a YouTube intro step by step. Download it now to have a try!
Step 1: Import Video
If you have downloaded Filmora, open it directly and choose New Project. If you haven’t, you can download this video editor to quickly get started.
Click Import Media Files Here in the Media library to import the video that you want to edit. Then drag it to the timeline.
Step 2: Make a YouTube Intro
Choose Titles at the top first, and select Openers. There are 25 intros for YouTube you can use. Double click on the intro thumbnail to preview it. Then click the plus icon to add it to the timeline after you hover your mouse on a thumbnail.
After double click on the YouTube intro clip in the timeline, you can input your intro text in the basic setting which includes adjusting text style, color, and more. If you feel like music will touch up your intro, please feel free to add royalty-free music to the video.
Step 3: Export YouTube Intro
After you are done with editing, click Export in the toolbar. A pop-up window will appear. You can directly choose the output format, device, and export platforms, like YouTube and Vimeo. Now, just click Export at the right top corner. A YouTube intro video is done quickly. Share your video and start getting likes!
Bonus Tips: Create YouTube Intros in a Snap with Filmora Template Mode
Filmora recently released a new mode - Filmora Template Mode, which offers a wide range of intro templates that you can quickly make stunning YouTube intros effortlessly.
Part 3: Tools to Make Intros for YouTube
You can also make intros for YouTube by using other tools. Here are the best YouTube intro makers you can use. Some of them are online video makers, so if you don’t want to download software, you can also use online tools with limited functions.
1. Renderforest
Renderforest is a popular online branding platform where you can create intro videos for your YouTube videos instantly. The platform lets you create videos, graphics, logos and even websites so that you can create a proper online brand with your identity as a video creator. There are several video templates available to create intro videos instantly. Some of these templates are extremely eye-catching and you have to choose as per the theme of your YouTube channel. Here are the key features of Renderforest YouTube intro maker.
- Comes with 1000+ intro video templates.
- Search option to find template as per category.
- Option to select video aspect ratio and frame rate.
- Massive collection of graphics, photos, fonts, and sound clips.
- Free plan offers 500 MB of storage.
- Unlimited videos of up to 3 minutes.
2. IntroMaker
IntroMaker.net also has some exciting animated intros, but instead of text, you add your own unique logo into your video. Videos on IntroMaker cost between $5 and $20, although there are two free options. Intro Maker is a dedicated YouTube intro creator and it is designed for beginners as well as advanced users. You can learn how to make professional intro videos from its tutorials and create stunning intro videos to grab the attention of the audiences. There are tons of templates available and you can make 3D intro, whiteboard animations, corporate intro videos and much more in a few steps. Here are the key features of Intro Maker.
- Customizable templates to choose from categorically.
- Log animation and color customization for advanced users.
- Eliminates the sign-up requirements.
- You can save the video in full HD 1080p.
- Intro videos compatible with all devices.
3. iVidID
iVipID is a site with intros based on Hollywood movies. Pricing depends on the resolution you want your intro to have. The highest quality videos are $6.99. You can get a really low-resolution video for free, but it will have a watermark. A lot of VipID videos are longer than you generally want a Youtube intro to be. Ivipid makes it super easy to create YouTube intro videos in three simple steps. You have to choose a template, customize it instantly and get the video ready to publish. Therefore, you can make different intro videos for different videos you want to upload on YouTube. There are heavily features templates available that look stunning and attention-grabbing. The videos you make on the platform are saved in the cloud for instant access. Here are the key features of Ivipid.
- Easy interface makes it ideal for beginners.
- Enables easy customization of templates.
- Simple three-step process for making videos.
- Comes with the feature of Cloud storage.
- Comes with featured templates as per modern trends.
4. Placeit
Placeit is a trusted platform for creating YouTube intro video easily. The platform has options to create videos, logos, and mockup designs. Coming specifically to video creation, there are innovative templates available for all online platforms including YouTube. You can easily create stunning YouTube videos instantly that will look unique to your audiences. Even professional video creators use the platform for making advanced videos. Here are the key features of Placeit by Envato.
- Comes with categorized templates for saving time.
- Simple interface but advanced features.
- Includes video templates for intro and outros.
- Step-by-step tutorials for hassle-free video creation.
- Allows adding images, music, and slides.
- Wide range of stock audio library.
5. Flixpress
This is a great YouTube intro creator where you do not need any experience to create stunning videos instantly. The user interface is intuitive to make videos in a few minutes. You can create videos that can have studio-like quality. The platform offers ultimate creative freedom and there are templates and elements available for better intro video creation. Here are the key features of Flixpress.
- Create promos, ads, intros, and quick presentation videos.
- Customizable templates and editable layouts.
- Ability to create 3D video files.
- Comes with a massive library of stock images.
- Compatible with different devices.
- Feature of drag and drop for quick editing.
6. Animaker
If you like to have an animation-style intro for YouTube, Animaker is the best tool you can use. You can select a built-in template to use. After importing, you can also import your logo to make it unique. So convenient. Besides, it is also a great way to add some music to make it interesting.
Animaker lets you create professional-quality intro videos that you can incorporate in your YouTube videos easily. There are loads of customizable templates available to choose from as per the theme of your video or channel. It is a completely free online platform and you can get awesome avatars, text animations, and graphical objects to insert in your intro video. The process of making intro videos is extremely easy and you can complete in a few minutes. Here are the key features of Animaker.
- A wide range of customizable templates.
- Comes with a vast stock library of animations.
- A wide range of sound and background effects.
- Different graphical elements and objects to add to video.
- Powerful HTML5 engine for seamless performance.
- Powerful avatar creator and advanced animations.
7. Motionden
We know your time is valuable, so if you want to make an intro for YouTube easily, you can consider using Motionden. It includes hundreds of intros for YouTube that you just need to pick the one you like. You can use customizable layers to add brand logos.
Are you on a hurry to make an intro video so that you can publish your video content instantly? Motionden provides you a quick solution to intro making instantly. The platform offers stunning templates based on which you can create intro videos with proper customization as per your requirements. Starting from graphical elements and animations to stock music and audio effects, there is no dearth of options to create amazing videos. Here are the key features of Motionden.
- Includes a customization editor to edit templates.
- Suitable for creating different types of intro videos.
- Has animated texts and logos to add to videos.
- Allows selecting from hundreds of templates.
- Intuitive interface for simple operation.
8. Biteable
If you want to make collaborative intro videos for YouTube, this is the best platform. If you have a team, you can include them all to design eh intro video in the best possible way. Biteable is perfect for brands to add intro videos on all their videos before publishing and the interface has a specific feature for the same. Apart from that, there are sales enablement options, internal communication features, and loads of templates to customize to get the perfect intro video. Here are the key features of Biteable.
- Comes with a wide range of templates.
- Powerful interface for team collaboration.
- High-impact animations and effects available.
- Options for internal communication among team members.
- Automatically attaches branding elements as per settings.
- Text animations, creative logos and graphical elements.
9. Videobolt
If you want to make professional intro videos for better branding, this is the platform for you. Starting from cinematic, retro and minimalist to 3D motion graphics and stomp, there are templates available for everything. All you need to do is select your video type followed by the industry to which the video belongs and you will get the templates of your dream. You can customize the templates and publish intro videos instantly. Here are the key features of VideoBolt.
- 2500+ high-quality templates to choose from.
- Simple but powerful interface for easy operation.
- Saves the video in high-resolution with compression.
- Template editor that can run on any device.
- Includes abstract effects and large stock library.
- Option to create scalable video intros with custom fonts.
10. Intro Maker
As the name suggests, this is a dedicated platform to make intro videos for YouTube. They have lined up the popular and trending video templates so that you can choose from them immediately and get started. There are featured templates available with amazing animations. Making intro videos on this platform cannot get any easier. Here are the key features of Intro Maker you should be aware of.
- Choose from popular video tags for perfect templates.
- Comes with photo montages and hybrid sequences.
- Clean interface for customizing the templates swiftly.
- Ability to save the video in a high-quality format.
- Choose from different video durations for apt templates.
11. Tube Arsenal
There are various YouTube intro templates you can use. Some are even movie-style. You can preview it still, or preview the movie. The price is $9 for 720p, $13 for HD intros, so you can buy it one by one without paying too much money.
This is another platform that is suitable for creating intro videos for branding purposes. Most of the templates are for professional-quality intro videos with stunning animations in the background. The platform is suitable for beginners as there is no learning curve. They have curated collection of graphical objects and animations to add to your videos. Here are the key features of Tube Arsenal.
- Unique set of curate templates.
- Filterable and tagged templates for easy selection.
- Intuitive online editor to customize the templates.
- Eliminates the need for plugins.
- Feature of one-click download of the videos.
12. VistaCreate
Creating a video in VistaCreate is as easy as creating a website from a template. Search for any category of templates and select the perfect one as per your video theme. There are templates available for different social media platforms including YouTube. There are various creative assets available that will make the video stand out easily. Starting from photos to vectors, there is no dearth of stock items. Here are the key features of VistaCreate.
- Different categories of customizable templates.
- Wide range of creative assets for video enhancement.
- The intuitive interface prevents any hassle in operation.
- Option to choose from millions of stock images and elements.
- Allows uploading images and fonts to add to videos.
- Tutorials available for better intro video creation.
13. InVideo
InVideo is a powerful video creation platform where you will have everything you need to create stunning YouTube intro videos. Starting from thousands of templates to stock media library, everything is available instantly as per your requirements. There are premium media assets also available for purchasing and making videos stand out. You can create videos in different languages as per your audiences. Here are the key features of InVideo.
- Thousands of customizable video templates.
- Millions of royalty-free stock images.
- Option to purchase premium media files.
- Automatic conversion of articles into videos.
- Option to create intro videos in different languages.
- Amazing text effects and editing options available.
14. Promo
Promo is a great YouTube intro creator that you can use to create quirky intro videos instantly. If you want to make intro videos that look fresh and different, Promo is the platform for you. Some of the video templates are not very usual and hence, they have better chances of grabbing attention. The platform has different types of tools for better video creation. There is also no dearth of resources through which you can create better video content easily. Here are the key features of Promo.
- Different types of customizable video templates.
- Wide range of tools for different categories of videos.
- Features premium library for multiple options.
- Comes with a user-friendly interface.
- Allows adding music and text animations.
- Option to save the video in a high-quality format.
15. Canva
Here is another dedicated online platform for YouTube intro video creation. You must have used Canva for creating infographic designs and photo editing. Video creation is as easy as editing photos. All you have to do is find the perfect video templates of your choice and edit the templates as per your preference. There are millions of stock media items to explore and enhance your video quality and content. Here are the key features of Canva video intro creator.
- Video templates for specifically for YouTube intro videos.
- Simple interface with proper flow of steps.
- Wide range of customizable options.
- Option to upload audio and images.
- Millions of free stock media items.
5 Tips for Making YouTube Intro Awesome
In this part, we’ll share 5 ways to make your YouTube intro awesome.
1. Keep It Under 10 Seconds
A 10-second intro should have lots of movement and exciting music to hold viewers’ attention. If your intro is more subdued then aim for more than 5 seconds.
2. Support Your Brand
One of the most important things your intro can do is strengthen your personal brand. Your intro should look related to your channel art and video thumbnails, but even beyond that, it should match the tone of your content.
3. Use Music
When there’s a silent pause in your video the chances of viewers clicking away increase. Make sure your intro includes music that suits the tone of your channel.
4. Include Your Channel Name
Your channel name should be a huge, prominent, visual in your intro. This may seem like a given, but there are intros out there where the channel name is either small easy to overlook, or left out completely in favor of a logo.
5. Do a Cold Open
On TV, shows usually have at least one scene before they play the theme song. That’s because nobody is tuning in just for the theme, or in your case the intro. Make sure you have at least a short clip before your intro to get viewers interested in the rest of your video. Beyond setting the tone for the rest of the video and introducing your topic, you can use this first clip to create a ‘curiosity gap’. This means generating curiosity and making your viewers feel invested in the video so they stay on the page.
Conclusion
We have listed 16 different YouTube intro makers that you can use conveniently any time you want. Some are completely free while others have limitations in free versions. You can also purchase premium templates for making your YouTube intro video stand out. Go through all of them and choose the best ones that you can use alternatively as per your requirements.
Download Mac Version ](https://tools.techidaily.com/wondershare/filmora/download/ )
Richard Bennett
Richard Bennett is a writer and a lover of all things video.
Follow @Richard Bennett
Also read:
- In 2024, Crafting a Music Career 15 Essential Video Tutorials for Artists
- [New] Channel Success Story Optimal Themes and Ideas to Boost Content
- From Passive Watchers To Profit YouTube Monetization
- [New] Blitz Broadcasting Channel Your Playlist Swiftly
- [Updated] Binge-Watch With Ease Best Playlist Extractors Reviewed & Rated
- 2024 Approved Convert & Share Optimal Tools for YouTube-to-AVI Transfers
- The Ultimate Guide to Easy Content Making 10 Basic YouTube Videos
- Transforming Skincare Secrets Into Social Stardom
- FreeFall Into Success Top Hashtags and Vlogging Techniques
- [Updated] Elevating Creative Content Vimeo vs YouTube's Approach
- 2024 Approved Clubbing Essentials Top-Rated DJ Template Vids
- [Updated] Elevate Your Content YouTube Movie Maker 101
- Escaping YouTube Ranked List of 27 Alternative Streaming Services for 2024
- [Updated] Effortless Spotify-to-YouTube Playlist Conversion 5 Must-Have Apps
- [New] Enhancing Viewability Creating Custom YouTube Thumbnails
- [New] Elevate Your YouTube Presence with Custom Animated Subscription Buttons in Filmora
- [Updated] 10 Cheeky Tunes Turned Parodies
- 2024 Approved Access Free Photographic Treasures Through Favored 4 Youtube Clips
- From Passive Viewers to Earnings YouTube's Monetization Mastery
- Transform Your YouTube Venture From Free to Earnings at the 500 Mark
- Master the Art of Virtual Reality From Videography to YouTube Upload
- The Financial Frontier Youtube's Pay Structure at the 1M Mark
- [New] Boost Video Quality on YouTube - The Essential Webcams Guide
- 11 FREE YouTube Video Rippers to Download YouTube Videos for 2024
- 2024 Approved Essential Steps to Implement Video Card Anchors on YouTube
- [New] Amplify Audience on Both Platforms Youtube + Twitch Strategy
- 2024 Approved Audio Extraction Made Easy YouTube Music on Your Mac
- Crafting an Inviting Subscribe Icon for YouTube Videographers
- Inside Look How YouTube Funds Are Transforming Content Creation
- [Updated] Best Bits of Bulb Tech - Top 17 Choices
- [New] Discovering the Most Innovative Youtube Channel Names A Vlogger's Must-Have List (Maximum Length 156 Characters)
- In 2024, Crafting GIFs From YouTube Detailed Step-by-Step Guide for PC/Mobile
- 2024 Approved A Comprehensive Guide to Using YouTube's CC Licensing
- 2024 Approved Elevate Your Biz Game YouTube Channels That Succeeded
- Crescendo Control Secure Sound Sharing Online for 2024
- Charting Your YouTube Trajectory Essential Tools From Social Blade for 2024
- [New] 2024 Approved Tweet Time Machine Capturing the Essence of Twitter's Videos
- [Updated] Elevate Online Engagement Unlocking the Potential of VoiceMod on Discord for 2024
- Integrating Voices Into Videos Effectively
- In 2024, Unleashing Potential in Screen Recording Expertise in Adobe Captivate
- [Updated] Fraps for Gamers A Screen Record Review
- New Do You Want to Apply BRAW LUTs to Your Pictures and Video Footage? Here We Will Discuss some of the Best Options Available to Help You Choose the Right One for 2024
- [New] Leading Discord Font Crafting Applications for All Platforms for 2024
- 5 Essential Strategies for Successful Twitch Livestreaming
- Unlocking Twitter’s Full Potential The Ultimate Guide for 2024
- [Updated] Recorders Unite, Compete for 2024
- How To Deal With the Oppo A58 4G Screen Black But Still Works? | Dr.fone
- [New] In 2024, From Broadcasting Basics to Facebook Live with Wirecast
- [Updated] In 2024, Leverage Loops for Stirring Instagram Engagement & Likes
- How to Stop Life360 from Tracking You On Itel P55? | Dr.fone
- [Updated] In 2024, Your Journey to 1K Followers in One Month Secrets From Top Influencers
- Updated WMM Not Your Thing? Try These 13 Video Editing Solutions
- How to Manually Install a Hardware Driver in Windows 10
- [New] 2024 Approved Superior Practices for Mute Videography
- [New] Efficient & Reliable A Comparison of the Best PC Sniping Software
- [New] Live Streaming Showdown Streamlabs Vs. OBS Face-Off
- Here are Different Ways to Find Pokemon Go Trainer Codes to Add to Your Account On Apple iPhone 12 mini | Dr.fone
- In 2024, What Pokémon Evolve with A Dawn Stone For Vivo Y36? | Dr.fone
- Updated 2024 Approved Voice Purging Protocols The Six Key Steps to a Vocally Cleansed Audio Track via Adobe Audition
- Title: "2024 Approved Adobe's Toolset Perfecting Your YouTube Uploads"
- Author: Steven
- Created at : 2024-05-25 18:24:17
- Updated at : 2024-05-26 18:24:17
- Link: https://youtube-clips.techidaily.com/2024-approved-adobes-toolset-perfecting-your-youtube-uploads/
- License: This work is licensed under CC BY-NC-SA 4.0.
