
10 Recording Tips for Recording Audio with High Quality for 2024
Soundscapes in HD: Techniques for Precision Recording
10 Recording Tips for Recording Audio with High Quality

Richard Bennett
Oct 26, 2023• Proven solutions
Getting the best sound for your recording is not as simplistic as buying an expensive microphone. There are many different things you can do to record your audio more clearly. Here are 10 recording tips to record high-quality audio.
1. Silence everything you don’t want your microphone to record
2. Put your mobile phone in airplane mode
3. Minimize echo
4. Block wind from reaching your microphone
5. Upgrade your microphone
6. Adjust your levels
7. Start with a sound cue if you’re planning to do some syncing in post
8. Get close to the sound
9. ADR
10. Record Ambient Sound

Bonus Tip-Record Your Audio with Wondershare Filmora
Wondershare Filmora has great recording features that enable you to record screen , voiceover, and webcam. Just connect the recording device to your computer, and start the recording in Wondershare Filmora and you will get high-quality audio. And you can also easily pick a song from the royalty-free music library on Wondershare Filmora. These audio features on Filmora are rare and very simple to use, you only need to click a few times and your video will have a new sound and background song.
 PCDJ DEX 3 for Windows & MAC is the total entertainment DJ software solution, offering audio, video, and karaoke mixing ability. Automatic beat-sync, smart looping, 4 decks, DJ MIDI controller support, Karaoke Streaming and much more.

1. Silence everything you don’t want your microphone to record
When you’re recording audio, you have to be more aware of the subtle sounds that drone on in your background. These sounds may include humming from machines with fans, buzzing from lights, and jingling from your pet’s collar. Observe your recording space and find ways to silence everything that you don’t want in your audio recording.
2. Put your mobile phone in airplane mode
Although it may be quite obvious to turn your phone’s ring tone off when you’re recording, it may not be as obvious to put your phone in airplane mode. When phones receive calls or perform searches as part of their background processes, they emit signals that can get picked up by your recording system. Avoid ruining good takes with unwanted sounds of phone signals by putting your phones in airplane mode.
3. Minimize echo
If you are recording yourself talk or sing, make sure to set up your recording space in a way where the sound projected from your voice bounces minimally off the walls and back to your microphone. Bare walls and hardwood floors will cause a lot of bouncing. Make use of materials that will absorb your sound rather than bounce it, like a thick rug or a comforter. If you want your voice to echo, that’s something you should do in post-production.
4. Block wind from reaching your microphone
Although it might not sound so loud and distracting to the naked ear, wind sounds terribly loud through a microphone recording and can cause your audio to clip (distortion of waveform due to output of sound exceeding maximum capacity or 0 dB point). This includes the “wind” that comes out of your mouth when you pronounce words starting with the letter “p.” Use pop filters, windscreens, and deadcats to block wind from reaching your microphone.

5. Upgrade your microphone
As much as you try to control all the noise in your surroundings, your greatest recording limitation will come from the hardware that you use. Improve your recordings by plugging in an external microphone into your camera’s microphone jack or record audio completely separately with a professional microphone.
Need help with deciding on a microphone to buy? Check out our recommended list of microphones.

6. Adjust your levels
Before pressing the record button, see how loudly your microphone picks up the sound you wish to record. Adjust your levels (sensitivity of your microphone) until the sound sits in between -6 dBs and -12dBs. This range gives the source of your sound some room to get louder without the recorded audio getting clipped. When you first listen to audio recorded within this range, it may sound very quiet. No need to worry though because you can increase the volume later in editing.
7. Start with a sound cue if you’re planning to do some syncing in post
If you’re recording separate audio that you plan to sync to your video later in editing, start your recording with a short and loud sound cue like a clap or a high pitched “beep” tone. Later, when you’re editing, it’ll be much easier for you to find the section where your video and additional audio match.
8. Get close to the sound
Unless you’re aiming to record ambient sound, bring your microphone close to the source of sound you are wanting to record. The closer your microphone is to the source of sound, the lower your sensitivity setting can be on your microphone. As a result of lowering your levels, sounds you are not meaning to record will also sound fainter.
9. ADR
When you need to record a scene in a loud setting where you have very little control over the noise, record additional vocals later and replace the original vocals through a process called automated dialogue replacement.
 Glarysoft File Recovery Pro Annually - Helps to recover your lost file/data, even permanently deleted data.
10. Record Ambient Sound
Remember to record ambient sound or “room tone.” You can use these recordings to fill in the blanks if you run out of audio and also smooth out parts of your audio where you hear pops, clicks, and other unwanted noise.

Richard Bennett
Richard Bennett is a writer and a lover of all things video.
Follow @Richard Bennett
Richard Bennett
Oct 26, 2023• Proven solutions
Getting the best sound for your recording is not as simplistic as buying an expensive microphone. There are many different things you can do to record your audio more clearly. Here are 10 recording tips to record high-quality audio.
1. Silence everything you don’t want your microphone to record
2. Put your mobile phone in airplane mode
3. Minimize echo
4. Block wind from reaching your microphone
5. Upgrade your microphone
6. Adjust your levels
7. Start with a sound cue if you’re planning to do some syncing in post
8. Get close to the sound
9. ADR
10. Record Ambient Sound

Key features:
• Import from any devices and cams, including GoPro and drones. All formats supported. Сurrently the only free video editor that allows users to export in a new H265/HEVC codec, something essential for those working with 4K and HD.
• Everything for hassle-free basic editing: cut, crop and merge files, add titles and favorite music
• Visual effects, advanced color correction and trendy Instagram-like filters
• All multimedia processing done from one app: video editing capabilities reinforced by a video converter, a screen capture, a video capture, a disc burner and a YouTube uploader
• Non-linear editing: edit several files with simultaneously
• Easy export to social networks: special profiles for YouTube, Facebook, Vimeo, Twitter and Instagram
• High quality export – no conversion quality loss, double export speed even of HD files due to hardware acceleration
• Stabilization tool will turn shaky or jittery footage into a more stable video automatically.
• Essential toolset for professional video editing: blending modes, Mask tool, advanced multiple-color Chroma Key
Bonus Tip-Record Your Audio with Wondershare Filmora
Wondershare Filmora has great recording features that enable you to record screen , voiceover, and webcam. Just connect the recording device to your computer, and start the recording in Wondershare Filmora and you will get high-quality audio. And you can also easily pick a song from the royalty-free music library on Wondershare Filmora. These audio features on Filmora are rare and very simple to use, you only need to click a few times and your video will have a new sound and background song.
1. Silence everything you don’t want your microphone to record
When you’re recording audio, you have to be more aware of the subtle sounds that drone on in your background. These sounds may include humming from machines with fans, buzzing from lights, and jingling from your pet’s collar. Observe your recording space and find ways to silence everything that you don’t want in your audio recording.
2. Put your mobile phone in airplane mode
Although it may be quite obvious to turn your phone’s ring tone off when you’re recording, it may not be as obvious to put your phone in airplane mode. When phones receive calls or perform searches as part of their background processes, they emit signals that can get picked up by your recording system. Avoid ruining good takes with unwanted sounds of phone signals by putting your phones in airplane mode.
3. Minimize echo
If you are recording yourself talk or sing, make sure to set up your recording space in a way where the sound projected from your voice bounces minimally off the walls and back to your microphone. Bare walls and hardwood floors will cause a lot of bouncing. Make use of materials that will absorb your sound rather than bounce it, like a thick rug or a comforter. If you want your voice to echo, that’s something you should do in post-production.
4. Block wind from reaching your microphone
Although it might not sound so loud and distracting to the naked ear, wind sounds terribly loud through a microphone recording and can cause your audio to clip (distortion of waveform due to output of sound exceeding maximum capacity or 0 dB point). This includes the “wind” that comes out of your mouth when you pronounce words starting with the letter “p.” Use pop filters, windscreens, and deadcats to block wind from reaching your microphone.
5. Upgrade your microphone
As much as you try to control all the noise in your surroundings, your greatest recording limitation will come from the hardware that you use. Improve your recordings by plugging in an external microphone into your camera’s microphone jack or record audio completely separately with a professional microphone.
Need help with deciding on a microphone to buy? Check out our recommended list of microphones.
6. Adjust your levels
Before pressing the record button, see how loudly your microphone picks up the sound you wish to record. Adjust your levels (sensitivity of your microphone) until the sound sits in between -6 dBs and -12dBs. This range gives the source of your sound some room to get louder without the recorded audio getting clipped. When you first listen to audio recorded within this range, it may sound very quiet. No need to worry though because you can increase the volume later in editing.
7. Start with a sound cue if you’re planning to do some syncing in post
If you’re recording separate audio that you plan to sync to your video later in editing, start your recording with a short and loud sound cue like a clap or a high pitched “beep” tone. Later, when you’re editing, it’ll be much easier for you to find the section where your video and additional audio match.

8. Get close to the sound
Unless you’re aiming to record ambient sound, bring your microphone close to the source of sound you are wanting to record. The closer your microphone is to the source of sound, the lower your sensitivity setting can be on your microphone. As a result of lowering your levels, sounds you are not meaning to record will also sound fainter.

9. ADR
When you need to record a scene in a loud setting where you have very little control over the noise, record additional vocals later and replace the original vocals through a process called automated dialogue replacement.
10. Record Ambient Sound
Remember to record ambient sound or “room tone.” You can use these recordings to fill in the blanks if you run out of audio and also smooth out parts of your audio where you hear pops, clicks, and other unwanted noise.
Richard Bennett
Richard Bennett is a writer and a lover of all things video.
Follow @Richard Bennett
Richard Bennett
Oct 26, 2023• Proven solutions
Getting the best sound for your recording is not as simplistic as buying an expensive microphone. There are many different things you can do to record your audio more clearly. Here are 10 recording tips to record high-quality audio.
1. Silence everything you don’t want your microphone to record
2. Put your mobile phone in airplane mode
3. Minimize echo
4. Block wind from reaching your microphone
5. Upgrade your microphone
6. Adjust your levels
7. Start with a sound cue if you’re planning to do some syncing in post
8. Get close to the sound
9. ADR
10. Record Ambient Sound
Bonus Tip-Record Your Audio with Wondershare Filmora
Wondershare Filmora has great recording features that enable you to record screen , voiceover, and webcam. Just connect the recording device to your computer, and start the recording in Wondershare Filmora and you will get high-quality audio. And you can also easily pick a song from the royalty-free music library on Wondershare Filmora. These audio features on Filmora are rare and very simple to use, you only need to click a few times and your video will have a new sound and background song.
1. Silence everything you don’t want your microphone to record
When you’re recording audio, you have to be more aware of the subtle sounds that drone on in your background. These sounds may include humming from machines with fans, buzzing from lights, and jingling from your pet’s collar. Observe your recording space and find ways to silence everything that you don’t want in your audio recording.
2. Put your mobile phone in airplane mode
Although it may be quite obvious to turn your phone’s ring tone off when you’re recording, it may not be as obvious to put your phone in airplane mode. When phones receive calls or perform searches as part of their background processes, they emit signals that can get picked up by your recording system. Avoid ruining good takes with unwanted sounds of phone signals by putting your phones in airplane mode.
3. Minimize echo
If you are recording yourself talk or sing, make sure to set up your recording space in a way where the sound projected from your voice bounces minimally off the walls and back to your microphone. Bare walls and hardwood floors will cause a lot of bouncing. Make use of materials that will absorb your sound rather than bounce it, like a thick rug or a comforter. If you want your voice to echo, that’s something you should do in post-production.
4. Block wind from reaching your microphone
Although it might not sound so loud and distracting to the naked ear, wind sounds terribly loud through a microphone recording and can cause your audio to clip (distortion of waveform due to output of sound exceeding maximum capacity or 0 dB point). This includes the “wind” that comes out of your mouth when you pronounce words starting with the letter “p.” Use pop filters, windscreens, and deadcats to block wind from reaching your microphone.
5. Upgrade your microphone
As much as you try to control all the noise in your surroundings, your greatest recording limitation will come from the hardware that you use. Improve your recordings by plugging in an external microphone into your camera’s microphone jack or record audio completely separately with a professional microphone.
Need help with deciding on a microphone to buy? Check out our recommended list of microphones.
6. Adjust your levels
Before pressing the record button, see how loudly your microphone picks up the sound you wish to record. Adjust your levels (sensitivity of your microphone) until the sound sits in between -6 dBs and -12dBs. This range gives the source of your sound some room to get louder without the recorded audio getting clipped. When you first listen to audio recorded within this range, it may sound very quiet. No need to worry though because you can increase the volume later in editing.
7. Start with a sound cue if you’re planning to do some syncing in post
If you’re recording separate audio that you plan to sync to your video later in editing, start your recording with a short and loud sound cue like a clap or a high pitched “beep” tone. Later, when you’re editing, it’ll be much easier for you to find the section where your video and additional audio match.
8. Get close to the sound
Unless you’re aiming to record ambient sound, bring your microphone close to the source of sound you are wanting to record. The closer your microphone is to the source of sound, the lower your sensitivity setting can be on your microphone. As a result of lowering your levels, sounds you are not meaning to record will also sound fainter.
9. ADR
When you need to record a scene in a loud setting where you have very little control over the noise, record additional vocals later and replace the original vocals through a process called automated dialogue replacement.
10. Record Ambient Sound
Remember to record ambient sound or “room tone.” You can use these recordings to fill in the blanks if you run out of audio and also smooth out parts of your audio where you hear pops, clicks, and other unwanted noise.

Richard Bennett
Richard Bennett is a writer and a lover of all things video.
Follow @Richard Bennett
Richard Bennett
Oct 26, 2023• Proven solutions
Getting the best sound for your recording is not as simplistic as buying an expensive microphone. There are many different things you can do to record your audio more clearly. Here are 10 recording tips to record high-quality audio.
1. Silence everything you don’t want your microphone to record
2. Put your mobile phone in airplane mode
3. Minimize echo
4. Block wind from reaching your microphone
5. Upgrade your microphone
6. Adjust your levels
7. Start with a sound cue if you’re planning to do some syncing in post
8. Get close to the sound
9. ADR
10. Record Ambient Sound
 Power Tools add-on for Google Sheets, Lifetime subscription
Bonus Tip-Record Your Audio with Wondershare Filmora
Wondershare Filmora has great recording features that enable you to record screen , voiceover, and webcam. Just connect the recording device to your computer, and start the recording in Wondershare Filmora and you will get high-quality audio. And you can also easily pick a song from the royalty-free music library on Wondershare Filmora. These audio features on Filmora are rare and very simple to use, you only need to click a few times and your video will have a new sound and background song.
1. Silence everything you don’t want your microphone to record
When you’re recording audio, you have to be more aware of the subtle sounds that drone on in your background. These sounds may include humming from machines with fans, buzzing from lights, and jingling from your pet’s collar. Observe your recording space and find ways to silence everything that you don’t want in your audio recording.
2. Put your mobile phone in airplane mode
Although it may be quite obvious to turn your phone’s ring tone off when you’re recording, it may not be as obvious to put your phone in airplane mode. When phones receive calls or perform searches as part of their background processes, they emit signals that can get picked up by your recording system. Avoid ruining good takes with unwanted sounds of phone signals by putting your phones in airplane mode.
3. Minimize echo
If you are recording yourself talk or sing, make sure to set up your recording space in a way where the sound projected from your voice bounces minimally off the walls and back to your microphone. Bare walls and hardwood floors will cause a lot of bouncing. Make use of materials that will absorb your sound rather than bounce it, like a thick rug or a comforter. If you want your voice to echo, that’s something you should do in post-production.
4. Block wind from reaching your microphone
Although it might not sound so loud and distracting to the naked ear, wind sounds terribly loud through a microphone recording and can cause your audio to clip (distortion of waveform due to output of sound exceeding maximum capacity or 0 dB point). This includes the “wind” that comes out of your mouth when you pronounce words starting with the letter “p.” Use pop filters, windscreens, and deadcats to block wind from reaching your microphone.
5. Upgrade your microphone
As much as you try to control all the noise in your surroundings, your greatest recording limitation will come from the hardware that you use. Improve your recordings by plugging in an external microphone into your camera’s microphone jack or record audio completely separately with a professional microphone.
Need help with deciding on a microphone to buy? Check out our recommended list of microphones.
6. Adjust your levels
Before pressing the record button, see how loudly your microphone picks up the sound you wish to record. Adjust your levels (sensitivity of your microphone) until the sound sits in between -6 dBs and -12dBs. This range gives the source of your sound some room to get louder without the recorded audio getting clipped. When you first listen to audio recorded within this range, it may sound very quiet. No need to worry though because you can increase the volume later in editing.
7. Start with a sound cue if you’re planning to do some syncing in post
If you’re recording separate audio that you plan to sync to your video later in editing, start your recording with a short and loud sound cue like a clap or a high pitched “beep” tone. Later, when you’re editing, it’ll be much easier for you to find the section where your video and additional audio match.
 SwifDoo PDF 2-Year Plan
8. Get close to the sound
Unless you’re aiming to record ambient sound, bring your microphone close to the source of sound you are wanting to record. The closer your microphone is to the source of sound, the lower your sensitivity setting can be on your microphone. As a result of lowering your levels, sounds you are not meaning to record will also sound fainter.
9. ADR
When you need to record a scene in a loud setting where you have very little control over the noise, record additional vocals later and replace the original vocals through a process called automated dialogue replacement.
10. Record Ambient Sound
Remember to record ambient sound or “room tone.” You can use these recordings to fill in the blanks if you run out of audio and also smooth out parts of your audio where you hear pops, clicks, and other unwanted noise.
 Greeting Card Builder
Richard Bennett
Richard Bennett is a writer and a lover of all things video.
Follow @Richard Bennett
Best YouTube Banner Size and Channel Art Dimension (The Ultimate Guide)
Best YouTube Banner Size and Channel Art Dimension (The Ultimate Guide)
Richard Bennett
Oct 26, 2023• Proven solutions
YouTube is a social platform that relies on visually exciting material to attract the audience. Just like a book with an appealing cover compels a person to pick it up and read, it is significant to display and advertise your YouTube channel in a way that makes viewers click and browse through the channel.
Despite creating a beautiful banner on your desktop screen, it might end up distorted on a mobile screen if the recommended sizes for all kinds of gadgets are not followed. Hence, choosing your YouTube channel art dimension is essential since it is the viewer’s first impression. To commence with, you must be careful about your YouTube banner size and channel art dimensions. Are you wondering how to create the perfect banner or cover photo as we know it? Worry not as we are going to tell you the exact details to achieve an ideal YouTube banner size that fits all devices from computers to phones.
- Part 1: The Recommended YouTube Banner Size
- Part 2: The Best YouTube Banner Size on Different Devices
- Part 3: The Best YouTube Video Maker–Wondershare Filmora

WPS Office Premium ( File Recovery, Photo Scanning, Convert PDF)–Yearly
Part 1: The Recommended YouTube Banner Size
According to YouTube’s official standards, the recommended banner size is 2560×1440 pixels. However, the minimum image dimensions are 2048×1152 pixels. To ensure that your text is visible regardless of the screen size, sticking to the “safe area” of 2560×423 pixels is the best option. Why are these sizes significant? Well, it’s essential to keep in mind the fact that people worldwide will be using different kinds of gadgets to access YouTube, and it is crucial to optimize your YouTube banner size for it to be ideal.
Part 2: The Best YouTube Banner Size on Different Devices
For the best results on all devices, your YouTube banner size should be:
YouTube Channel Art/Banner Dimensions Displayed on TVs
2560 x 1440 px


YouTube will display your entire channel art on TVs
 PDF application, powered by AI-based OCR, for unified workflows with both digital and scanned documents.
Here’s what our YouTube channel art example would look like on a TV.
YouTube Channel Art/Banner Dimensions Displayed on Smaller Desktop Monitors and Mobile Phones
1546 x 423 px


On small desktop monitors and mobile devices, YouTube will display less than 20% of your entire channel art, the center area measuring a width of 1546 pixels and a height of 423 pixels. You want to make sure that your text and logo make it into this part.

Here’s what our YouTube channel art example would look like on a mobile phone.
YouTube Channel Art/Banner Dimensions Displayed on Tablets
1855 x 423 px


On tablet devices, YouTube will display around 20% more of your channel art, just to the sides of your smaller desktop monitor and mobile device area.

Here’s what our YouTube channel art example would look like on a tablet device.
YouTube Channel Art/Banner Dimensions Displayed on Larger Desktop Monitors
2560 x 423 px

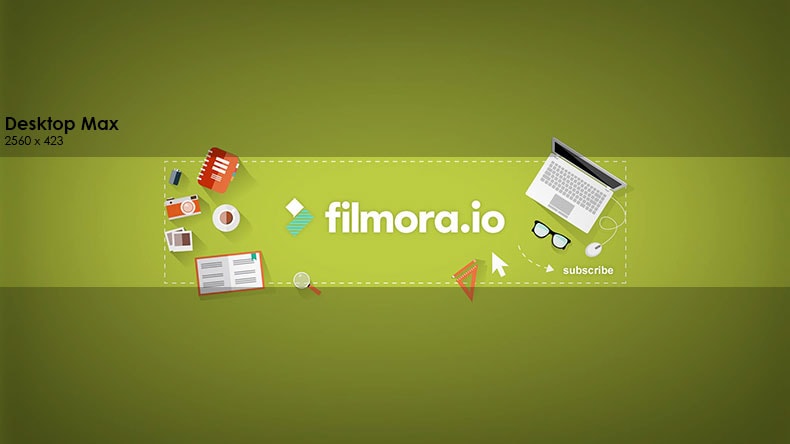
On larger desktop monitors, YouTube will display the entire width of your channel art but not the upper and lower part.
Here’s what our YouTube channel art example would look like on a large desktop monitor.
By following these dimensions in the design of your YouTube channel art/banner, you can be sure to have a responsive image that works best across different devices.
Have you ever had trouble with your YouTube banner size?
If you’d like to make your own channel art, check out our list of Top 9 YouTube Channel Art Makers .
Part 3: The Best YouTube Video Maker–Wondershare Filmora
Want to create a spectacular YouTube video with excellent graphics but lack the expertise? Don’t stress! Wondershare Filmora is here to save the day with its incredible video editing features. Despite the professional outcome it provides, it has been customized for easy use by the beginners.
Key Features:
- Supports GIF and 4K Resolution with advanced text editing features.
- Directly import files from any social media platform, for example, Facebook.
- Transform your video by layering multiple video clips and adding titles, filters, and overlays.
- Time-lapse, noise reduction, and split-screen preset available.
Compatibility:
- Windows: Microsoft Windows 7/Windows 8/Windows 10 (64 bit OS recommended).
- Processor: Intel i3 or better multicore processor, 2GHz or above.
- RAM: 4 GB RAM (8GB required for HD and 4K videos).
To Sum Up
So, are you ready to optimize your channel by following the YouTube banner size’s basic requirements? We hope you are now aware of the importance your YouTube channel art dimension has.
Also, for your channel to be distinctive and attractive enough, it must be edited, which is now relatively easy through video editing apps like the Wondershare Filmora. What are you waiting for? Invest in this pocket-friendly application to create stunning videos in no time and take your channel to the next level.
Richard Bennett
Richard Bennett is a writer and a lover of all things video.
Follow @Richard Bennett
Richard Bennett
Oct 26, 2023• Proven solutions
YouTube is a social platform that relies on visually exciting material to attract the audience. Just like a book with an appealing cover compels a person to pick it up and read, it is significant to display and advertise your YouTube channel in a way that makes viewers click and browse through the channel.
Despite creating a beautiful banner on your desktop screen, it might end up distorted on a mobile screen if the recommended sizes for all kinds of gadgets are not followed. Hence, choosing your YouTube channel art dimension is essential since it is the viewer’s first impression. To commence with, you must be careful about your YouTube banner size and channel art dimensions. Are you wondering how to create the perfect banner or cover photo as we know it? Worry not as we are going to tell you the exact details to achieve an ideal YouTube banner size that fits all devices from computers to phones.
- Part 1: The Recommended YouTube Banner Size
- Part 2: The Best YouTube Banner Size on Different Devices
- Part 3: The Best YouTube Video Maker–Wondershare Filmora

Part 1: The Recommended YouTube Banner Size
According to YouTube’s official standards, the recommended banner size is 2560×1440 pixels. However, the minimum image dimensions are 2048×1152 pixels. To ensure that your text is visible regardless of the screen size, sticking to the “safe area” of 2560×423 pixels is the best option. Why are these sizes significant? Well, it’s essential to keep in mind the fact that people worldwide will be using different kinds of gadgets to access YouTube, and it is crucial to optimize your YouTube banner size for it to be ideal.
 Nero Burning ROM:
The ultimate burning program for all your needs!
Part 2: The Best YouTube Banner Size on Different Devices
For the best results on all devices, your YouTube banner size should be:
YouTube Channel Art/Banner Dimensions Displayed on TVs
2560 x 1440 px
YouTube will display your entire channel art on TVs
Here’s what our YouTube channel art example would look like on a TV.
YouTube Channel Art/Banner Dimensions Displayed on Smaller Desktop Monitors and Mobile Phones
1546 x 423 px
On small desktop monitors and mobile devices, YouTube will display less than 20% of your entire channel art, the center area measuring a width of 1546 pixels and a height of 423 pixels. You want to make sure that your text and logo make it into this part.

Here’s what our YouTube channel art example would look like on a mobile phone.
YouTube Channel Art/Banner Dimensions Displayed on Tablets
1855 x 423 px
On tablet devices, YouTube will display around 20% more of your channel art, just to the sides of your smaller desktop monitor and mobile device area.

Here’s what our YouTube channel art example would look like on a tablet device.
YouTube Channel Art/Banner Dimensions Displayed on Larger Desktop Monitors
2560 x 423 px

On larger desktop monitors, YouTube will display the entire width of your channel art but not the upper and lower part.

Here’s what our YouTube channel art example would look like on a large desktop monitor.
By following these dimensions in the design of your YouTube channel art/banner, you can be sure to have a responsive image that works best across different devices.
Have you ever had trouble with your YouTube banner size?
If you’d like to make your own channel art, check out our list of Top 9 YouTube Channel Art Makers .
Part 3: The Best YouTube Video Maker–Wondershare Filmora
Want to create a spectacular YouTube video with excellent graphics but lack the expertise? Don’t stress! Wondershare Filmora is here to save the day with its incredible video editing features. Despite the professional outcome it provides, it has been customized for easy use by the beginners.
Key Features:
- Supports GIF and 4K Resolution with advanced text editing features.
- Directly import files from any social media platform, for example, Facebook.
- Transform your video by layering multiple video clips and adding titles, filters, and overlays.
- Time-lapse, noise reduction, and split-screen preset available.
Compatibility:
- Windows: Microsoft Windows 7/Windows 8/Windows 10 (64 bit OS recommended).
- Processor: Intel i3 or better multicore processor, 2GHz or above.
- RAM: 4 GB RAM (8GB required for HD and 4K videos).
To Sum Up
So, are you ready to optimize your channel by following the YouTube banner size’s basic requirements? We hope you are now aware of the importance your YouTube channel art dimension has.
Also, for your channel to be distinctive and attractive enough, it must be edited, which is now relatively easy through video editing apps like the Wondershare Filmora. What are you waiting for? Invest in this pocket-friendly application to create stunning videos in no time and take your channel to the next level.
Richard Bennett
Richard Bennett is a writer and a lover of all things video.
Follow @Richard Bennett
Richard Bennett
Oct 26, 2023• Proven solutions
YouTube is a social platform that relies on visually exciting material to attract the audience. Just like a book with an appealing cover compels a person to pick it up and read, it is significant to display and advertise your YouTube channel in a way that makes viewers click and browse through the channel.
Despite creating a beautiful banner on your desktop screen, it might end up distorted on a mobile screen if the recommended sizes for all kinds of gadgets are not followed. Hence, choosing your YouTube channel art dimension is essential since it is the viewer’s first impression. To commence with, you must be careful about your YouTube banner size and channel art dimensions. Are you wondering how to create the perfect banner or cover photo as we know it? Worry not as we are going to tell you the exact details to achieve an ideal YouTube banner size that fits all devices from computers to phones.
- Part 1: The Recommended YouTube Banner Size
- Part 2: The Best YouTube Banner Size on Different Devices
- Part 3: The Best YouTube Video Maker–Wondershare Filmora
Part 1: The Recommended YouTube Banner Size
According to YouTube’s official standards, the recommended banner size is 2560×1440 pixels. However, the minimum image dimensions are 2048×1152 pixels. To ensure that your text is visible regardless of the screen size, sticking to the “safe area” of 2560×423 pixels is the best option. Why are these sizes significant? Well, it’s essential to keep in mind the fact that people worldwide will be using different kinds of gadgets to access YouTube, and it is crucial to optimize your YouTube banner size for it to be ideal.
Part 2: The Best YouTube Banner Size on Different Devices
For the best results on all devices, your YouTube banner size should be:
YouTube Channel Art/Banner Dimensions Displayed on TVs
2560 x 1440 px
YouTube will display your entire channel art on TVs
Here’s what our YouTube channel art example would look like on a TV.
YouTube Channel Art/Banner Dimensions Displayed on Smaller Desktop Monitors and Mobile Phones
1546 x 423 px
On small desktop monitors and mobile devices, YouTube will display less than 20% of your entire channel art, the center area measuring a width of 1546 pixels and a height of 423 pixels. You want to make sure that your text and logo make it into this part.
Here’s what our YouTube channel art example would look like on a mobile phone.
YouTube Channel Art/Banner Dimensions Displayed on Tablets
1855 x 423 px
On tablet devices, YouTube will display around 20% more of your channel art, just to the sides of your smaller desktop monitor and mobile device area.
Here’s what our YouTube channel art example would look like on a tablet device.
YouTube Channel Art/Banner Dimensions Displayed on Larger Desktop Monitors
2560 x 423 px
On larger desktop monitors, YouTube will display the entire width of your channel art but not the upper and lower part.
Here’s what our YouTube channel art example would look like on a large desktop monitor.
By following these dimensions in the design of your YouTube channel art/banner, you can be sure to have a responsive image that works best across different devices.
Have you ever had trouble with your YouTube banner size?
If you’d like to make your own channel art, check out our list of Top 9 YouTube Channel Art Makers .
Part 3: The Best YouTube Video Maker–Wondershare Filmora
Want to create a spectacular YouTube video with excellent graphics but lack the expertise? Don’t stress! Wondershare Filmora is here to save the day with its incredible video editing features. Despite the professional outcome it provides, it has been customized for easy use by the beginners.
Key Features:
- Supports GIF and 4K Resolution with advanced text editing features.
- Directly import files from any social media platform, for example, Facebook.
- Transform your video by layering multiple video clips and adding titles, filters, and overlays.
- Time-lapse, noise reduction, and split-screen preset available.
Compatibility:
- Windows: Microsoft Windows 7/Windows 8/Windows 10 (64 bit OS recommended).
- Processor: Intel i3 or better multicore processor, 2GHz or above.
- RAM: 4 GB RAM (8GB required for HD and 4K videos).
To Sum Up
So, are you ready to optimize your channel by following the YouTube banner size’s basic requirements? We hope you are now aware of the importance your YouTube channel art dimension has.
Also, for your channel to be distinctive and attractive enough, it must be edited, which is now relatively easy through video editing apps like the Wondershare Filmora. What are you waiting for? Invest in this pocket-friendly application to create stunning videos in no time and take your channel to the next level.
Richard Bennett
Richard Bennett is a writer and a lover of all things video.
Follow @Richard Bennett
Richard Bennett
Oct 26, 2023• Proven solutions
YouTube is a social platform that relies on visually exciting material to attract the audience. Just like a book with an appealing cover compels a person to pick it up and read, it is significant to display and advertise your YouTube channel in a way that makes viewers click and browse through the channel.
Despite creating a beautiful banner on your desktop screen, it might end up distorted on a mobile screen if the recommended sizes for all kinds of gadgets are not followed. Hence, choosing your YouTube channel art dimension is essential since it is the viewer’s first impression. To commence with, you must be careful about your YouTube banner size and channel art dimensions. Are you wondering how to create the perfect banner or cover photo as we know it? Worry not as we are going to tell you the exact details to achieve an ideal YouTube banner size that fits all devices from computers to phones.
- Part 1: The Recommended YouTube Banner Size
- Part 2: The Best YouTube Banner Size on Different Devices
- Part 3: The Best YouTube Video Maker–Wondershare Filmora
Part 1: The Recommended YouTube Banner Size
According to YouTube’s official standards, the recommended banner size is 2560×1440 pixels. However, the minimum image dimensions are 2048×1152 pixels. To ensure that your text is visible regardless of the screen size, sticking to the “safe area” of 2560×423 pixels is the best option. Why are these sizes significant? Well, it’s essential to keep in mind the fact that people worldwide will be using different kinds of gadgets to access YouTube, and it is crucial to optimize your YouTube banner size for it to be ideal.
Part 2: The Best YouTube Banner Size on Different Devices
For the best results on all devices, your YouTube banner size should be:
YouTube Channel Art/Banner Dimensions Displayed on TVs
2560 x 1440 px
YouTube will display your entire channel art on TVs
Here’s what our YouTube channel art example would look like on a TV.
YouTube Channel Art/Banner Dimensions Displayed on Smaller Desktop Monitors and Mobile Phones
1546 x 423 px
On small desktop monitors and mobile devices, YouTube will display less than 20% of your entire channel art, the center area measuring a width of 1546 pixels and a height of 423 pixels. You want to make sure that your text and logo make it into this part.

WPS Office Premium ( File Recovery, Photo Scanning, Convert PDF)–Yearly
Here’s what our YouTube channel art example would look like on a mobile phone.
YouTube Channel Art/Banner Dimensions Displayed on Tablets
1855 x 423 px
On tablet devices, YouTube will display around 20% more of your channel art, just to the sides of your smaller desktop monitor and mobile device area.
Here’s what our YouTube channel art example would look like on a tablet device.
YouTube Channel Art/Banner Dimensions Displayed on Larger Desktop Monitors
2560 x 423 px
 Project Manager - Asset Browser for 3Ds Max
On larger desktop monitors, YouTube will display the entire width of your channel art but not the upper and lower part.
Here’s what our YouTube channel art example would look like on a large desktop monitor.
By following these dimensions in the design of your YouTube channel art/banner, you can be sure to have a responsive image that works best across different devices.
Have you ever had trouble with your YouTube banner size?
If you’d like to make your own channel art, check out our list of Top 9 YouTube Channel Art Makers .
Part 3: The Best YouTube Video Maker–Wondershare Filmora
Want to create a spectacular YouTube video with excellent graphics but lack the expertise? Don’t stress! Wondershare Filmora is here to save the day with its incredible video editing features. Despite the professional outcome it provides, it has been customized for easy use by the beginners.
[ ](https://tools.techidaily.com/wondershare/filmora/download/) [ ](https://tools.techidaily.com/wondershare/filmora/download/)Key Features:
- Supports GIF and 4K Resolution with advanced text editing features.
- Directly import files from any social media platform, for example, Facebook.
- Transform your video by layering multiple video clips and adding titles, filters, and overlays.
- Time-lapse, noise reduction, and split-screen preset available.
Compatibility:
- Windows: Microsoft Windows 7/Windows 8/Windows 10 (64 bit OS recommended).
- Processor: Intel i3 or better multicore processor, 2GHz or above.
- RAM: 4 GB RAM (8GB required for HD and 4K videos).
 With Screensaver Wonder you can easily make a screensaver from your own pictures and video files. Create screensavers for your own computer or create standalone, self-installing screensavers for easy sharing with your friends. Together with its sister product Screensaver Factory, Screensaver Wonder is one of the most popular screensaver software products in the world, helping thousands of users decorate their computer screens quickly and easily.
To Sum Up
So, are you ready to optimize your channel by following the YouTube banner size’s basic requirements? We hope you are now aware of the importance your YouTube channel art dimension has.
Also, for your channel to be distinctive and attractive enough, it must be edited, which is now relatively easy through video editing apps like the Wondershare Filmora. What are you waiting for? Invest in this pocket-friendly application to create stunning videos in no time and take your channel to the next level.
Richard Bennett
Richard Bennett is a writer and a lover of all things video.
Follow @Richard Bennett
- Title: 10 Recording Tips for Recording Audio with High Quality for 2024
- Author: Steven
- Created at : 2024-08-03 03:09:38
- Updated at : 2024-08-04 03:09:38
- Link: https://youtube-clips.techidaily.com/10-recording-tips-for-recording-audio-with-high-quality-for-2024/
- License: This work is licensed under CC BY-NC-SA 4.0.